Introduction
This document provides a configuration example to restrict per-user access to a Wireless LAN (WLAN) based on the service set identifier (SSID).
Prerequisites
Requirements
Cisco recommends that you have knowledge of these topics:
- How to configure the Wireless LAN Controller (WLC) and lightweight access point (LAP) for basic operation
- How to configure the Cisco Secure Access Control Server (ACS)
- Lightweight Access Point Protocol (LWAPP) and wireless security methods
Components Used
The information in this document is based on these software and hardware versions:
- Cisco 5500 Series WLC that runs firmware Version 7.4.110
- Cisco 1142 Series LAP
- Cisco Secure ACS Server Version 5.2.0.26.11
Configure
In order to configure the devices for this setup, you need to:
- Configure the WLC for the two WLANs and RADIUS server.
- Configure the Cisco Secure ACS.
- Configure the wireless clients and verify the configuration.
Configure the WLC
Complete these steps in order to configure the WLC for this setup:
- Configure the WLC in order to forward the user credentials to an external RADIUS server. The external RADIUS server (Cisco Secure ACS in this case) then validates the user credentials and provides access to the wireless clients. Complete these steps:
- Select Security > RADIUS Authentication from the controller GUI in order to display the RADIUS Authentication Servers page.
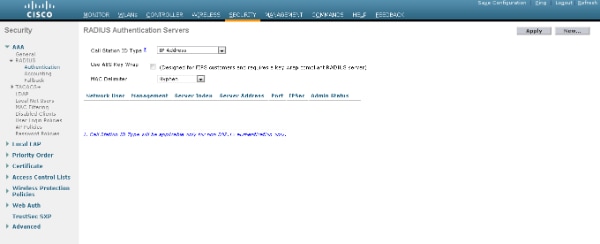
- Click New in order to define the RADIUS server parameters.
These parameters include the RADIUS Server IP Address, Shared Secret, Port Number, and Server Status. The Network User and Management checkboxes determine if the RADIUS-based authentication applies for management and network users. This example uses the Cisco Secure ACS as the RADIUS server with IP address 10.104.208.56.
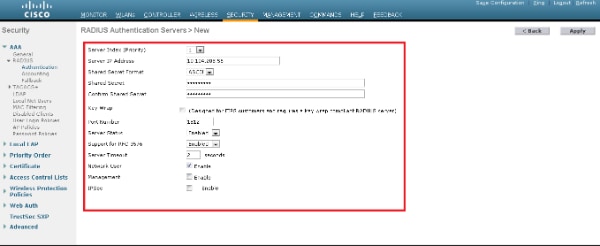
- Click Apply.
- Complete these steps in order to configure one WLAN for the Employee with SSID Employee and the other WLAN for Contractors with SSID Contractor.
- Click WLANs from the controller GUI in order to create a WLAN. The WLANs window appears. This window lists the WLANs configured on the controller.
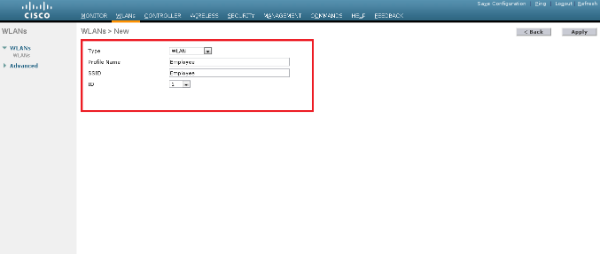
- Click New in order to configure a new WLAN.
- This example creates a WLAN named Employee and the WLAN ID is 1. Click Apply.
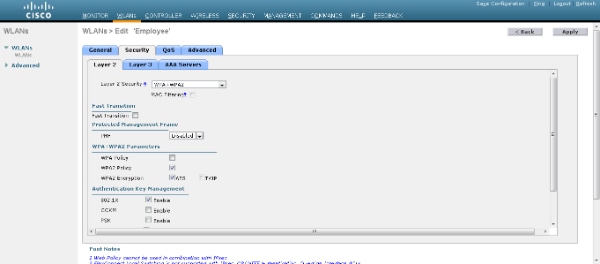
- Select the WLAN > Edit window and define the parameters specific to the WLAN:
- From the Layer 2 Security tab, select 802.1x. By default, the Layer 2 Security option is 802.1x. This enables 802.1 x/Extensible Authentication Protocol (EAP) authentications for the WLAN.
- From the AAA servers tab, select the appropriate RADIUS server from the drop-down list under RADIUS Servers. The other parameters can be modified based on the requirement of the WLAN network. Click Apply.
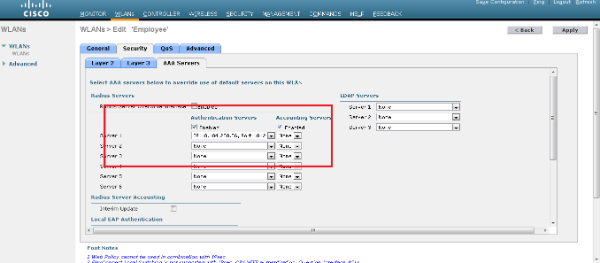
- Similarly, in order to create a WLAN for Contractors, repeat steps b through d.
Configure Cisco Secure ACS
On the Cisco Secure ACS server you need to:
- Configure the WLC as an AAA client.
- Create the User database (Credentials) for SSID-based authentication.
- Enable EAP authentication.
Complete these steps on the Cisco Secure ACS:
- In order to define the controller as an AAA client on the ACS server, select Network Resources > Network Devices and AAA Clients from the ACS GUI. Under Network Devices and AAA Clients, click Create.
- When the Network Configuration page appears, define the name of the WLC, IP address, and shared secret and authentication method (RADIUS).
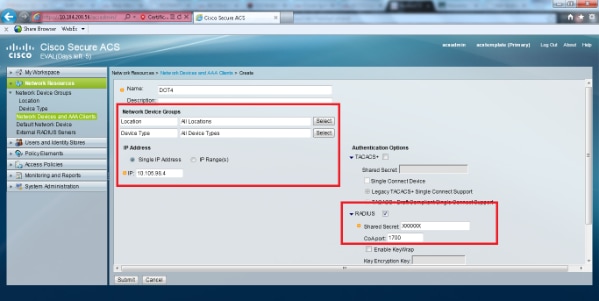
- Select Users and Identity Stores > Identity Groups from the ACS GUI. Create the respective Groups for Employee and Contractor and click Create. In this example the Group created is named Employees.
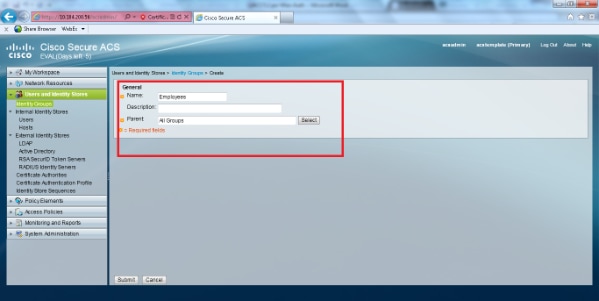
-
Select Users and Identity Stores > Internal Identity Stores. Click Create and enter the username. Place them in the correct group, define their password, and click Submit.In this example a user named employee1 in the group Employee is created. Similarly, create a user named contractor1 under the group contractors.
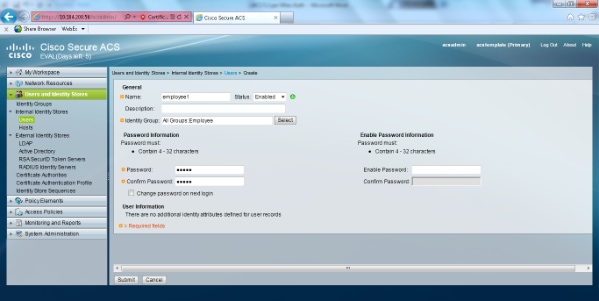
- Select Policy Elements > Network Conditions > End Station Filters. Click Create.
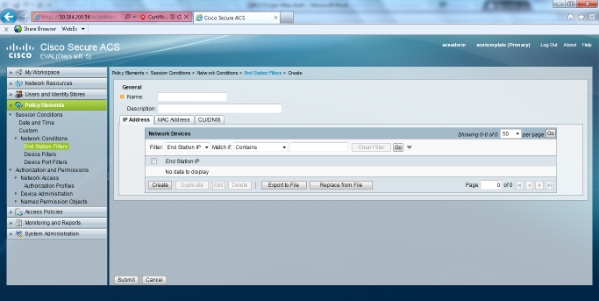
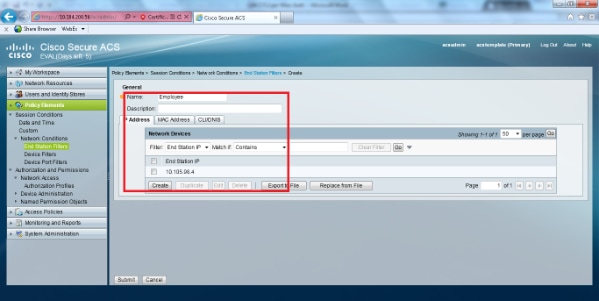
- Enter a meaningful name and under the IP address tab enter the IP address of the WLC. In this example the names are Employee and Contractor.
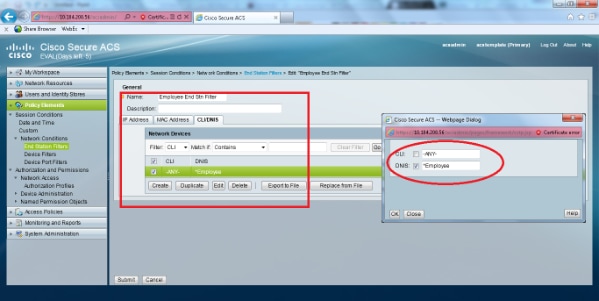
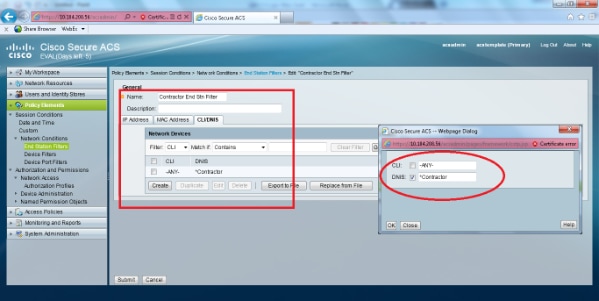
- Under the CLI/DNIS tab, leave CLI as -ANY- and enter DNIS as *<SSID>. In this example, the DNIS field is entered as *Employee as this End station filter is used to restrict access only to the Employee WLAN. The DNIS attribute defines the SSID that the user is allowed to access. The WLC sends the SSID in the DNIS attribute to the RADIUS server.
- Repeat the same steps for the Contractor end station filter.
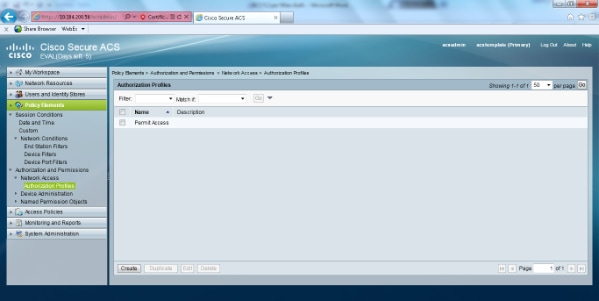
- Select Policy Elements > Authorization and Permissions > Network Access > Authorization Profiles. There should be a default profile for Permit Access.
- Select Access Policies > Access Services > Service Selection Rules. Click Customize.
- Add any suitable Condition. This example uses Protocol as Radius as the matching condition.
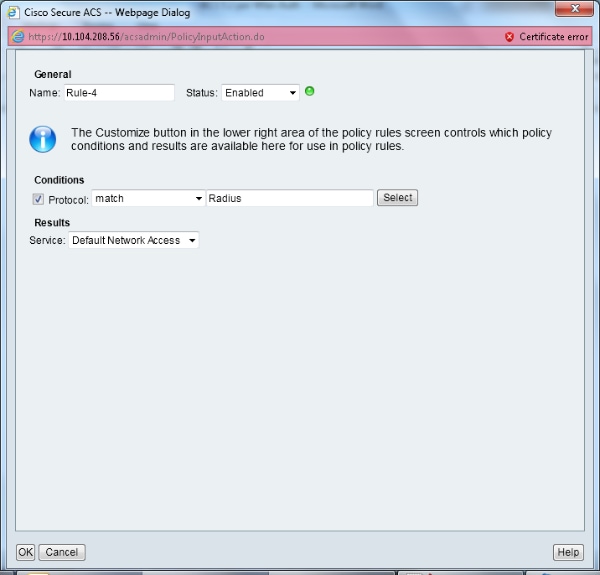
- Click Create. Name the Rule. Select Protocol and select Radius.
- Under Results, choose the appropriate Access Service. In this example, it is left as Default Network Access.
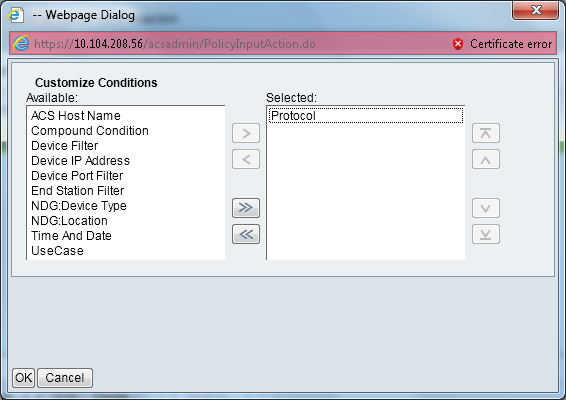
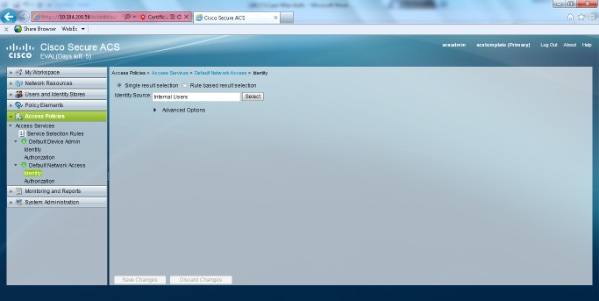
- Select Access Policies > Access Services > Default Network Access > Identity. Choose Single Result Selection and Identity Source as Internal users.
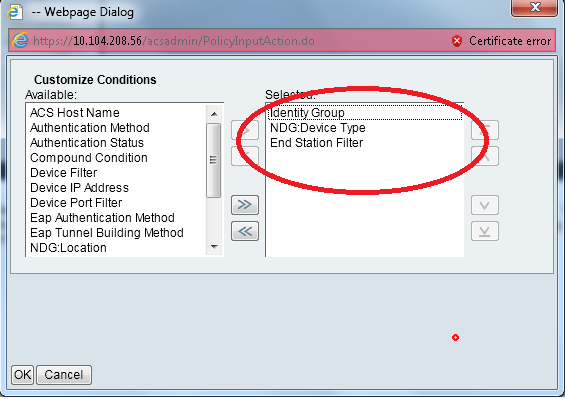
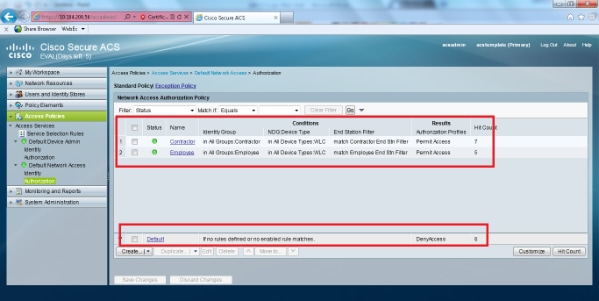
- Select Access Policies > Access Services > Default Network Access > Authorization. Click Customize and add the Customized conditions. This example uses Identity Group, NDG:Device Type, and End Station Filter in that order.
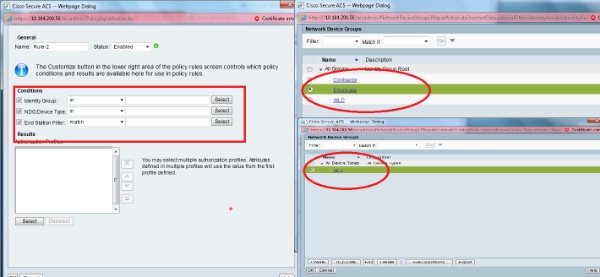
- Click Create. Name the rule and choose the appropriate Identity Group under All Groups. In this example it is Employee.
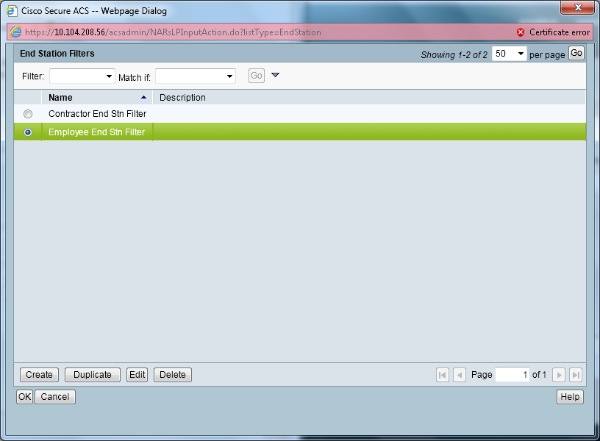
- Click the Employee End Stn Filter radio button or enter the name you input in Step1b in the "Configure the WLC" section.
- Check the Permit Access check box.
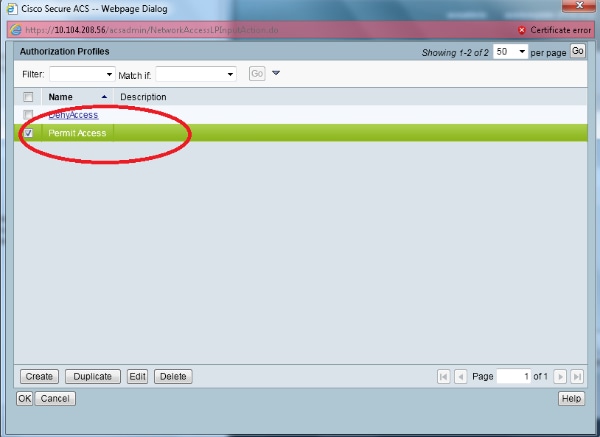
- Repeat the same steps above for Contractor Rules as well. Ensure the Default Action is to Deny Access.
Once you have completed step e, your rules should look like this example:
This concludes the configuration. After this section, the client needs to be configured accordingly with the SSID and security parameters in order to connect.
Verify
There is currently no verification procedure available for this configuration.
Troubleshoot
There is currently no specific troubleshooting information available for this configuration.
