Configuring Funk RADIUS to Authenticate Cisco Wireless Clients With LEAP
Available Languages
Contents
Introduction
This document describes how to configure 340 and 350 Series access points and 350 Series bridges. It also describes how the Funk Software, Inc. ![]() product, Steel-Belted Radius, works together with Light Extensible Authentication Protocol (LEAP) to authenticate a Cisco wireless client.
product, Steel-Belted Radius, works together with Light Extensible Authentication Protocol (LEAP) to authenticate a Cisco wireless client.
Note: The portions of this document that refer to non-Cisco products were written based on experience the author had with that non-Cisco product, not on formal training. They are intended for the convenience of Cisco customers, not as technical support. For authoritative technical support on non-Cisco products, contact the product technical support for the vendor.
Prerequisites
Requirements
The information presented in this document assumes that the Funk Software, Inc. product, Steel-Belted Radius, is successfully installed and working properly. It also assumes that you are gaining administrative access to the access point or to the bridge through the browser interface.
Components Used
The information in this document is based on the Cisco Aironet 340 and 350 Series access points and 350 Series bridges. The information in this document applies to all VxWorks firmware versions 12.01T and later.
The information in this document was created from the devices in a specific lab environment. All of the devices used in this document started with a cleared (default) configuration. If your network is live, make sure that you understand the potential impact of any command.
Conventions
For more information on document conventions, refer to the Cisco Technical Tips Conventions.
Configuration
Configuring the Access Point or Bridge
Complete these steps to configure the access point or bridge.
-
From the Summary Status page, complete these steps:
-
Click Setup.
-
Click Security.
-
Click Radio Data Encryption (WEP).
-
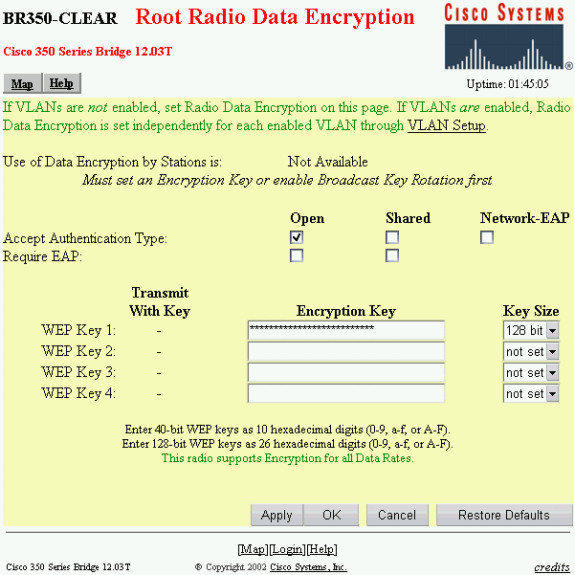
Enter a random WEP Key (26 hexadecimal characters) in the WEP Key 1 slot.
-
Set the Key Size to 128 bit.
-
Click Apply.
-
Click OK.
-
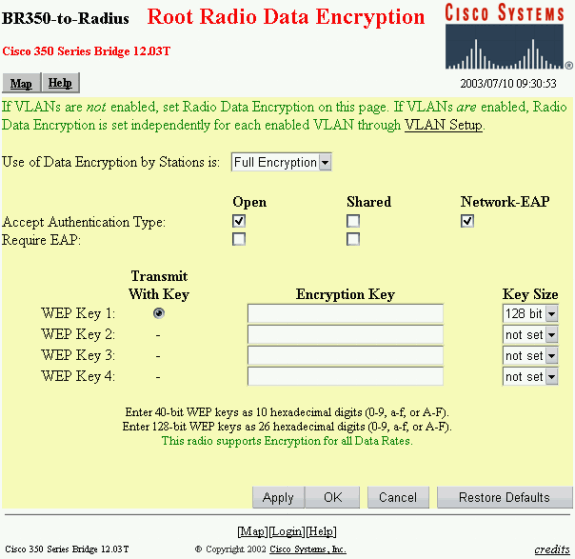
Change the option Use of Data Encryption by Stations is: to Full Encryption.
-
Check the Open and Network EAP boxes on the Accept Authentication Type line.
-
Click OK.
-
-
From the Security Setup page, click Authentication Server and make these entries on the page:
-
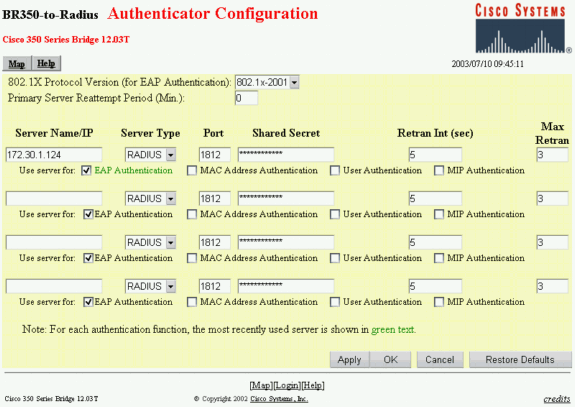
Server Name/IP: Enter the IP address or host name of the RADIUS server.
-
Shared Secret: Enter the exact string as the one on the RADIUS server for this access point or bridge.
-
On the Use server for: line for this RADIUS server, check the EAP Authentication check box.
-
-
When you have configured the parameters in Step 2, click OK.
With these settings, the access point or bridge is ready to authenticate LEAP clients against a RADIUS server.
Configuring the Funk Software, Inc. Product, Steel-Belted Radius
Complete the steps in the next procedure to configure the Funk Software, Inc. product, Steel-Belted Radius, to communicate with the access point or bridge. For more complete information on the server, refer to Funk Software ![]() .
.
Note: The portions of this document that refer to non-Cisco products were written based on experience the author had with that non-Cisco product, not on formal training. They are intended for the convenience of Cisco customers, not as technical support. For authoritative technical support on non-Cisco products, contact the product technical support for the vendor.
-
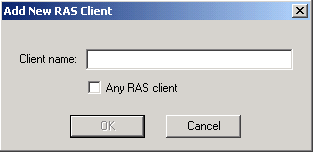
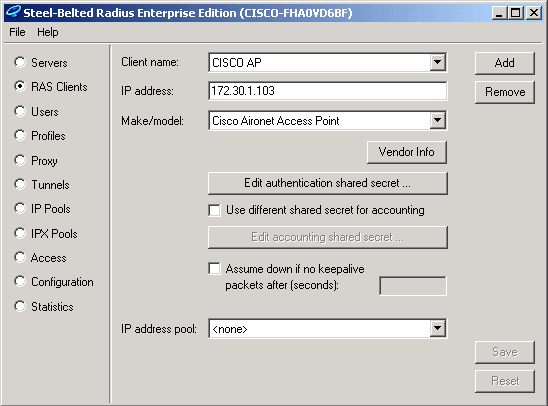
On the RAS Clients menu, click Add to create a new RAS Client.
-
Configure the parameters for client name, IP address and make/model.
-
Client Name: Enter the name of the access point or bridge.
-
IP Address: Enter the address of the access point or bridge that communicates with Steel-Belted Radius.
Note: The RADIUS server views the access point or bridge as a RADIUS client.
-
Make/model: Select Cisco Aironet Access Point.
-
-
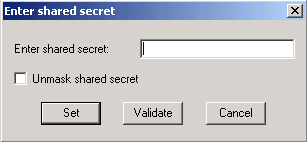
Click Edit authentication shared secret.
-
Enter the exact string as the one on the access point or bridge for this server.
-
Click Set to return to the previous dialog box.
-
Click Save.
-
-
Look for the EAP.INI file that is located in the installation folder for Steel-Belted Radius (on a Windows-based PC, this file is normally located in C:\Radius\Services).
-
Verify that LEAP is an option for EAP-Type.
A sample file looks similar to this:
[Native-User]
EAP-Only = 0
First-Handle-Via-Auto-EAP = 0
EAP-Type = LEAP, TTLS
-
Save the modified EAP.INI file.
-
Stop and restart the RADIUS Service.
Creating Users in Steel-Belted Radius
This section describes how to create a new native (local) user with the Funk Software, Inc. product, Steel-Belted Radius. If a Domain or Workgroup user needs to be added, contact Funk Software ![]() for assistance. Native user entries require that the user’s name and password be entered into the Steel-Belted Radius local database. For all other types of User entries, Steel-Belted Radius relies on another database to validate the credentials of a user.
for assistance. Native user entries require that the user’s name and password be entered into the Steel-Belted Radius local database. For all other types of User entries, Steel-Belted Radius relies on another database to validate the credentials of a user.
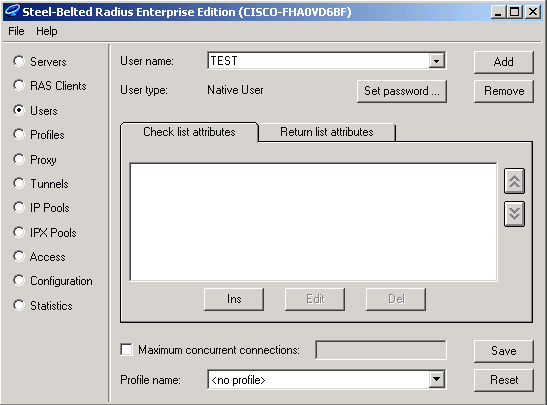
Complete these steps to configure a Native user in Steel-Belted Radius:
-
On the Users menu, click Add to create a new user.
-
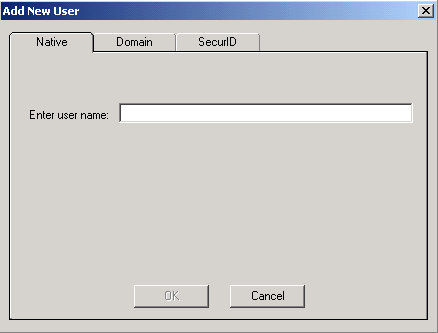
Click the Native tab, enter the user name into the field, and click OK.
The Add New User dialog box closes.
-
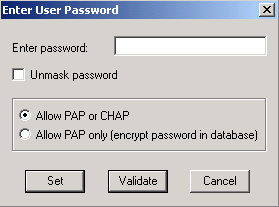
In the Users dialog box, select the user and click Set Password.
-
Enter the password for the user and click Set.
-
In the Users dialog box, click Save and you have created the user.
Related Information
Revision History
| Revision | Publish Date | Comments |
|---|---|---|
1.0 |
01-Sep-2003 |
Initial Release |
Contact Cisco
- Open a Support Case

- (Requires a Cisco Service Contract)


 Feedback