Introduction
This document describes how to configure Cisco DNA Spaces Direct Connect where WLC connects to DNA spaces directly without going through CMX or DNA Spaces Connector
Prerequisites
Requirements
Cisco recommends that you have knowledge of these topics:
- Command Line Interface (CLI) or Graphic User Interface (GUI) access to the AireOS wireless controllers
- Cisco DNA Spaces
Components Used
The information in this document is based on these software and hardware versions:
- 5520 Wireless LAN Controller (WLC) version 8.8.120.0
- DNA Spaces Connector version 1.0.188
Configure
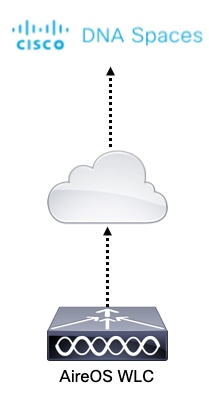
Network Diagram
Configurations
To connect the WLC to Cisco DNA Spaces, the WLC must be able to reach Cisco DNA Spaces cloud over HTTPS.
Import the DigiCert CA root certificate into the WLC
If the WLC uses a root certificate not signed by DigiCert CA, one will see the https: SSL certificate problem: unable to get local issuer certificate error.
Step 1. Go to the link https://global-root-ca.chain-demos.digicert.com/info/index.html, copy the root certificate content to any text editor and save the file with a .cer extension i.e. CertCA.cer
Step 2. Copy the .cer file to a TFTP server which needs to be reachable by the WLC.
Step 3. Log in to the WLC CLI and run these commands:
(Cisco Controller) > transfer download datatype cmx-serv-ca-cert
(Cisco Controller) > transfer download mode tftp
(Cisco Controller) > transfer download filename <your_filename>.cer
(Cisco Controller) > transfer download path <path_to_file>
(Cisco Controller) > transfer download serverip <your_tftp_server_ip>
(Cisco Controller) > transfer download start
Step 4. Reboot the WLC for the changes to take effect.
Note: if the network deployment contains WLCs in an anchor and foreign setup, you must import the certificate to both WLCs
Add the WLC to Cisco DNA spaces
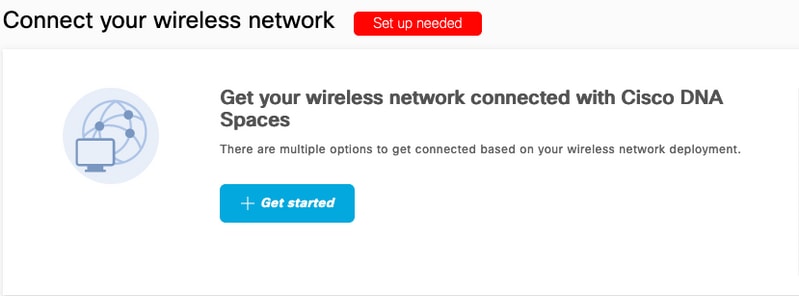
Step 1: Navigate to Setup > Wireless Networks > + Get Started.
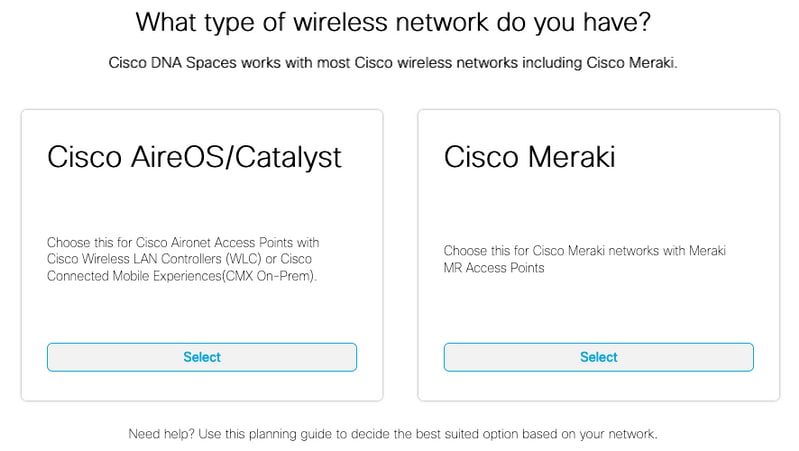
Step 2. Select Cisco AireOS/Catalyst.
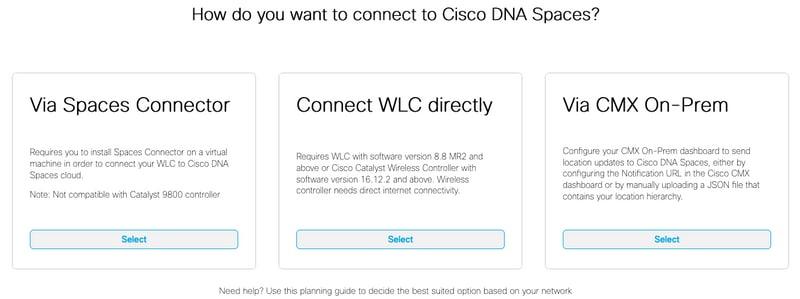
Step 3. Choose Connect WLC directly
Step 4. Click on Customize Setup

Step 5. Click on View Token to get the cloud-services URL and cloud-services server ID Token for the WLC
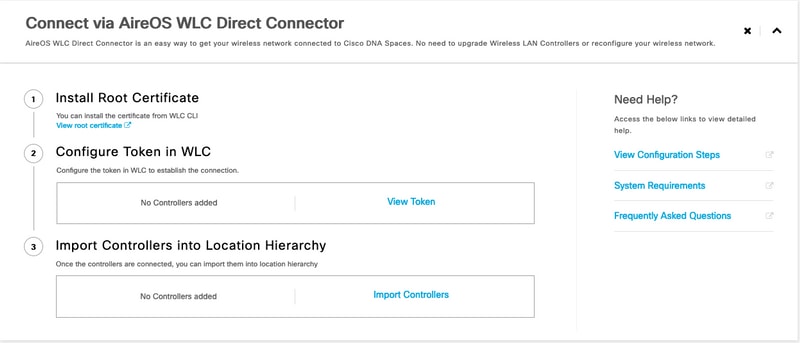
Step 6. Log in to the WLC CLI and run these commands:
(Cisco Controller) > config cloud-services cmx disable
(Cisco Controller) > config cloud-services server url https://<Customer>.<Domain> <IP Address>
(Cisco Controller) > config cloud-services server id_token <Token>
(Cisco Controller) > config network dns serverip <dns_server_ip>
(Cisco Controller) > config cloud-services cmx enable
Import the WLC to Cisco DNA Spaces
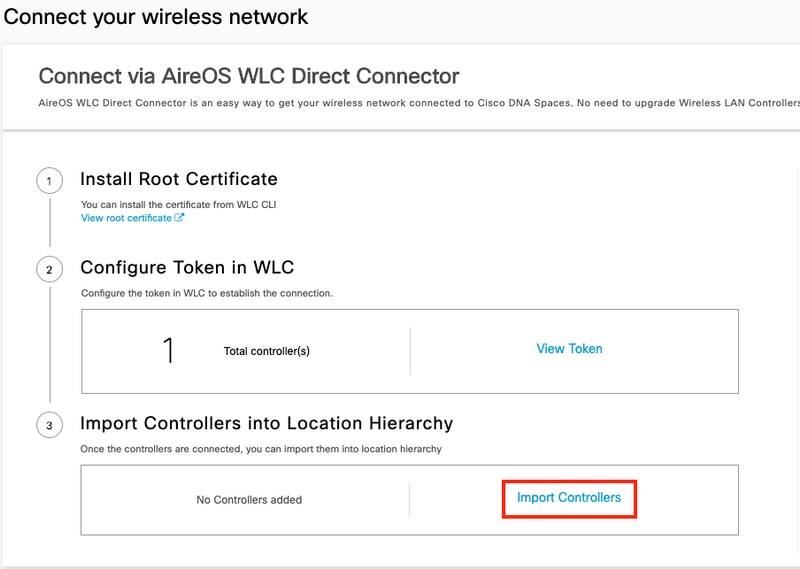
Step 1. Navigate to Setup > Wireless Networks, and click on Import Controllers
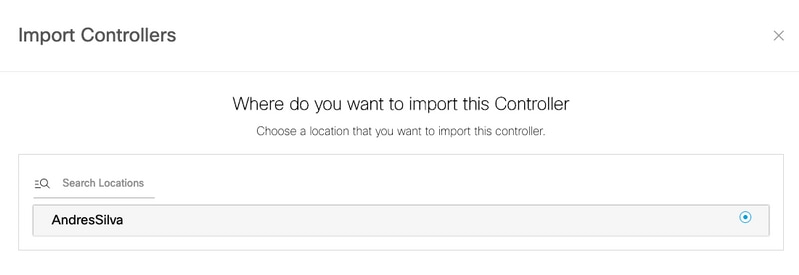
Step 2. Choose the location where you want to import controllers and click Next. If this is the first time you import a controller, you may see the default location i.e. your Cisco DNA Spaces account Name
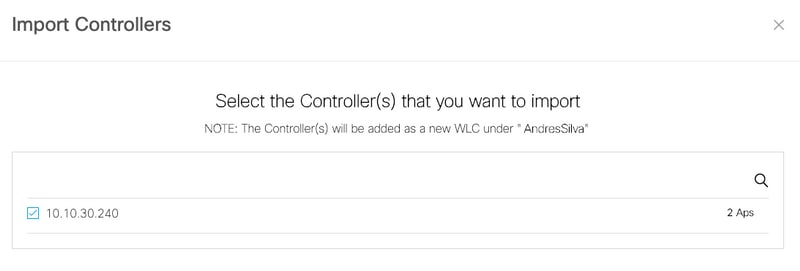
Step 3. Check the IP address of the WLC you want to add. Then click Next.
Step 4. Select the locations and click Finish.
Note: Cisco DNA Spaces will automatically group the Access Points (APs) based on the prefix of their names and creates networks. If you want to maintain the same grouping, select the networks. If the location is not as per your business location, then uncheck the Select All option. If the APs are not grouped, network names are not displayed.

Organize the Location Hierarchy on Cisco DNA Spaces
If a new location hierarchy is desired or if no locations were added in the step 4 of the Import the WLC to Cisco DNA Spaces section, you can configure them manually.
Step 1. Navigate to Location Hierarchy, hover the mouse on the existing wireless controller and create a group. Groups organize multiple locations or zones based on geolocation, brand or any other type of grouping depending on the business.

Step 2. Hover the mouse on the Group and select Add Network. A network or location is defined in Cisco DNA Spaces as all access points within a physical building consolidated as a Location.
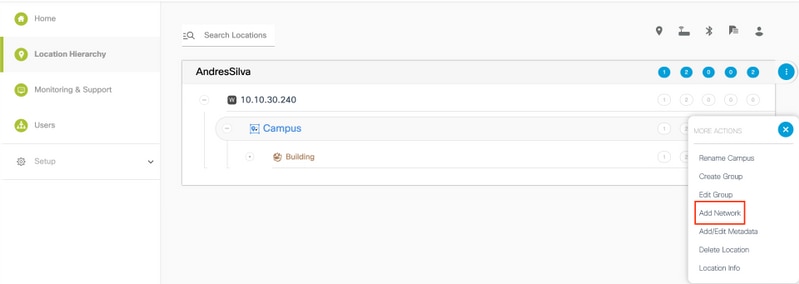
Note: This is the most important node in the Location Hierarchy as business insights and location analytics calculations are generated from here.
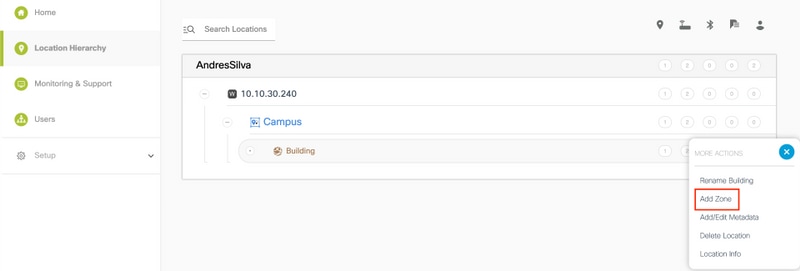
Step 3. Hover the mouse on the Network and select Add Zone. A zone is a collection of access points within a section of a building/location. It can be defined based on the departments in a physical building or an organization.
Step 4. Configure the Zone Name and selec the APs for the zone, and click Add:
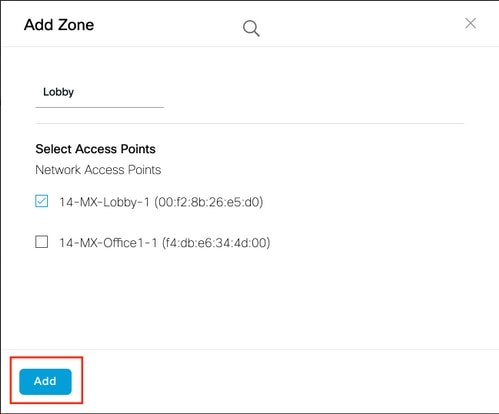
Repeat steps 3 and 4 as many times as needed.
Verify
To confirm the connectivity status between the WLC and Cisco DNA spaces, run the show cloud-services cmx summary command. The result should be as follows:
(Cisco Controller) > show cloud-services cmx summary

CMX Service

    Server ....................................... https://andressilva.dnaspaces.io
    IP Address.................................... 52.20.144.155
    Connectivity.................................. https: UP
    Service Status ............................... Active
    Last Request Status........................... HTTP/1.1 200 OK

    Heartbeat Status ............................. OK
    Payload Compression type ..................... gzip
Troubleshoot
There is currently no specific troubleshooting information available for this configuration.
