Introduction
This document describes how to create a soapUI Application Programmers Interface (API) request and how to create a soapUI Test Case that loops over Test Steps which automate the API requests to Quantum Policy Suite (QPS).
The example soapUI Test Case in this article implementa Test Steps which read a file of subscriber IDs and then create and send a querySubscriberRequst to QPS.
Create a soapUI Project
Before you begin this procedure, install the soapUI application on your desktop. You can download the soapUI installation executable from www.soapui.org.
Before you create an API request or Test Case you must first create a soapUI project. You need the Web Services Description Language (WSDL) file and the XML Schema Description (XSD) file in order to create the project. The WSDL specifies the supported APIs. You can normally obtain the WSDL and XSD from the QPS when you run these commands from the Load Balancer (LB):
- wget http://lbvip01:8080/ua/wsdl/UnifiedApi.wsdl
- wget http://lbvip01:8080/ua/wsdl/UnifiedApi.xsd
Store the WSDL and XSD in the same directory on the desktop where you plan to run the soapUI application.
Complete these steps in order to create the soapUI project:
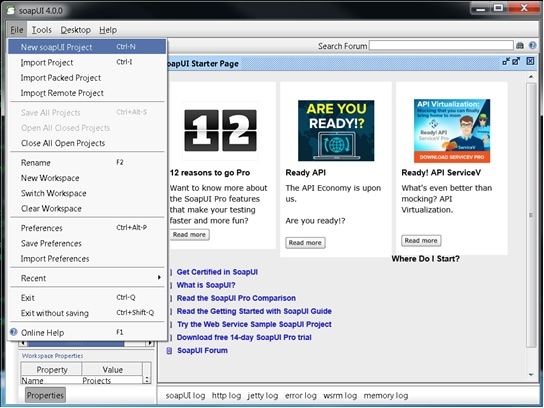
- Choose File > New soapUI Project from the soapUI window:
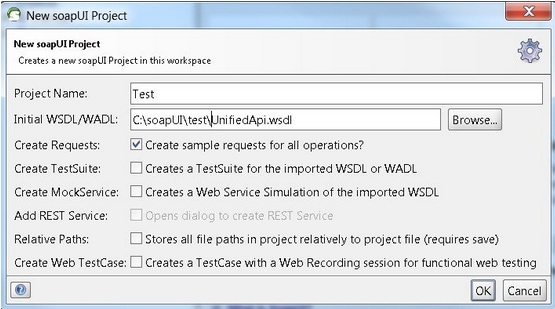
- In the New soapUI Project window enter a name for the project in the Project Name field and enter the location where the WSDL file is stored in the Initial WSDL/WADL field. Click OK when you are done.
Create a soapUI API Request
Complete these steps in order to create a soapUI API request:
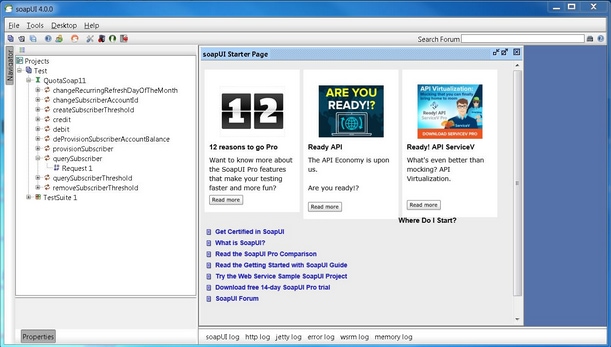
- Expand the soapUI project you created in order to see the APIs. You can also expand one of the APIs in order to see the request.
In this example, querySubscriberRequest is expanded:
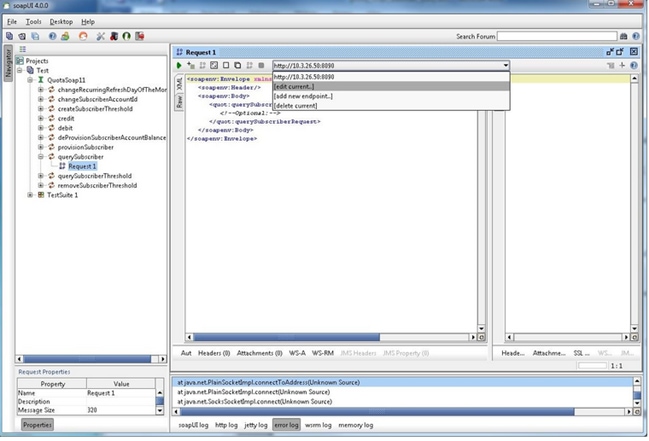
- Open the request in order to see the request window with the XML that forms the query. In the Request window edit the http:// IP address to the IP address and port. This is normally the lbvip01 IP address and port where you want to send the request as this example shows:
- Modify the fields in the XML with the data you want to send in your request. In this example, the request is a querySubscriberRequest. Modify the subscriber ID for the subscriber you want to query and set showDetailedInformatin to false:
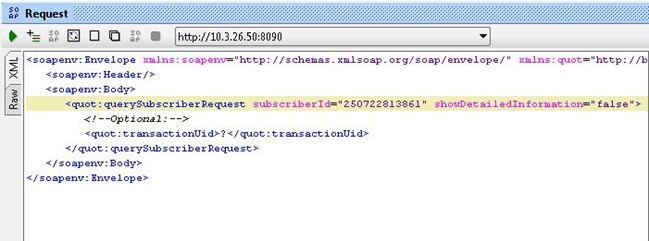
- Click the green Run button at the top of the Request window in order to run the query.
Create a soapUI Test Case
This procedure explains how to create a test suite that can automate when APIs are sent to the QPS.
In this example procedure the test suite loops over a list of subscriber IDs and then uses those subscriber IDs in the querySubscriberRequest it sends to QPS. The list of subscriber IDs are each on a single line in a text file called subid.txt.
Complete these steps in order to create the Test Suite:
- In the soapUI project you created, create a new Test Suite. Right-click on the soapUI and choose New TestSuite.
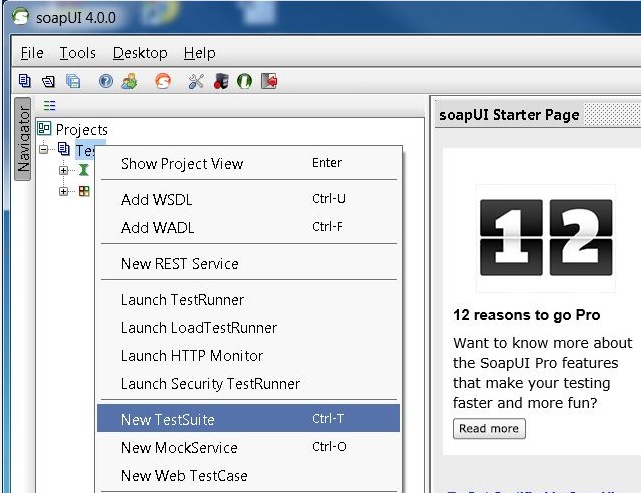
- Right-click the Test Suite and choose New TestCase.
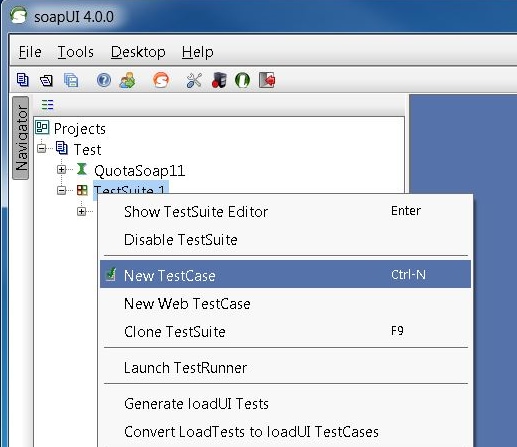
- Right-click the Test Case and choose Add Step > Groovy Script in order to add a Groovy Script test step. Name it Data Source:
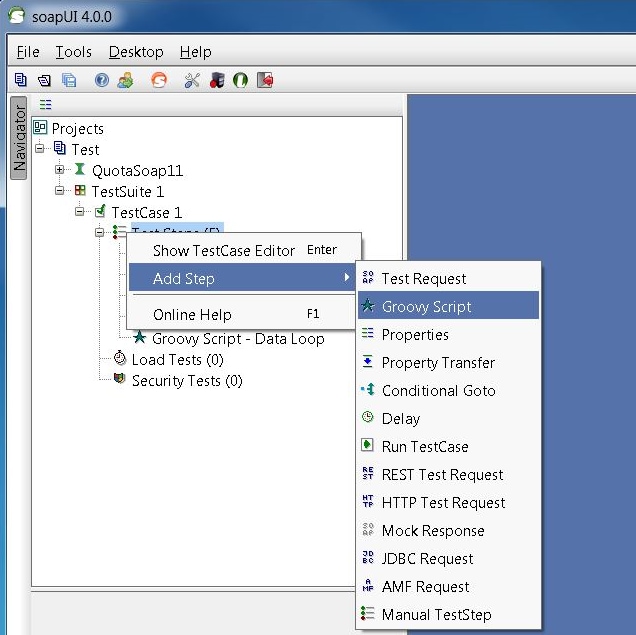
- In the Data Source file paste this code. This code reads file C:/subid.txt which contains a subscriber ID on each line:
import com.eviware.soapui.support.XmlHolder def myTestCase = context.testCase
def counter,next,previous,sizeFile tickerEnumFile = new File("C:/subid.txt") //subscriber
IDs sepearted by new line (CR). List lines = tickerEnumFile.readLines() size =
lines.size.toInteger() propTestStep = myTestCase.getTestStepByName("Property - Looper")
// get the Property TestStep propTestStep.setPropertyValue("Total", size.toString())
counter = propTestStep.getPropertyValue("Count").toString() counter= counter.toInteger()
next = (counter > size-2? 0: counter+1) tempValue = lines[counter]
propTestStep.setPropertyValue("Value", tempValue) propTestStep.setPropertyValue
("Count", next.toString()) next++ log.info "Reading line : ${(counter+1)} /
$lines.size"propTestStep.setPropertyValue("Next", next.toString()) log.info
"Value '$tempValue' -- updated in $propTestStep.name" if (counter == size-1) {
propTestStep.setPropertyValue("StopLoop", "T")    log.info "Setting the stoploop property now..."}
else if (counter==0) {    def runner = new com.eviware.soapui.impl.wsdl.testcase.WsdlTestCaseRunner
(testRunner.testCase, null) propTestStep.setPropertyValue("StopLoop", "F") } else{
 propTestStep.setPropertyValue("StopLoop", "F") }
- Right-click on the Test Step and choose Add Step > Properties in order to add a Property test step and name it Property - Looper.
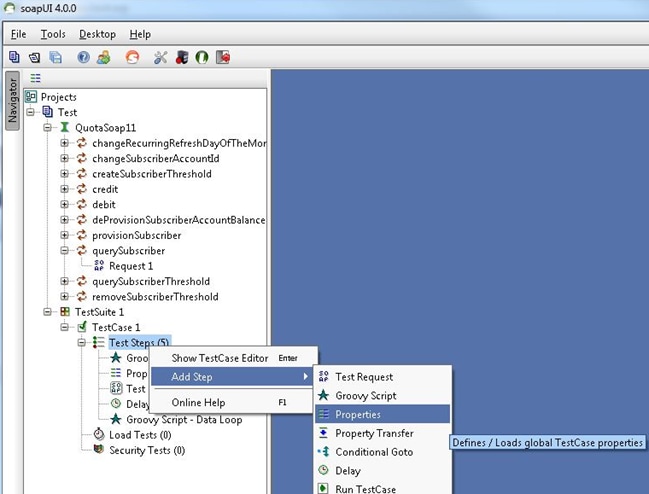
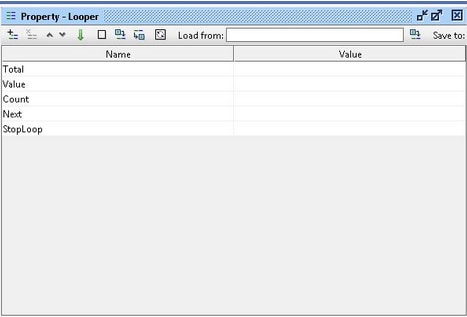
- Add these user defined properties of the Looper test step:
- Total
- Value - In our example this hold the subscriber ID read from the file subscriber IDs
- Count
- Next
- StopLoop
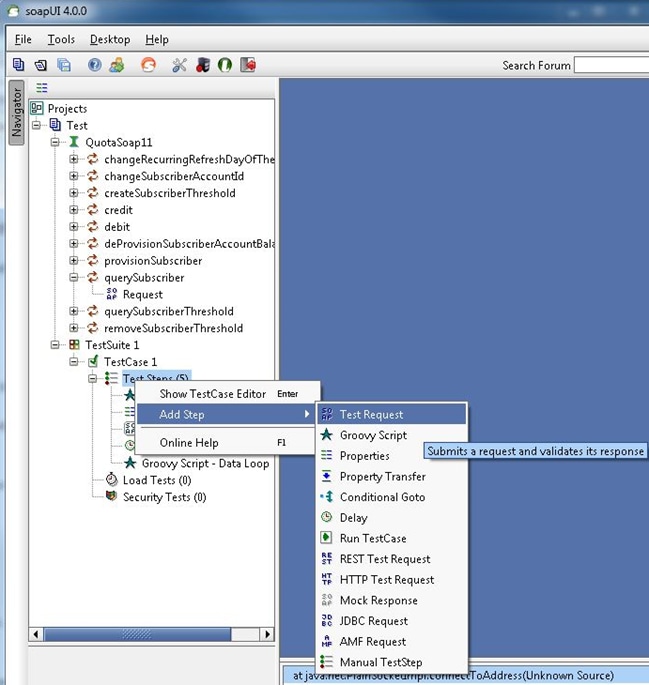
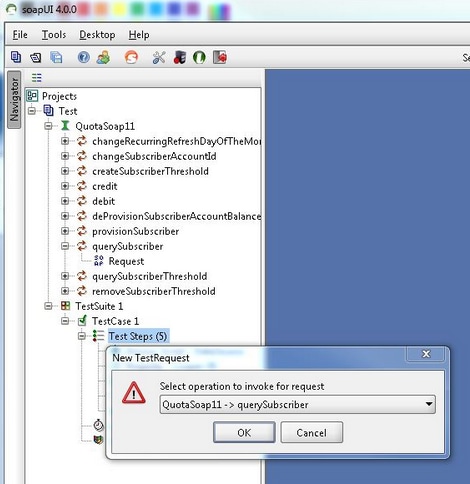
- Right-click on the Test Step and choose Add Step > TestRequest in order to add a Test Request Test Step and choose the request you want to invoke:
In this example, querySubscriberRequest is used.
- In the request, the expansion code replaces the field values of what you query. In this example the ? of the SubscriberId=? in the querySubscriberRequest is replaced with expansion code ${Property - Looper#Value} (soap_test_req_expansion_code):
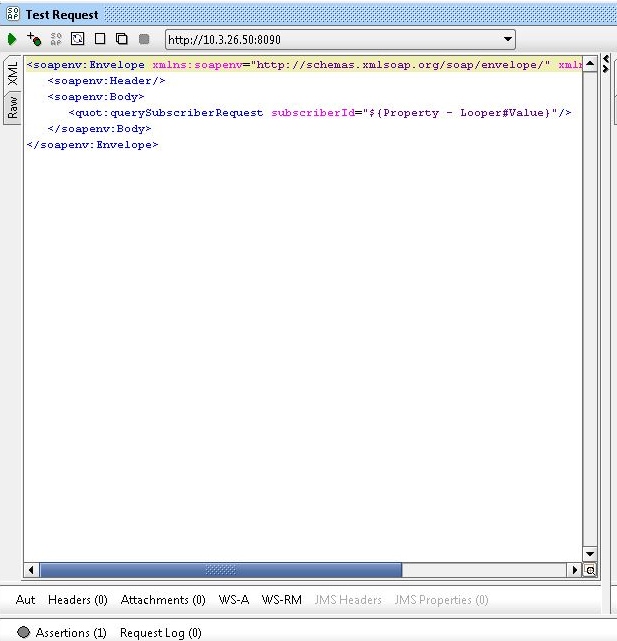
Property - Looper is the name of the Property TestStep previously created and Value holds the current subscriber ID read from the file of subscriber IDs.
- Right-click on the Test Step and choose Add Step > Groovy Script and name it Data Loop:
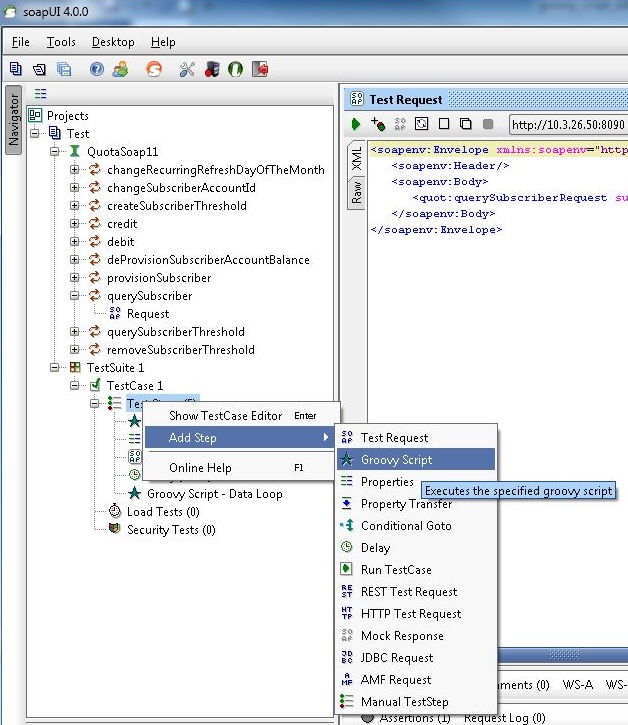
- Paste this code in the Groovy Script Data Loop:
def myTestCase = context.testCase
 	def runner
	propTestStep = myTestCase.getTestStepByName("Property - Looper")
 	endLoop = propTestStep.getPropertyValue("StopLoop").toString()
	 if (endLoop.toString() == "T" || endLoop.toString()=="True"
|| endLoop.toString()=="true")
 	{
	   log.info ("Exit Groovy Data Source Looper")
	   assert true
	}
	else
	{
	   testRunner.gotoStepByName("Groovy Script - DataSource") //go to the DataSource
	}
- In this example procedure, a 1000 ms delay between each loop is added. This step is optional.
With the delay there are now five Test Steps:
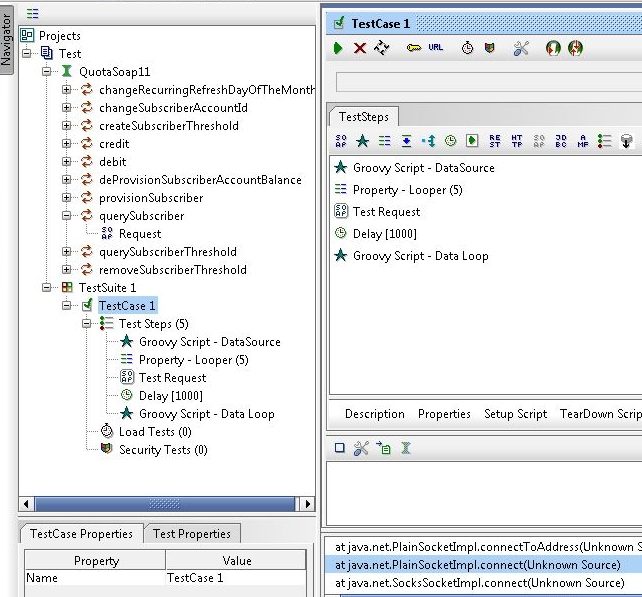
- Click the green Run button in order to run the five Test Steps in the TestCase window.


 Feedback