Introduction
This document describes how to configure Locally Significant Certificates (LSC) with a Wireless LAN Controller (WLC) and a newly-installed Microsoft Windows Server 2012 R2.
Note: Real deployments might differ in many points and you should have full control and knowledge of the settings on Microsoft Windows Server 2012. This configuration example is only provided as a reference template for Cisco customers to implement and adapt their Microsoft Windows Server configuration in order to make LSC work.
Prerequisites
Requirements
Cisco recommends that you understand every change made in Microsoft Windows Server and check the relevant Microsoft documentation if needed.
Note: LSC on WLC is not supported with intermediate-CA, as the root CA will is missed from WLC since the controller only gets the intermediate CA.
Components Used
The information in this document is based on these software and hardware versions:
- WLC Version 7.6
- Microsoft Windows Server 2012 R2
The information in this document was created from the devices in a specific lab environment. All of the devices used in this document started with a cleared (default) configuration. If your network is live, make sure that you understand the potential impact of any command.
Configure
Microsoft Windows Server Configuration
This configuration is shown as performed on a newly-installed Microsoft Windows Server 2012. You must adapt the steps to your domain and your configuration.
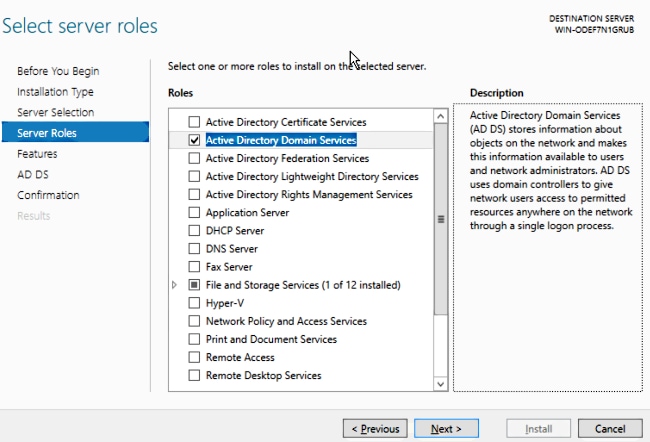
Step 1.Install Active Directory Domain Services for the roles and features wizard.
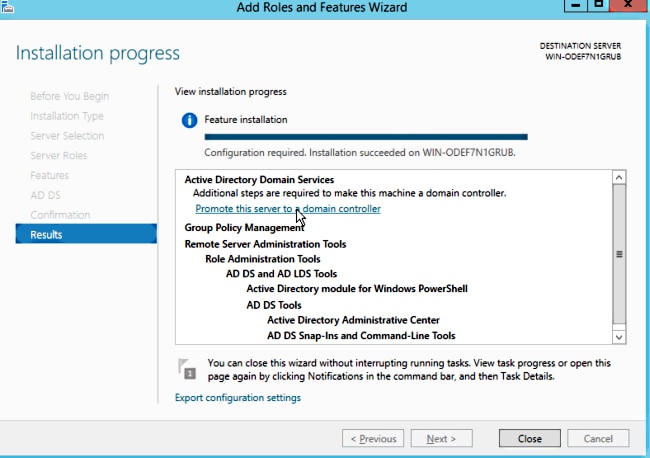
Step 2.After installation, you must promote the server to domain controller.
Step 3. Since this is a new setup, you configure a new forest; but typically in existing deployments, simply configure these points on a domain controller. Here, you choose the LSC2012.com domain. This activates the Domain Name Server (DNS) feature as well.
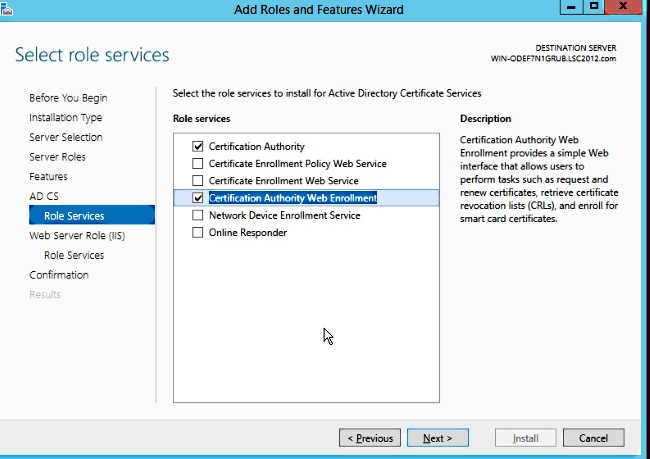
Step 4. After a reboot, install the Certificate Authority (CA) service as well as web enrollment.
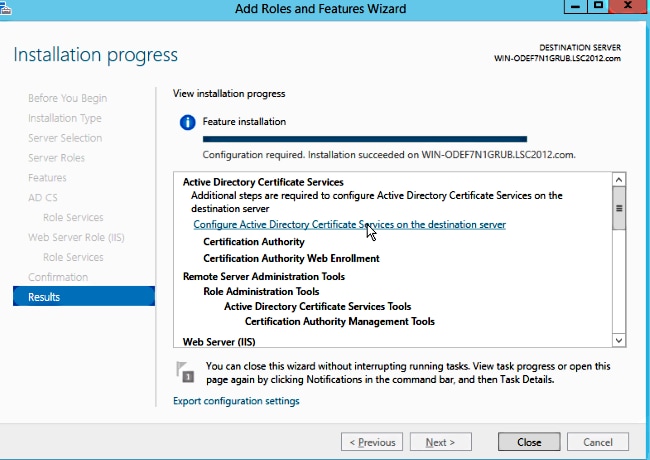
Step 5.Configure them.
Step 6. Choose Enterprise CA and leave everything as default.

Step 7. Click the Microsoft Windows/Start menu.
Step 8. Click Administrative tools.
Step 9. Click Active Directory Users and Computers.
Step 10. Expand the domain, right-click the Users folder, and choose New Object > User.

Step 11. In this example, it is named APUSER. Once created, you must edit the user and click the MemberOf tab, and make it a member of the IIS_IUSRS group
The required User Rights Assignments are:
- Allow log on locally
- Log on as a service
Step 12. Install the Network Device Enrollment Service (NDES).

- Choose the account member of the IIS_USRS group, APUSER in this example, as the service account for NDES.
Step 13. Navigate to Administrative Tools.
Step 14. Click Internet Information Services (IIS).
Step 15. Expand the Server > Sites > Default web site > Cert Srv.
Step 16. For both mscep and mscep_admin, click authentication. Make sure that anonymous authentication is enabled.
Step 17. Right-click windows authentication and choose Providers. Make sure that NT LAN Manager (NTLM) is first in the list.
Step 18. Disable the authentication challenge in the registry settings, otherwise Simple Certificate Enrollment Protocol (SCEP) expects challenge password authentication, which is not supported by the WLC.
Step 19. Open the regedit application.
Step 20. Go to HKEY_LOCAL_MACHINE\SOFTWARE\MICROSOFT\Cryptography\MSCEP\.
Step 21. Set EnforcePassword to 0.

Step 22. Click the Microsoft Windows/Start menu.
Step 23. Type MMC.
Step 24. On the File menu, choose Add/Remove Snap-in. Choose Certification Authority.
Step 25. Right-click the Certificate Template folder and click Manage.
Step 26. Right-click an existing template, such as User, and choose Duplicate Template.
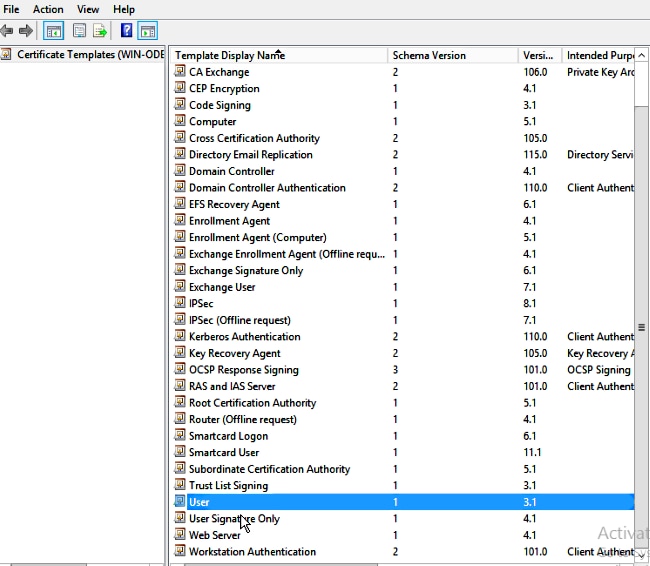
Step 27. Choose the CA to be Microsoft Windows 2012 R2.
Step 28. On the General tab, add a display name such as WLC and a validity period.
Step 29. In the Subject Name tab, confirm that Supply in the request is selected.

Step 30. Click the Issuance Requirements tab. Cisco recommends that you leave issuance policies blank in a typical hierarchical CA environment:

Step 31. Click the Extensions tab, Application Policies, and then Edit. Click Add, and ensure that Client Authentication is added as an application policy. Click OK.
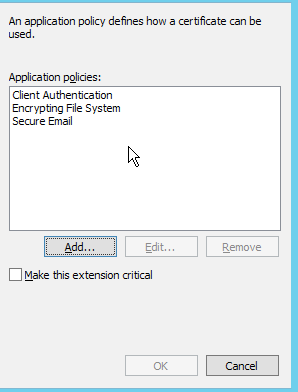
Step 32. Click the Security tab, and then click Add.... Ensure that the SCEP service account defined in the NDES service installation has full control of the template, and click OK.

Step 33. Return to the Certification Authority GUI interface. Right-click the Certificate Templates directory. Navigate to New > Certificate Template to Issue. Select the WLC template configured previously, and click OK.

Step 34. Change the default SCEP template in the registry settings under Computer > HKEY_LOCAL_MACHINE > SOFTWARE > Microsoft > Cryptography > MSCEP. Change the EncryptionTemplate, GeneralPurposeTemplate, and SignatureTemplate keys from IPsec (Offline Request) to the WLC template previously created.
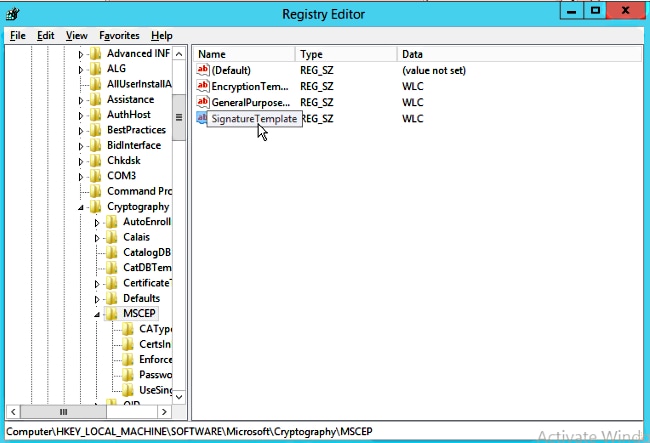
Step 35. Reboot the system.
Configure the WLC
Step 1. On the WLC, navigate to the Security menu. Click Certificates > LSC.
Step 2. Check the Enable LSC on Controller checkbox.
Step 3. Enter your Microsoft Windows Server 2012 URL. By default, it is appended with /certsrv/mscep/mscep.dll.
Step 4. Enter your details in the Params section.
Step 5. Apply the change.

Step 6.Click the blue arrow on the upper CA line and choose Add. It should change the status from Not present to present.
Step 7. Click the AP provisioning tab.
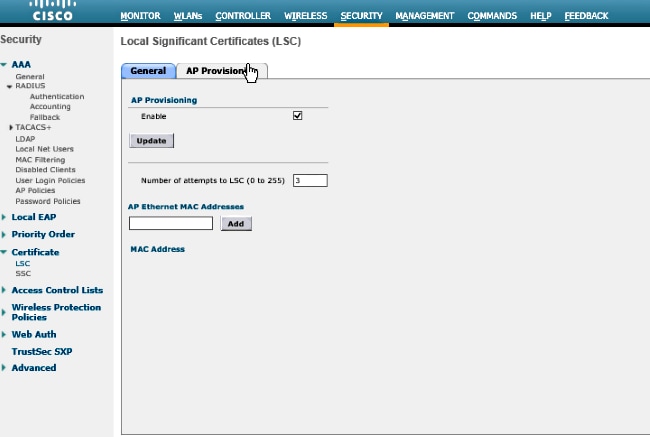
Step 8.Check the Enable checkbox under AP Provisioning and click Update.
Step 9.Reboot your access points if they have not rebooted themselves.
Verify
Use this section in order to confirm that your configuration works properly.
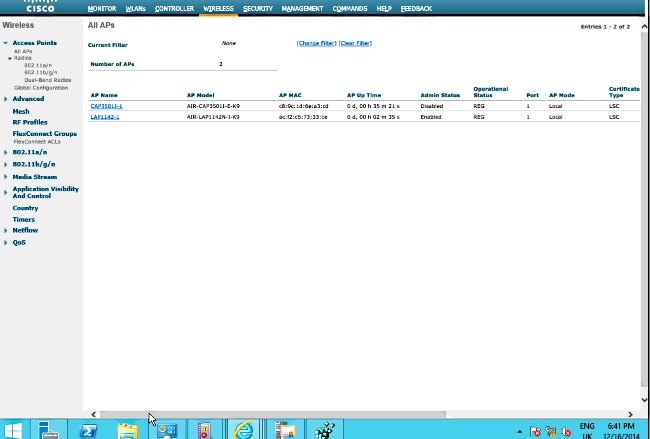
The access point, after reboot, joins back and displays with LSC as the certificate type in the Wireless menu.
Note: After 8.3.112, MIC APs cannot join at all once LSC is enabled. Therefore the "attempts to LSC" count feature becomes of limited use.
Troubleshoot
There is currently no specific troubleshooting information available for this configuration.
