Cisco DNA Center on ESXi Deployment Guide
Cisco DNA Center on ESXi Deployment Overview
Cisco DNA Center is now available as a virtual appliance. Cisco DNA Center on ESXi provides a straightforward deployment process and allows you to try out Cisco DNA Center without having to purchase a physical appliance.
This guide provides the following information:
-
The requirements that need to be met in order to successfully deploy a Cisco DNA Center on ESXi virtual appliance.
-
Procedures that detail how to create a virtual machine on a VMware ESXi host, configure a virtual appliance, execute the Quick Start workflow, and complete post-deployment tasks that should be carried out before you use Cisco DNA Center on ESXi.
Deployment Requirements
The following requirements need to be met in order to successfully deploy a virtual appliance. For performance tips that cover the most performance-critical areas of VMware vSphere, see the relevant document:
-
For VMware vSphere Client 7.0, see Performance Best Practices for VMware vSphere 7.0 (PDF).
-
For VMware vSphere Client 8.0, see Performance Best Practices for VMware vSphere 8.0 (PDF).
Virtual Machine Minimum Requirements
| Feature | Description |
|---|---|
|
Virtualization platform and hypervisor |
VMware vSphere (which includes ESXi and vCenter Server) 7.0.x or later, including all patches |
|
Processors |
Intel 2.1-GHz and above CPU 32 vCPUs, with 64-GHz reservation must be dedicated to the VM |
|
Memory |
256-GB DRAM, with 256-GB reservation must be dedicated to the VM |
|
Storage |
3 TB solid-state drive (SSD) If you plan to create backups of your virtual appliance, also reserve additional datastore space. For information, see "Backup Server Requirements" in the Cisco DNA Center on ESXi Administrator Guide. |
|
I/O Bandwidth |
180 MB/sec |
|
Input/output operations per second (IOPS) rate |
2000-2500 |
|
Latency |
Cisco DNA Center on ESXi to network device connectivity: 200 ms |
|
Concurrent Sessions |
Up to 5 concurrent user connections are supported for network admins to log in to Cisco DNA Center on ESXi |
Scale Numbers
The following tables list the number of devices and site elements that Cisco DNA Center on ESXi supports.
| Network Component | Maximum Number Supported |
|---|---|
|
Endpoints |
25,000 |
|
Devices |
1000 |
|
Access Points |
4000 |
|
Site Elements |
2500 |
| Network Component | Maximum Number Supported |
|---|---|
|
Endpoints |
25,000 |
|
Devices |
2000 |
|
Access Points |
3000 |
|
Site Elements |
2500 |
Cisco DNA Assurance uses near real-time streaming analytics, which requires additional guarantees on resource availability. When operating Cisco DNA Center on ESXi close to maximum scale, this functionality may be impacted by uncontrolled external events, such as host resource oversubscriptions and edge use cases that result in a resource usage spike. A number of things can indicate that these events are taking place, such as slow performance, data processing gaps, high I/O latency, and a CPU readiness percentage that's higher than normal.
To avoid these issues and ensure that Cisco DNA Center on ESXi supports the number of components listed above, we strongly recommend that you complete the following tasks:
-
Enable CPU affinity for the virtual machine that Cisco DNA Center on ESXi will use by completing the steps described here: https://docs.vmware.com/en/VMware-vSphere/7.0/com.vmware.vsphere.resmgmt.doc/GUID-F40F901D-C1A7-43E2-90AF-E6F98C960E4B.html. In the Scheduling Affinity field, enter 0-31.
-
Be aware of the potential CPU affinity issues described here: https://docs.vmware.com/en/VMware-vSphere/7.0/com.vmware.vsphere.resmgmt.doc/GUID-199F1ADD-3B9B-490C-8F0C-440B53577B3A.html
-
Set the virtual machine's Latency Sensitivity value to High. See the following URLs for more information:
-
Monitor the virtual machine's readiness percentage (keeping this number as close to zero as possible) and monitor for oversubscribed storage.
Launcher Requirements
If you plan to use the launcher app to configure a virtual appliance, the following requirements must be met by the machine on which you'll run the app:
| Feature | Description |
|---|---|
|
RAM |
1 GB |
|
Storage |
|
|
Supported operating systems |
|
|
Sleep setting |
Configure the machine to not go to sleep. |
In addition to these requirements, also ensure that the user who will run the launcher has the privileges necessary to deploy the virtual appliance's OVA file and modify the appliance's virtual machine.
Supported Browsers
-
Mozilla Firefox, version 65 or later
-
Google Chrome, version 72 or later
Mandatory and Optional Packages
The following packages are installed by default when you configure your virtual appliance and are required for operation:
|
Package Name |
Package Version |
|---|---|
|
mks-upgrade |
2.3.107 |
|
core-platform |
0.5.146 |
|
iam |
4.0.27 |
|
harbor-ui |
3.0.1105 |
|
idm-ui-plugin |
3.1.9 |
|
data-ingestion-infra |
6.2.16 |
|
data-contextstore |
6.2.7 |
|
data-analytics-infra |
6.2.27 |
|
data-platform-pipeline-infra |
6.2.21 |
|
data-store-management |
6.2.44 |
|
data-platform-ui |
6.2.13 |
|
cloud-connectivity-datahub |
6.3.5 |
|
cloud-connectivity |
6.1.36 |
|
dnacaap |
6.3.88 |
|
dnac-search |
6.3.7 |
|
system-management-operations |
1.1.1078 |
|
telemetry |
3.2.11 |
|
cloud-connectivity-sense |
6.2.8 |
|
rca-scripts |
0.1.11 |
|
b2b-upgrade |
2.710.65449 |
|
system-commons |
2.710.65449 |
|
ise-bridge |
2.710.80885 |
|
ncp |
2.710.65449 |
|
assurance-base-analytics |
2.370.312 |
|
assurance |
2.370.263 |
|
ai-network-analytics |
3.1.19 |
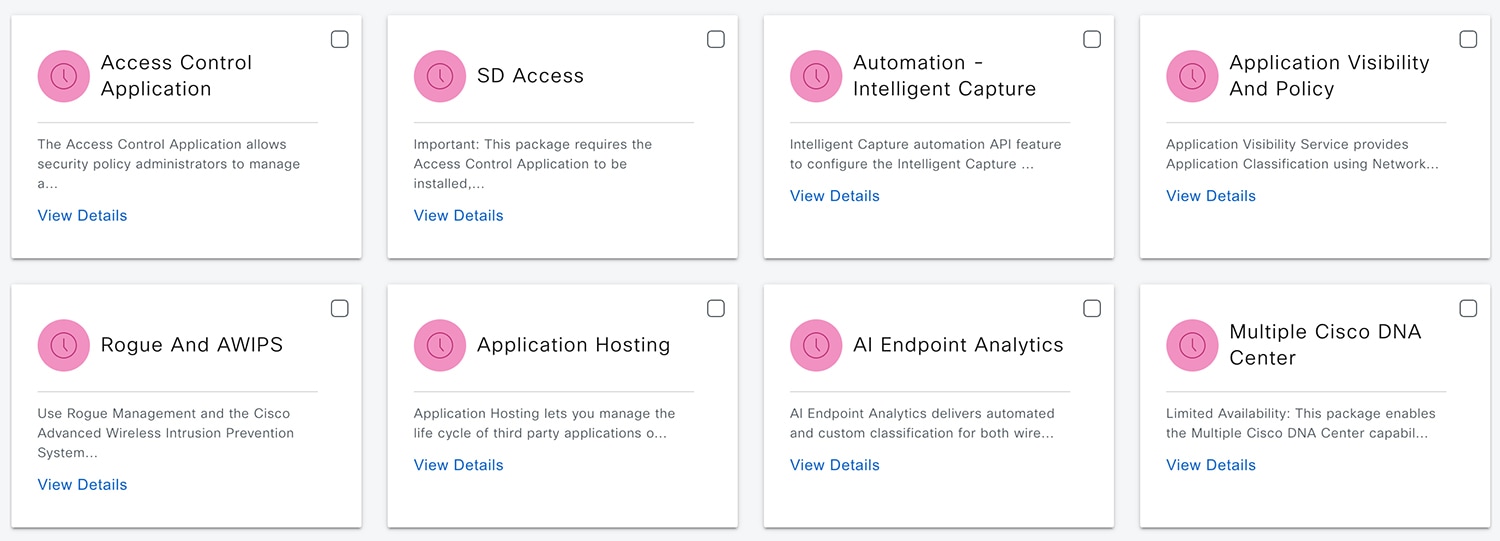
To view these packages, first click the menu icon from the top-left corner and choose to open the Software Management window. Then click the Currently Installed Applications link.
The bottom of the Software Management window also displays optional packages that are available for download. For the packages you want to install, check the corresponding check box and then click Install.
Prepare for Deployment
In order to prepare for the deployment of a Cisco DNA Center on ESXi virtual appliance, you'll need to complete the following tasks:
Install VMware vSphere
To run, Cisco DNA Center on ESXi requires VMware vSphere (which includes ESXi and vCenter Server) 7.0.x or later, including all patches. Click here to access an overview of the VMware vSphere installation and setup process. After you have installed ESXi, confirm that the ESXi you set up can be reached from the computer that you will use to deploy the virtual appliance's OVA file.
Reserve Enterprise Interface
Before you set up the virtual appliance, ensure that you reserve one 1-Gbps/10-Gbps Enterprise interface to connect to and communicate with your enterprise network. Jot down the IP address for this interface, since you'll need to enter it during appliance configuration.
Optionally, you can also reserve one 1-Gbps/10-Gbps Management network interface to access the Cisco DNA Center on ESXi GUI. Jot down this interface's IP address as well if you plan to configure it.
Note the following points:
-
The intracluster interface's IP address is predefined, so you won't need to enter it when you complete either the Maglev Configuration wizard with default mode selected or the browser-based Install configuration wizard.
-
Cisco DNA Center on ESXi supports the configuration of one additional interface for use by the virtual appliance. If you do so, make sure that you choose VMXNET from the Adapter Type drop-down list. Otherwise, appliance configuration will not complete successfully. For more information, see the Add a Network Adapter to a Virtual Machine topic in vSphere Virtual Machine Administration.
Import the IdenTrust Certificate Chain
The Cisco DNA Center on ESXi OVA file is signed with an IdenTrust CA certificate, which not included in VMware's default truststore. As a result, the Deploy OVF Template wizard's Review details page will indicate that you are using an invalid certificate while completing the wizard. You can prevent this by importing the IdenTrust certificate chain to the host or cluster on which you want to deploy the OVA file.
Procedure
|
Step 1 |
On the VMware ESXi host or cluster where your virtual appliance will reside, download trustidevcodesigning5-2.3.7.0-VA.tar.gz from the same location that Cisco specified to download the Cisco DNA Center on ESXi OVA file. |
|
Step 2 |
Unzip this file. |
|
Step 3 |
Log in to the vSphere Web Client. |
|
Step 4 |
Choose . |
|
Step 5 |
In the Trusted Root Certificates field, click Add. |
|
Step 6 |
In the Add Trusted Root dialog box, click Browse. |
|
Step 7 |
Navigate to and select the certificate chain you downloaded in Step 1 (trustidevcodesigning5.pem), then click Open. |
|
Step 8 |
Check the Start Root certificate push to vCenter Hosts check box, then click Add. A message indicates that the certificate chain was successfully imported. When you complete the Deploy OVF Template wizard, the Review details page's Publisher field should indicate that you are using a trusted certificate. |
Prepare NTP and Proxy Servers
You'll be prompted to specify two items:
-
The Network Time Protocol (NTP) server that Cisco DNA Center on ESXi will use for clock synchronization.
-
(Optional) The proxy server that Cisco DNA Center on ESXi will use to access internet-bound URLs.
Before you configure your virtual appliance, do the following:
-
Ensure that the servers you want to use are both available and running.
-
For an NTP server, obtain its IP address or hostname. And for a proxy server, collect either its URL or hostname and its login credentials.
Enable Storage Input/Output Control
For the datastore in which you are planning to deploy a virtual appliance, complete the following procedure so the appliance's virtual machine input/out (I/O) is prioritized over other virtual machines when the network is experiencing I/O congestion.
Procedure
|
Step 1 |
In the vSphere Client, navigate to and click the datastore in which you plan to deploy a virtual appliance. |
|
Step 2 |
Click the Configure tab, then click General. |
|
Step 3 |
In the Datastore Capabilities area, click Edit. |
|
Step 4 |
In the Configure Storage I/O Control window, do the following: |
|
Step 5 |
Click OK. |
Check HA Admission Control Setting
You cannot connect Cisco DNA Center on ESXi VMs to create three-node clusters. If you want to enable High Availability (HA), you'll need to use VMware vSphere's HA functionality and enable strict admission control to ensure that:
-
A virtual machine cannot be powered on if it will result in the violation of availability constraints.
-
Configured failover capacity limits are enforced.
-
HA operates as expected during a failover.
For more information, in the Cisco DNA Center on ESXi Administrator Guide, Release 2.3.7, see the "High Availability" section in the "Configure System Settings" chapter.
Prepare for the Quick Start Workflow
After you create a virtual machine on an ESXi host and configure a Cisco DNA Center on ESXi virtual appliance, you'll be prompted to complete the Quick Start workflow. By completing this workflow, you'll discover the devices that Cisco DNA Center on ESXi will manage and enable the collection of telemetry from those devices. In order to complete this workflow successfully, you'll need to perform the following tasks:
-
Decide on the username and password for the new admin user you're going to create. The default admin username and password (admin/maglev1@3) should only be used the very first time you log in to Cisco DNA Center on ESXi.

Important
Changing this password is critical to network security, especially when the people who set up a Cisco DNA Center on ESXi virtual appliance are not the same people who will serve as its administrators.
-
Obtain the credentials you use to log in to Cisco.com.
-
Identify the users that need access to your system. For these users, define their roles as well as unique passwords and privilege settings.
You have the option to use an IPAM server and Cisco Identity Services Engine (ISE) with your virtual appliance. If you choose to use one or both of them, you'll also need to obtain the relevant URL and login credentials.
Deploy a Virtual Appliance
To set up a Cisco DNA Center on ESXi virtual appliance, you'll need to complete the following tasks:
If you want to set up your virtual appliance using the ESXi launcher app, you'll first complete the steps described in Configure a Virtual Appliance Using the ESXi Launcher App. Then you'll complete the Quick Start workflow.
Create a Virtual Machine
Complete the following procedure to create a virtual machine on the VMware ESXi host or cluster where your virtual appliance will reside.
Procedure
|
Step 1 |
Download the Cisco DNA Center on ESXi OVA file from the location specified by Cisco. |
|
Step 2 |
Log in to the vSphere Web Client. |
|
Step 3 |
In the navigation pane, right-click the IP address of host or cluster on which you want to deploy the OVA file and then click Deploy OVF Template. |
|
Step 4 |
Complete the Deploy OVF Template wizard: |
Configure a Cisco DNA Center on ESXi Virtual Appliance
Complete one of the following procedures to configure a Cisco DNA Center on ESXi virtual appliance on a VMware ESXi host:
-
Configure a Virtual Appliance Using the Maglev Configuration Wizard: Default Mode
-
Configure a Virtual Appliance Using the Maglev Configuration Wizard: Advanced Mode
-
Configure a Virtual Appliance Using the Install Configuration Wizard
-
Configure a Virtual Appliance Using the Advanced Install Configuration Wizard
Configure a Virtual Appliance Using the Maglev Configuration Wizard: Default Mode
If you want to configure a virtual appliance as quickly as possible using the Maglev Configuration wizard and are okay with using preset appliance settings, complete the following procedure.
Note |
The Intracluster interface is preconfigured when using this wizard. If you don't want to use the default settings for this interface, you'll need to complete the Maglev Configuration wizard with advanced mode selected. |
Before you begin
Gather the following information for the virtual appliance before you start this procedure:
-
Static IP address
-
Subnet mask
-
Default gateway
-
DNS address
-
NTP server details
-
Proxy server details
Procedure
|
Step 1 |
After deployment completes, power on the newly-created virtual machine:
It takes around 45 minutes for the virtual machine to become operational. The actual time will depend on things like available bandwidth, RAM, hard disk space, and the number of vCPUs. You can monitor the progress in the VMware VM Console. |
|
Step 2 |
Launch either the remote console or web console by clicking the appropriate link. |
|
Step 3 |
Configure the virtual machine by completing the Maglev Configuration Wizard: |
Configure a Virtual Appliance Using the Maglev Configuration Wizard: Advanced Mode
If you want to configure a virtual appliance using the Maglev Configuration wizard and need to specify settings that are different from the preset appliance settings, complete the following procedure.
Before you begin
Gather the following information for the virtual appliance before you start this procedure:
-
Static IP address
-
Subnet mask
-
Default gateway
-
DNS address
-
NTP server details
-
Proxy server details
Procedure
|
Step 1 |
After deployment completes, power on the newly-created virtual machine:
It takes around 45 minutes for the virtual machine to become operational. The actual time will depend on things like available bandwidth, RAM, hard disk space, and the number of vCPUs. You can monitor the progress in the vSphere Client's Recent Tasks tab. |
|
Step 2 |
Launch either the remote console or web console by clicking the appropriate link. |
|
Step 3 |
Configure the virtual machine by completing the Maglev Configuration Wizard: |
Configure a Virtual Appliance Using the Install Configuration Wizard
If you want to configure a virtual appliance as quickly as possible using the browser-based Install configuration wizard and are okay with using preset appliance settings, complete the following procedure.
Important |
Ensure that all of the IP addresses you enter while completing this procedure are valid IPv4 addresses with valid IPv4 netmasks. Also make sure that the addresses and their corresponding subnets do not overlap. Service communication issues can result if they do. |
Before you begin
Ensure that you:
-
Collected the following information:
-
Static IP address
-
Subnet mask
-
Default gateway
-
DNS address
-
NTP server details
-
Proxy server details
-
-
Are using a supported browser. See Deployment Requirements.
-
Enabled ICMP on the firewall between Cisco DNA Center on ESXi and the DNS servers you will specify in the following procedure. This wizard uses Ping to verify the DNS server you specify. This ping can be blocked if there is a firewall between Cisco DNA Center on ESXi and the DNS server and ICMP is not enabled on that firewall. When this happens, you will not be able to complete the wizard.
Note |
The Intracluster interface is preconfigured when using this wizard. If you don't want to use the default settings for this interface, you'll need to complete the browser-based Advanced Install configuration wizard. |
Procedure
|
Step 1 |
After deployment completes, power on the newly-created virtual machine:
It takes around 45 minutes for the virtual machine to become operational. The actual time will depend on things like available bandwidth, RAM, hard disk space, and the number of vCPUs. You can monitor the progress in the vSphere Client's Recent Tasks tab. |
||||
|
Step 2 |
Launch either the remote console or web console by clicking the appropriate link. |
||||
|
Step 3 |
Open the Install Configuration wizard: |
||||
|
Step 4 |
Configure your virtual appliance by completing the Install Configuration wizard: |
||||
|
Step 5 |
After appliance configuration completes, click the copy icon to copy the default admin superuser password.
|
Configure a Virtual Appliance Using the Advanced Install Configuration Wizard
If you want to configure a virtual appliance using the browser-based Advanced Install configuration wizard and need to specify settings that are different from the preset appliance settings, complete the following procedure.
Important |
Ensure that all of the IP addresses you enter while completing this procedure are valid IPv4 addresses with valid IPv4 netmasks. Also make sure that the addresses and their corresponding subnets do not overlap. Service communication issues can result if they do. |
Before you begin
Ensure that you:
-
Collected the following information:
-
Static IP address
-
Subnet mask
-
Default gateway
-
DNS address
-
NTP server details
-
Proxy server details
-
-
Are using a supported browser. See Deployment Requirements.
-
Enabled ICMP on the firewall between Cisco DNA Center on ESXi and both the default gateway and the DNS server you specify in the following procedure. The wizard uses ping to verify the gateway and DNS server you specify. This ping might get blocked if a firewall is in place and ICMP is not enabled on that firewall. When this happens, you will not be able to complete the wizard.
Procedure
|
Step 1 |
After deployment completes, power on the newly-created virtual machine:
It takes around 90 to 120 minutes for the virtual machine to become operational. The actual time will depend on things like available bandwidth, RAM, hard disk space, and the number of vCPUs. You can monitor the progress in the vSphere Client's Recent Tasks tab. |
||||
|
Step 2 |
Launch either the remote console or web console by clicking the appropriate link. |
||||
|
Step 3 |
Open the Advanced Install Configuration wizard: |
||||
|
Step 4 |
Configure your virtual appliance by completing the Advanced Install Configuration wizard: |
||||
|
Step 5 |
After appliance configuration completes, click the copy icon to copy the default admin superuser password.
|
Configure a Virtual Appliance Using the ESXi Launcher App
To configure a Cisco DNA Center on ESXi virtual appliance using the launcher app, complete the following procedure.
Procedure
|
Step 1 |
From the location specified by Cisco, download the Cisco DNA Center on ESXi OVA file. Also download the launcher app bundle (DNAC-SW-Launcher-2.3.7.0-VA.tar.gz) and extract it. |
||
|
Step 2 |
Navigate to the directory of your operating system and extract the dnac-esxi-launcher-os-v0.9.1007 tar file. The bundle contains the following files:
|
||
|
Step 3 |
Navigate to the directory where the launcher app bundle files were extracted and open config.json in a text editor. |
||
|
Step 4 |
For the parameters provided in the configuration file, enter the values specific to your deployment. See Configuration File Parameters for more information.
|
||
|
Step 5 |
Run the Cisco DNA Center on ESXi launcher app using the values you specified in the configuration file:
|
||
|
Step 6 |
Enter the host/vCenter server's credentials to connect and begin the deployment process.
After entering the vCenter server credentials, the launcher will verify connectivity with the host/vCenter server. |
||
|
Step 7 |
Enter and then confirm the Maglev password. The password is used to access the shell and grant SSH access. The password must meet the following requirements:
|
||
|
Step 8 |
Do one of the following:
The launcher app validates your configuration file entries. If the entries are valid, the launcher app asks if you want to proceed with deployment. |
||
|
Step 9 |
Start the deployment and configuration process by entering y. The launcher app completes the following tasks:
Note the following points:
|
||
|
Step 10 |
After the Cisco DNA Center on ESXi virtual appliance powers on, log in to the host/vCenter server you deployed and open the virtual appliance's VMWare console. A terminal shell opens after the virtual appliance boots up, which can take up to 60 minutes. |
||
|
Step 11 |
Log in, using the same Maglev password you entered in Step 7. The default username is maglev. |
||
|
Step 12 |
When all of the Cisco DNA Center on ESXi services are up, open a supported browser and type in the address you entered for the configuration file's IPAddress parameter. |
||
|
Step 13 |
When prompted by the Cisco DNA Center on ESXi GUI, enter the default credentials (admin/maglev1@3) to log in. |
Configuration File Parameters
The following table describes the parameters you need to enter values for in the config.json file.
| Category | Configuration Parameter | Description | ||
|---|---|---|---|---|
|
Host/vCenter information (host_info) |
ip (ip)1 |
IP address or FQDN of the vCenter or ESXi host that the OVA will be imported to. |
||
|
SSL Port (ssl_port)1 |
Port that HTTPS is configured for on the vCenter or ESXi host. The default port is 443. |
|||
|
Import configuration (import_info) |
OVA file path (ova_path) 1 |
Directory where the Cisco DNA Center on ESXi OVA file was downloaded to.
|
||
|
VM Name (vm_name) 1 |
Name of the VM. |
|||
|
Datacenter (data_center) 2 |
Name of the data center the virtual appliance OVA file will be imported to. This parameter is not applicable to ESXi host deployments. |
|||
|
Cluster Name (cluster) 2 |
Name of the cluster where the virtual machine will reside. |
|||
|
Resource Pool (resource_pool) 2 |
Resource pool in which the imported VM should be placed. This parameter is not applicable to ESXi host deployments. |
|||
|
Host Name (host_name)2 |
The ESXi host (managed by vCenter) in which the VM should be placed. This parameter is not applicable to ESXi host deployments. |
|||
|
Datastore (datastore)1 |
Name of the datastore where the VMDK and other supporting files should be placed. |
|||
|
Enterprise Network (network: enterprise_network)1 |
Name of the host network that will be mapped to the virtual machine's Enterprise network. |
|||
|
Management Network (network: management_network)1 |
Name of the host network that will be mapped to the virtual machine's Management network, which is used to access Cisco DNA Center on ESXi's GUI. |
|||
|
Cisco DNA Center on ESXi configuration information (dnac_info) |
IP address (IPAddress)1 |
IP address of the virtual appliance. |
||
|
Subnet mask (netmask) 1 |
Subnet mask for the virtual appliance's Enterprise network interface. |
|||
|
Gateway (gateway)1 |
IP address of the Enterprise network interface's gateway. |
|||
|
DNS servers (dns_servers)1 |
DNS servers used by the virtual appliance. Specify a maximum of three servers, separated by commas. |
|||
|
HTTP Proxy (http_proxy)3 |
HTTP proxy the virtual appliance will use. When specifying the proxy, use the following format: http://IP-address-or-FQDN:port-number |
|||
|
NTP server (ntp)1 |
NTP servers used by the virtual appliance. Specify a maximum of three servers, separated by commas. |
|||
|
FQDN (fqdn)3 |
Fully qualified domain name to be configured for the virtual appliance. Aside from hyphens, this name should not contain any special characters. |
Complete the Quick Start Workflow
After you have deployed and configured a Cisco DNA Center on ESXi virtual appliance, you can log in to its GUI. Use a compatible, HTTPS-enabled browser when accessing Cisco DNA Center on ESXi.
When you log in for the first time as the admin superuser (with the username admin and the SUPER-ADMIN-ROLE assigned), the Quick Start workflow automatically starts. Complete this workflow to discover the devices that Cisco DNA Center on ESXi will manage and enable the collection of telemetry from those devices.
Before you begin
To log in to Cisco DNA Center on ESXi and complete the Quick Start workflow, you will need:
-
If you completed the Advanced Install configuration wizard, the admin superuser username and password that you specified.
-
The information described in the Cisco DNA Center Second-Generation Appliance Installation Guide's "Required First-Time Setup Information" topic.
Procedure
|
Step 1 |
Do one of the following:
One of the following messages appears (depending on the browser you are using):
|
||
|
Step 2 |
Ignore the message and click Advanced. One of the following messages appears:
These messages appear because the controller uses a self-signed certificate. For information on how Cisco DNA Center on ESXi uses certificates, see the "Certificate and Private Key Support" section in the Cisco DNA Center Administrator Guide. |
||
|
Step 3 |
Ignore the message and do one of the following:
|
||
|
Step 4 |
Click Log In. The Cisco DNA Center on ESXi login screen appears. |
||
|
Step 5 |
Do one of the following and then click Login:
In the next screen, you are prompted to configure a new admin user (as the default credentials used to log in for the first time will be deleted). |
||
|
Step 6 |
Do the following in the resulting dialog box, then click Submit.
|
||
|
Step 7 |
Click Log In. The Cisco DNA Center on ESXi login screen appears. |
||
|
Step 8 |
Enter the username and password you configured for the new admin user, then click Login. |
||
|
Step 9 |
Enter your cisco.com username and password (which are used to register software downloads and receive system communications) and then click Next.
The Terms & Conditions screen opens, providing links to the software End User License Agreement (EULA) and any supplemental terms that are currently available. |
||
|
Step 10 |
After reviewing these documents, click Next to accept the EULA. The Quick Start Overview slider opens. Click > to view a description of the tasks that the Quick Start workflow will help you complete in order to start using Cisco DNA Center on ESXi. |
||
|
Step 11 |
Complete the Quick Start workflow: |
Post-Deployment Configurations
After deploying a virtual appliance, you'll need to complete the following post-deployment tasks to run the appliance.
Enable VM Restart Priority
If VMware vSphere HA is enabled in your environment, complete the following procedure to ensure that the virtual appliance's VM is prioritized to power on first during an HA failover.
Procedure
|
Step 1 |
In the vSphere Client's navigation pane, click the HA cluster. |
|
Step 2 |
Click the Configure tab. |
|
Step 3 |
Choose , then click Add. |
|
Step 4 |
Click the virtual machine you want to apply overrides to, then click OK. |
|
Step 5 |
In the vSphere HA area's VM Restart Priority field, do the following:
|
|
Step 6 |
Click Finish. |
 Feedback