Intersight Kubernetes Service
Overview
IKS integrates the Kubernetes lifecycle management capabilities of Cisco into the Intersight orchestration platform to offer Kubernetes as a service. It enables you to quickly and easily deploy and manage the lifecycle of Kubernetes clusters across the globe using a single cloud portal—Intersight.
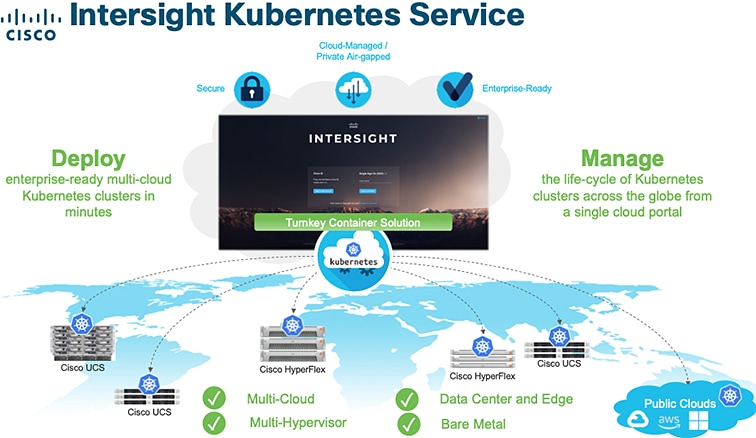
IKS is built on 100 percent upstream Kubernetes and works with seamless container networking, enterprise-grade persistent storage, and built-in production-grade security. IKS also comes with a useful collection of add-ons such as logging, and monitoring using the Kubernetes dashboard.
Roles and privileges
Intersight provides Role-Based Access Control (RBAC) to authorize or restrict system access to a user, based on user roles and privileges. A user role in Intersight represents a collection of the privileges a user has to perform a set of operations and provides granular access to resources. Intersight provides role-based access to individual users or a set of users under Groups. For the complete list of roles and privileges in Intersight and details on managing roles and privileges see Role Based Access Control in Intersight.
The following table describes the supported System-defined roles in IKS, their corresponding permissions, and restrictions:
|
Intersight Kubernetes Service Roles |
Permissions |
Restrictions |
|---|---|---|
|
Kubernetes Administrator |
You can create, edit, deploy, and manage Kubernetes clusters. You can also view all the cluster dashboard widgets and the cluster details. Additionally, you also have privileges to view and manage the storage devices associated with the Kubernetes clusters. The capability to view and execute workflows against the Kubernetes clusters is also granted. It also allows you to run workflows to manage VMs on hypervisor endpoints, and manage connected storage, and create and view IP pools. |
This role does not include the ability to claim a device. You must have a Device Technician, Device Administrator, or an Account Administrator role to claim a device. |
|
Kubernetes Operator |
You can view Kubernetes Clusters. You can also view all the cluster dashboard widgets, and view cluster details. Additionally, you also have privileges to view storage devices associated with the Kubernetes clusters. The capability to view workflows is also granted. It also allows the user to view VMs on hypervisor endpoints. |
This role does not include the ability to claim a device. You must have a Device Technician, Device Administrator, or an Account Administrator role to claim a device. |
Kubernetes Cluster Profiles
IKS enables you to create cluster profiles to configure Kubernetes clusters. A cluster profile is associated with only one cluster. A cluster profile contains information such as the infrastructure provider, the target environment, and the node configuration. IKS enables you to set these configurations by choosing existing Kubernetes policies or by creating new policies.
After a cluster profile is configured, you can choose to deploy the cluster profile immediately, or save the cluster profile and deploy it later.
For more information, see Deploying Kubernetes Cluster Profiles.
Kubernetes Cluster Policies
Policies in IKS define the configurations that can be used across multiple cluster profiles. Using policies helps you to quickly and easily update multiple cluster profile configurations. Whenever you update a policy, the changes apply to all cluster profiles that use the policy. Thus, you can make the changes in a single location, rather than searching for and updating multiple instances.
For more information on the IKS policies that you can configure on Intersight, see Managing Kubernetes Policies.
Kubernetes Multi-cluster Dashboard
The Kubernetes multi-cluster dashboard displays the status of all your Kubernetes clusters.
The Connection status widget groups the connected and not connected clusters. You can click the widget to filter the clusters that are connected and not connected.
To customize the Kubernetes Cluster Table View, you can click Settings (Gear icon) and choose the columns that you want in the Table view. Using the Search field, you can filter the clusters displayed in the Table view by searching on one or more attributes. You can sort the table data based on the Name and Status fields. The data displayed in the Table view can be exported to a CSV file using the Export icon.
The following table describes the attributes of the Kubernetes Cluster Table view.
|
Field |
Description |
||
|---|---|---|---|
|
Name |
The name of the Kubernetes cluster. You can click a cluster name to view the details view of the cluster. |
||
|
Status |
The status of the Kubernetes cluster.
|
||
|
Last Update |
The date on which the Kubernetes cluster was last updated. |
||
|
Associated Profile |
The profile associated with the cluster.
|
||
|
Profile Status |
The status of the profile. |
||
|
Organization |
The organization to which the Kubernetes cluster profile belongs. |
For more information, see Kubernetes Cluster Management.
Kubernetes Cluster Details View
You can click a cluster name from the Kubernetes Cluster Table to view the details the cluster configuration. The Kubernetes Cluster Details view has the following tabs:
-
Monitor: This tab provides an overview of the cluster details and its inventory.
You can view the following information in the Details pane:
-
Status
-
Name
-
Description
-
Infra/Cloud Provider
-
K8s Cluster API Address
-
Storage Class
-
K8s Version
-
Master Nodes
-
Worker Nodes
-
IP Pool
-
CNI Type
-
Load Balancers
-
Add Ons
-
Tags: You can click Set and enter the metadata that you want to associate with the cluster object.
The widgets in the Inventory pane summarises the resources used by the cluster and its status. You can view the following widgets in the Inventory pane:
-
Node Pools
-
Node Pools by Infra Clusters
-
Nodes
-
Node Status
-
Active Networks
-
Total Add-ons
-
-
Operate: This tab provides the details of the resources configured for the cluster. You can click each section to view the next level of details and the corresponding widgets. The widgets also enable you to filter the data in the table displayed in these panes.The sections in the Operate tab are as follows:
-
Nodes: The Node Status and Node Pools widgets are displayed in the Nodes pane. The nodes in your cluster are displayed in the table view. You can click the name of a node from the table to view the infrastructure on which the node runs.
-
Node Pools: The Node Pool Status, Node Pool Types, Hypervisor Managers, and Datacenters widgets are displayed in the Node Pools pane. You can click the name of a node pool from the table to view the virtualization objects associated with the node pool.
-
IP Pools: You can view the IP pools associated with the cluster in the table displayed in the IP Pools pane.
-
Container Runtime: You can view the container runtime information that is configured for the cluster.
-
Add-ons: The Add-on Status, Upgrade Strategy, and Add-on Version widgets are displayed in the Add-ons pane.
-
For more information, see Kubernetes Cluster Management.
Getting Started
This chapter covers only IKS-specific information, for detailed information about getting started with Intersight, see the Getting Started section on Intersight Help Center.
Supported Features Matrix
|
Features |
SaaS |
Connected Virtual Appliance |
Private Virtual Appliance |
|---|---|---|---|
|
Intersight Kubernetes Service |
Yes |
No |
No |
For more information, see Supported Features Matrix on Intersight Help Center.
Intersight Licensing Requirements
|
Features |
Base |
Essentials |
Advantage |
Premier |
|---|---|---|---|---|
|
Intersight Kubernetes Service |
No |
No |
No |
Yes Beta Feature |
For more information, see Intersight Licensing on Intersight Help Center.
Deploy Cisco Intersight Assist
Cisco Intersight Assist helps you add endpoint devices to Cisco Intersight. A datacenter could have multiple devices that do not connect directly with Cisco Intersight. Any device that is supported by Cisco Intersight but does not connect directly with it, will need a connection mechanism. Cisco Intersight Assist provides that connection mechanism, and helps you add devices into Cisco Intersight. For more information about deploying Intersight Assist and for the right sizing for other Intersight features, see the Cisco Intersight Assist Getting Started Guide.
Resource Requirements for Intersight Assist
 Note |
You can deploy Cisco Intersight Assist on VMware ESXi 6.7U3+ or vCenter 6.7U3+. |
The following table describes the resource requirements to install and deploy Cisco Intersight Assist for Intersight Kubernetes Service.
|
Resource Requirement |
System Requirements |
|
|---|---|---|
|
- |
Small |
Medium |
|
vCPU |
16 |
24 |
|
RAM (GiB) |
32 |
64 |
|
Storage (Disk in GiB) |
500 |
500 |
|
Deploy Configuration |
25 Kubernetes clusters |
100 Kubernetes clusters |
|
Supported Hypervisors |
ESXi 6.7U3+ or vCenter 6.7U3+ |
ESXi 6.7U3+ or vCenter 6.7U3+ |
Kubernetes Cluster Management
You can create Kubernetes clusters and manage the end-to-end lifecycle of these clusters.
The following sections provide information about the cluster management tasks that you can perform:
Deploying Kubernetes Cluster Profiles
Before you begin
Before you proceed with deploying a Kubernetes cluster, you must:
-
Download and deploy Intersight Assist OVA on your vCenter.
-
Claim Intersight assist and VMware vCenter on Intersight.
For information on Intersight Assist, see Cisco Intersight Assist Getting Started Guide.
You must also ensure that:
-
vCenter has access to Intersight to import the tenant OVA.
-
The datastore used in a node pool is attached to all the hosts in that cluster (Only for ESXi clusters).
-
The network interface used in a node pool is attached to all the hosts in that cluster (Only for ESXi clusters).
-
Intersight Assist has access to vCenter and all IKS tenant VMs.
-
All IKS tenant VMs have access to vCenter.
To create and deploy a Kubernetes cluster profile:
-
In the left pane, click Profiles.
-
Click the Kubernetes Cluster Profiles tab.
The list of available profiles is displayed.
-
Click Create Kubernetes Cluster Profile.
The Kubernetes Cluster Profile wizard appears.
-
To configure the name, description, and tag for the cluster, in the General screen:
-
From the Organization drop-down list, choose the default organization or a specific organization to which the Kubernetes cluster profile should belong.
Note
An Organization is a logical entity that enables multi-tenancy through a separation of resources.
-
In the Cluster Name field, enter a name for the cluster profile.
-
In the Add Tag field, enter the metadata that you want to associate with the cluster profile.
Add Tag is an optional field. If you are adding a tag, you must enter the tag in the key:value format. This tag will be used internal to Intersight.
-
In the Description field, enter a description for the cluster profile.
Description is an optional field.
-
Click Next.
-
-
To configure the network, system, and SSH settings, in the Cluster Configuration screen:
-
Under IP Pool, click Select IP Pool, and then do one of the following steps:
-
Click Create New to create a new IP pool.
For more information on creating a new IP pool, see Intersight Managed Mode Configuration Guide.
-
Choose a pre-configured IP pool.
You can click the Eye icon to view the details of the IP pool.
-
-
In the Load Balancers field, enter the number of load balancer IP addresses for this cluster.
-
The SSH User field displays the SSH username as iksadmin.
This field is not editable.
-
In the SSH Public Key field, enter the SSH public key that you want to use for creating the cluster.
Note
We recommend that you use only Ed25519 or ECDSA format for the public key.
You can use the
ssh-keygencommand to generate an SSH key pair.For example:
ssh-keygen -t ed25519
-
Under Policies, configure the following policies:
-
Expand DNS, NTP and Time Zone and fill the details, or click Select Policy, and then choose a pre-configured policy.
For more information on creating a new policy, see Creating DNS, NTP, and Timezone Policy.
-
Expand Network CIDR and fill the details, or click Select Policy, and then choose a pre-configured policy.
For more information on creating a new policy, see Creating Network CIDR Policy.
-
If you want to add Trusted Registries, expand Trusted Registries and enter the policy details, or choose a pre-configured policy.
For more information, see Creating Trusted Certificate Authorities Policy.
-
If you want to add a Container Runtime Policy, expand Container Runtime Policy and enter the policy details, or choose a pre-configured policy.
For more information, see Creating Container Runtime Policy.
-
-
Click Next.
-
-
To configure the master node pools, in the Control Plane Node Pool Configuration screen:
-
Under Control Plane Node Configuration, in the Counts field, enter the number of master nodes that you want.
Note
You can create a single master or multi-master. We recommend that you limit the number of master nodes to the tested configuration of three master nodes.
-
Under Kubernetes Version, click Select Version, and then do one of the following steps:
-
Click Create New to create a new policy. For more information, see Creating Kubernetes Version Policy.
-
Choose a pre-configured policy.
You can click the Eye icon to view the details of the policy.
-
-
Under IP Pool, click Select IP Pool, and then do one of the following steps:
-
Create a new IP Pool policy.
For more information on creating an IP pool, see Intersight Managed Mode Configuration Guide.
-
Choose a pre-configured IP pool policy.
You can click the Eye icon to view the details of the policy.
-
-
Under Kubernetes Labels, enter the key-value pair.
-
Under Virtual Machine Infrastructure Provider, click Select Infra Provider, and then do one of the following steps:
-
Click Create New to create a new policy.
For more information, see Creating Infra Provider Policy.
-
Choose a pre-configured policy.
You can click the Eye icon to view the details of the policy.
-
-
Under Virtual Machine Instance Type, click Select Instance Type, and then do one of the following steps:
-
Click Create New to create a new policy.
For more information, see Creating Infra Provider Policy.
-
Choose a pre-configured policy.
You can click the Eye icon to view the details of the policy.
-
-
Click Next.
-
-
To configure worker node pools, in the Worker Node Pools Configuration screen:
-
Click Add Worker Node Pool.
-
In the Name field, enter a name for the worker node pool.
-
Under Worker Node Configuration, in the Counts field, enter the number of worker nodes that you want.
Note
We recommend that you limit the number of worker nodes to the tested configuration of 24 worker nodes.
-
Under Kubernetes Version, click Select Version, and then do one of the following steps:
-
Click Create New to create a new policy. For more information, see Creating Kubernetes Version Policy.
-
Choose a pre-configured policy.
You can click the Eye icon to view the details of the policy.
-
-
Under IP Pool, click Select IP Pool, and then do one of the following steps:
-
Create a new IP Pool policy.
For more information on creating an IP pool, see Intersight Managed Mode Configuration Guide.
-
Choose a pre-configured IP pool policy.
You can click the Eye icon to view the details of the policy.
-
-
Under Kubernetes Labels, enter the key-value pair.
-
Click Add.
-
Click Next.
-
-
To configure storage and optional add-ons, in the Add-on Configuration screen:
Note
Add-on configuration is optional.
-
Click Add Add-on.
-
Under Add-on Policy, click Select Add-on, and then do one of the following steps:
-
Click Create New to create a new policy.
For more information, see Creating Add-on Policy.
-
Choose a pre-configured policy.
You can click the Eye icon to view the details of the policy.
-
-
Click Next.
-
-
To review and deploy or save the cluster profile do one of the following steps in the Summary screen:
-
If you want to deploy the cluster profile, verify the configuration, and then click Deploy.
You can click the Requests icon displayed in the menu bar to view the status of your cluster deployment. For more information, see Monitoring Progress of Kubernetes Cluster Requests.
The cluster deployment takes a few minutes to complete. The newly created cluster is displayed on the Kubernetes Cluster Table View.
-
If you want to save the cluster profile and deploy it later, click Close to exit the profile.
-
The cluster profile is listed in the Profiles screen. You can select the profile and click the Edit icon to edit the profile.
Viewing the Kubernetes Cluster Profiles
To view a Kubernetes cluster profile:
-
In the left pane, click Profiles.
-
Click the Kubernetes Cluster Profiles tab.
The list of available profiles is displayed in the Kubernetes Cluster profile table.
-
To customize the Table view, click Settings (Gear icon), and then choose the columns that you want in the Table view.
-
To filter the clusters displayed in the Table view, search using one or more attributes.
-
To sort the table data based on the Name and Status fields, use the Sort icon.
-
To export the data displayed in the Table view to a CSV file, use the Export icon.
The following table describes the attributes of the Kubernetes Cluster profile table.
|
Field |
Description |
|---|---|
|
Name |
The name of the Kubernetes cluster profile. |
|
Status |
The status of the Kubernetes cluster profile. |
|
Kubernetes Version |
The version of Kubernetes attached to the Kubernetes cluster profile. |
|
Cloud Provider |
The cloud provider associated with the cluster. |
|
Master Node |
The number of master node pools configured for the cluster. |
|
Worker Node |
The number of worker node pools configured for the cluster. |
|
Last Update |
The date on which the Kubernetes cluster profile was last updated. |
|
Organization |
The organization to which the Kubernetes cluster profile belongs. |
Scaling Node Pools
Node pools enable you to create a group of nodes within a cluster. All nodes in the group have the same configuration.
To add a node pool to a cluster:
-
In the left pane, click Profiles.
-
Click the Kubernetes Cluster Profiles tab.
The list of available profiles is displayed.
-
Select the profile that is associated with the cluster that you want to scale, and click the Edit icon.
-
Go to the Node Pools Configuration screen to scale the worker nodes:
-
Under Worker Node Pool, click Add Worker Node Pools to add a worker node pool.
The Add Worker Node Pools screen appears.
-
In the Name field, enter a name for the worker node pool.
-
Under Worker Node Configuration, in the Counts field, enter the number of worker nodes that you want.
Note
You can create a maximum of only 20 worker nodes.
-
Under IP Pool, select an IP pool policy.
-
Under Kubernetes Labels, enter the key-value pair.
-
Click Add.
-
-
Click Next until you reach the Summary screen and click Deploy for the changes to take effect.
Downloading Kubeconfig File
The Kubeconfig file is used to configure access to the Kubernetes clusters on vSphere.
To download the Kubeconfig file of a cluster:
-
In the left pane, click Kubernetes.
-
For the cluster environment you want to download, click the Ellipsis (…) icon, and then choose Download Kubeconfig.
The Kubeconfig file that contains the cluster information and the certificates required to access clusters is downloaded to your local system.
Undeploying Kubernetes clusters
Undeploying a Kubernetes cluster deletes the cluster but retains the associated cluster profile. You can reuse the cluster profile to deploy another cluster.
To undeploy a cluster:
-
In the left pane, click Kubernetes or Profiles.
-
For the cluster profile you want to undeploy, click the Ellipsis (…) icon, and then choose Undeploy Cluster.
The Kubernetes cluster is undeployed.
Opening TAC Case
Intersight enables Cisco TAC to automatically generate and upload Tech Support Diagnostic files when a Service Request is opened.
To open a TAC case for Intersight Kubernetes Service:
-
In the left pane, click Kubernetes.
-
For the cluster environment you want to troubleshoot, click the Ellipsis (…) icon, and then choose Open TAC Case.
-
In the Cisco Support Case Manager UI, add the details of your case, and then click Submit.
Deleting Kubernetes Clusters
Deleting a Kubernetes cluster deletes the cluster and the cluster profile associated with the cluster.
To delete a cluster:
-
In the left pane, click Profiles.
-
For the cluster you want to delete, click the Ellipsis (…) icon, and then choose Delete.
The Kubernetes cluster is deleted.
Monitoring Progress of Kubernetes Cluster Requests
The Requests pane displays the progress of deployment and configuration tasks of a cluster. You can review the progress of each step for troubleshooting purposes.
To monitor the progress and history of the tasks associated with the Kubernetes cluster requests:
-
Click the Requests icon from the top-right corner of your screen.
The Requests pane appears on the left pane, displaying the active and completed requests in the last 24 hours. You can click View All to view older requests.
-
Click the name of the cluster task.
The details of the workflow is displayed.
Obtaining Ingress IP Address of the Ingress Controller LoadBalancer
The Ingress IP address is used to access optional add-ons that use an Ingress resource. You can obtain the Ingress IP address using the kubectl utility.
To obtain the Ingress IP address:
-
Download the Kubeconfig file for the cluster.
For more information, see Downloading Kubeconfig File.
-
Obtain the Ingress IP address of the LoadBalancer using the Kubeconfig file.
kubectl --kubeconfig kubeconfig.yaml -n iks get svc essential-nginx-ingress-ingress-nginx-controller -o jsonpath='{.status.loadBalancer.ingress[0].ip}
Accessing Kubernetes Clusters
You can access clusters using the Kubernetes dashboard and the Kubernetes default token.
To access a Kubernetes cluster:
-
Follow these steps to get the Kubernetes default token using the kubectl utility and the Kubeconfig file (see Downloading Kubeconfig File).
-
List the Kubernetes secrets in the kube-system namespace.
kubectl get secrets -n kube-system -
Search for the secret that has the following format:
default-token-XXXXX -
Get the default token in one of the following ways:
-
kubectl describe secret default-token-XXXXX -n kube-system -
`kubectl get secret default-token-XXXXX -n kube-system -o jsonpath='{.data.token}' | base64 -d
-
-
-
Follow these steps to set up the Kubernetes dashboard access:
-
Obtain the Ingress IP address.
For more information, see Obtaining the Ingress IP Address of the Ingress Controller LoadBalancer.
-
Navigate to the Kubernetes Dashboard:
https://<ingress-ip>/dashboard/
The Kubernetes Dashboard login screen is displayed.
-
To log in to the Kubernetes Dashboard, click the TOKEN radio button and enter the token you got from Step 1-iii.
-
Accessing Monitoring Dashboard
It is recommended to continuously monitor the health of your cluster deployment to improve the probability of early detection of failures and avoid any significant impact from a cluster failure.
Monitor is an optional add-on that can be deployed to a cluster. Once installed, Prometheus and Grafana, are available to monitor various metrics from the cluster.
Prometheus collects the data from the cluster deployment, and Grafana provides a general purpose dashboard for displaying the collected data. Grafana offers a highly customizable and user-friendly dashboard for monitoring purposes.
Prometheus is an open-source systems monitoring and alerting toolkit and Grafana is an open source metric analytics and visualization suite.
-
Access the Grafana Dashboard as follows:
-
Obtain the Ingress IP address.
For more information, see Obtaining the Ingress IP Address of the Ingress Controller LoadBalancer.
-
Navigate to the Grafana login page:
https://<ingress-ip>/monitor/
The Grafana login page is displayed.
-
-
Follow these steps to access Grafana:
Use the kubectl utility and the kubeconfig file (see Downloading Kubeconfig File)
export GRAFANA_USER=$(kubectl get secret monitor-grafana -n iks -o=jsonpath='{.data.admin-user}' | base64 --decode)
export GRAFANA_PASSWORD=$(kubectl get secret monitor-grafana -n iks -o=jsonpath='{.data.admin-password}' | base64 --decode)
echo $GRAFANA_USER
echo $GRAFANA_PASSWORD
Monitoring Logs from Cluster Deployments
The Elasticsearch, Fluentd, and Kibana (EFK) stack enables you to collect and monitor log data from containerized applications for troubleshooting or compliance purposes. These components are optional.
Fluentd is an open source data collector. It works at the backend to collect and forward the log data to Elasticsearch.
Kibana is an open source analytics and visualization platform designed to work with Elasticsearch. It allows you to create rich visualizations and dashboards with the aggregated data.
Viewing EFK Logs Using Kibana
To access the Kibana UI and view the data from outside a cluster:
-
Follow these steps using the kubectl utility and the kubeconfig file (see Downloading Kubeconfig File) to create a port forward:
-
Determine the pod.
kubectl -n iks get podsExample
efk-kibana-6d7c97575c-9qxbf -
Open a port forward.
Example
kubectl port-forward -n iks
efk-kibana-6d7c97575c-9qxbf 5601:5601
-
-
Access the Kibana UI and view the data from the target tenant cluster using a web browser.
http://localhost:5601/app/kibana
Managing Kubernetes Policies
The following sections provide information about the IKS policies that you can configure on Intersight.
Creating Add-on Policy
Add-ons are Kubernetes applications that provide enhanced features to Kubernetes clusters.
Many of the core add-ons are automatically created when you deploy a cluster. For example, nginx-ingress, cert-manager, and metallb. Optional add-ons can be added any time later according to your requirement. For example, logging, monitoring, and UI dashboard for management.
To create an add-on policy:
-
In the left pane, click Policies.
The Policies screen appears, displaying the list of available policies.
-
Click Create Policy to create a new policy.
-
In the Select Policy Type screen, click , and then click Start.
-
In the General screen:
-
From the Organization drop-down list, choose the default organization or a specific organization to which the policy should belong.
-
In the Name field, enter a name for the policy.
-
In the Add Tag field, enter the metadata that you want to associate with the policy.
Add Tag is an optional field. If you are adding a tag, you must enter the tag in the key:value format. This tag will be used internal to Intersight.
-
In the Description field, enter a description for the policy.
Description is an optional field.
-
Click Next.
-
-
In the Policy Details screen, under Add-ons, click Add Add-on.
-
Click Add Add-on.
-
From the Add-on Definition drop-down list, choose an add-on:
-
kubernetes-dashboard: To deploy and manage your applications.
-
ccp-monitor: To monitor the cluster.
-
efk: To collect and monitor log data from your applications for troubleshooting purposes.
-
-
Skip the Overrides field.
-
From the Upgrade Strategy field, select one of the following options:
-
No Action
-
Upgrade Only
-
Reinstall on Failure
-
Always Reinstall
-
-
Click Add.
-
If you want to include more add-ons in the policy, repeat these steps for each add-on.
-
Click Create.
-
The newly created policy is displayed in the Policies screen.
Creating Container Runtime Policy
The policy for Container Runtime enables you to configure the proxy settings for a cluster profile.
To create a Container Runtime policy:
-
In the left pane, click Policies.
The Policies screen appears, displaying the list of available policies.
-
Click Create Policy to create a new policy.
-
In the Select Policy Type screen, click , and then click Start.
-
In the General screen:
-
From the Organization drop-down list, choose the default organization or a specific organization to which the policy should belong.
-
In the Name field, enter a name for the policy.
-
In the Add Tag field, enter the metadata that you want to associate with the policy.
Add Tag is an optional field. If you are adding a tag, you must enter the tag in the key:value format. This tag will be used internal to Intersight.
-
In the Description field, enter a description for the policy.
Description is an optional field.
-
Click Next.
-
-
In the Policy Details screen:
-
Under Docker HTTP Proxy:
-
From the Protocol drop-down list, choose the protocol for the HTTP proxy server.
-
In the Hostname field, enter the FQDN or IP address of the HTTP proxy server.
-
In the Port field, enter the port number for the HTTP proxy server.
-
In the Username field, enter the username of the HTTP proxy server.
-
In the Password field, enter the password of the HTTP proxy server.
-
-
Under Docker HTTPS Proxy server:
-
From the Protocol drop-down list, choose the protocol for the HTTPS proxy server.
-
In the Hostname field, enter the FQDN or IP address of the HTTPS proxy server.
-
In the Port field, enter the port number for the HTTPS proxy server.
-
In the Username field, enter the username of the HTTPS proxy server.
-
In the Password field, enter the password of the HTTPS proxy server.
-
In the Docker Bridge Network CIDR field, enter a valid CIDR to override the default Docker bridge.
-
In the Docker No Proxy field, add the host that you want to exclude from proxy.
-
-
Click Create.
-
The newly created policy is displayed in the Policies screen.
Creating DNS, NTP, and Timezone Policy
The policy for DNS, NTP, and Timezone enables you to configure the DNS, NTP, and timezone for your cluster profile.
To create a DNS, NTP, and Timezone policy:
-
In the left pane, click Policies.
The Policies screen appears, displaying the list of available policies.
-
Click Create Policy to create a new policy.
-
In the Select Policy Type screen, click , and then click Start.
-
In the General screen:
-
From the Organization drop-down list, choose the default organization or a specific organization to which the policy should belong.
-
In the Name field, enter a name for the policy.
-
In the Add Tag field, enter the metadata that you want to associate with the policy.
Add Tag is an optional field. If you are adding a tag, you must enter the tag in the key:value format. This tag will be used internal to Intersight.
-
In the Description field, enter a description for the policy.
Description is an optional field.
-
Click Next.
-
-
In the Policy Details screen:
-
From the Timezone drop-down list, choose the timezone for the system clock of your node.
-
In the DNS Suffix field, enter the DNS search domain name.
-
In the DNS Server field, enter the IP address of the DNS server.
-
In the NTP Server field, enter the IP address of the NTP server.
-
Click Create.
-
The newly created policy is displayed in the Policies screen.
Creating Kubernetes Version Policy
The policy for Kubernetes Version enables you to configure the Kubernetes version for your cluster profile.
To create a Kubernetes version policy:
-
In the left pane, click Policies.
The Policies screen appears, displaying the list of available policies.
-
Click Create Policy to create a new policy.
-
In the Select Policy Type screen, click , and then click Start.
-
In the General screen:
-
From the Organization drop-down list, choose the default organization or a specific organization to which the policy should belong.
-
In the Name field, enter a name for the policy.
-
In the Add Tag field, enter the metadata that you want to associate with the policy.
Add Tag is an optional field. If you are adding a tag, you must enter the tag in the key:value format. This tag will be used internal to Intersight.
-
In the Description field, enter a description for the policy.
Description is an optional field.
-
Click Next.
-
-
In the Policy Details screen:
-
Choose the Kubernetes version that you want to attach to this policy.
-
Click Create.
-
The newly created policy is displayed in the Policies screen.
Creating Network CIDR Policy
The policy for Network CIDR enables you to configure the internal networks in a Kubernetes cluster.
To create a network CIDR policy:
-
In the left pane, click Policies.
The Policies screen appears, displaying the list of available policies.
-
Click Create Policy to create a new policy.
-
In the Select Policy Type screen, click , and then click Start.
-
In the General screen:
-
From the Organization drop-down list, choose the default organization or a specific organization to which the policy should belong.
-
In the Name field, enter a name for the policy.
-
In the Add Tag field, enter the metadata that you want to associate with the policy.
Add Tag is an optional field. If you are adding a tag, you must enter the tag in the key:value format. This tag will be used internal to Intersight.
-
In the Description field, enter a description for the policy.
Description is an optional field.
-
Click Next.
-
-
In the Policy Details screen:
-
In the Service CIDR field, enter the CIDR block from which the IP address for the cluster service can be allocated.
-
In the Pod Network CIDR field, enter the CIDR block from which the IP address for the pod network can be allocated.
-
Click Create.
-
The newly created policy is displayed in the Policies screen.
Creating Trusted Certificate Authorities Policy
The policy for Trusted Certificate Authorities enables you to configure the trusted certificates for your cluster profile.
To create a Trusted Certificate Authorities policy:
-
In the left pane, click Policies.
The Policies screen appears, displaying the list of available policies.
-
Click Create Policy to create a new policy.
-
In the Select Policy Type screen, click , and then click Start.
-
In the General screen:
-
From the Organization drop-down list, choose the default organization or a specific organization to which the policy should belong.
-
In the Name field, enter a name for the policy.
-
In the Add Tag field, enter the metadata that you want to associate with the policy.
Add Tag is an optional field. If you are adding a tag, you must enter the tag in the key:value format. This tag will be used internal to Intersight.
-
In the Description field, enter a description for the policy.
Description is an optional field.
-
Click Next.
-
-
In the Policy Details screen:
-
In the Root CA Registries field, add the root CS certificate that allows tenant clusters to securely connect to additional services.
-
In the Unsigned Registries field, add the docker registries created with unsigned certificates.
-
Click Create.
-
The newly created policy is displayed in the Policies screen.
Creating VM Instance Type Policy
The policy for VM Instance Type enables you to configure the system disk size, number of CPUs, and memory of the Virtual Machines.
To create a VM Instance Type policy:
-
In the left pane, click Policies.
The Policies screen appears, displaying the list of available policies.
-
Click Create Policy to create a new policy.
-
In the Select Policy Type screen, click , and then click Start.
-
In the General screen:
-
From the Organization drop-down list, choose the default organization or a specific organization to which the policy should belong.
-
In the Name field, enter a name for the policy.
-
In the Add Tag field, enter the metadata that you want to associate with the policy.
Add Tag is an optional field. If you are adding a tag, you must enter the tag in the key:value format. This tag will be used internal to Intersight.
-
In the Description field, enter a description for the policy.
Description is an optional field.
-
Click Next.
-
-
In the Policy Details screen:
-
In the CPU field, enter the number of CPUs you want to allocate to the Virtual Machine.
-
In the System Disk Size field, enter the disk capacity along with its units.
For example, 10GiB.
-
In the Memory field, enter the memory for the virtual machine in mebibytes.
-
Click Create.
-
The newly created policy is displayed in the Policies screen.
Creating Infra Provider Policy
The policy for Infra Provider enables you to configure the infrastructure provider that you want to use.
To create an Infra Provider policy:
-
In the General screen:
-
From the Organization drop-down list, choose the default organization or a specific organization to which the policy should belong.
-
In the Name field, enter a name for the policy.
-
In the Set Tags field, enter the metadata that you want to associate with the policy.
Set Tags is an optional field. If you are adding tags, you must enter the tags in the key:value format. These tags will be used internal to Intersight.
-
In the Description field, enter a description for the policy.
Description is an optional field.
-
Click Next.
-
-
In the Policy Details screen:
-
If you want to use vCenter as the infrastructure provider:
-
Click the vCenter tab.
-
Select a vCenter provider from the table.
-
From the Datastore drop-down list, choose the datastore that you want to use.
-
In the vSphere Admin Passphrase field, enter the vSphere passphrase.
-
-
In the Resource Pool field, enter a resource pool.
For more information on finding the resource pool name from vCenter, see Finding the Resource Pool Name.
-
In the Interface field, enter the name of the portgroup or network that is to be attached to the Kubernetes cluster virtual machines. This network should be associated with the Hypervisor cluster that you selected earlier.
For more information on finding the network name from vCenter, see Finding the Network Interface Name.
-
If you want to use HyperFlex as the infrastructure provider:
-
Click the HyperFlex tab.
-
Select a HyperFlex provider from the table.
-
-
Click Create.
-
The newly created policy is displayed in the Policies screen.
Finding the Resource Pool Name
To find the resource pool name from vCenter:
-
Navigate to the vCenter server:
https://<vCenter_SERVER> -
From the links listed on the left side of your screen, click Browse objects managed by vSphere.
-
Enter the username and password of the vCenter server.
The Managed Objects Home page appears.
-
In the Properties section, in the row on content, click content under the VALUE column.
Name
TYPE
VALUE
content
servicecontent
content
-
In the page that opens, in the row on rootFolder, click group-xx.
For example:
Name
TYPE
VALUE
rootFolder
ManagedObjectReference:Folder
group-d1 (Datacenters)
-
In the page that opens, in the row on childEntity, click datacenter-x in which the host is located.
For example:
Name
TYPE
VALUE
childEntity
ManagedObjectReference:ManagedEntity
datacenter-2 (Hyperflex)
-
In the page that opens, in the row on hostFolder, click group-hx, which is the desired host group.
For example:
Name
TYPE
VALUE
hostFolder
ManagedObjectReference:Folder
group-h4 (host)
-
In the page that opens, in the row on childEntity, click domain-xxxx, which is the domain of the desired host.
For example:
Name
TYPE
VALUE
childEntity
ManagedObjectReference:ManagedEntity[]
domain-c108 (hx1)
-
In the page that opens, in the row on resourcePool, click resgroup-xxx, which is the resource pool group
For example:
Name
TYPE
VALUE
resourcePool
ManagedObjectReference:ResourcePool
resgroup-109 (Resources)
-
In the page that opens, in the row on resourcePool, click resgroup-xxxx, which is the the desired resource pool.
For example:
Name
TYPE
VALUE
resourcePool
ManagedObjectReference:ResourcePool[]
resgroup-45677 (iks-resource)
-
In the page that opens, in the row on name, copy the name of the resource. This value is to be used in the Resource Pool field in the Infra Provider policy wizard.
For example:
Name
TYPE
VALUE
name
string
iks-resource
Here, iks-resource is the value you must provide in the Resource Pool field.
Note
If there are spaces or special characters in the name string, you need to encode it using a URL encoder.
Finding the Network Interface Name
To find the network interface name from vCenter:
-
Navigate to the vCenter server:
https://<vCenter_SERVER> -
From the links listed on the left side of your screen, click Browse objects managed by vSphere.
-
Enter the username and password of the vCenter server.
The Managed Objects Home page appears.
-
In the Properties section, in the row on content, click content under the VALUE column.
Name
TYPE
VALUE
content
servicecontent
content
-
In the page that opens, in the row on rootFolder, click group-xx.
For example:
Name
TYPE
VALUE
rootFolder
ManagedObjectReference:Folder
group-d1 (Datacenters)
-
In the page that opens, in the row on childEntity, click datacenter-x in which the host is located.
For example:
Name
TYPE
VALUE
childEntity
ManagedObjectReference:ManagedEntity
datacenter-2 (Hyperflex)
-
In the page that opens, in the row on network, click network-xx, which is the desirednetwork.
For example:
Name
TYPE
VALUE
network
ManagedObjectReference:Network[]
network-13 (Management-Network)
-
In the page that opens, in the row on name, copy the name of the network interface or portgroup. This value is to be used in the Interface field in the Infra Provider policy wizard.
For example:
Name
TYPE
VALUE
name
string
Management-Network
Here, Management-Network is the value you must provide in the Interface field.
Note
If there are spaces or special characters in the name string, you need to encode it using a URL encoder.
Editing Kubernetes Cluster Policy
To edit a policy:
-
In the left pane, click Policies.
The Policies screen appears, displaying the list of available policies.
-
Select the policy that you want to edit, and then click the Edit icon.
Deleting Kubernetes Cluster Policy
Before you begin
Ensure that the policy that you are going to delete is not attached to any profile.
To delete a policy:
-
In the left pane, click Policies.
The Policies screen appears, displaying the list of available policies.
-
Select the policy that you want to delete, and then click the Delete icon.
IKS application visibility and right-sizing using Intersight Workload Optimizer
You can install Intersight Workload Optimizer (IWO) on an IKS cluster for gaining visibility and right-sizing IKS applications.
The Helm v3 and network requirements for using the IWO Kubernetes Collector are met in the IKS cluster environment. For information on deploying the IWO Kubernetes collector, see the instructions for Helm v3 in the Deploying the Intersight Workload Optimizer Kubernetes Collector section in Cisco Intersight Workload Optimizer Target Configuration Guide.
Open Caveats
This section describes the caveats and workarounds for common issues when using Intersight Kubernetes Service.
|
Workaround |
|
|---|---|
|
CSCvx27447 - Push cached images to tenant registry When you import a new VM template into vCenter, it has a name format that is shorter because “ubuntu” is replaced with “u”. This consumes additional storage space. |
To recover storage space, you can delete the obsolete template iks-ti-1-18-12-ubuntu18-94a8577-2-0b919b. |
|
CSCvw50943 - Incorrect style applied to Create button in the Infra Provider Policy page The Create button in the Infra Provider Policy page is enabled even if the mandatory fields are not filled. Moreover, there are no error messages displayed when you click the Create button without entering the mandatory fields. This is a button styling issue. |
There is no known workaround for this issue. |
|
CSCvw81794-Unable to use the IKS-ONLY-VLAN1177-10.12.100.0/22 network While creating an Infrastructure Provider policy, IKS VM creation fails if you configure the **IKS-ONLY-VLAN1177-10.12.100.0/22** network in the **Interface** field. |
Use a network other than IKS-ONLY-VLAN1177-10.12.100.0/22. |
 Feedback