Cisco Spectrum Expert Quick Start Guide
Available Languages
Table Of Contents
Downloading Cisco Spectrum Expert Software
Installing Cisco Spectrum Expert Software
Installing the Sensor Card in the Laptop Slot
Attaching the External Antenna
Cisco Spectrum Expert™
Quick Start Guide
Package Contents
•
Cisco Spectrum Expert Sensor Wi-Fi (Sensor card)
•
Cisco Spectrum Expert Antenna (External antenna)
•
Quick Start Guide
System Requirements
•
Notebook computer with:
–
Pentium series processor running at 1 GHz or faster
–
Windows 7 Professional, Windows Vista Business, or Windows XP Professional (SP2 or later)—All 32 bit editions only
–
256 MB of RAM required (512 MB strongly recommended)
–
Display resolution of 800 600 or higher (1024 x 768 recommended)
–
30 MB free disk space
–
Available Sensor (Wi-Fi) slot
–
802.11 capability (recommended)
1 Downloading Cisco Spectrum Expert Software

Note
Install the Cisco Spectrum Expert Software before installing the Sensor card in the slot in your computer. See the Cisco Spectrum Expert User's Guide for more information.
To download the Cisco Spectrum Expert Software, follow these steps:
Step 1
Go to http://www.cisco.com/en/US/products/ps9393/tsd_products_support_series_home.html.
Step 2
Click Download Software.
Step 3
Click Cisco Spectrum Expert Wi-Fi link from the third text box.
Step 4
Select the most current download (.exe) file for your operating system.
Step 5
Click Download Now button to download the Spectrum Expert software.
2 Installing Cisco Spectrum Expert Software
To install the Cisco Spectrum Expert Software, follow these steps:
Step 1
Click on the downloaded executable setup program to initiate the installation wizard.
Step 2
If security warning screens appear, click Run or Yes to confirm and continue.
Step 3
From the Welcome screen, click Next.
Step 4
On the License Agreement screen, review the Cisco Software license agreement and select the I accept the terms in the license agreement checkbox.
Step 5
Click Next.
Step 6
On the Customer Information screen, enter your User Name and Organization.
Step 7
Click Next.
Step 8
On the Destination Folder screen, click Next to confirm the default install destination.

Note
To choose a different location, select Change... and use the dialog box to select the correct destination folder.
Step 9
From the Ready to Install screen, click Install. A progress bar will display the status of the installation.
Step 10
Select Finish to complete the installation.
3 Installing the Sensor Card in the Laptop Slot

Note
Install the Cisco Spectrum Expert Software before installing the Sensor card into an available slot in your computer.
The Cisco Spectrum Expert Sensor Wi-Fi (Sensor card) contains Cisco's custom hardware, the SAgE chip, for detecting RF spectrum activity.
To install the Sensor card, follow these steps:
Step 1
Insert the Sensor card into an open slot (i.e., a PCMCIA Card slot) on your laptop.

Note
The pins go in first with the LEDs on the card face up.
Step 2
Press the card gently but firmly into place.
Step 3
Windows should automatically detect the hardware and install the necessary drivers for the Sensor card.

Note
Once the installation is complete, a Windows 7, Windows XP, or Windows Vista pop-up window indicates that the hardware has been installed.
Step 4
When a dialog box indicates the installation is complete, click Finish.
4 Attaching the External Antenna
The Sensor card has an internal antenna, however we recommend using the external omni antenna (included) for improved detection sensitivity. An external directional antenna can also be ordered from Cisco (optional).

CautionTo avoid damaging both the connector and the Sensor card, use caution when detaching the external antenna. See the Cisco Spectrum Expert User's Guide for detailed instructions.

CautionSignificant repetition (over 500 times) of connecting and disconnecting the external antenna may degrade the connector's performance.
Omni Antenna
To attach the omni antenna, follow these steps:
Step 1
Attach the antenna holder clip to the top of the computer's display panel.

Step 2
Slide the antenna vertically into the round, horizontal holder with the swivel base above the antenna holder clip.

Step 3
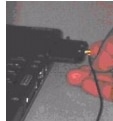
Install the antenna's cable into the external jack on the Sensor card using the cable plug (MMCX male connector).

Directional Antenna
To attach the directional antenna, follow these steps:
Step 1
Mount the Velcro strip to the back of the PC using the strip's adhesive backing.
Step 2
Attach the plastic holder to the Velcro strip.
Step 3
Slide the antenna's support staff into the slot holder.
Step 4
Install the antenna's cable into the external jack on the Sensor card using the cable plug (MMCX male connector).

See the Cisco Spectrum Expert User's Guide for more information on how to make effective use of the directional antenna.
5 Program Startup
When Cisco Spectrum Expert Software and the Sensor card are installed, Cisco Spectrum Expert Software can identify sources of interference in the neighborhood of your network.
To start the Cisco Spectrum Expert Software, follow these steps:
Step 1
From the Start menu, select All Programs > Cisco > Cisco Spectrum Expert or click the desktop icon.

Note
If you receive a Windows security alert for a Spectrum Expert-related program called Sensord, select the Unblock option.
Step 2
From the Connect to Sensor dialog box, choose from:
•
Sensor Card with Internal Antenna
•
Sensor Card with External Antenna
•
Spectrum Capture File

Note
If you choose Spectrum Capture File, click Browse to identify the applicable file.
Step 3
To identify these settings as default, select the Automatically start sensor connection with these settings next time application is launched check box.
Step 4
Click OK to access the Cisco Spectrum Expert Software application.

Note
Depending on the country in which you are located, you may need to change the settings before you can make effective use of Spectrum Expert.
Step 5
Select Tools > Settings to change the application settings, if necessary.
See the Cisco Spectrum Expert User's Guide or Online Help for more information.
Contact Cisco
- Open a Support Case

- (Requires a Cisco Service Contract)
 Feedback