Configuración del Switch como Cliente SNTP Unicast Simple Network Time Protocol a través de CLI
Objetivo
La hora sincronizada también reduce la confusión en los sistemas de archivos compartidos, ya que es importante que las horas de modificación concuerden, independientemente de la máquina en la que residen los sistemas de archivos.
Los switches Cisco Small Business admiten el protocolo simple de hora de red (SNTP) y, cuando se activa, el switch sincroniza dinámicamente la hora del dispositivo con la hora de un servidor SNTP. El switch funciona solo como cliente SNTP y no puede proporcionar servicios de hora a otros dispositivos.
La unidifusión es una conexión uno a uno en la que los datos se envían únicamente a un único destino. La multidifusión es una conexión de uno a varios que permite a un host enviar paquetes a un subconjunto de todos los hosts como una transmisión de grupo. Un Anycast es una conexión entre un cliente y una lista de direcciones.
El motivo para configurar el servidor de unidifusión es que es posible que los dispositivos de red más antiguos de la red no admitan tráfico multidifusión/difusión ilimitada o que haya un motivo de seguridad para querer mantener el tráfico multidifusión/difusión ilimitada fuera de un segmento de red.
Este documento muestra cómo configurar el switch como un cliente de unidifusión SNTP (protocolo simple de tiempo de red) a través de la interfaz de línea de comandos (CLI).
Nota: Para aprender a configurar los parámetros de unidifusión SNTP en la interfaz gráfica de usuario (GUI), haga clic en aquí.
Dispositivos aplicables
· Serie Sx300
· Serie Sx350
· Serie SG350X
· Serie Sx500
· Serie SG550X
Versión del software
· 2.3.5.63 & arriba
Configuración del cliente de unidifusión SNTP
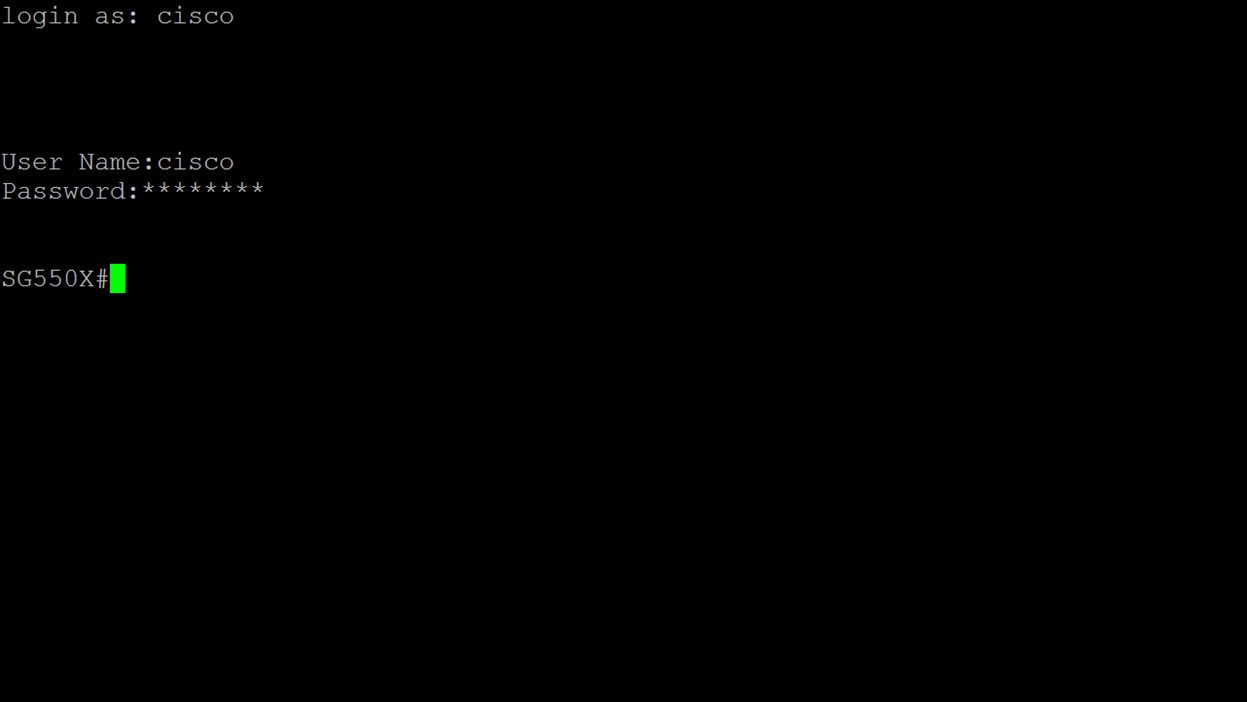
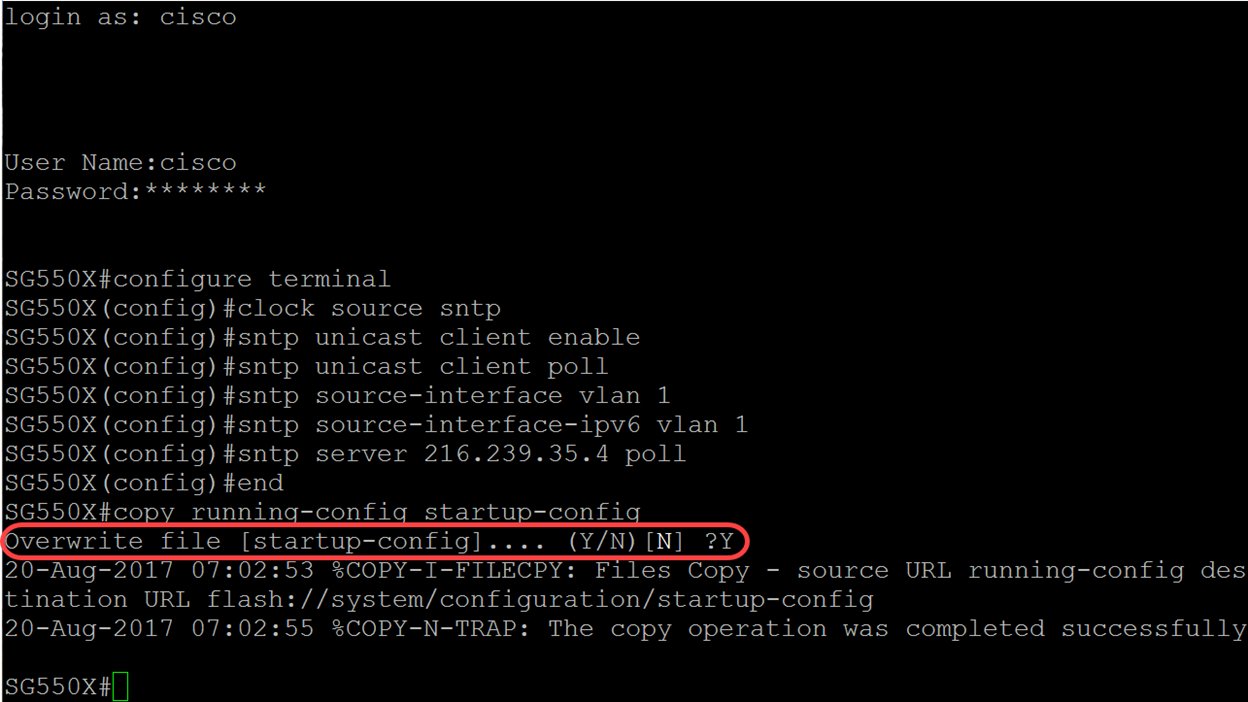
Paso 1. Acceda a la CLI del switch mediante el método que prefiera. En este ejemplo, utilizaremos la masilla para conectar con un switch SG550X. Los comandos pueden variar en función de la ID de producto (PID) del switch.
Nota: Asegúrese de que SSH esté habilitado en la sección Seguridad para el switch. Para obtener más información sobre cómo acceder a la CLI mediante SSH o Telnet, haga clic aquí.
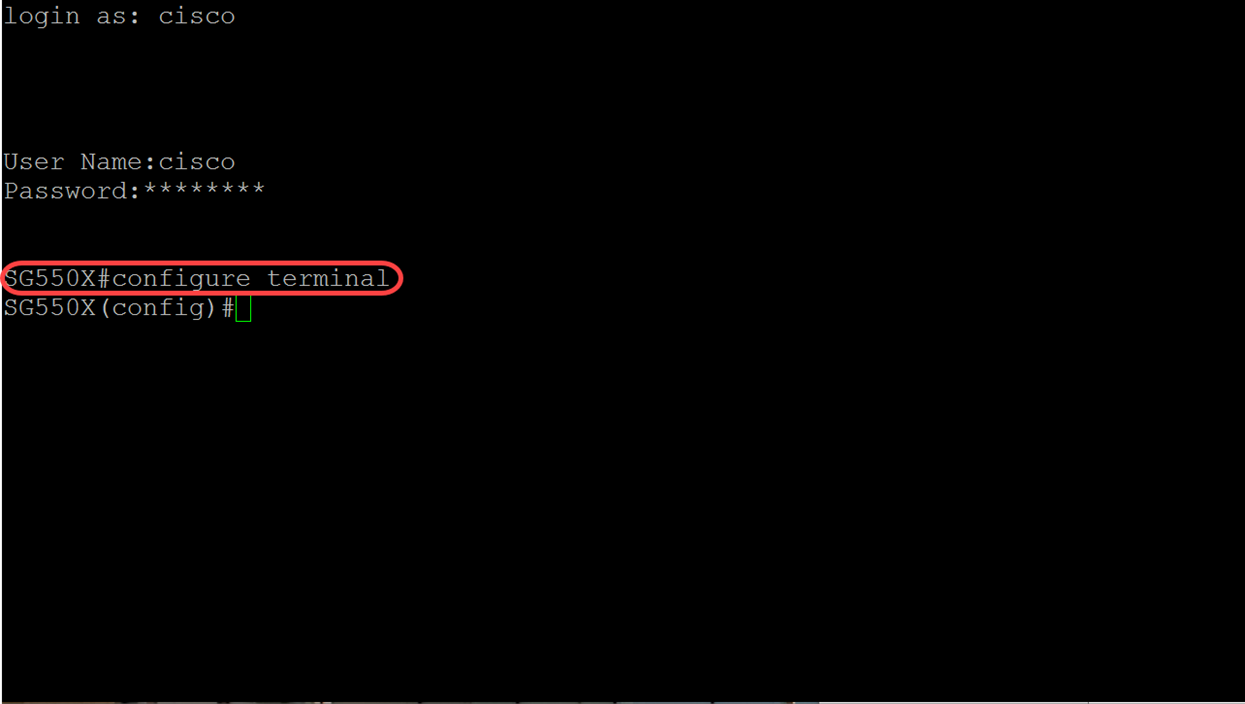
Paso 2. Cambie al modo de configuración global introduciendo el siguiente comando.
SG550X#configure terminal
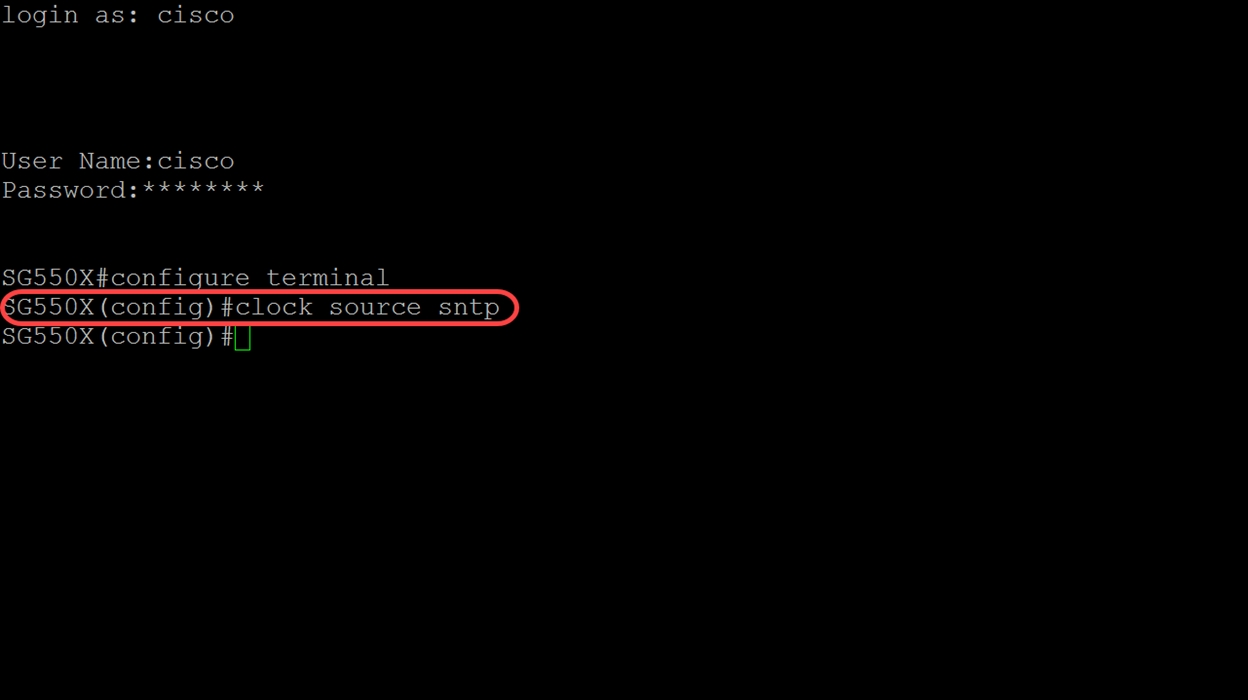
Paso 3. Para configurar la hora del sistema (origen del reloj principal) para el servidor sntp, escriba el comando siguiente. Esto configurará una fuente de hora externa para el reloj del sistema.
SG550X(config)#clock source sntp
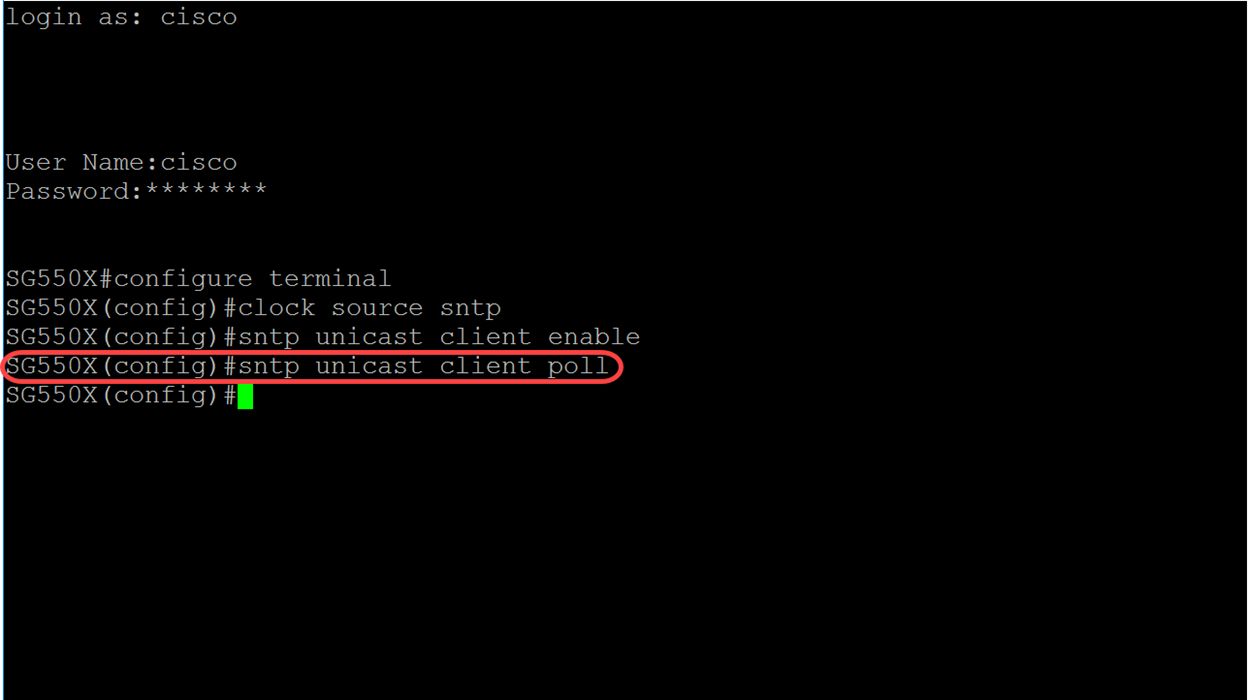
Paso 4. Los clientes de unidifusión utilizan paquetes predefinidos al comunicarse con el servidor SNTP. Para habilitar el cliente de unidifusión, escriba el siguiente comando.
SG550X(config)#sntp unicast client enable
Nota: Para inhabilitar los clientes de unidifusión SNTP, utilice la forma no de este comando: no sntp unicast client enable.

Paso 5. (Opcional) El intervalo de sondeo es de 1024 segundos. Para habilitar el sondeo para el cliente de unidifusión SNTP, utilice el siguiente comando.
SG550X(config)#sntp unicast client poll
Nota: Para inhabilitar el cliente de unidifusión SNTP, utilice el comando: no sntp unicast client poll.
Paso 6. (Opcional) Para especificar la interfaz de origen cuya dirección IPv4 se utilizará como dirección IPv4 de origen para la comunicación con servidores SNTP IPv4, utilice el comando siguiente en el modo de configuración global.
Nota: Para restaurar la configuración predeterminada, utilice el comando no de este comando. Por ejemplo, no sntp source-interface.
SG550X(config)#sntp source-interface [Interface-id]

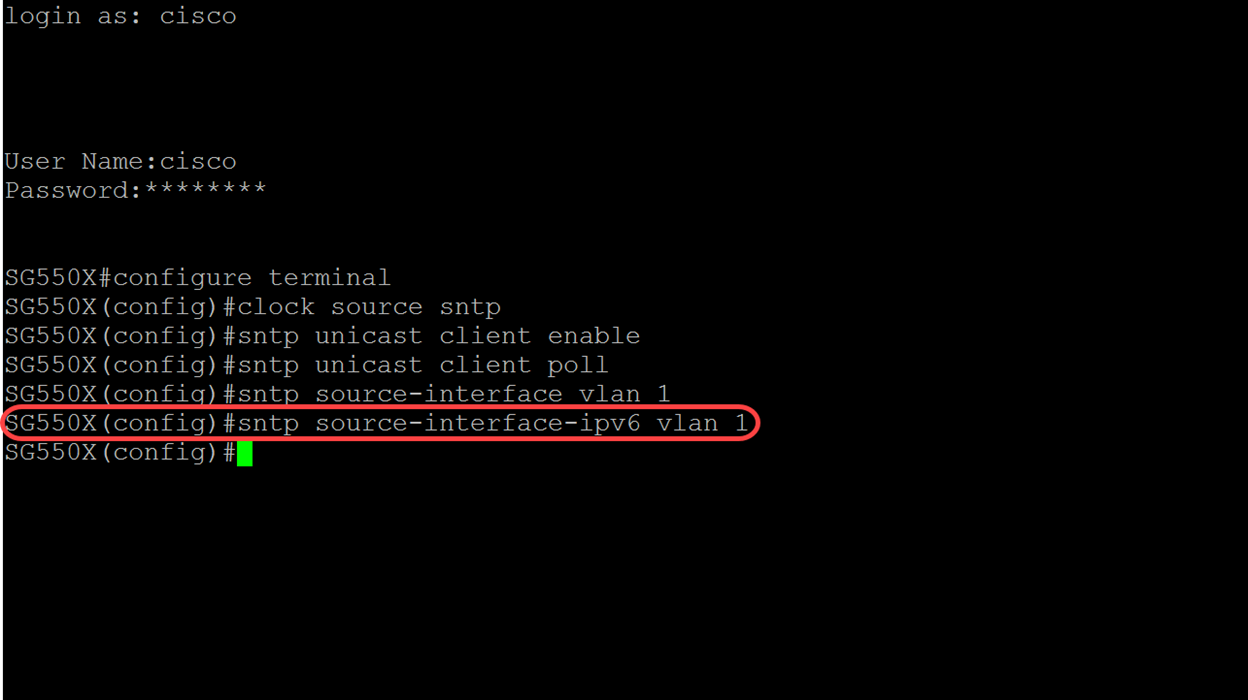
Paso 7. (Opcional) Para especificar la interfaz de origen cuya dirección IPv6 se utilizará como dirección IPv6 de origen para la comunicación con servidores SNTP IPv6, utilice el comando siguiente.
Nota: Utilice el comando no sntp source-interface-ipv6 para restaurar la configuración predeterminada para la interfaz de origen SNTP ipv6.
SG550X(config)#sntp source-interface-ipv6 [interface-id]
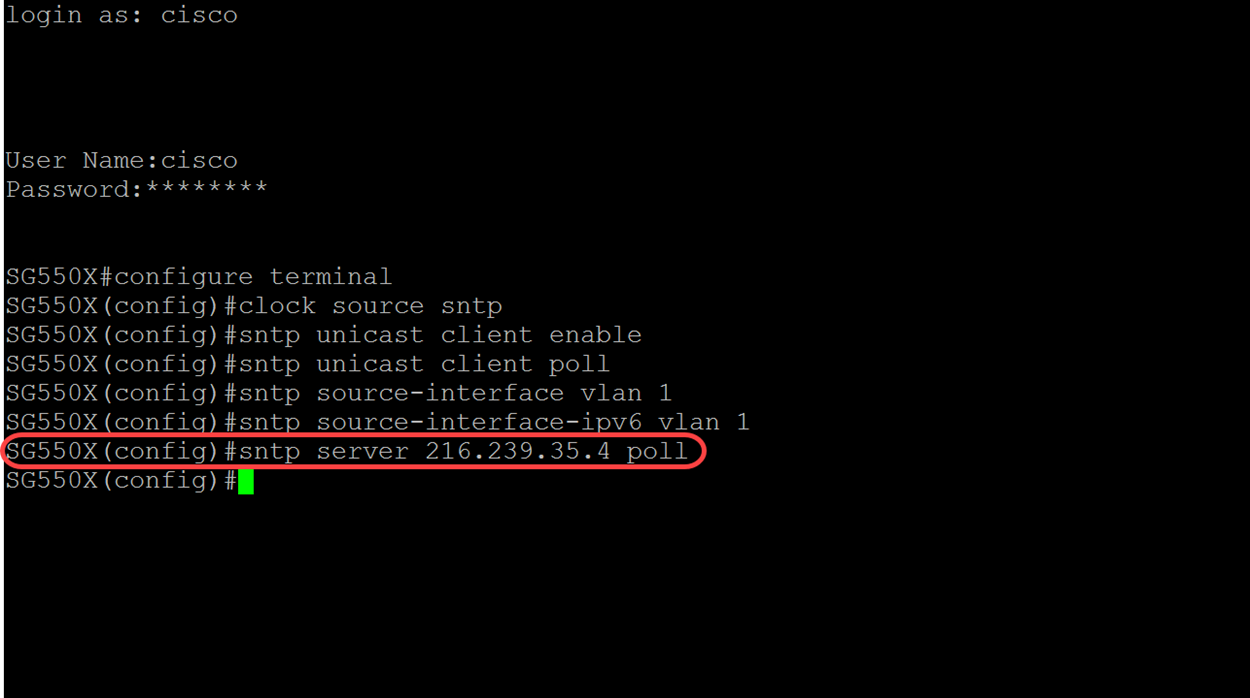
Paso 8. Ingrese el siguiente comando para agregar un nuevo servidor SNTP. Cuando trabaje en entornos de alto riesgo (instituciones públicas, hospitales, etc.), es recomendable disponer de varios servidores para obtener redundancia y protegerse frente a los servidores que no funcionen correctamente y que proporcionen una hora incorrecta. Si ha configurado la autenticación, especifique la clave de autenticación que se utilizará al enviar paquetes a este par. La clave de autenticación varía entre 1 y 4294967295. En este ejemplo, agregaremos 216.239.35.4 que es time.google.com y habilitaremos el sondeo para nuestro nuevo servidor SNTP.
Nota: El switch admite hasta 8 servidores SNTP. Esto puede variar dependiendo del modelo de switch que esté utilizando. Para obtener más información sobre la configuración de los parámetros de autenticación del protocolo simple de tiempo de red (SNTP) en un switch a través de la CLI, haga clic aquí.
SG550X(config)#sntp server {IP address | hostname} [poll] [key keyid]
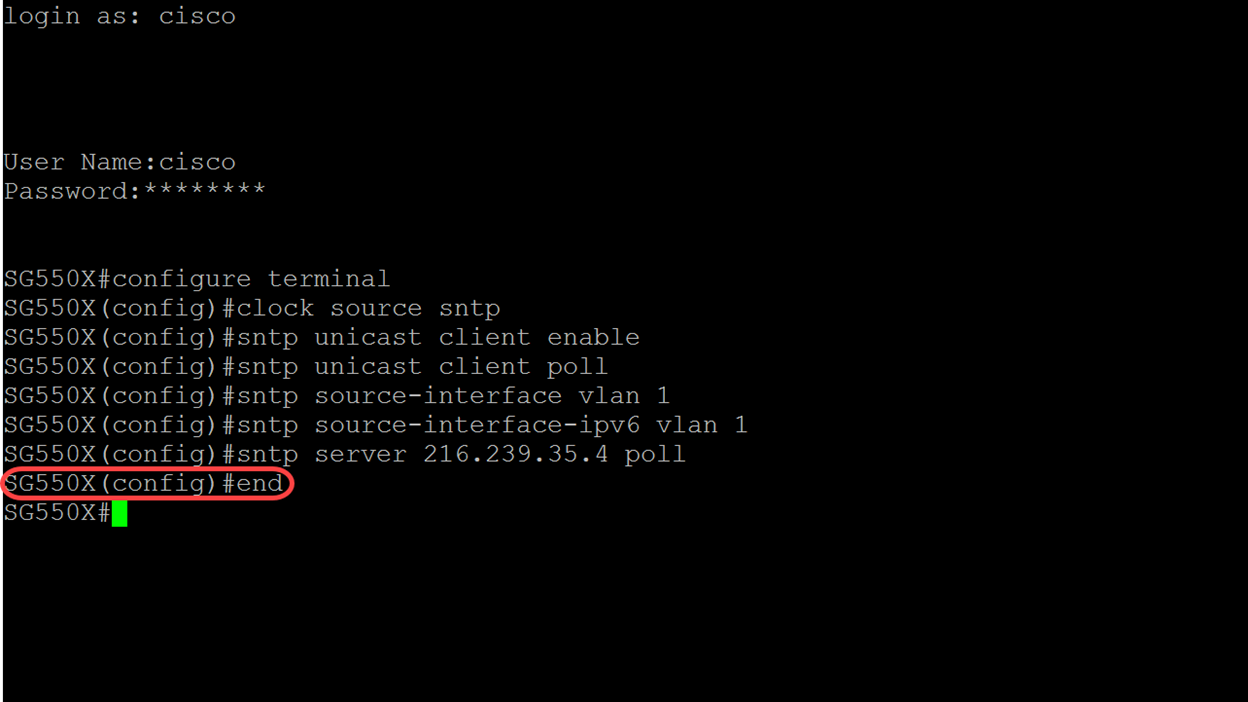
Paso 9. Ingrese el comando end para volver al modo EXEC privilegiado.
SG550X(config)#end
Paso 10. (Opcional) Ingrese el siguiente comando en el modo EXEC privilegiado para guardar la configuración.
SG550X#copy running-config startup-config
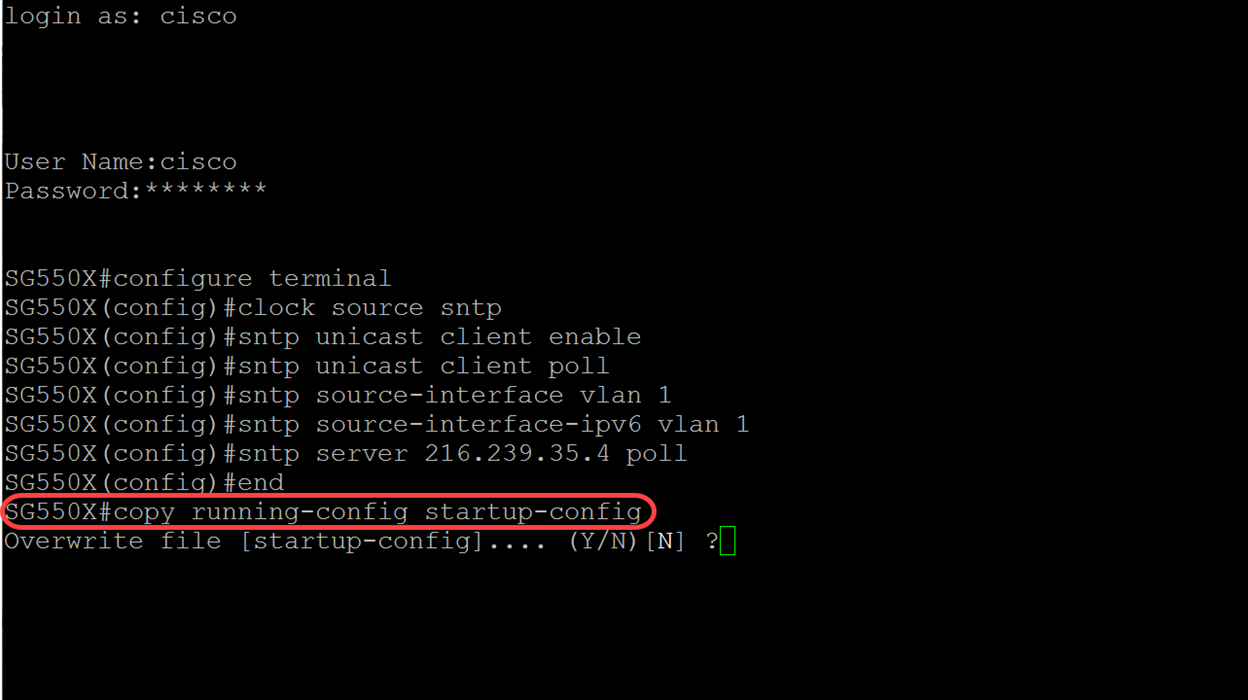
Paso 11. (Opcional) Presione Y para guardar los ajustes en la configuración de inicio del switch. De lo contrario, presione N para continuar sin guardar la configuración en la configuración de inicio del switch.
Conclusión
Ahora debería haber configurado el switch para que sea un cliente.
Nota: Los comandos que se ejecutaron a continuación se utilizaron en el modo EXEC privilegiado.
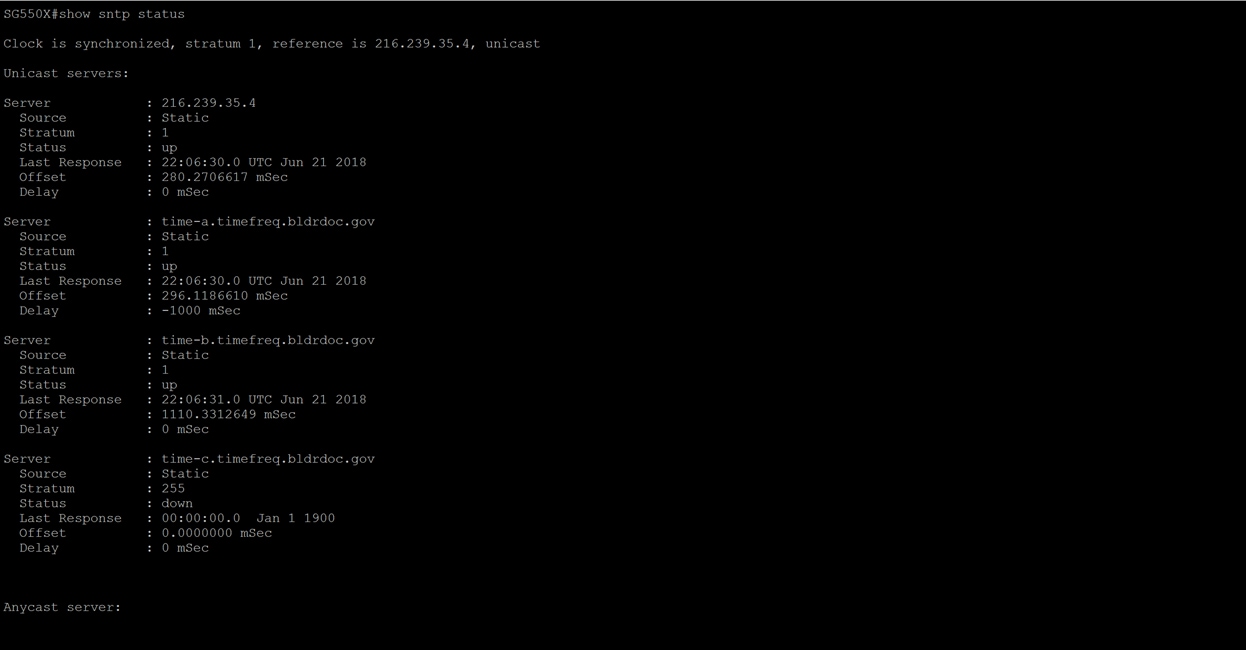
Paso 1. Para mostrar el estado de SNTP, escriba el siguiente comando:
SG550X#show sntp status
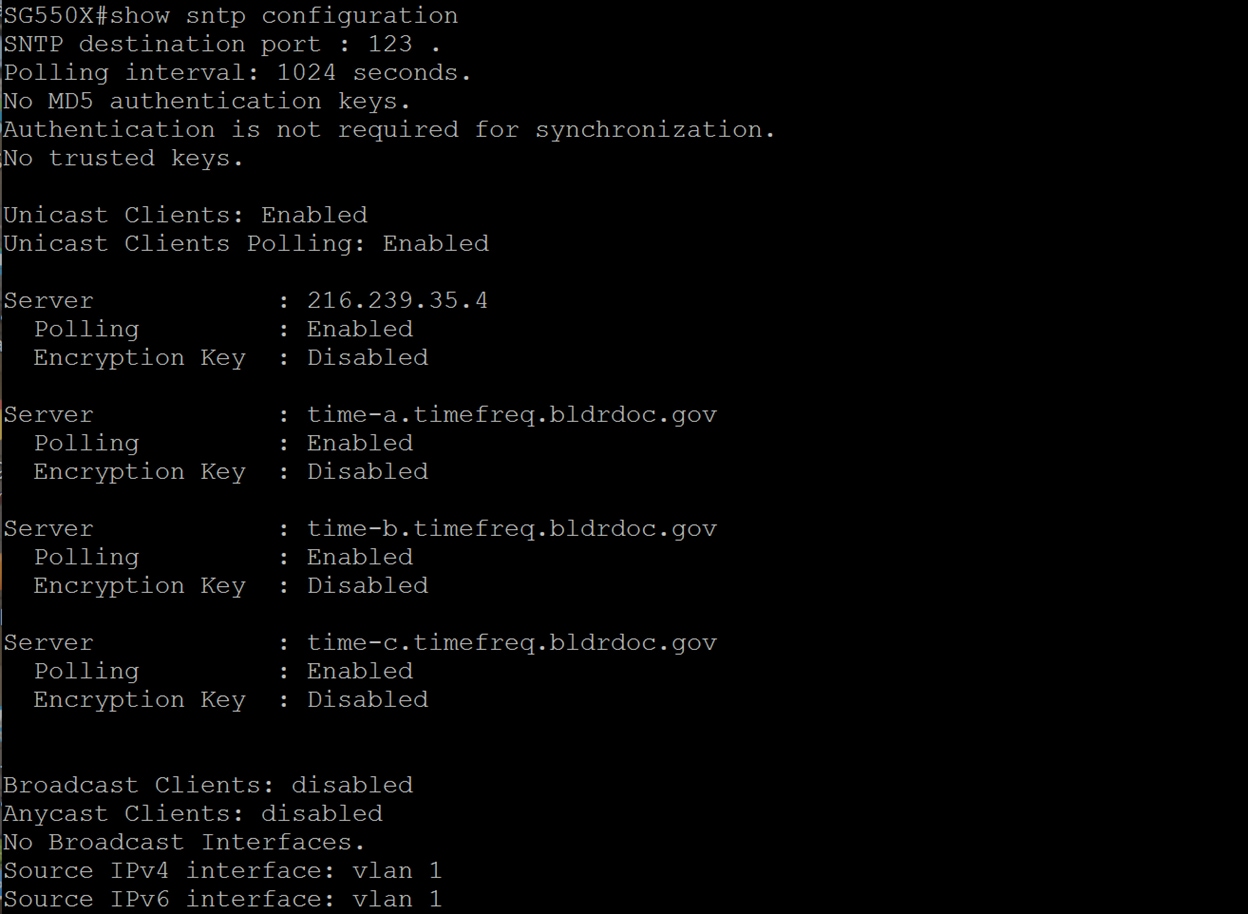
Paso 2. En el ejemplo siguiente se muestra la configuración SNTP actual del dispositivo.
SG550X#show sntp configuration
Historial de revisiones
| Revisión | Fecha de publicación | Comentarios |
|---|---|---|
1.0 |
18-Jan-2019
|
Versión inicial |
 Comentarios