はじめに
このドキュメントでは、シスコ コラボレーション製品(Cisco Unified Communications Manager(CUCM)、Cisco Unity Connection(UCXN))、CUCM IM and Presence、Cisco Prime Collaboration など)の Cisco のようなシスコ コラボレーション製品で Security Assertion Markup Language(SAML)シングルオン(SSO)を有効にするために、Active Directory Federation Service(AD FS)バージョン 2.0 を設定する方法について説明します。
前提条件
要件
AD FS バージョン 2.0 がインストールされてテスト済みであること。
注意:このインストールガイドはラボのセットアップに基づいており、AD FSバージョン2.0はCisco Collaboration製品でのSAML SSOでのみ使用することを前提としています。ビジネスに不可欠な他のアプリケーションで AD FS バージョン 2.0 を使用するには、Microsoft の公式資料に従って、所定のカスタマイズを行う必要があります。
使用するコンポーネント
このドキュメントの情報は、次のソフトウェアとハードウェアのバージョンに基づいています。
- AD FS バージョン 2.0
- Microsoft Internet Explorer 10
- CUCM バージョン 10.5
- Cisco Unified Presence サーバ バージョン 10.5
- UCXN バージョン 10.5
- Cisco Prime Collaboration Provisioning 10.5
このドキュメントの情報は、特定のラボ環境にあるデバイスに基づいて作成されました。このドキュメントで使用するすべてのデバイスは、クリアな(デフォルト)設定で作業を開始しています。対象のネットワークが実稼働中である場合には、どのようなコマンドについても、その潜在的な影響について確実に理解しておく必要があります。
設定
AD FS バージョン 2.0 ID プロバイダ(IdP)メタデータのダウンロード
IdPメタデータをダウンロードするには、ブラウザで次のリンクを実行します。https://<FQDN of ADFS>/FederationMetadata/2007-06/FederationMetadata.xml
Collaboration サーバ(SP)メタデータのダウンロード
CUCM IM and Presence Service
Web ブラウザを開き、管理者として CUCM にログインして、[System] > [SAML Single Sign] に移動します。
Unity Connection
Web ブラウザを開き、管理者として UCXN にログインし、[System Settings] > [SAML Single Sign On] に移動します。
Cisco Prime Collaboration Provisioning
Web ブラウザを開き、globaladmin として Prime Collaboration Assurance にログインし、[Administration] > [System Setup] > [Single Sign On] に移動します。
証明書利用者信頼としての CUCM の追加
- AD FS サーバにログインし、Microsoft Windows の [Programs] メニューから AD FS バージョン 2.0 を起動します。
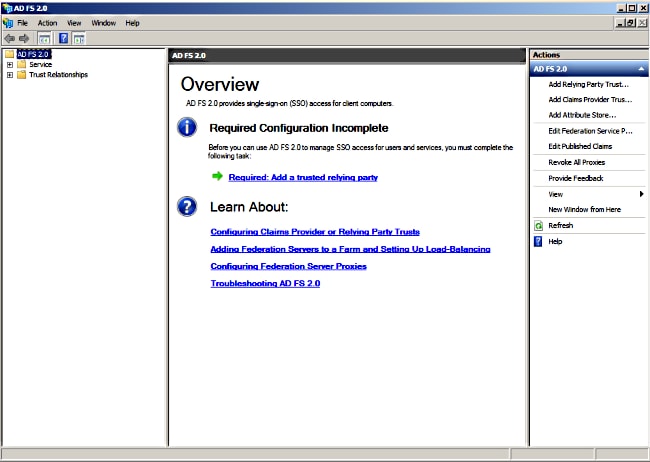
- [Add Relying Party Trust] をクリックします。
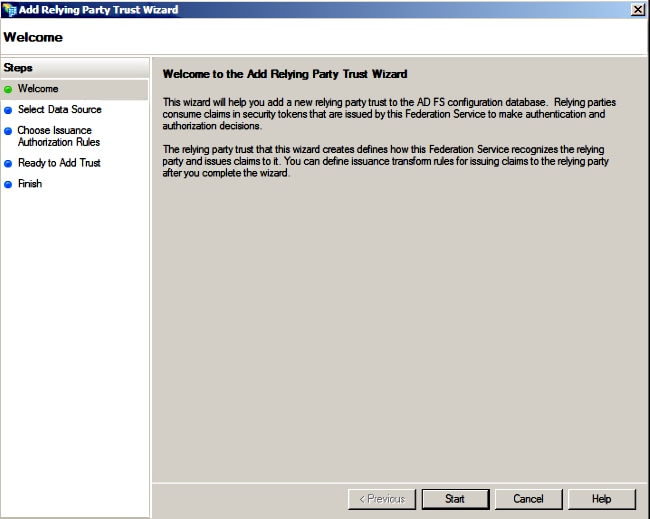
- [Start(スタート)] をクリックします。
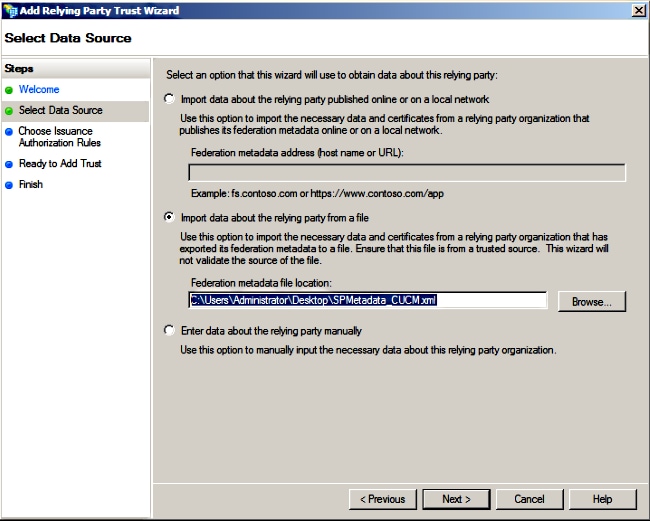
- Import data about the relying party from a fileオプションを選択し、以前にCUCMからダウンロードしたSPMetadata_CUCM.xmlメタデータファイルを選択して、Nextをクリックします。
- [Display name] を入力し、[Next] をクリックします。
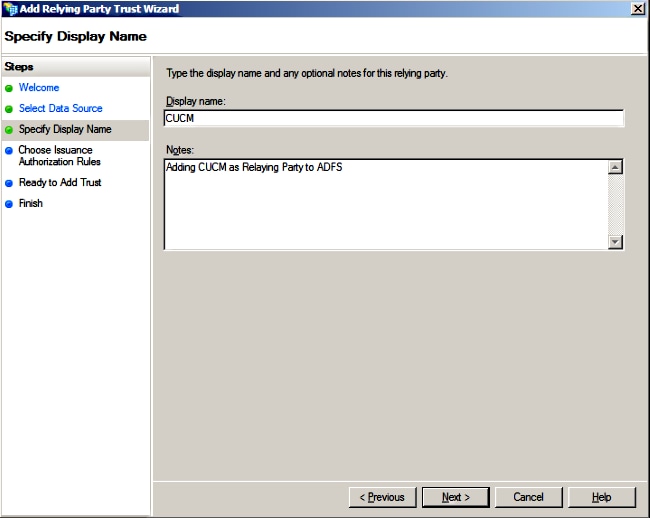
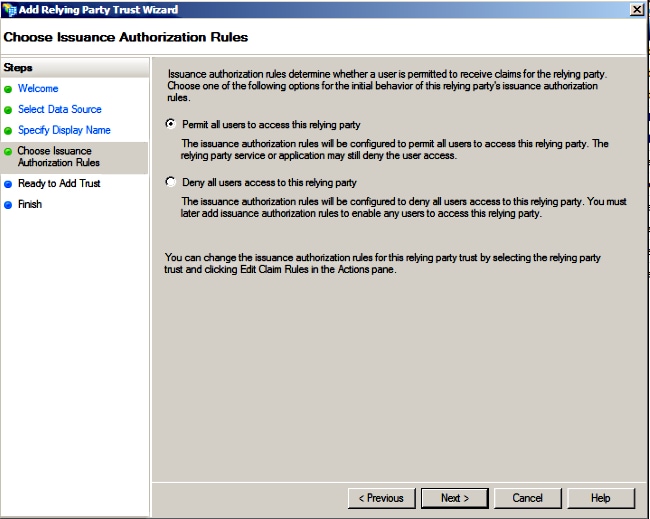
- [Permit all users to access this relying party] を選択し、[Next] をクリックします。
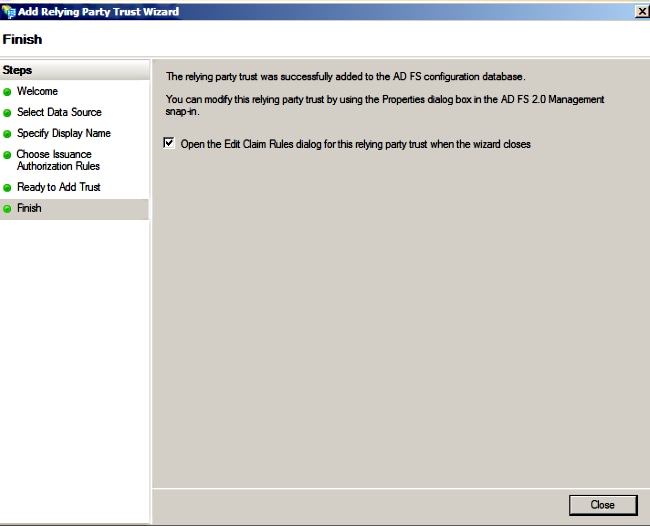
- [Open the Edit Claim Rules dialog for the relying party trust when the wizard closes] を選択し、[Close] をクリックします。
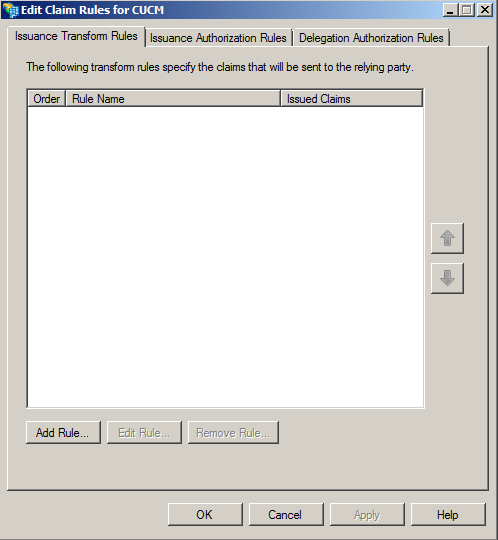
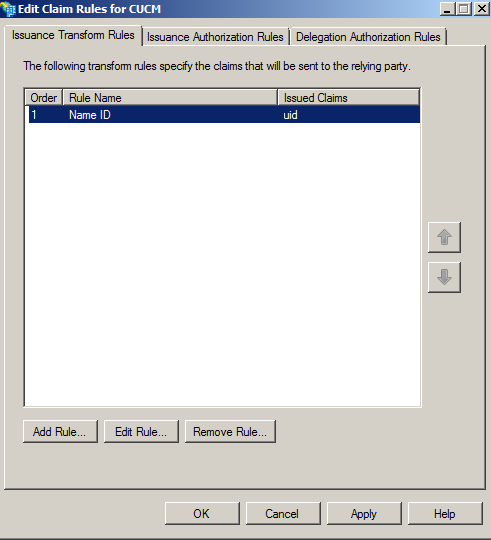
- [Add Rule] をクリックします。
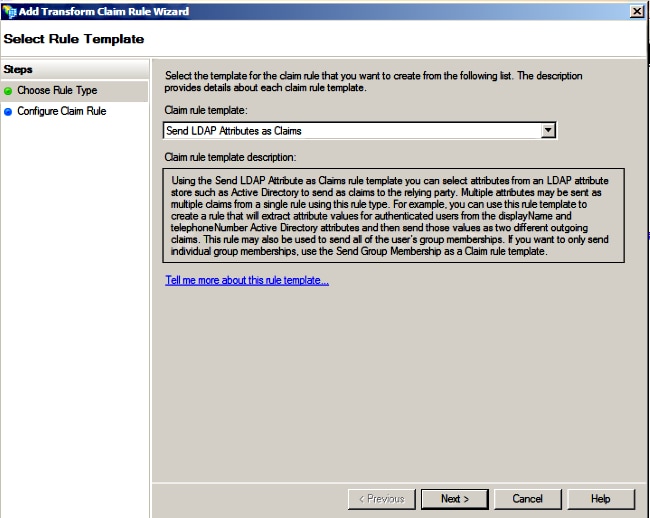
- デフォルトの [Claim rule template] が [Send LDAP Attributes as Claims] に設定された状態で [Next] をクリックします。
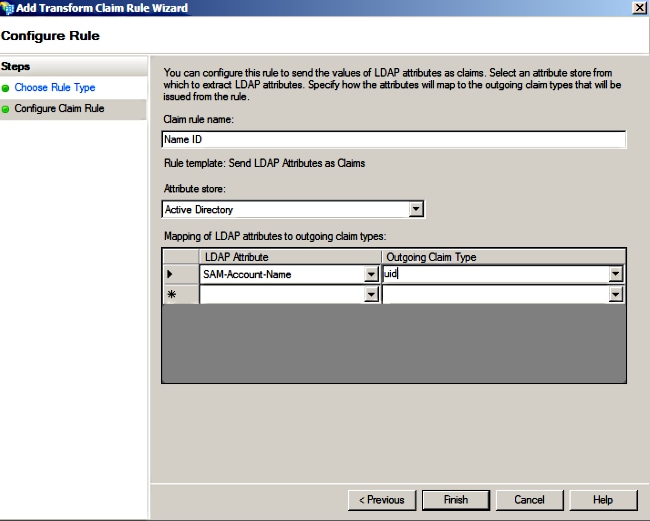
- [Configure Rule] 画面の [Claim rule name] に要求規則名を入力し、[Attribute store] として [Active Directory] を選択して、[LDAP Attribute] および [Outgoing Claim Type] を次のイメージに示すように設定した後、[Finish] をクリックします。
注:
- Lightweight Directory Access Protocol(LDAP)属性は、CUCM 上のディレクトリ同期属性と一致していなければなりません。
- 「uid」は小文字である必要があります。
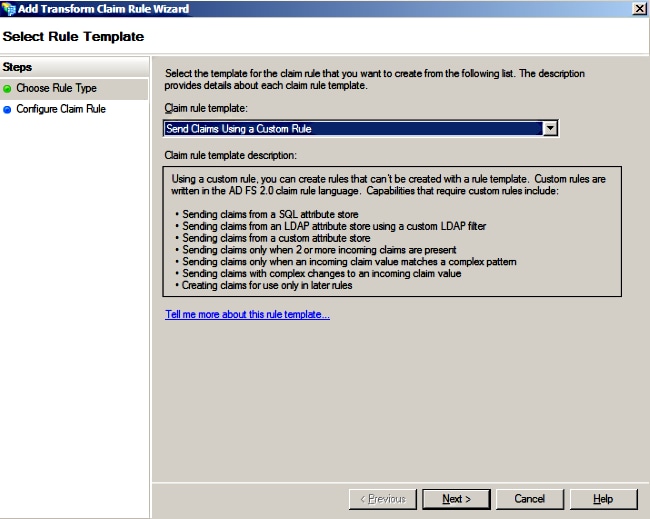
- [Add Rule] をクリックし、[Claim rule template] として [Send Claims Using a Custom Rule] を選択してから [Next] をクリックします。
- [Claim rule name] に要求規則名の名前を入力し、[Custom rule] の下に設けられているスペースに以下のシンタックスをコピーします。
c:[Type == "http://schemas.microsoft.com/ws/2008/06/identity/claims/windowsaccountname"]=> issue(Type = "http://schemas.xmlsoap.org/ws/2005/05/identity/claims/nameidentifier", Issuer = c.Issuer, OriginalIssuer = c.OriginalIssuer, Value = c.Value, ValueType = c.ValueType, Properties["http://schemas.xmlsoap.org/ws/2005/05/identity/claimproperties/format"] = "urn:oasis:names:tc:SAML:2.0:nameid-format:transient", Properties["http://schemas.xmlsoap.org/ws/2005/05/identity/claimproperties/namequalifier"] = "http://<FQDN of ADFS>/com/adfs/services/trust", Properties["http://schemas.xmlsoap.org/ws/2005/05/identity/claimproperties/spnamequalifier"] = "<FQDN of CUCM>");
(注:これらの例のテキストをコピーして貼り付ける場合、一部のワープロソフトウェアでは、ASCII引用符(")がUNICODEバージョン("")で置き換えられることに注意してください。UNICODEバージョンでは、要求ルールが失敗します。)
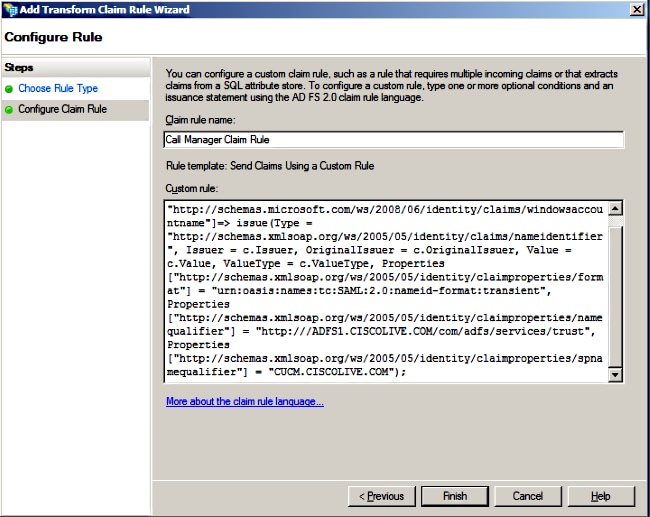
注:
- この例では、CUCM および ADFS 完全修飾ドメイン名(FQDN)がラボ環境の CUCM および ADFS で事前入力されているため、ご使用の環境に合わせて変更する必要があります。
- CUCM/ADFS の FQDN は大文字/小文字の区別があり、メタデータ ファイルと一致していなければなりません。
- [Finish] をクリックします。
- [Apply] の次に [OK] をクリックします。
- Services.msc から AD FS バージョン 2.0 サービスを再起動します。
証明書利用者信頼としての CUCM IM and Presence の追加
- 証明書利用者信頼としての CUCM の追加で説明されているステップ 1 から 11 を繰り返してから、ステップ 2 に進みます。
- [Claim rule name] に要求規則名の名前を入力し、[Custom rule] の下に設けられているスペースに以下のシンタックスをコピーします。
c:[Type == "http://schemas.microsoft.com/ws/2008/06/identity/claims/windowsaccountname"]=> issue(Type = "http://schemas.xmlsoap.org/ws/2005/05/identity/claims/nameidentifier", Issuer = c.Issuer, OriginalIssuer = c.OriginalIssuer, Value = c.Value, ValueType = c.ValueType, Properties["http://schemas.xmlsoap.org/ws/2005/05/identity/claimproperties/format"] = "urn:oasis:names:tc:SAML:2.0:nameid-format:transient", Properties["http://schemas.xmlsoap.org/ws/2005/05/identity/claimproperties/namequalifier"] = "http://<FQDN of ADFS>/com/adfs/services/trust", Properties["http://schemas.xmlsoap.org/ws/2005/05/identity/claimproperties/spnamequalifier"] = "<FQDN of IMP>");
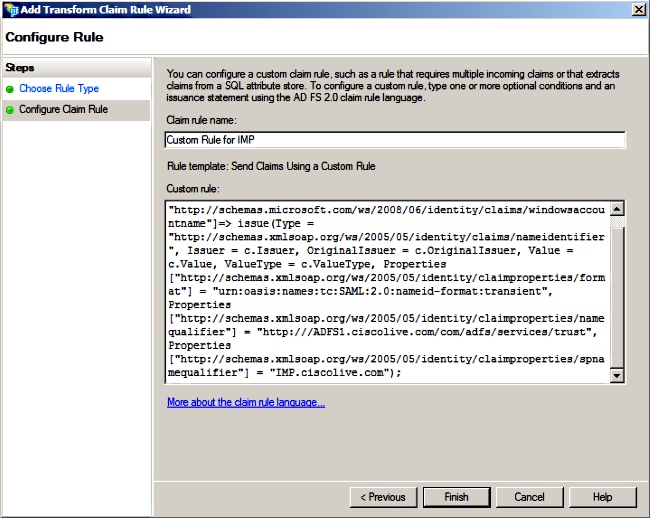
この例では、IM and Presence および AD FS FQDN がラボ環境の IM and Presence および AD FS で事前入力されているため、ご使用の環境に合わせて変更する必要があります。
- [Finish] をクリックします。
- [Apply] の次に [OK] をクリックします。
- Services.msc から AD FS バージョン 2.0 サービスを再起動します。
証明書利用者信頼としての UCXN の追加
- 証明書利用者信頼としての CUCM の追加で説明されているステップ 1 から 12 を繰り返してから、ステップ 2 に進みます。
- [Claim rule name] に要求規則名の名前を入力し、[Custom rule] の下に設けられているスペースに以下のシンタックスをコピーします。
c:[Type == "http://schemas.microsoft.com/ws/2008/06/identity/claims/windowsaccountname"]=> issue(Type = "http://schemas.xmlsoap.org/ws/2005/05/identity/claims/nameidentifier", Issuer = c.Issuer, OriginalIssuer = c.OriginalIssuer, Value = c.Value, ValueType = c.ValueType, Properties["http://schemas.xmlsoap.org/ws/2005/05/identity/claimproperties/format"] = "urn:oasis:names:tc:SAML:2.0:nameid-format:transient", Properties["http://schemas.xmlsoap.org/ws/2005/05/identity/claimproperties/namequalifier"] = "http://<FQDN of ADFS>/com/adfs/services/trust", Properties["http://schemas.xmlsoap.org/ws/2005/05/identity/claimproperties/spnamequalifier"] = "<FQDN of UCXN>");
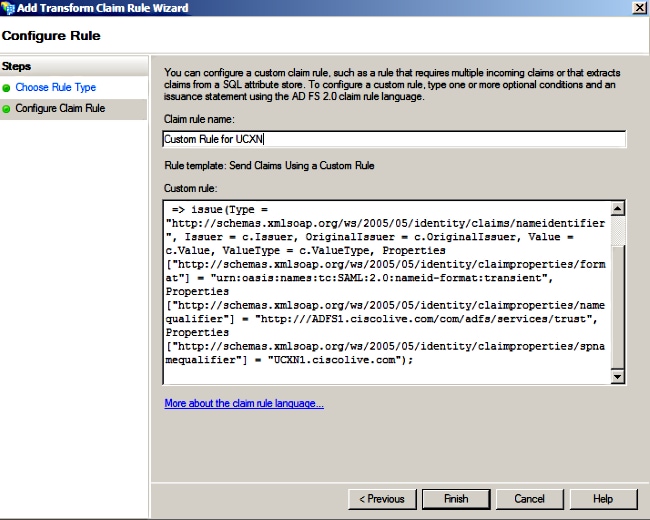
この例では、UCXN および AD FS FQDN がラボ環境の UCXN および ADFS で事前入力されているため、ご使用の環境に合わせて変更する必要があります。
- [Finish] をクリックします。
- [Apply] の次に [OK] をクリックします。
- Services.msc から AD FS バージョン 2.0 サービスを再起動します。
証明書利用者信頼としての Cisco Prime Collaboration Provisioning の追加
- 証明書利用者信頼としての CUCM の追加で説明されているステップ 1 から 12 を繰り返してから、ステップ 2 に進みます。
- [Claim rule name] に要求規則名の名前を入力し、[Custom rule] の下に設けられているスペースに以下のシンタックスをコピーします。
c:[Type == "http://schemas.microsoft.com/ws/2008/06/identity/claims/windowsaccountname"]=> issue(Type = "http://schemas.xmlsoap.org/ws/2005/05/identity/claims/nameidentifier", Issuer = c.Issuer, OriginalIssuer = c.OriginalIssuer, Value = c.Value, ValueType = c.ValueType, Properties["http://schemas.xmlsoap.org/ws/2005/05/identity/claimproperties/format"] = "urn:oasis:names:tc:SAML:2.0:nameid-format:transient", Properties["http://schemas.xmlsoap.org/ws/2005/05/identity/claimproperties/namequalifier"] = "http://<FQDN of ADFS>/com/adfs/services/trust", Properties["http://schemas.xmlsoap.org/ws/2005/05/identity/claimproperties/spnamequalifier"] = "<FQDN of PCP>");
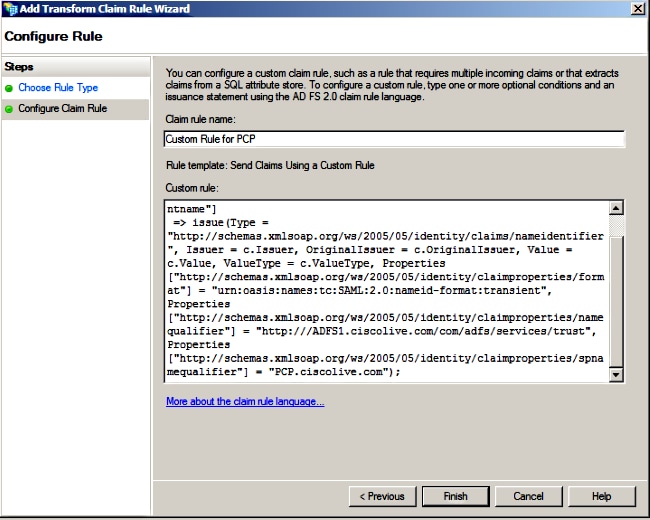
この例では、Prime Provisioning および AD FS FQDN がラボ環境の Prime Collaboration Provisioning(PCP)および AD FS で事前入力されているため、ご使用の環境に合わせて変更する必要があります。
- [Finish] をクリックします。
- [Apply] の次に [OK] をクリックします。
- Services.msc から AD FS バージョン 2.0 サービスを再起動します。
AD FS バージョン 2.0 の設定が完了したら、シスコ コラボレーション製品で SAML SSO を有効にする必要があります。
確認
現在、この設定に使用できる確認手順はありません。
トラブルシュート
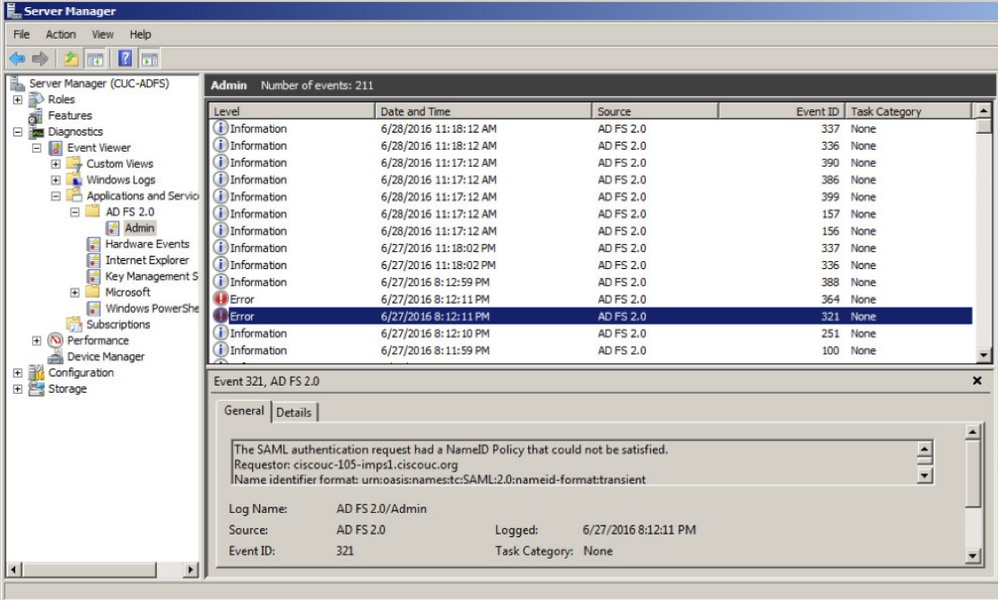
AD FSは、診断データをシステムイベントログに記録します。 AD FSサーバーのサーバーマネージャーで、[診断] -> [イベントビューア] -> [アプリケーションとサービス] -> [AD FS 2.0] -> [管理者]を開きます
AD FSアクティビティでログに記録されたエラーを探します
