CIMC を使用した Cisco ISE のインストール
このセクションでは、Cisco ISE を簡単にインストールするための基本的なインストール手順を提供します。
始める前に
-
本書で指定されているとおりに「システム要件」を満たしていることを確認します。
-
(オプション:Cisco ISE を仮想マシンにインストールする場合にのみ必要)仮想マシンを正常に作成したことを確認します。
詳細については、次のトピックを参照してください。
-
(オプション:Cisco ISE を SNS ハードウェア アプライアンスにインストールするときにのみ必要)Cisco Integrated Management Interface(CIMC)設定ユーティリティを設定して、アプライアンスを管理し、BIOS を設定していることを確認します。詳細については、次のマニュアルを参照してください。
-
SNS3500 シリーズ アプライアンスについては、『Cisco SNS-3500 Series Appliance Hardware Installation Guide』を参照してください。
-
SNS-3600 シリーズ アプライアンスについては、『Cisco SNS-3600 Series Appliance Hardware Installation Guide』を参照してください。
-
SNS-3700 シリーズ アプライアンスについては、『Cisco SNS-3700 Series Appliance Hardware Installation Guide』を参照してください。
-
手順
|
ステップ 1 |
Cisco ISE を次のものにインストールするには、
|
||
|
ステップ 2 |
Cisco ISE ISO イメージをダウンロードします。 |
||
|
ステップ 3 |
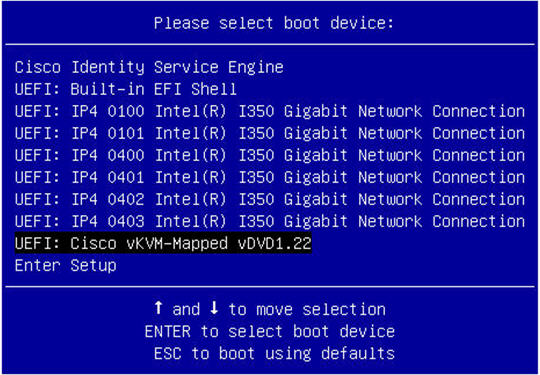
アプライアンスまたは仮想マシンを起動します。
|
||
|
ステップ 4 |
シリアル コンソールを使用して Cisco ISE をインストールするには、ブート プロンプトで 1 および Enter キーを押します。 キーボードとモニターを使用する場合は、矢印キーを使用して、[Cisco ISE のインストール(シリアル コンソール)(Cisco ISE Installation (Serial Console))] オプションを選択します。次のメッセージが表示されます。 |
||
|
ステップ 5 |
プロンプトで、setup と入力し、セットアップ プログラムを起動します。セットアップ プログラム パラメータの詳細については、「Cisco ISE のセットアッププログラムの実行」を参照してください。 |
||
|
ステップ 6 |
セットアップ モードでネットワーク設定パラメータを入力すると、アプライアンスが自動的に再起動し、シェル プロンプト モードに戻ります。 |
||
|
ステップ 7 |
シェル プロンプト モードを終了します。アプライアンスが起動します。 |
||
|
ステップ 8 |
「Cisco ISE インストールプロセスの確認」に進みます。 |

 フィードバック