1단계. 엔드포인트/쿼드 카메라와 Windows 시스템 간에 USB를 마이크로 USB 케이블에 연결합니다.
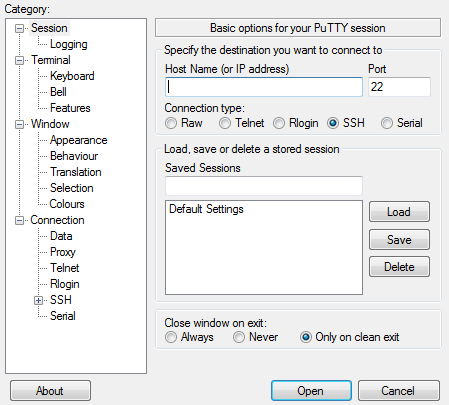
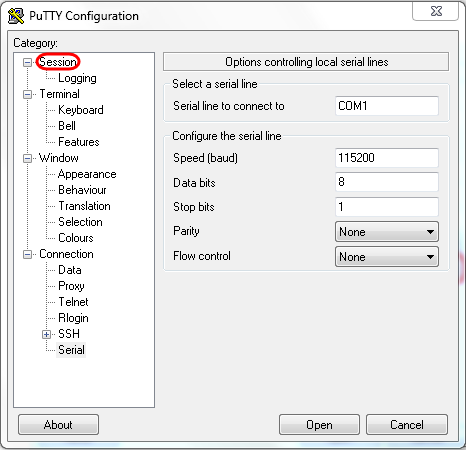
2단계. PuTTY 애플리케이션을 엽니다. 이미지에 표시된 대로 PuTTY Configuration(PuTTY 컨피그레이션) 창이 열립니다.
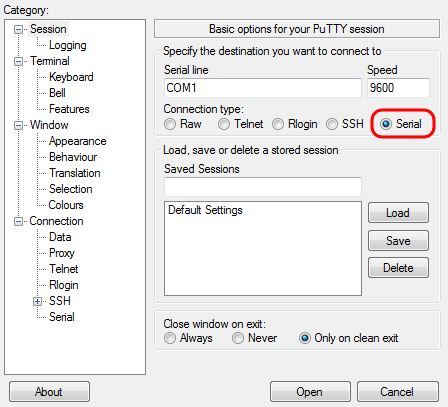
3단계. Connection Type(연결 유형) 필드 아래에서 이미지에 표시된 Serialradio(직렬 라디오) 버튼을 선택합니다.
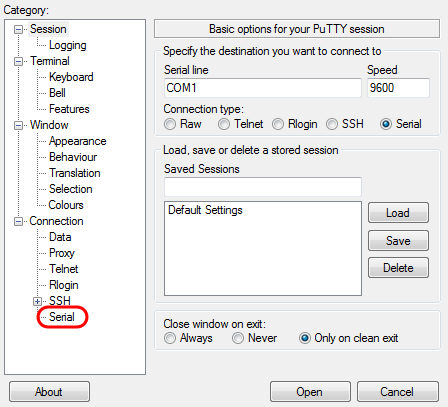
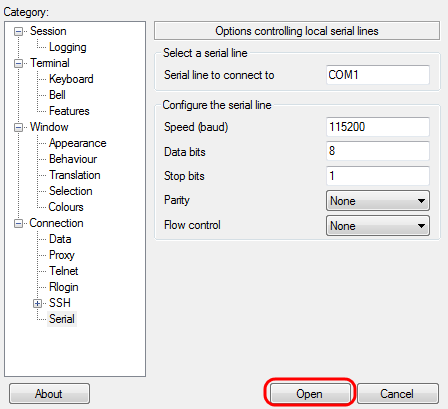
4단계. Category(범주) 탐색 필드에서 이미지에 표시된 대로 Serial(시리얼)을 선택합니다.
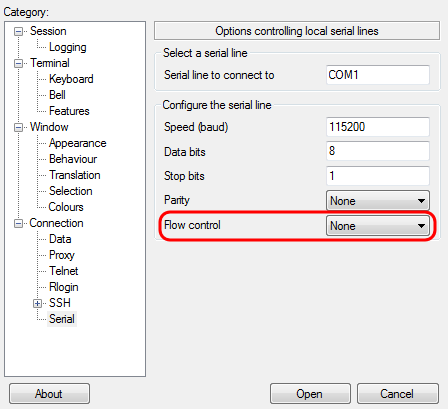
로컬 직렬 회선 제어 옵션 페이지가 이미지와 같이 열립니다.
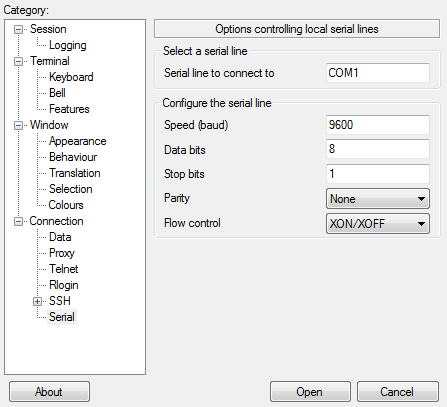
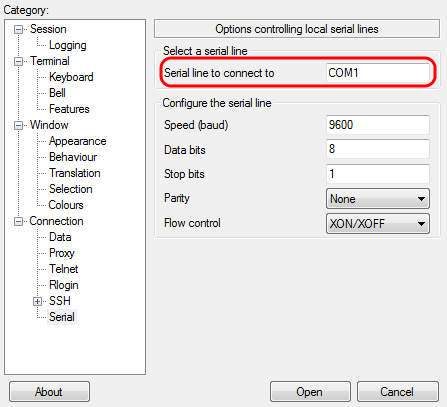
5단계. Serial Line to connect to(연결할 시리얼 라인) 필드에 디바이스가 연결된 COM 포트를 입력합니다(예: 기본 COM 포트는 COM1임).
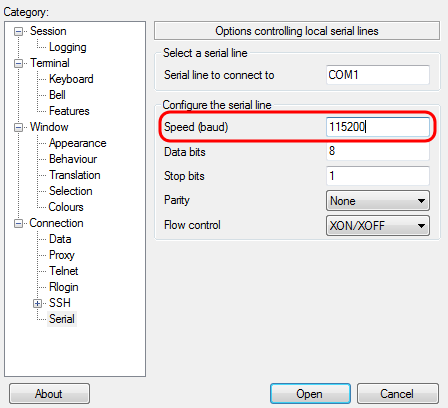
6단계. Speed (baud)(속도(보드)) 필드에 이미지에 표시된 것과 같이 스위치와 호환되는 디지털 전송 속도를 입력합니다. 대부분의 엔드포인트에서 속도를 115200으로 설정할 수 있습니다.
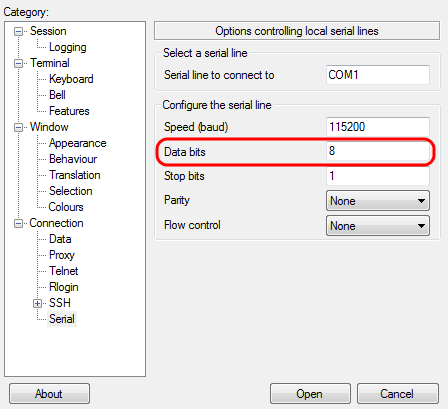
7단계. Data bits(데이터 비트) 필드에 이미지에 표시된 대로 각 문자에 사용된 데이터 비트 수를 입력합니다. 권장 값은 8입니다.
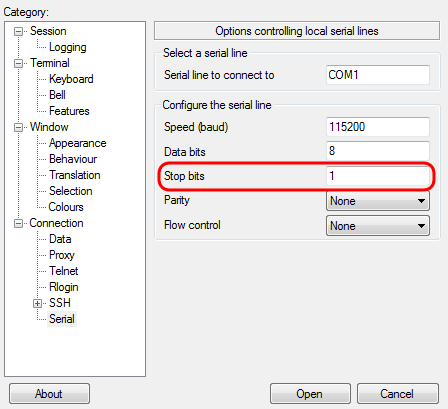
8단계. 이미지에 표시된 대로 Stop bits(정지 비트) 필드에 모든 문자의 끝에 전송할 비트 수를 입력합니다. 중지 비트는 바이트 끝에 도달했음을 머신에 알립니다. 권장 값은 1입니다.
9단계. Parity 드롭다운 메뉴에서 이미지를 통해 전송 오류를 탐지하는 방법을 선택합니다. 전송 오류를 탐지하기 위해 권장되는 방법은 None입니다.

10단계. Flow Control 드롭다운 메뉴에서 이미지에 표시된 대로 데이터 오버플로를 방지하기 위해 방법을 선택합니다. 데이터 오버플로를 방지하기 위해 권장되는 메서드는 None입니다.
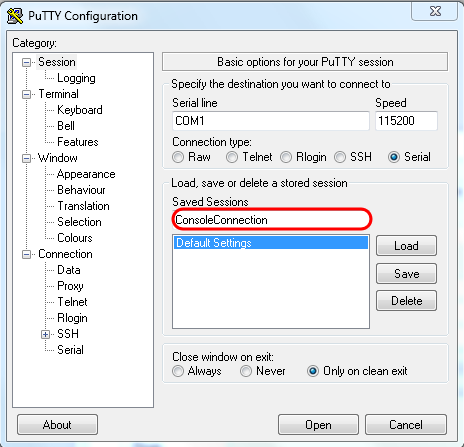
11단계. (선택 사항) 나중에 사용할 수 있도록 연결 설정을 저장하려면 Categorynavigation(범주 탐색) 창으로 이동하고 Session(세션)을 선택합니다. 연결 설정을 저장하지 않으려면 14단계로 건너뜁니다.
12단계. Saves Sessions(세션 저장) 필드에 저장할 설정의 이름을 입력합니다.
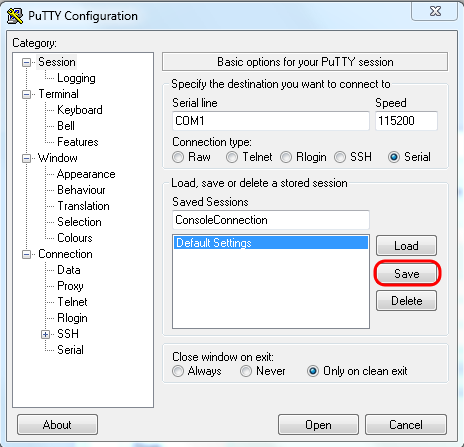
13단계. 이미지에 표시된 대로 저장을 선택합니다.
14단계. 열기를 선택합니다.
COM1 - PuTTY 콘솔 창이 열립니다.
15단계. CLI(Command Line Interface)를 활성화하려면 키보드에서 HitEnter 키를 누릅니다. 프롬프트의 로그가 표시됩니다.
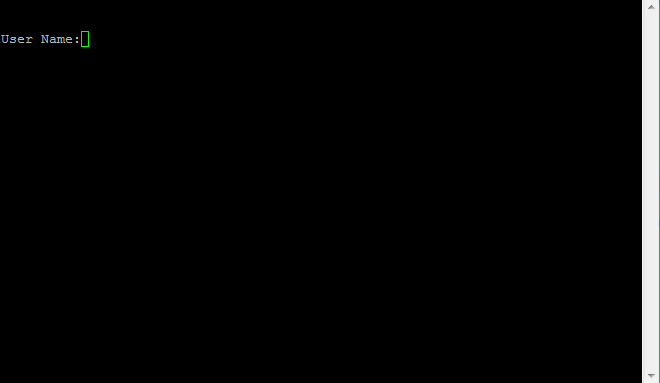
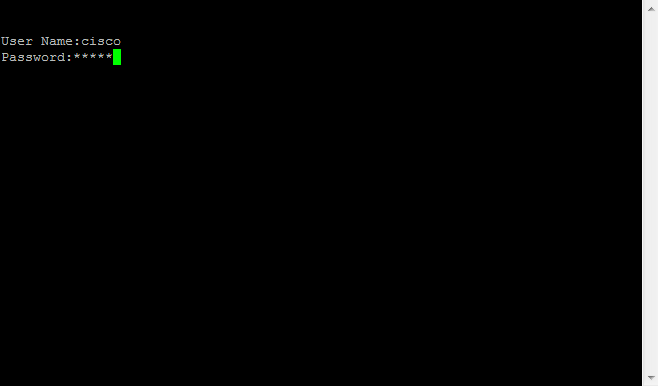
16단계. 사용자 이름을 입력합니다. 기본 사용자 이름은 admin입니다.

14단계. 비밀번호를 입력합니다. 기본 비밀번호는 cisco입니다.
 피드백
피드백