소개
이 문서에서는 Cisco XDR과 Secure Firewall 7.2의 Cisco Secure Firewall 통합을 통합하고 문제를 해결하는 방법에 대해 설명합니다.
사전 요구 사항
요구 사항
Cisco에서는 다음 항목에 대한 지식을 권장합니다.
- FMC(Firepower Management Center)
- Cisco 보안 방화벽
- 이미지 가상화 옵션
- Secure Firewall 및 FMC는 라이센스가 있어야 합니다.
사용되는 구성 요소
- Cisco Secure Firewall - 7.2
- FMC(firepower 관리 센터) - 7.2
- SSE(Security Services Exchange)
- Cisco XDR
- Smart License 포털
- Cisco CTR(Threat Response)
이 문서의 정보는 특정 랩 환경의 디바이스를 토대로 작성되었습니다. 이 문서에 사용된 모든 디바이스는 초기화된(기본) 컨피그레이션으로 시작되었습니다. 현재 네트워크가 작동 중인 경우 모든 명령의 잠재적인 영향을 미리 숙지하시기 바랍니다.
배경
릴리스 7.2에는 보안 방화벽과 Cisco XDR 및 Cisco XDR 오케스트레이션의 통합 방식에 대한 변경 사항이 포함되어 있습니다.
| 기능 |
설명 |
| Cisco XDR 통합, Cisco XDR 오케스트레이션 개선. |
We have streamlined the SecureX integration process. Now, as long as you already have a SecureX account, you just choose your cloud region on the new Integration > SecureX page, click Enable SecureX, and authenticate to SecureX. The option to send events to the cloud, as well as to enable Cisco Success Network and Cisco Support Diagnostics, are also moved to this new page. When you enable SecureX integration on this new page, licensing and management for the systems's cloud connection switches from Cisco Smart Licensing to SecureX. If you already enabled SecureX the "old" way, you must disable and re-enable to get the benefits of this cloud connection management. Note that this page also governs the cloud region for and event types sent to the Secure Network Analytics (Stealthwatch) cloud using Security Analytics and Logging (SaaS), even though the web interface does not indicate this. Previously, these options were on System > Integration > Cloud Services. Enabling SecureX does not affect communications with the Secure Network Analytics cloud; you can send events to both. The management center also now supports SecureX orchestration—a powerful drag-and-drop interface you can use to automate workflows across security tools. After you enable SecureX, you can enable orchestration.
|
이 릴리스에 포함된 모든 기능을 확인하려면 7.2 릴리스 정보를 참조하십시오.
구성
통합을 시작하기 전에 사용자 환경에서 다음 URL이 허용되는지 확인합니다.
미국 지역
- api-sse.cisco.com
- eventing-ingest.sse.itd.cisco.com
EU 지역
- api.eu.sse.itd.cisco.com을 참조하십시오.
- eventing-ingest.eu.sse.itd.cisco.com을 참조하십시오.
APJ 지역
- api.apj.sse.itd.cisco.com
- eventing-ingest.apj.sse.itd.cisco.com
1단계. FMC에 대한 통합 로그를 시작합니다. 통합>Cisco XDR로 이동하여 연결할 지역(미국, EU 또는 APJC)을 선택하고 Cisco XDR로 전달할 이벤트 유형을 선택한 다음 Cisco XDR 사용을 선택합니다.
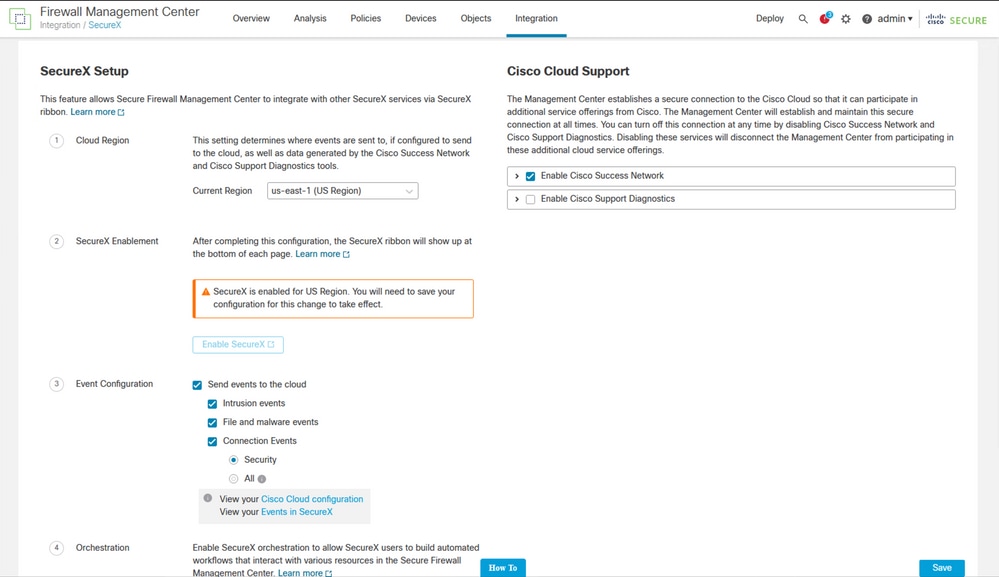
를 선택할 때까지 변경 사항이 적용되지 않습니다 Save .
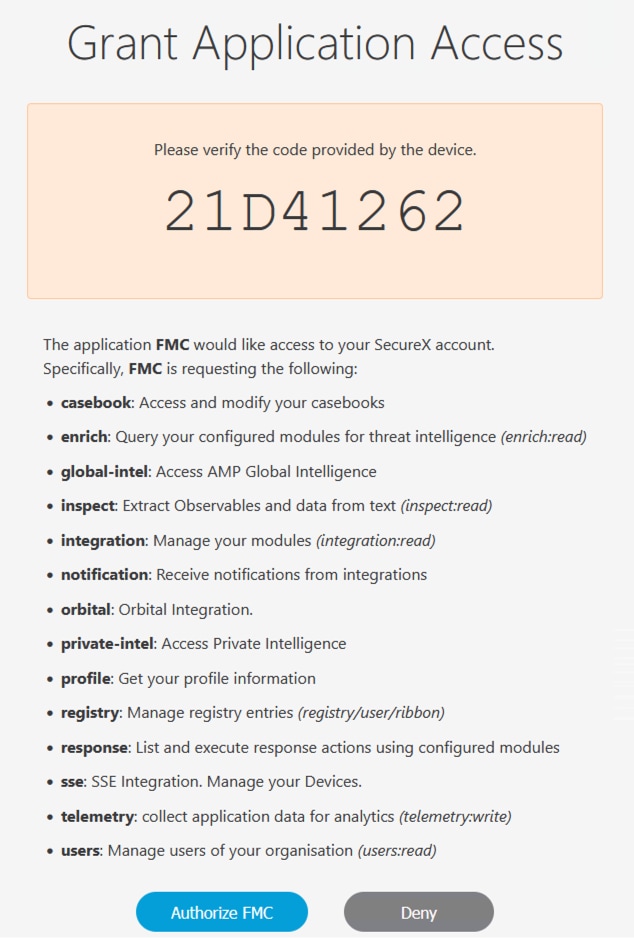
2단계. [저장]을 선택하면 Cisco XDR 계정에서 FMC를 인증하도록 리디렉션됩니다(이 단계를 수행하기 전에 Cisco XDR 계정에 로그인해야 함). 다음과 같이 FMC 권한 부여를 선택합니다.
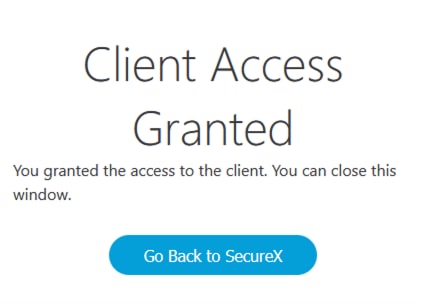
3단계. 권한이 부여되면 Cisco XDR로 리디렉션됩니다.
여러 개의 조직이 있는 경우 FMC 및 보안 방화벽 장치를 통합할 조직을 선택할 수 있는 Cisco XDR 랜딩 페이지가 표시됩니다.
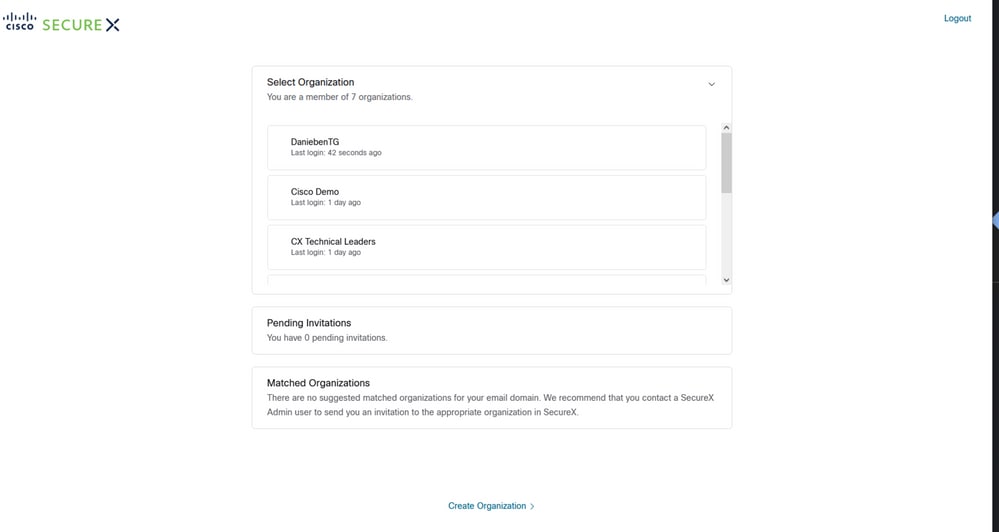
4단계. Cisco XDR 조직을 선택하면 다시 FMC로 리디렉션되며 통합에 성공했다는 메시지를 받아야 합니다.
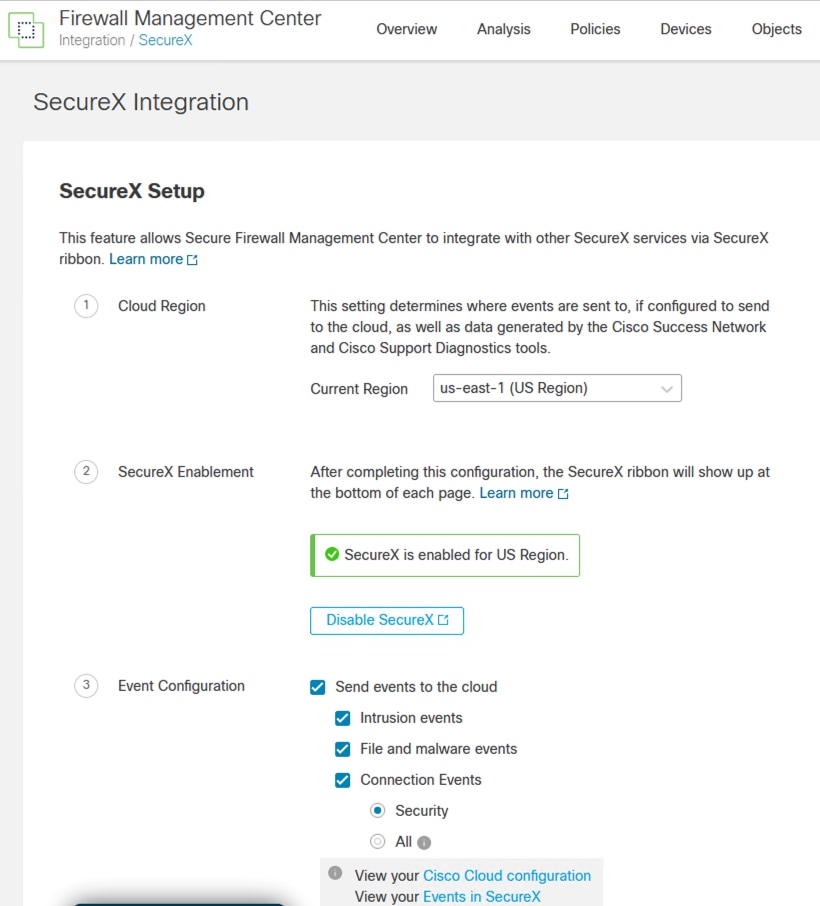
다음을 확인합니다.
통합이 완료되면 페이지 아래쪽에서 리본을 확장할 수 있습니다.
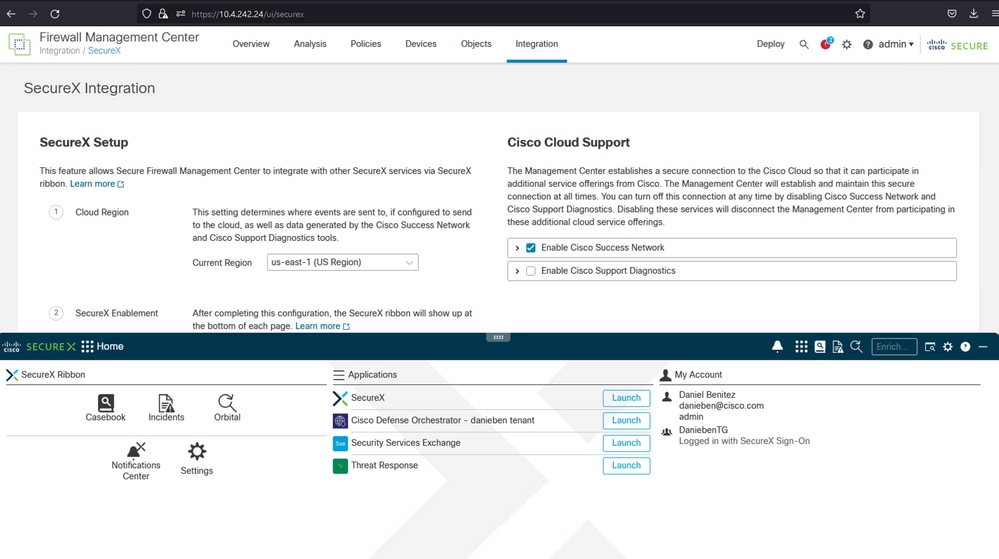
리본에서 Security Services Exchange를 시작하고 Devices에서 방금 통합한 FMC 및 보안 방화벽을 모두 확인해야 합니다.
