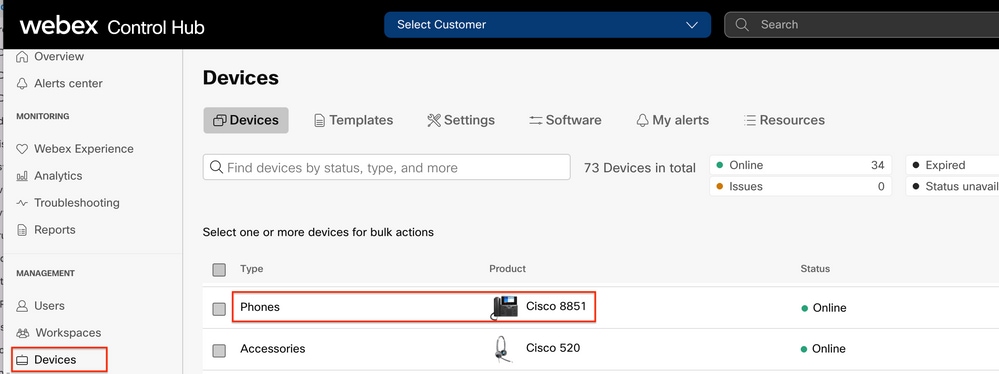
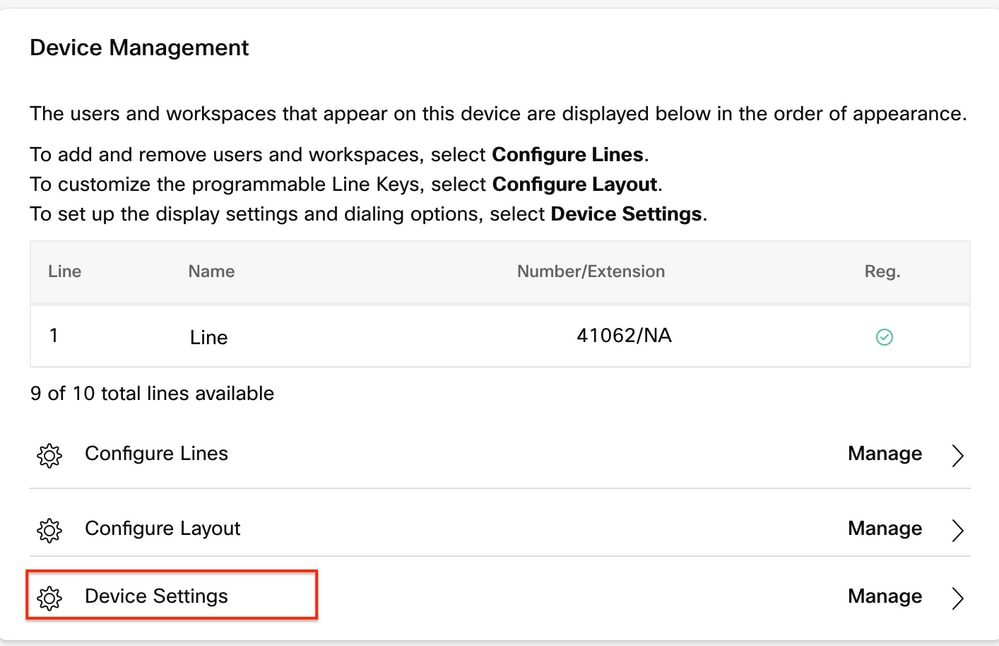
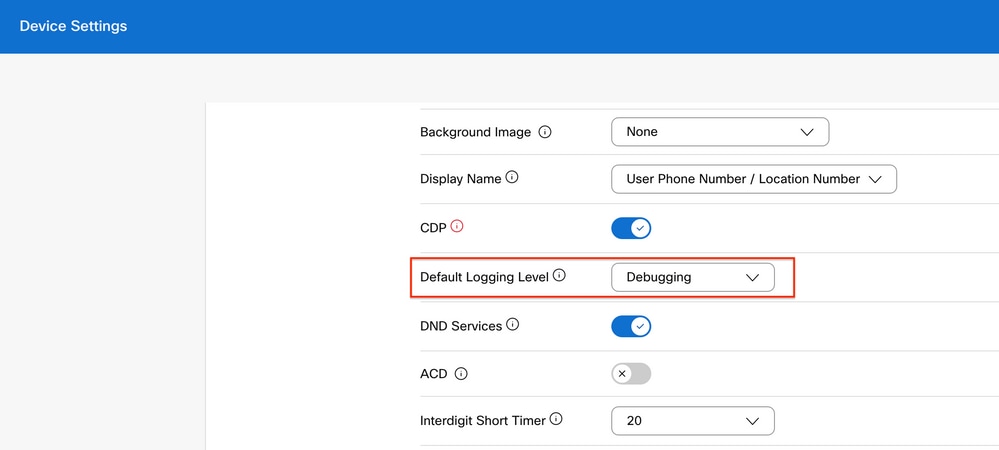
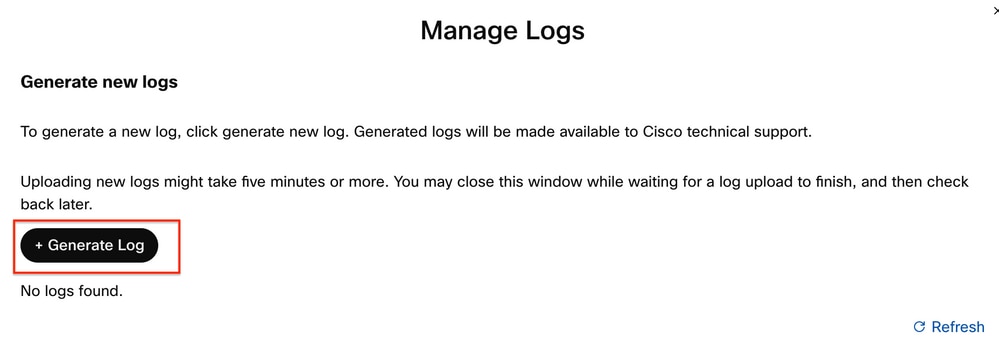
簡介
本文檔介紹在控制中心的MPP(多平台韌體)電話中將日誌級別設定為調試的過程。
必要條件
需求
思科建議您瞭解以下主題:
採用元件
本檔案中的資訊是根據以下軟體版本:
- Cisco 8851 IP電話 — MPP韌體11.3.7
本文中的資訊是根據特定實驗室環境內的裝置所建立。文中使用到的所有裝置皆從已清除(預設)的組態來啟動。如果您的網路運作中,請確保您瞭解任何指令可能造成的影響。
背景資訊
當MPP電話出現問題或錯誤時,必須在調試中設定日誌級別,然後才能從裝置檢索PRT(問題報告工具)以進行故障排除。
設定日誌級別
要正確配置日誌級別,請導航到Control Hub > Devices,然後選擇出現問題的裝置。確認裝置顯示Online:
![Webex Control Hub - Screen Shot 2022-08-17 at 15.38.59](/c/dam/en/us/support/docs/collaboration-endpoints/ip-phone-8851/218093-configure-debug-level-in-mpp-phones-regi-00.png)
在Device Page上,導航到Device Management部分,然後選擇Device Settings。
![Device Management - Screen Shot 2022-08-17 at 15.45.49](/c/dam/en/us/support/docs/collaboration-endpoints/ip-phone-8851/218093-configure-debug-level-in-mpp-phones-regi-01.png)
在Device Settings中,確認Default Logging Level設定為Debugging,然後選擇Save。
![Screen Shot 2022-08-21 at 19.59.52](/c/dam/en/us/support/docs/collaboration-endpoints/ip-phone-8851/218093-configure-debug-level-in-mpp-phones-regi-02.png)
附註:要使更改生效,請重置裝置以便它下載更新的配置檔案。
生成PRT
在裝置中配置正確的日誌級別後,請留出時間來解決問題並生成PRT。
從裝置生成PRT
步驟1.在裝置上,按Applications按鈕
.
步驟2.轉至Status > Report Problem。
步驟3.輸入問題的日期和時間。
步驟4.從清單中選擇描述。
步驟5.按提交。
從控制中心生成PRT
步驟1. 導覽至Control Hub > Devices,然後選擇裝置:
![Webex Control Hub - Screen Shot 2022-08-17 at 15.38.59](/c/dam/en/us/support/docs/collaboration-endpoints/ip-phone-8851/218093-configure-debug-level-in-mpp-phones-regi-04.png)
步驟2.在電話頁面上,前往Support > Device Logs。
![Device Management - Screen Shot 2022-08-21 at 21.07.22](/c/dam/en/us/support/docs/collaboration-endpoints/ip-phone-8851/218093-configure-debug-level-in-mpp-phones-regi-05.png)
步驟3.在「管理日誌」頁上,選擇「生成日誌」。
![Manage Logs - Screen Shot 2022-08-21 at 21.16.01](/c/dam/en/us/support/docs/collaboration-endpoints/ip-phone-8851/218093-configure-debug-level-in-mpp-phones-regi-06.png)
驗證
手動或通過Control Hub提交PRT後,可用日誌列在Manage Logs部分:
![Manage Logs - Screen Shot 2022-08-21 at 21.19.09](/c/dam/en/us/support/docs/collaboration-endpoints/ip-phone-8851/218093-configure-debug-level-in-mpp-phones-regi-07.png)
相關資訊