Provide Data to Smart Net Total Care Through the Netformx Collector
Available Languages
This document describes how to discover, collect, and then upload your inventory and device data to the Cisco Smart Net Total Care™ portal via the Netformx DesignXpert application.
The Netformx DesignXpert is one of the collection options that are supported by the Smart Net Total Care portal. If you would like to learn more about the other collection options that are available to you, refer to the Device Data Collection Options document for more information.
Prerequisites
The information in this document is provided with the assumptions that a Netformx application is already installed (DesignXpert or Netformx Discovery) on your machine, and that you have your Cisco ID correctly defined inside the application. If you do not currently meet these requirements, then you will not be able to associate the discovery action to an end-user account or successfully upload the discovery output results to Cisco.
Complete these actions as needed in order to prepare for the processes that are described in this document:
- If you have not yet registered and obtained a Cisco ID, navigate to the Cisco Registration page and complete the process that is described.
- If you require assistance with basic installation of the Netformx collector, refer to the Netformx DesignXpert User Guide for more details.
Discover, Collect, and Upload Data to Cisco
Complete these steps in order to setup a network discovery, collect your inventory, and then upload the data to Cisco:
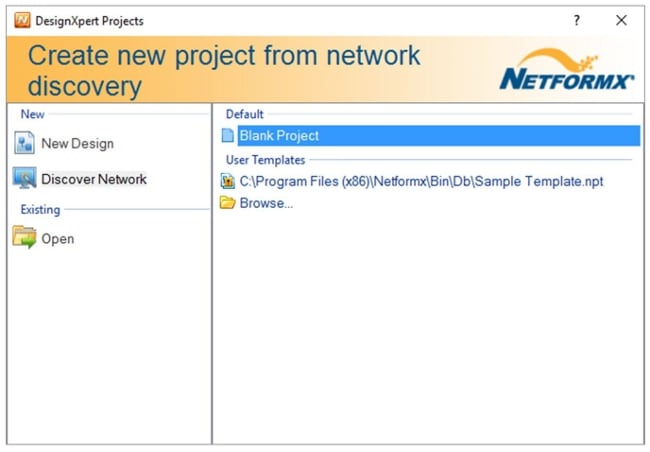
- Launch the DesignXpert, click Discover Network, and then click Blank Project:
- Enter a name for your project, and then click OK. The default Netformx Discovery Settings interface appears:
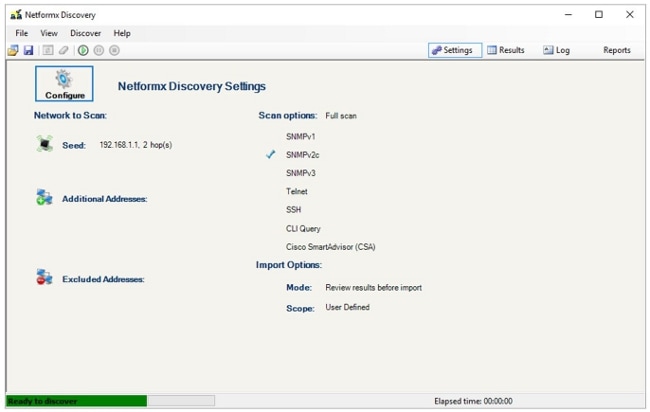
- Some of the items might have default settings applied. Change the settings as needed so that they match your network setup.
- Click Configure on the Netformx Discovery Settings screen, and the Netformx Discovery Configuration window appears with the Network tab exposed. This tab allows you to describe the starting point, span, and scope of a discovery operation:
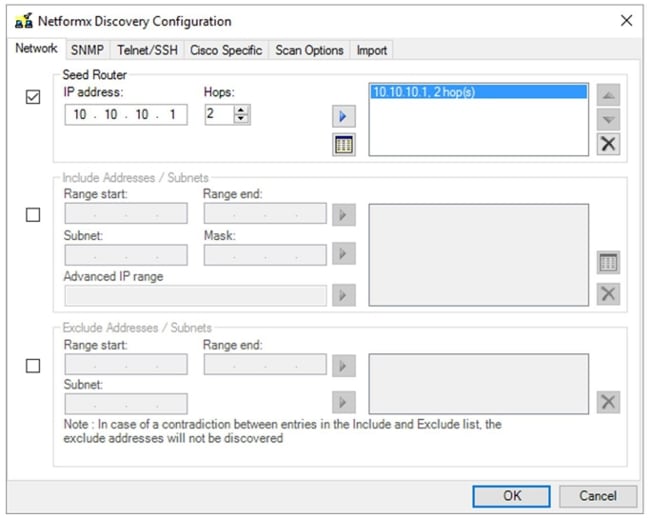
- Choose one of these two methods in order to describe the environment to the application:
- Specify the seed router. A seed router, as the name implies, is the starting point of the network discovery itself. The seed router is the first router point of contact for the discovery operation. The number of hops determines the number of subnet hops that the discovery takes from the seed router. Therefore, the seed router and hop count establish the discovery starting point and overall range of the entire operation. The discovery uses the routing and other table information of the seed router in order to guide the rest of the discovery process, bounded by the hop count in order to set the ultimate distance from the seed router. The greater the hop count, the wider the span, which means that the entire process takes longer due to the increase in the total range of devices that must be discovered.
- Define the scope of the discovery action with a range. The second method explicitly defines the start and end IP addresses in order to establish a defined range. You set the start and end points, and the process runs through the specified range. Again, the greater the overall range, the longer the discovery process. For large networks, we suggest that you either break up your main action into smaller chunks via the specification of IP ranges, or via the use of the Exclude option. The Exclude option can also help to reduce the size and scope of the discovery operation itself but requires additional information about the address of the network, as established by your IT department.
- Specify the seed router. A seed router, as the name implies, is the starting point of the network discovery itself. The seed router is the first router point of contact for the discovery operation. The number of hops determines the number of subnet hops that the discovery takes from the seed router. Therefore, the seed router and hop count establish the discovery starting point and overall range of the entire operation. The discovery uses the routing and other table information of the seed router in order to guide the rest of the discovery process, bounded by the hop count in order to set the ultimate distance from the seed router. The greater the hop count, the wider the span, which means that the entire process takes longer due to the increase in the total range of devices that must be discovered.
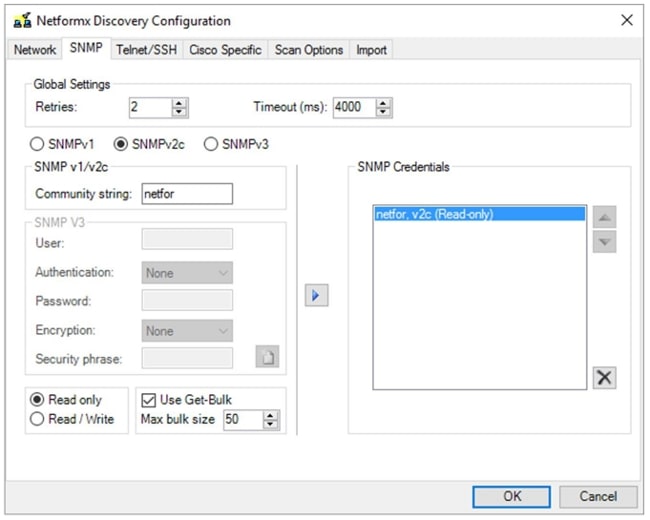
- Click SNMP, and then enter the Simple Network Management Protocol (SNMP) credentials:
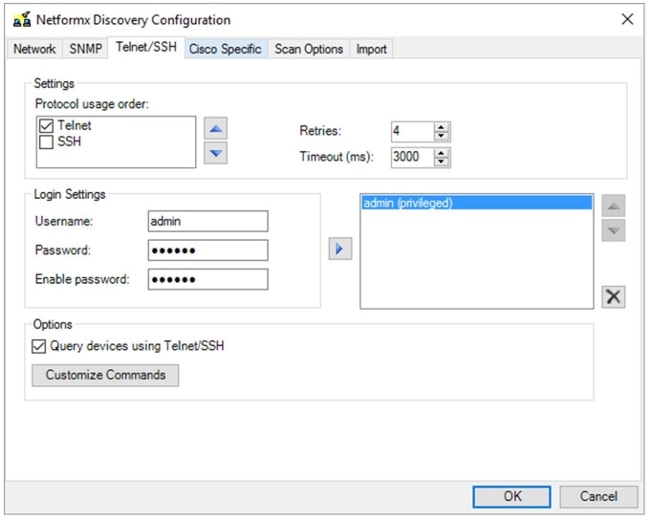
- Click Telnet/SSH, and then enter the Telnet and Secure Shell (SSH) credentials for the network devices:
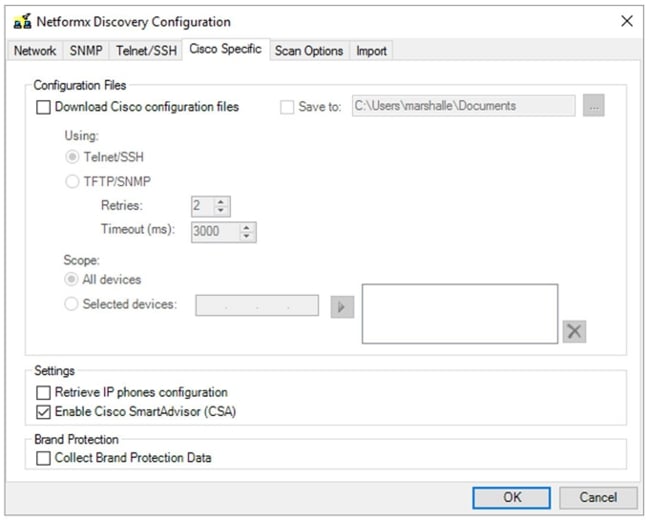
- Click Cisco Specific, and then select the Enable Cisco SmartAdvisor (CSA) checkbox in the Settings area:
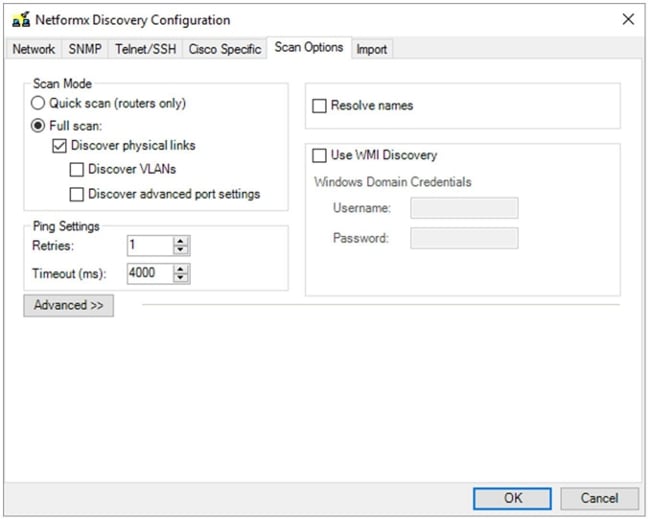
- Click Scan Options, and then adjust the options as desired:
- Click Import, and then adjust the options as desired:

- Click OK in order to return to the Netformx Discovery Settings interface.
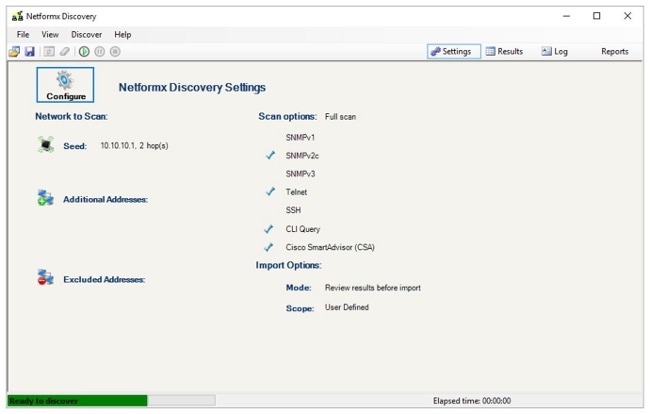
- Click the small, green run button in the upper ribbon (above Configure) in order to execute the discovery:
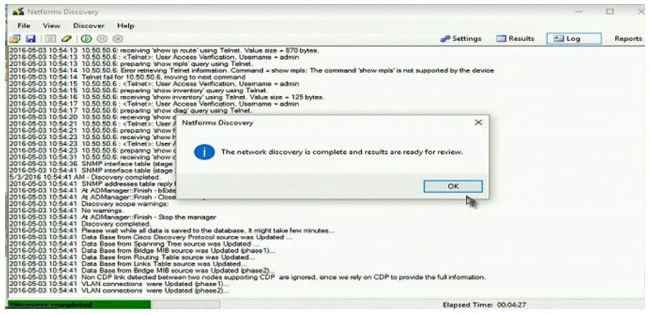
- Click OK after the discovery operation completes in order to review the output:
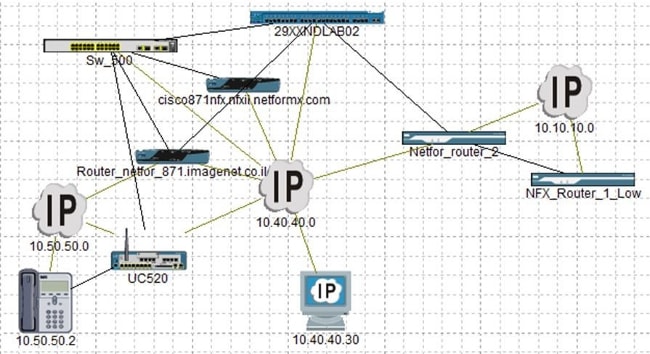
After your review is complete, the network topology diagram appears, which displays a drawing that illustrates the data that the discovery operation collected:
- Return to the Design tab, and you are ready to upload your information to Cisco:
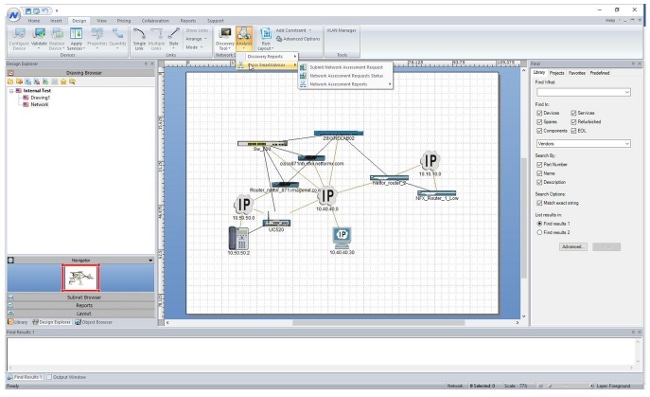
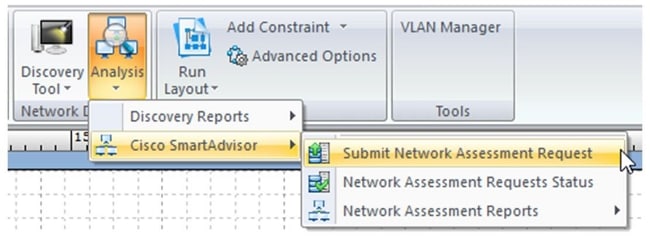
- Navigate to Analysis > Cisco Smart Advisor > Submit Network Assessment Request:
The Assessment Request Project Scope dialog box appears: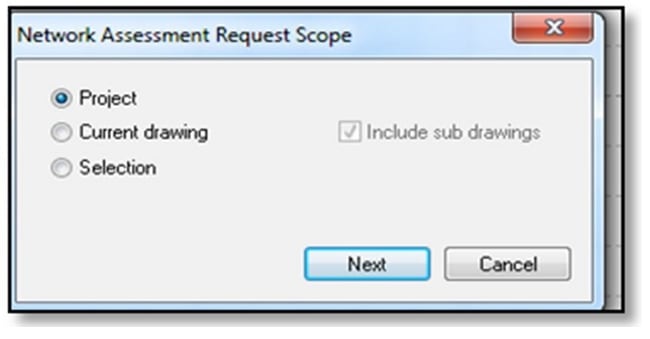
- Click Project, and then click Next. The Submission window appears.
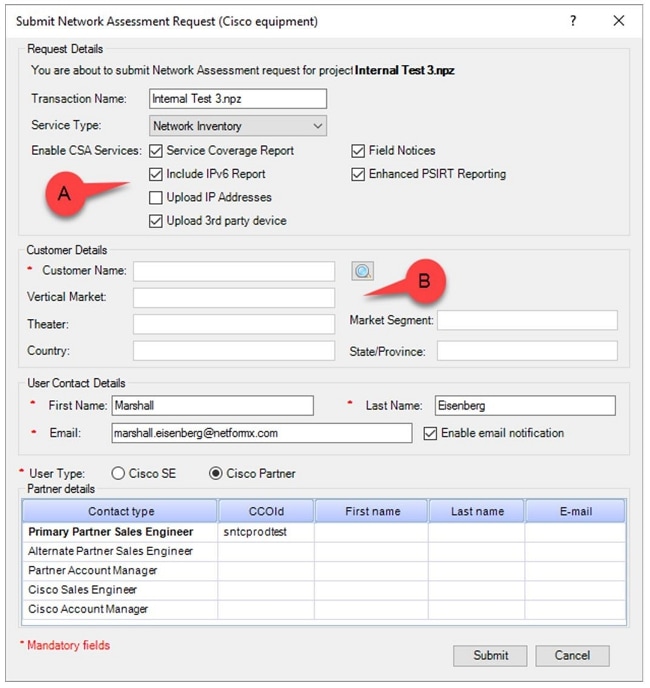
- Click the magnifying glass icon in the Customer Details section in order to open the Search dialogue box, which allows you to associate the discovery run to your company and upload the details to Cisco:
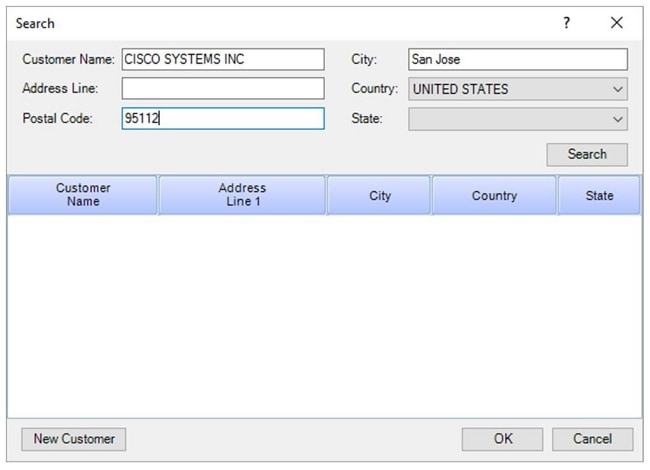
- Enter three discrete pieces of information, click Search, and Cisco responds with a list that contains all of the matches to the information that you provided:
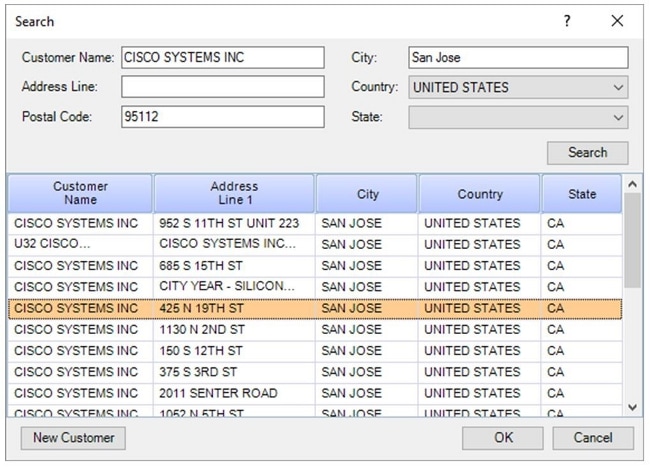
- Locate your exact address, and then click OK:
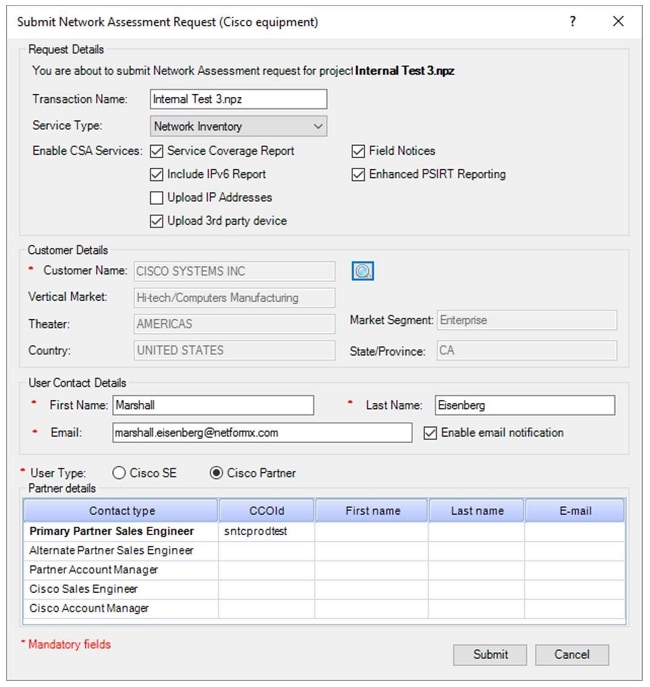
The information that you selected appears in the Customer Details section, and the dialog box displays your characteristics in the bottom section. - Click the Enable email notification checkbox (if it is not already enabled) in order to receive updates from Cisco.
- If you are a Cisco partner or Cisco Enterprise customer, then select the Cisco Partner radio button in the User Type section.
Additionally, Cisco employees should select the Cisco SE radio button in order to identify themselves, and then complete the Cisco related details, if desired.
- Click Submit after all of your information is added, and a window appears that shows the status of the data upload:
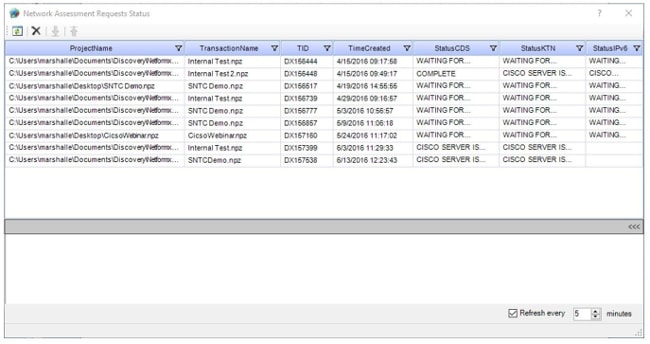
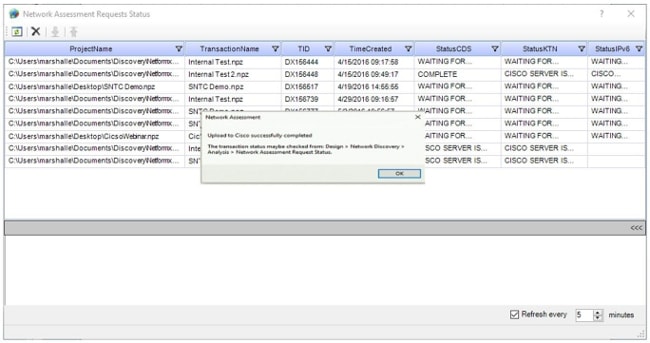
- Monitor the status of the upload and wait for the Status flag to change, which indicates that the upload is complete:
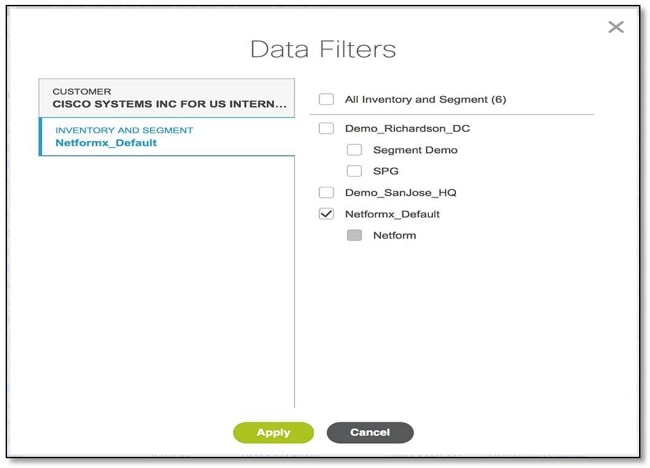
- After your inventory is successfully uploaded to the Smart Net Total Care portal, verify that the portal displays a new inventory with the name Netformx_Default:
 Feedback