Troubleshoot Smartports on your Sx250, Sx350, SG350X, or Sx550X Series Switch
Available Languages
Objective:
The objective of this document is to show how to identify, troubleshoot, and disable the Smartport feature if is causing problems with your switch.
Applicable Devices | Software Version
This article will answer the following questions
- Do I have the Smartport feature enabled?
- What if I have the Smartport feature enabled, but it doesn’t seem to be working?
- How do I disable the Smartport feature?
Introduction
Did you know that Sx250, Sx350, SG350X, and Sx550 switches include a Smartport feature?
This Smartport feature applies a preconfigured setup to that switch port based on the type of device that is trying to connect. Auto Smartport lets the switch apply these configurations to interfaces automatically when it detects the device.
Smartports have preset configurations for the following:
- Printer
- Desktop
- Guest
- Server
- Host
- IP Camera
- IP Phone
- IP Phone + Desktop
- Switch
- Router
- Wireless Access Points
Smartports can be a huge time-saver for you, but there may be circumstances where you need to change settings. In some instances, it might be easier to just disable the Smartport feature and move on! Not sure? Check this article out for more details.
First things first, let’s figure out if you have the Smartport feature enabled.
Do I have the Smartport feature enabled?
The short answer, it depends!
If you have firmware version 2.5.7 and earlier, the Smartport feature is enabled by default. So, unless you changed this setting, it is enabled.
If you have a 2.4.5.47 (or earlier) firmware version and you upgrade to the latest (February 2021) 2.5.7 version (or later when available), the default setting will remain with the Smartport feature enabled unless you have manually disabled this feature.
If you purchase a switch that has the 2.5.7 firmware version (or later), the firmware will have the Smartport feature disabled by default. This change was made because some customers didn’t necessarily want to use the Smartport feature or it was causing an issue with connectivity and customers didn’t realize it was enabled.
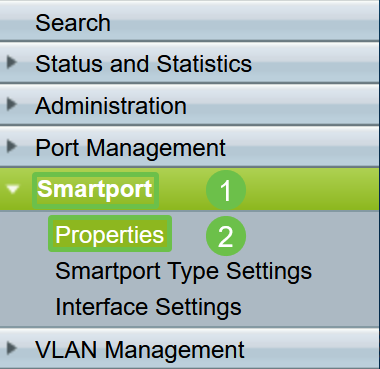
If you aren’t sure if you have the feature enabled, you can check. Navigate to Smartport > Properties. At this location, you can view the Smartport settings or simply disable the feature if you choose.
If you would like detailed steps for upgrading firmware, check out the article Upgrade Firmware on a Switch.
What if I have the Smartport feature enabled, but it doesn’t seem to be working?
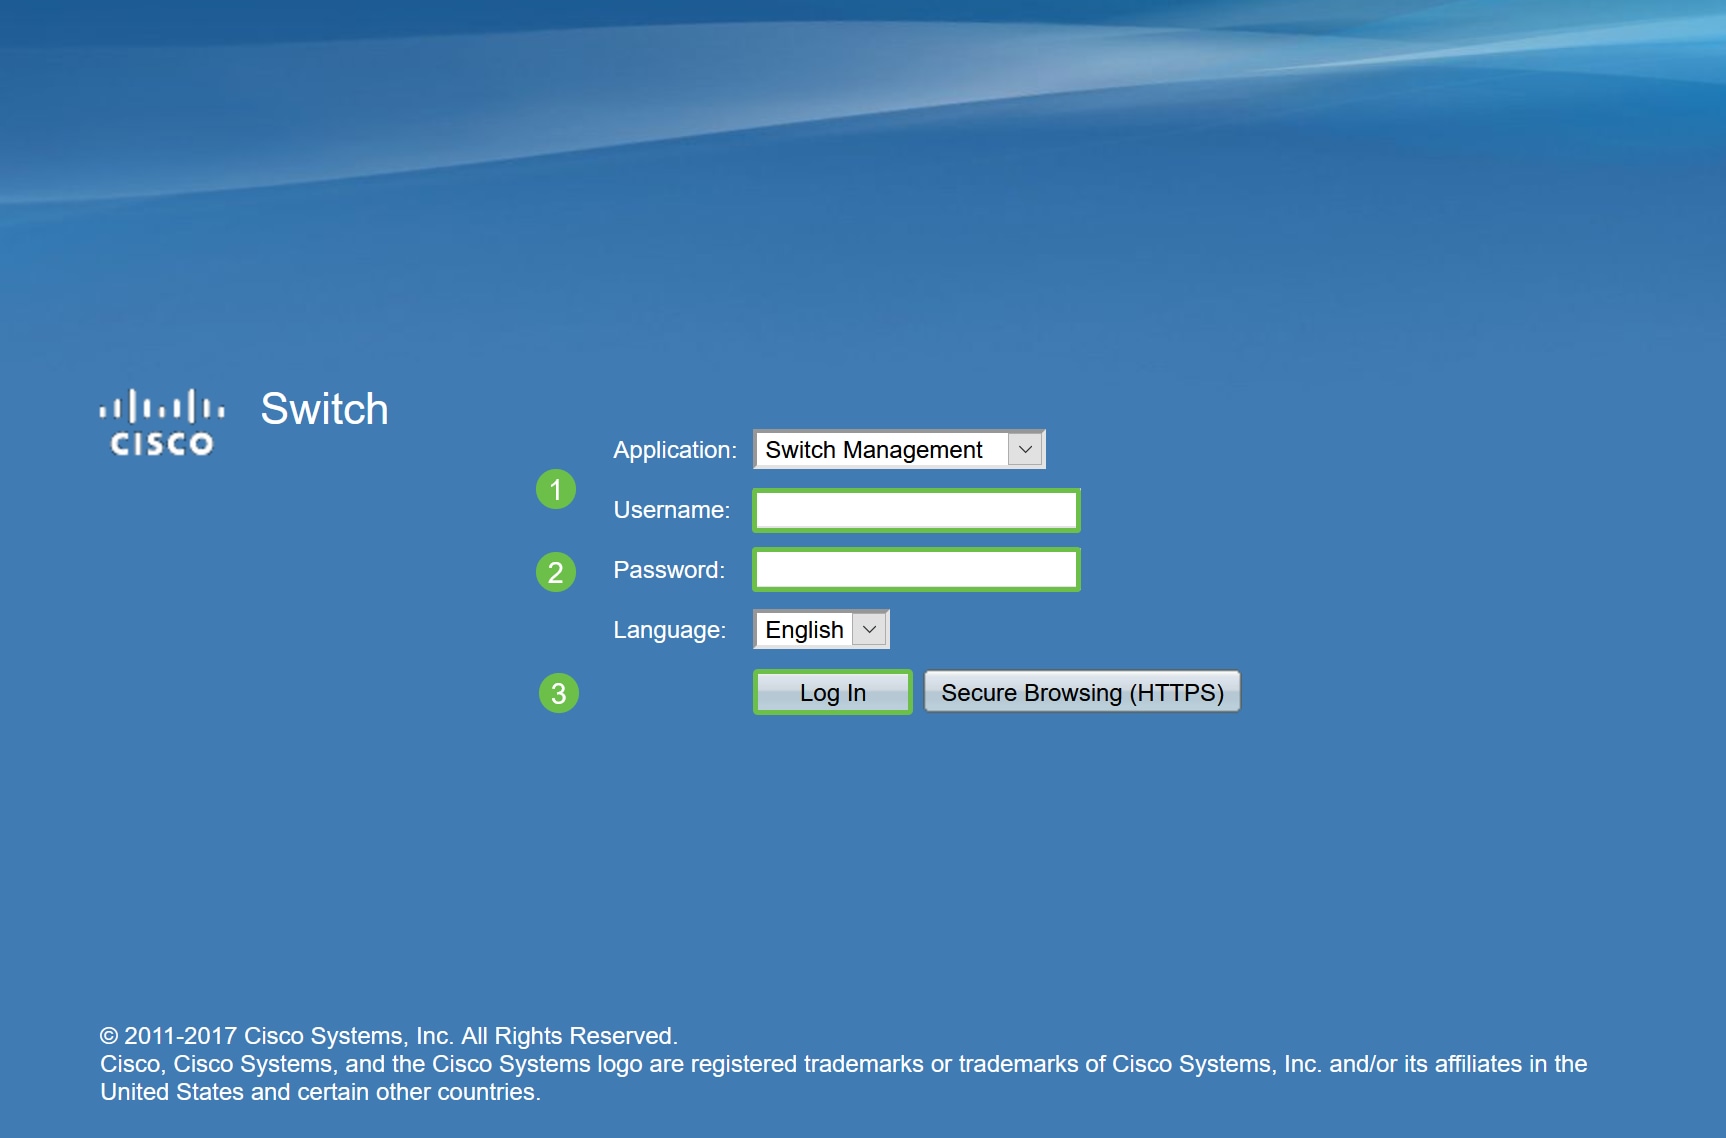
To check these possible issues, log into the Web User Interface (UI) of the switch.
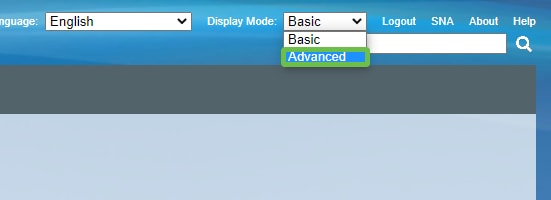
Once in the Web UI, change Display Mode from Basic to Advanced. This is located in the top-right corner of your screen.
Check the discovery protocol settings
The switch requires Cisco Discovery Protocol (CDP) and/or Layer Link Discovery Protocol (LLDP) to be enabled. These protocols share identification information between connecting devices or network equipment, which enables a device to advertise the type of device, operating system version, IP address, configuration, and capabilities to the switch. CDP, designed by Cisco, may have also been adopted by other manufacturers. If enabled on third-party equipment it could also be discovered by the Cisco switch. Both CDP and LLDP are enabled by default, so unless you manually changed it, you can move on to the next section.
If you need to manually change CDP and LLDP back to enabled, you should restart your equipment to see if the Smartport feature is now working. You can check these under the Administration tab. If that fixes your issue, congratulations!
If a device is not clearly identified by either CDP or LLDP, you might want to disable the Smartport feature to clear away issues. Click to jump to the disable Smartports section of this article.
Check Port Configurations
Step 1
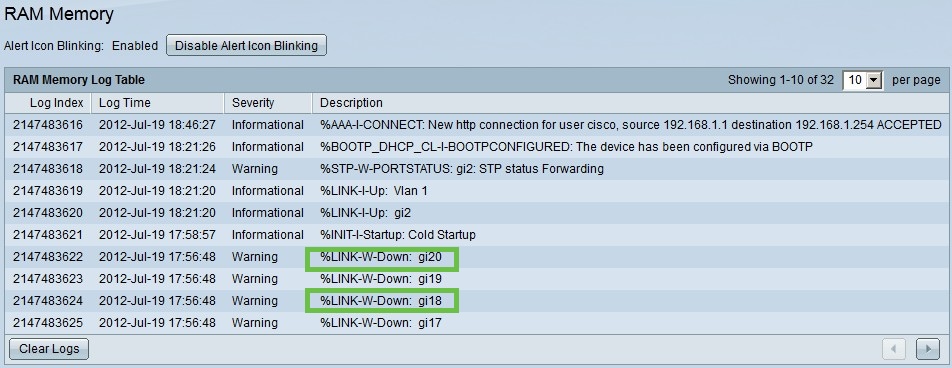
Go to Administration > Logs > RAM Memory. Check the device logs. Look for port locking placed to classic lock or any entries that did not result from a configuration that you set. Also, look for any entries that may place ports as Disabled or Down.
Step 2
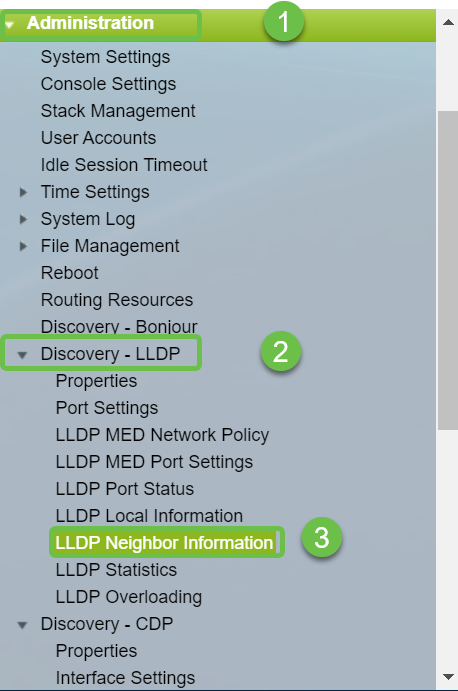
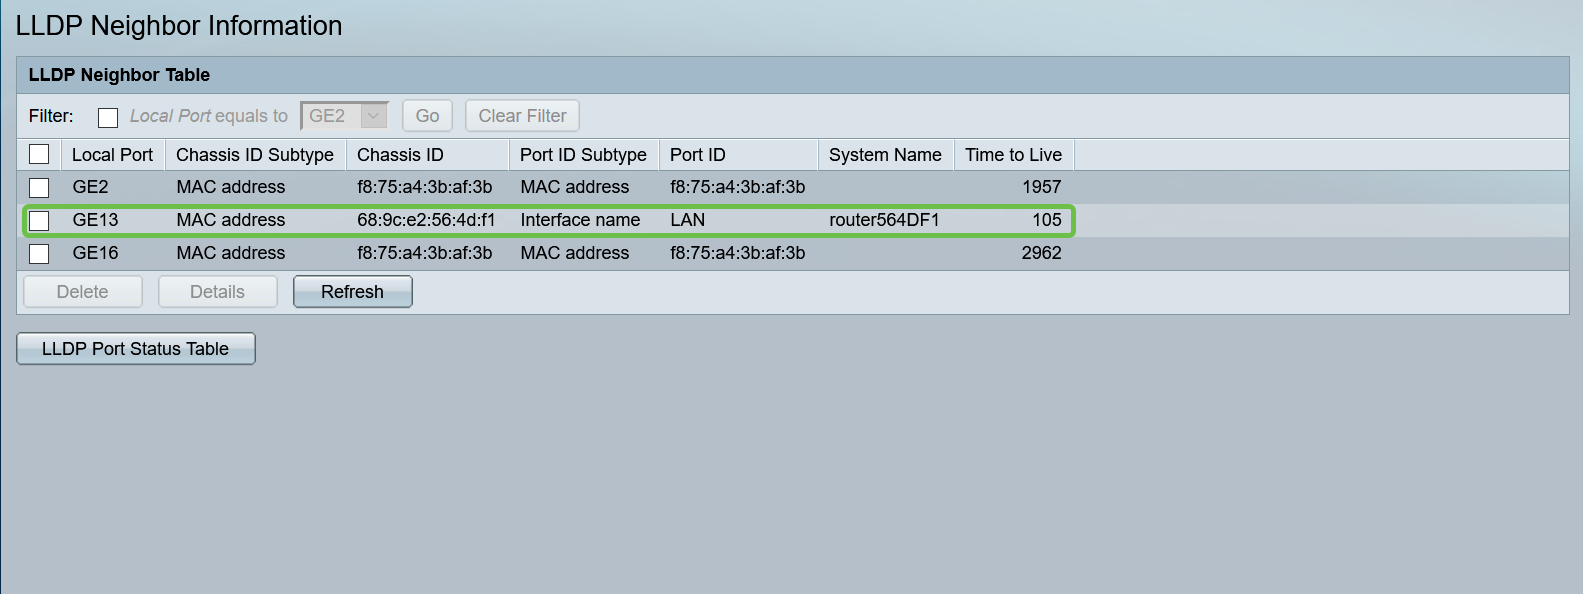
Navigate to Administration > Discovery LLDP neighbor > LLDP Neighbor Information.
Step 3
Check devices that may or may not be Cisco devices connected to your switch. Verify they are the correct devices and that the IP addresses are correct.
Step 4
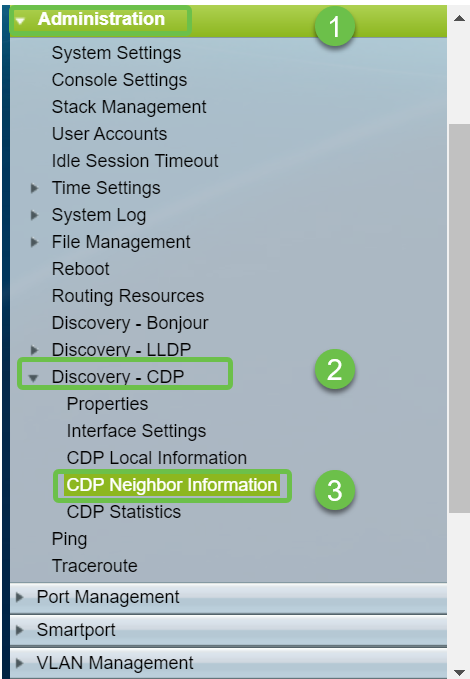
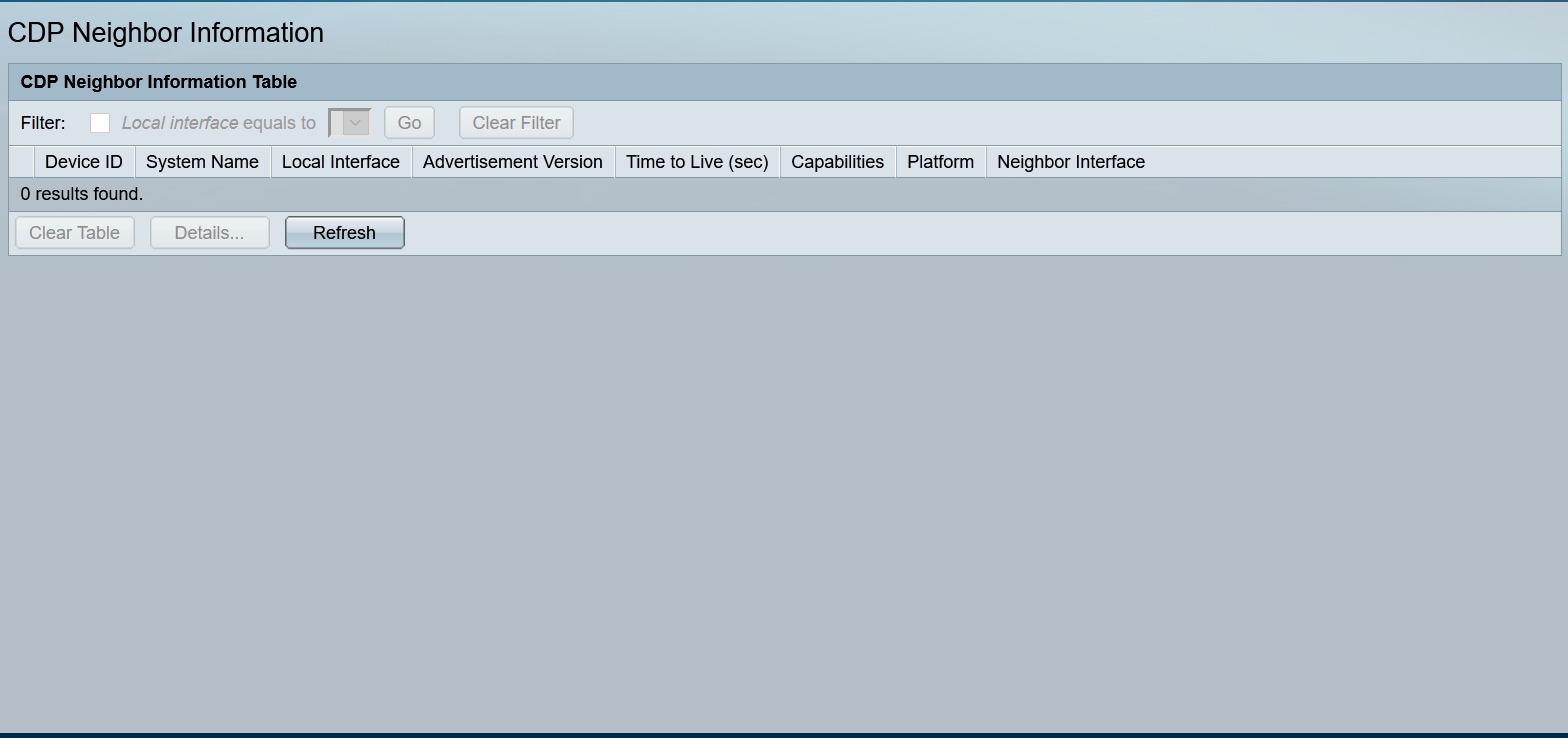
Go to Administration > Discovery CDP > CDP Neighbor Information.
Step 5
Check any available CDP information. If you are still having connectivity issues, follow the steps in the next section to disable the Smartport feature.
Check Port Security
Step 1
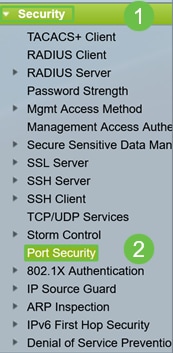
Navigate to Security > Port Security.
Step 2
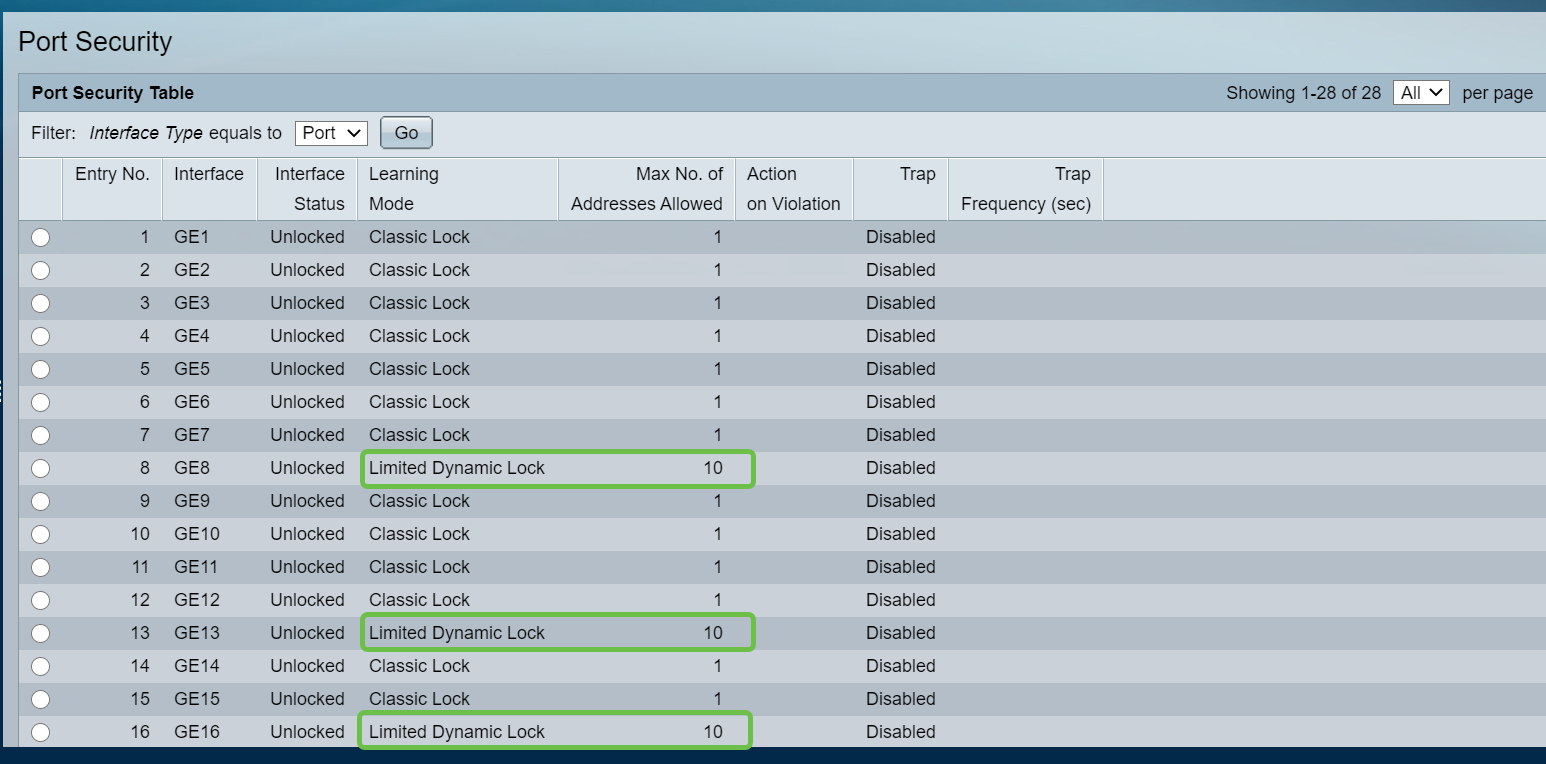
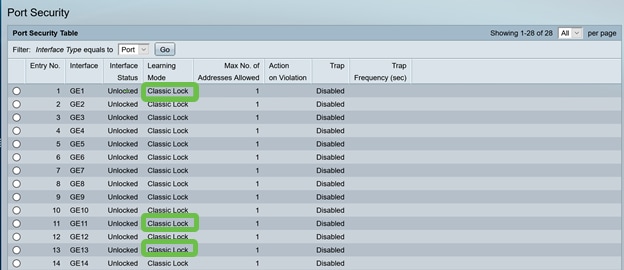
On the Port Security page, check for any ports that are not on Classic Lock. Classic Lock is the default for each port. Any port that is not on Classic Lock has a limit on the number of devices on that port, which can cause disconnections. If you did not configure the setting, you can follow the steps to disable Smartports to fix this issue.
Step 3
Navigate back to Port Security and verify all ports are back to Classic Lock and verify connectivity with devices in your network.
If you experienced any disconnections or Internet problems, verify connectivity has returned. If this did not fix your port issues, you may want to disable the Smartport feature as detailed in the next section of this article.
How do I disable the Smartport feature?
Step 1
Choose Smartport > Properties.
Step 2
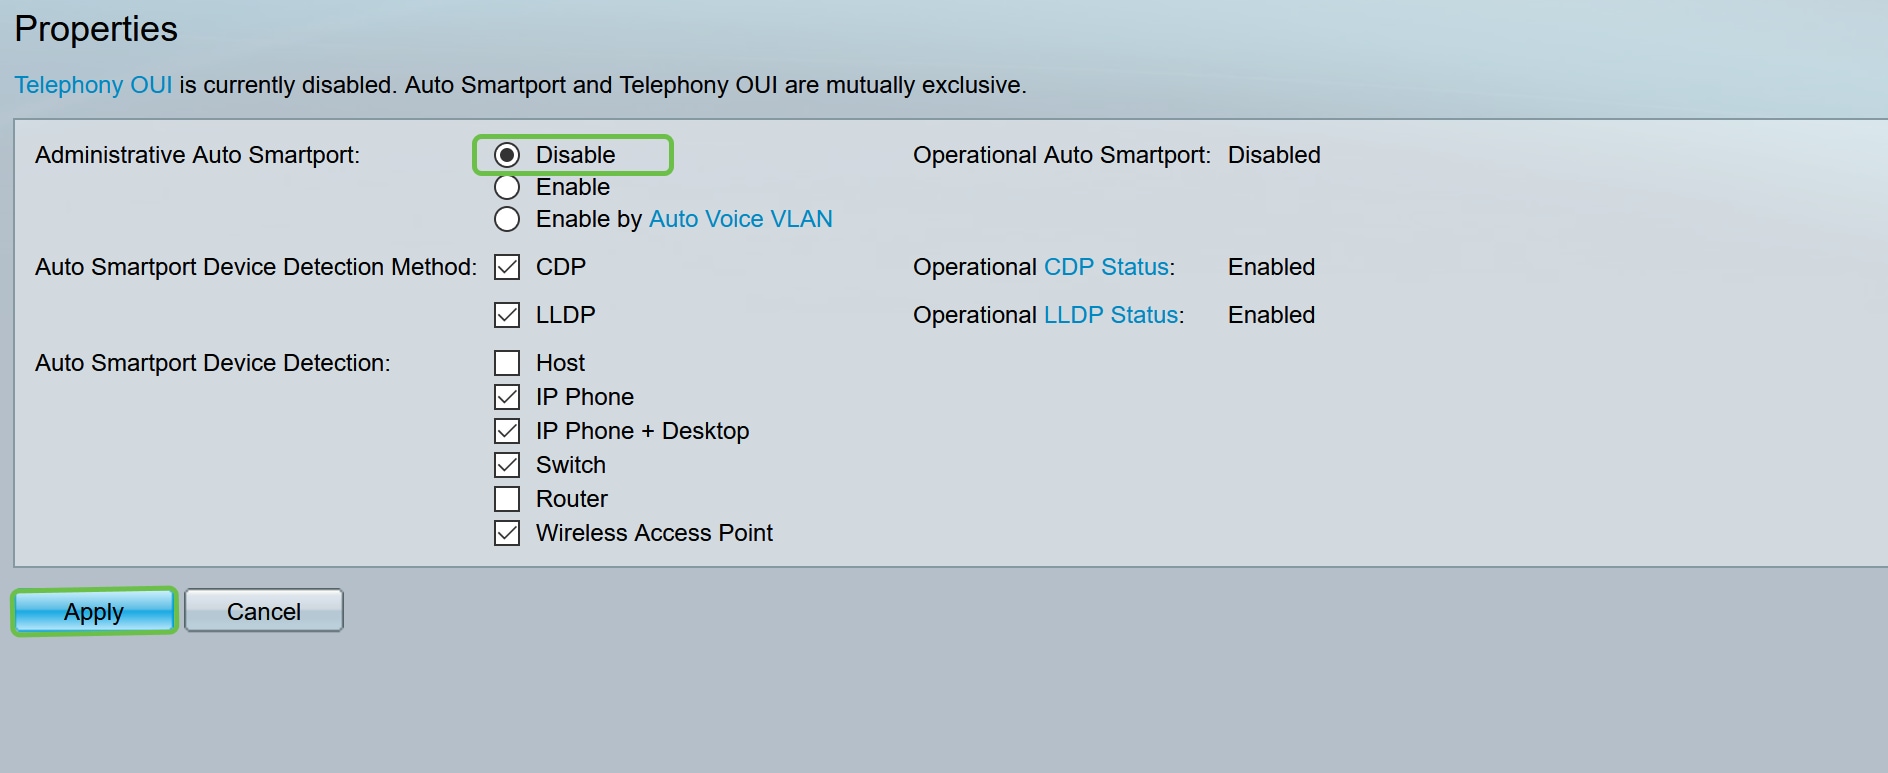
Select Disable next to Administrative Auto Smartport, to disable the Smartport feature globally on the switch. Click the Apply button.
This will disable the Smartport on all interfaces but will not affect manual VLAN configurations.
Conclusion:
Nice work, you were able to troubleshoot and disable the Smartport feature!