- Cisco StadiumVision Director Software Installation and Upgrade Guide
- Preface
- Getting Started Installing or Upgrading Cisco StadiumVision Director
- Installing Cisco StadiumVision Director for the First Time on a Platform 3 Server
- Upgrading a Cisco StadiumVision Director Platform 2 Server from Release 3.0 SP2 to Release 3.1
- Using the TUI Upgrade Utility to Upgrade the Cisco StadiumVision Software
- Upgrading the DMP Firmware
- Appendix A: Post-Upgrade Checklist
- Appendix B: Port Reference
- Appendix C: Installing Additional Hard Drives in the Platform 2 Server to Prepare for Upgrade to Release 3.1
- Appendix D: CIMC Configuration and Firmware Upgrade Guidelines on the Cisco UCS C220 Server
- Contents
- Best Practices
- Prerequisites
- Upgrade Tasks
- Verifying the Upgrade
- Validating the Content Migration
- Cleaning Up Legacy Video Files After Migration
- What to Do Next
Upgrading a Cisco StadiumVision Director Platform 2 Server from Release 3.0 SP2 to Release 3.1 SP1 and SP2
First Published: March 6, 2013
This module describes how to upgrade a Cisco StadiumVision Director Platform 2 server previously installed with a minimum of Release 3.0.0-433 Service Pack 2 to Cisco StadiumVision Director Release 3.1.0-787 (SP1), which contains important bug fixes. After upgrade to Release 3.1.0-787, an upgrade to Release 3.1.0-797 (SP2) is required to install the minimum supported software release for Cisco StadiumVision Director.

Best Practices
Before you begin upgrading a Cisco StadiumVision Director server from Release 3.0.0-433 Service Pack 2 to Release 3.1.0-787 Service Pack 1 software, consider the following best practices:
- Choose an appropriate down time to perform the upgrade on the Cisco StadiumVision Director server when there is adequate time to complete and verify the upgrade before any scheduled events and to allow time to resolve any unexpected issues that might occur.

Note If your site deploys a large amount of video content, the content migration process might take up to several hours to complete.
- Refer to the Release Notes for Cisco StadiumVision Director Release 3.1 for the latest information about hardware and software requirements, changes, important notes, and caveats for your software release.
- Pay particular attention to the required hardware and software versions for other devices supporting your Cisco StadiumVision solution and be sure that you plan to upgrade those devices as needed. For example, generally only certain firmware versions are supported for the DMP hardware, or a new firmware version is needed to provide additional functionality supported by the Cisco StadiumVision Director software.
- To streamline the content migration process and to be sure that all relevant video content is migrated to the unified Content Management System (CMS) in Cisco StadiumVision Director Release 3.1, perform the following tasks:
Caution Be sure that you independently back up any video content located in the Video Distribution Manager (VDM). Cisco StadiumVision Director does not back up VDM content as part of the backup process.
–![]() Check scripts for any video content with 0 bytes. If this video content is still used, re-import the video using VDM and confirm the content.
Check scripts for any video content with 0 bytes. If this video content is still used, re-import the video using VDM and confirm the content.
–![]() Additionally, identify any video content that is not currently in use but that you still want to retain. Either upload and activate that content in VDM prior to upgrade, or be prepared to independently import the video content post-upgrade to Release 3.1.
Additionally, identify any video content that is not currently in use but that you still want to retain. Either upload and activate that content in VDM prior to upgrade, or be prepared to independently import the video content post-upgrade to Release 3.1.
–![]() From the Control Panel Content interface, look for any external content that is no longer used and delete it. This will eliminate a potentially lengthy process of importing a video that is no longer in use.
From the Control Panel Content interface, look for any external content that is no longer used and delete it. This will eliminate a potentially lengthy process of importing a video that is no longer in use.
Note When you migrate content from Release 3.0 to Release 3.1 after the upgrade process, 0-byte files are ignored. After you have fully verified the content migration, there are steps that can be taken do VDM file cleanup on the Cisco StadiumVision Director server and DMPs.
- Perform a backup and restore of the primary and secondary servers, and then promote the secondary server:
–![]() Perform a backup of the currently active primary server.
Perform a backup of the currently active primary server.
–![]() Restore the backup data onto the standby secondary server. If using VDM, then you will need to reimport and activate the video files.
Restore the backup data onto the standby secondary server. If using VDM, then you will need to reimport and activate the video files.
Note The config service must be running on the secondary server to do the restore.
For more information about performing a backup and restore on a Cisco StadiumVision Server running release 3.0, see the Backing Up and Restoring Cisco StadiumVision Director Servers, Release 3.0 guide.
–![]() Promote the secondary server to active.
Promote the secondary server to active.
For more information about promoting a secondary server to active, see the Cisco StadiumVision Director Server Redundancy, Release 3.0 guide.
- Access the promoted secondary server to perform the upgrade.
- Due to the difficulty in recovering from an interrupted installation process if the Linux shell is accidentally closed or the network drops, it is highly recommended that you use a server console connection method that does not pose a risk to the success of upgrade completion if the session breaks during upgrade.
This can be done using a monitor and keyboard that are directly connected to the Cisco StadiumVision Director server to log into the TUI, or through a remote connection with access to the Cisco StadiumVision Director network and using the CIMC interface to log into the TUI.
Prerequisites
Before the Platform 2 server upgrade, be sure that the following requirements are met:
- Be sure that the Cisco StadiumVision Director Platform 2 server meets the following minimum requirements:
–![]() Two additional 300 GB hard drives are installed for a total of four required drives for Release 3.1. Contact your Cisco Systems sales representative for more information about how to obtain additional hard drives.
Two additional 300 GB hard drives are installed for a total of four required drives for Release 3.1. Contact your Cisco Systems sales representative for more information about how to obtain additional hard drives.
For information about how to install hard drives to support Release 3.1, see Appendix C: Installing Additional Hard Drives in the Platform 2 Server to Prepare for Upgrade to Release 3.1.
–![]() The software is at the minimum release level of Release 3.0.0-433 Service Pack 2. If the server is not at the minimum release level, see the
“Using the TUI Upgrade Utility to Update an Existing Release 3.0 Server”
module of the
Cisco StadiumVision Director Software Installation and Upgrade Guide, Release 3.0
.
The software is at the minimum release level of Release 3.0.0-433 Service Pack 2. If the server is not at the minimum release level, see the
“Using the TUI Upgrade Utility to Update an Existing Release 3.0 Server”
module of the
Cisco StadiumVision Director Software Installation and Upgrade Guide, Release 3.0
.
–![]() The Platform 2 server Unified Computing System (UCS) Server Firmware is at version 1.4(2) to avoid problems powering off the server hardware.
The Platform 2 server Unified Computing System (UCS) Server Firmware is at version 1.4(2) to avoid problems powering off the server hardware.
For more information about how to verify and upgrade, see the “ Upgrading the CIMC and BIOS Firmware on a Cisco StadiumVision Director Platform 2 Server ” module f the Cisco StadiumVision Director Software Installation and Upgrade Guide, Release 3.0 .
For more information about DMP hardware and software requirements, see the Release Notes for Cisco StadiumVision Director Release 3.1 .
- To access the Cisco Integrated Management Controller (CIMC) for the TUI software upgrade, the following requirements are met:
–![]() Your computer meets the minimum browser and Flash player requirements for Cisco StadiumVision Director, and also has Java 1.6 or later installed.
Your computer meets the minimum browser and Flash player requirements for Cisco StadiumVision Director, and also has Java 1.6 or later installed.
–![]() You have a laptop connection with access to the Cisco StadiumVision Director server network.
You have a laptop connection with access to the Cisco StadiumVision Director server network.
–![]() You have the IP address of the CIMC interface on the Cisco StadiumVision Director server.
You have the IP address of the CIMC interface on the Cisco StadiumVision Director server.
–![]() You have the CIMC interface login credential. The default is
admin
/
password
.
You have the CIMC interface login credential. The default is
admin
/
password
.
Note You also can use a monitor and keyboard that are directly connected to the Cisco StadiumVision Director server to log into the TUI.
Upgrade Tasks
To upgrade your Cisco StadiumVision Director server from Release 3.0 to 3.1, complete the following tasks:
- Running Proof of Play Reports (as required)
- Upgrading the Software From Release 3.0 SP2 to Release 3.1 (required)
- Extending the Original RAID Volume to Create a Single Group (as required)
- Migrating Content to the Release 3.1 CMS (required)
- Upgrading the DMP Firmware (as required)
- Staging the Flash Template (required)
- Deploying Global DMP Settings (required)
Running Proof of Play Reports
Before you perform the upgrade from Release 3.0 to 3.1, be sure that you have processed any outstanding Proof of Play reports. If you do not run these reports before the upgrade, the data will be lost.
For more information, see the Cisco StadiumVision Proof of Play module.
Upgrading the Software From Release 3.0 SP2 to Release 3.1
The upgrade from Cisco StadiumVision Director Release 3.0 to Release 3.1 is performed as an ISO upgrade using the Text Utility Interface (TUI).
For more information about how to perform the ISO upgrade, see the Using the TUI Upgrade Utility to Upgrade the Cisco StadiumVision Software.
Note Return to this module after the TUI upgrade to complete the content migration, upgrade verification, and content validation tasks specific to the 3.0-to-3.1 environment.
Extending the Original RAID Volume to Create a Single Group
Note This task is only required if you had to install additional hard drives to meet the minimum hard drive requirement on the Platform 2 server for Cisco StadiumVision Director Release 3.1 as described in the “Prerequisites” section.
For information about running this task, see the “Extending the Original RAID Volume to Create a Single Group” section. Return to this module after extending the RAID volume to complete migration of content to the Release 3.1 CMS.
Migrating Content to the Release 3.1 CMS
Note The tasks in this section are performed after you upgrade the software to Release 3.1.
This section includes the following topics:
- Preparing the Release 3.0 Video Content for Migration (required)
- Running the Content Migration (required)
Preparing the Release 3.0 Video Content for Migration
The Migration Preparation Wizard analyzes the release 3.0 content for the following problems:
- Missing external video content —This could be because the video no longer exists in VDM, or both the name and URL were changed in the Control Panel. This list is informational only so that you can correct the problem, which might require recreating/updating the playlists that reference the content after uploading the missing video files. Missing video files will also show up in the system without thumbnails.
- Detection of a rename of external video content —This is due to a mismatch found between the name of the external video content file and the name of the video content derived from the reference URL, which will prevent the video from being migrated.
To avoid having to create new content and update all referenced playlists, you should accept the rename to revert the file name to match the URL. You can replace the content after migration.
- Detection of duplicate references to the same video content —This will prevent the content from being migrated. This is likely caused by uploading a new version of a video file of the same name and activating it in VDM.
To allow the content to be migrated, accept merging of the duplicate content. All playlist references are updated to use the same content, and the duplicate entries are deleted. If not merged, duplicate content will appear in the system without thumbnails.
To migrate release 3.0 video content to the release 3.1 CMS, complete the following steps:
Step 1![]() Log into the TUI by doing the following:
Log into the TUI by doing the following:
a.![]() Use a directly connected console, or use an SSH client from a laptop computer that is connected to the Cisco StadiumVision Server network to run a secure login to the secondary Cisco StadiumVision Director server using the IP address for your server.
Use a directly connected console, or use an SSH client from a laptop computer that is connected to the Cisco StadiumVision Server network to run a secure login to the secondary Cisco StadiumVision Director server using the IP address for your server.
b.![]() When the login prompt appears, enter the
installer
userid followed by the installer password at the password prompt.
When the login prompt appears, enter the
installer
userid followed by the installer password at the password prompt.
Step 2![]() From the Main Menu, go to the
StadiumVision Server Administration
>
Content migration
menu.
From the Main Menu, go to the
StadiumVision Server Administration
>
Content migration
menu.
Step 3![]() Select
Migration Preparation Wizard
.
Select
Migration Preparation Wizard
.
The migration preparation process starts.
Step 4![]() If no exceptions for the content to be migrated are found, the following message is displayed:
If no exceptions for the content to be migrated are found, the following message is displayed:
Skip Step 5 and go on to the “Running the Content Migration” section.
Step 5![]() If any video content exceptions are found, one or more of the following screens are displayed:
If any video content exceptions are found, one or more of the following screens are displayed:
a.![]() If missing video content is found, an informational screen is displayed with the list of files (Figure 1). After noting the content, press
Enter
to continue with the migration.
If missing video content is found, an informational screen is displayed with the list of files (Figure 1). After noting the content, press
Enter
to continue with the migration.
Figure 1 Missing Video Content

b.![]() If a rename of video content is found, a screen appears listing that content (Figure 2). To migrate the content, the system must rename the video file to match the name in the reference URL. Type
y
to rename the content so that it can be migrated.
If a rename of video content is found, a screen appears listing that content (Figure 2). To migrate the content, the system must rename the video file to match the name in the reference URL. Type
y
to rename the content so that it can be migrated.
Figure 2 Renamed Video Content

After you type y, the screen returns the confirmation message “Done” when complete. Press Enter to continue.
c.![]() If duplicate content references are found, a screen appears listing that content (Figure 3). Type
y
to merge the content and continue with the migration.
If duplicate content references are found, a screen appears listing that content (Figure 3). Type
y
to merge the content and continue with the migration.
Figure 3 Duplicate Video Content

Messages are displayed on the screen as the content is processed, and the message “Completed merging the duplicate content” is displayed. Press Enter to continue.
d.![]() After any exception screens are processed, you return to the Content migration menu. Go on to the “Running the Content Migration” section.
After any exception screens are processed, you return to the Content migration menu. Go on to the “Running the Content Migration” section.
Running the Content Migration
Caution If your site deploys a large amount of video content, the content migration process might take up to several hours to complete. During this time do not restart any services or reboot the server.
To run the content migration, complete the following steps:
Step 1![]() From the Content migration menu, select
Run migration script
.
From the Content migration menu, select
Run migration script
.
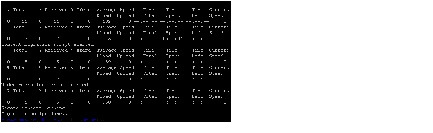
Observe the processing of the migration script and look for the “Migration script done” message (Figure 4).
Figure 4 Content Migration Start
Step 2![]() Press any key to return to the Content Migration menu.
Press any key to return to the Content Migration menu.
Step 3![]() Return to the Main Menu and exit the TUI.
Return to the Main Menu and exit the TUI.
Upgrading the DMP Firmware
Cisco StadiumVision Director supports DMP-4310G Version 5.3.4. from Release 3.0 for backward compatibility, as well as the updated DMP firmware version 5.4.
For more information about how to perform the upgrade, see the Upgrading the DMP Firmware.
Staging the Flash Template
To be sure that any changes that might have been made to the Cisco StadiumVision Director Flash Template (.swf file) are deployed to the DMPs, complete the following steps:
Step 1![]() Go to the Management Dashboard.
Go to the Management Dashboard.
Step 2![]() From the DMP and TV Controls dashboard drawer, navigate to and select the following command:
From the DMP and TV Controls dashboard drawer, navigate to and select the following command:
DMP and TV Controls
>
DMP Install
>
Stage Template
.
Step 3![]() Select all of the DMP devices where the command should be applied.
Select all of the DMP devices where the command should be applied.
Step 4![]() Click the play button to run the command on the selected devices.
Click the play button to run the command on the selected devices.
Deploying Global DMP Settings
To apply the global MIB variable settings to all DMPs, complete the following steps:
Step 1![]() Go to the Management Dashboard.
Go to the Management Dashboard.
Step 2![]() From the DMP and TV Controls dashboard drawer, navigate to and select the following command:
From the DMP and TV Controls dashboard drawer, navigate to and select the following command:
DMP and TV Controls
>
Global
>
Global DMP Settings
.
Step 3![]() Select all of the DMP devices where the command should be applied.
Select all of the DMP devices where the command should be applied.
Step 4![]() Click the play button to run the command on the selected devices.
Click the play button to run the command on the selected devices.
Verifying the Upgrade
To verify the upgrade, complete the following tasks:
Step 1![]() Complete the verification tasks as described in the Using the TUI Upgrade Utility to Upgrade the Cisco StadiumVision Software.
Complete the verification tasks as described in the Using the TUI Upgrade Utility to Upgrade the Cisco StadiumVision Software.
Step 2![]() Use the Appendix A: Post-Upgrade Checklist to be sure that you have completed the required verification steps.
Use the Appendix A: Post-Upgrade Checklist to be sure that you have completed the required verification steps.
Validating the Content Migration
Note This step is included as part of the Appendix A: Post-Upgrade Checklist.
To validate the content migration, complete the following steps:
Step 1![]() Log into Cisco StadiumVision Director as an administrator.
Log into Cisco StadiumVision Director as an administrator.
Step 2![]() Go to
Control Panel
>
Content
.
Go to
Control Panel
>
Content
.
- If no content is missing, go on to Step 4.
- If you find missing content (empty icons or content without icons), do the following:
–![]() Go to the Management Dashboard and verify that the CMS server is running. If the CMS is not running, restart the CMS service and re-verify the content:
Go to the Management Dashboard and verify that the CMS server is running. If the CMS is not running, restart the CMS service and re-verify the content:
Log into the TUI and go to Main Menu > Services Control > Content Management System (CMS) > Start Service .
–![]() If the missing content is not resolved, restart the Content Migration script and re-verify the content:
If the missing content is not resolved, restart the Content Migration script and re-verify the content:
Log into the TUI and go to Main Menu > StadiumVision Server Administration > Content Migration > Run migration script .
Step 4![]() Go to
Control Panel
>
Control
and stage content for all scripts.
Go to
Control Panel
>
Control
and stage content for all scripts.
Note If staging fails on the DMP due to lack of storage space run the “CleanAllVDMVideoFilesTask” from the Management Dashboard. This task automatically removes VDM video files from all active DMPs. For more information, see the “Cleaning Up Legacy Video Files After Migration” section.
Cleaning Up Legacy Video Files After Migration
Caution Perform video file clean up only after you have validated the success of your video file migration and scripts. If you clean up files before you run the content preparation wizard and migration, you will get a long list of missing files and invalidate the content migration.
This section describes how to clean up legacy VDM video files from the Cisco StadiumVision Director server and from the DMP.
Removing Legacy Video Files From the Cisco StadiumVision Director Server
To remove legacy video files from the Cisco StadiumVision Director server after migration, complete the following steps:
Step 1![]() Log into the TUI by doing the following:
Log into the TUI by doing the following:
a.![]() Use a directly connected console, or use an SSH client from a laptop computer that is connected to the Cisco StadiumVision Server network to run a secure login to the primary Cisco StadiumVision Director server using the IP address for your server.
Use a directly connected console, or use an SSH client from a laptop computer that is connected to the Cisco StadiumVision Server network to run a secure login to the primary Cisco StadiumVision Director server using the IP address for your server.
b.![]() When the login prompt appears, enter the
installer
userid followed by the installer password at the password prompt.
When the login prompt appears, enter the
installer
userid followed by the installer password at the password prompt.
Step 2![]() From the Main Menu, go to the
StadiumVision Server Administration
>
Content migration
menu.
From the Main Menu, go to the
StadiumVision Server Administration
>
Content migration
menu.

Tip To navigate through the TUI menus you must type the character that corresponds to the menu area where you want to go (a, b, c, and so on) and press Enter.
To return to other menus, you must back out of the hierarchy of menus using one of the indicated keys to return you to prior menus.
Step 3![]() Select
Remove legacy (VDM) video
files.
Select
Remove legacy (VDM) video
files.
Step 4![]() At the confirmation prompt, press
Y
to continue.
At the confirmation prompt, press
Y
to continue.
Step 5![]() Press any key to return to the Content Migration menu.
Press any key to return to the Content Migration menu.
Step 6![]() Return to the Main Menu and exit the TUI.
Return to the Main Menu and exit the TUI.
Removing Legacy Video Files From the DMP
Note If you are incrementally adding DMPs to the Release 3.1 system that were previously operating with earlier releases of Cisco StadiumVision Director, then you will need to re-run the CleanAllVDMVideoFilesTask. This task automatically removes VDM video files from all active DMPs.
To remove legacy video files from the DMP after migration, complete the following steps:
Step 1![]() Log into Cisco StadiumVision Director as an administrator.
Log into Cisco StadiumVision Director as an administrator.
Step 2![]() Go to the
Management Dashboard
.
Go to the
Management Dashboard
.
Step 3![]() Go to
Tools
>
Advanced
>
Run a Task
.
Go to
Tools
>
Advanced
>
Run a Task
.
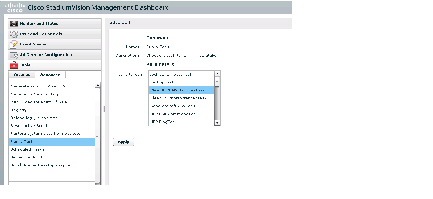
Step 4![]() Select the
CleanAllVDMVideoFilesTask
(Figure 5).
Select the
CleanAllVDMVideoFilesTask
(Figure 5).
Figure 5 CleanAllVDMVideoFilesTask in the Management Dashboard
Legacy VDM video files are automatically removed from all active DMPs.
What to Do Next
Caution Due to important bug fixes, Cisco StadiumVision Director Release 3.1.0-797 (SP2) is the minimum supported production software release.
After you have completed your upgrade to Release 3.1.0-787 (SP1), install the upgrade to Release 3.1.0-797 (SP2) using the instructions found in the Using the TUI Upgrade Utility to Upgrade the Cisco StadiumVision Software.
 Feedback