Perform System Upgrade and Install Feature Packages

The system upgrade and package installation processes are executed using install commands on the router. The processes involve adding and activating the iso images (.iso), feature packages (.rpm), and software maintenance upgrade files (.smu) on the router. These files are accessed from a network server and then activated on the router. If the installed package or SMU causes any issue on the router, it can be uninstalled.

The topics covered in this chapter are:

Upgrading the System

Upgrading the system is the process of installing a new version of the Cisco IOS XR operating system on the router. The router comes pre-installed with the Cisco IOS XR image. However, you can install the new version in order to keep router features up to date. The system upgrade operation is performed from the XR LXC. However, during system upgrade, the operating systems that run both on the XR LXC and the System Admin LXC get upgraded.

The 1G interface flaps twice instead of once in the Modular Port Adapter (MPA) NC55-MPA-12T-S after you reload any of these NCS 55A2 Fixed Chassis - NCS-55A2-MOD-SL, NCS-55A2-MOD-HD-S, NCS-55A2-MOD-HX-S, or NCS-55A2-MOD-SE-S.


Note

If an interface on a router does not have a configuration and is brought up by performing no-shut operation, then upon router reload, the interface state changes to admin-shutdown automatically.

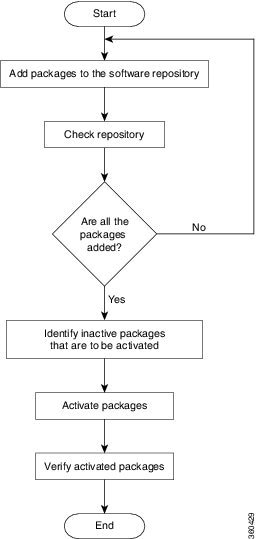
System upgrade is done by installing a base package–Cisco IOS XR Unicast Routing Core Bundle. The file name for this bundle is ncs5k-mini-x.iso. Install this ISO image using install commands. For more information about the install process, see Workflow for Install Process.


Caution

Do not perform any install operations when the router is reloading.

Do not reload the router during an upgrade operation.


For more information on upgrading the system and the RPMs, see Manage Automatic Dependency chapter.

Upgrading Features

Upgrading features is the process of deploying new features and software patches on the router. Feature upgrade is done by installing package files, termed simply, packages. Software patch installation is done by installing Software Maintenance Upgrade (SMU) files.

Installing a package on the router installs specific features that are part of that package. Cisco IOS XR software is divided into various software packages; this enables you to select the features to run on your router. Each package contains components that perform a specific set of router functions, such as routing, security, and so on.

For example, the components of the routing package are split into individual RPMs, such as BGP and OSPF. BGP is a mandatory RPM which is a part of the base software version and hence cannot be removed. Optional RPMs such as OSPF can be added and removed as required.

The naming convention of the package is <platform>-<pkg>-<pkg version>-<release version>.<architecture>.rpm. Standard packages are:

Package

Requirement

Example

BGP

Mandatory

ncs5k-bgp-1.0.0.0-<release-number>.x86_64.rpm

NCS5K RM

Mandatory

ncs5k-rm-1.0.0.0-<release-number>.x86_64.rpm

NCS 5K Forwarding

Mandatory

ncs5k-fwding-1.0.0.0-<release-number>.x86_64.rpm

ios-xr CE

Mandatory

ncs5k-iosxr-ce-1.0.0.0-<release-number>.x86_64.rpm

iosxr-fwding

Mandatory

ncs5k-iosxr-fwding-1.0.0.0-<release-number>.x86_64.rpm

iosxr-infra

Mandatory

ncs5k-iosxr-infra-1.0.0.0-<release-number>.x86_64.rpm

iosxr-infra-test

Optional

ncs5k-infra-test-1.0.0.0-<release-number>.x86_64.rpm

iosxr-mgbl

Optional

ncs5k-iosxr-mgbl-1.0.0.0-<release-number>.x86_64.rpm

iosxr-mpls

Optional

ncs5k-iosxr-mpls-1.0.0.0-<release-number>.x86_64.rpm

iosxr-os

Mandatory

ncs5k-iosxr-os-1.0.0.0-<release-number>.x86_64.rpm

iosxr-routing

Mandatory

ncs5k-iosxr-routing-1.0.0.0-<release-number>.x86_64.rpm

iosxr-security

Optional

ncs5k-k9sec-1.0.0.0-<release-number>.x86_64.rpm

os-support

Mandatory

ncs5k-os-support-1.0.0.0-<release-number>.x86_64.rpm

base

Mandatory

ncs5k-base-1.0.0.0-<release-number>.x86_64.rpm

mcast

Optional

ncs5k-mcast-1.0.0.0-<release-number>.x86_64.rpm

Package and SMU installation is performed using install commands. For more information about the install process, see Install Packages.

There are separate packages and SMUs for the XR LXC and the System Admin LXC. They can be identified by their filenames. The XR LXC packages or SMUs are activated from the XR LXC, whereas the System Admin LXC packages or SMUs are activated from the System Admin LXC.

For more information on upgrading the system and the RPMs, see Cisco IOS XR Flexible Packaging Configuration Guide.

Workflow for Install Process

The workflow for installation and uninstallation processes is depicted in this flowchart.

For installing a package, see Install Packages. For uninstalling a package, see Uninstall Packages.

Install Packages

Complete this task to upgrade the system or install a patch. The system upgrade is done using an ISO image file, while the patch installation is done using packages and SMUs. This task is also used to install .rpm files. The .rpm file contains multiple packages and SMUs that are merged into a single file. The packaging format defines one RPM per component, without dependency on the card type.

Note

The System Admin package and XR package can be executed using install commands in the System Admin EXEC mode and XR EXEC mode. All install commands are applicable in both these modes.


The workflow for installing a package is shown in this flowchart.

Figure 1. Installing Packages Workflow

Add packages workflow

Before you begin

  • Configure and connect to the management port. The installable file is accessed through the management port. For details about configuring the management port, see Configure the Management Port.

  • Copy the package to be installed either on the router's hard disk or on a network server to which the router has access.

SUMMARY STEPS

  1. Execute one of these:
    • install add source <tftp transfer protocol>/package_path/ filename1 filename2 ...
    • install add source <ftp or sftp transfer protocol>//user@server:/package_path/ filename1 filename2 ...
  2. show install request
  3. show install repository
  4. show install inactive
  5. Execute one of these:
    • install activate package_name
    • install activate id operation_id
  6. show install active
  7. install commit

DETAILED STEPS


Step 1

Execute one of these:

  • install add source <tftp transfer protocol>/package_path/ filename1 filename2 ...
  • install add source <ftp or sftp transfer protocol>//user@server:/package_path/ filename1 filename2 ...

Example:

or
RP/0/RP0/CPU0:router#install add source sftp://root@8.33.5.15:/auto/ncs/package/ 
ncs5k-mcast-1.0.0.0-<release-number>.x86_64.rpm ncs5k-iosxr-mpls-1.0.0.0-<release-number>.x86_64.rpm
or
RP/0/RP0/CPU0:router#install add source sftp://root@8.33.5.15:/auto/ncs/package/ ncs5k-mcast-1.0.0.0-<release-number>.x86_64.rpm ncs5k-iosxr-mpls-1.0.0.0-<release-number>.x86_64.rpm
Note 

A space must be provided between the package_path and filename.

The software files are unpacked from the package and added to the software repository. This operation might take time depending on the size of the files being added. The operation is performed in asynchronous mode. The install add command runs in the background, and the EXEC prompt is returned as soon as possible.

Note 

The repositories for the XR LXC and the System Admin LXC are different. The system automatically adds a routing package to the XR LXC repository and a system administration package to the System Admin LXC repository.

Step 2

show install request

Example:

RP/0/RP0/CPU0:router#show install request

(Optional) Displays the operation ID of the add operation and its status. The operation ID can be later used to execute the activate command.

Install operation 8 is still in progress

For system administration packages, the remaining steps must be performed from the System Admin EXEC mode. Use the admin command to enter the System Admin EXEC mode.

Step 3

show install repository

Example:

RP/0/RP0/CPU0:router#show install repository

Displays packages that are added to the repository. Packages are displayed only after the install add operation is complete.

Step 4

show install inactive

Example:

RP/0/RP0/CPU0:router#show install inactive

Displays inactive packages that are present in the repository. Only inactive packages can be activated.

Step 5

Execute one of these:

  • install activate package_name
  • install activate id operation_id

Example:

RP/0/RP0/CPU0:router#install activate ncs5k-mcast-1.0.0.0-<release-number>.x86_64.rpm ncs5k-iosxr-mpls-1.0.0.0-<release-number>.x86_64.rpm
or
RP/0/RP0/CPU0:router#install activate id 8

The operation_id is that of the install add operation. This command can also be run from System Admin mode. The package configurations are made active on the router. As a result, new features and software fixes take effect. This operation is performed in asynchronous mode. The install activate command runs in the background, and the EXEC prompt is returned.

If you use the operation ID, all packages that were added in the specified operation are activated together. For example, if 5 packages are added in operation 8, by executing install activate id 8 , all 5 packages are activated together. You do not have to activate the packages individually.

Activation does not happen instantaneously, but takes some time. Activation of some SMUs require a manual reloading of the router. When such SMUs are activated, a warning message is displayed to perform reload. The components of the SMU get activated only after the reload is complete. Perform router reload immediately after executing the install activate command. If the SMU has dependency on both XR LXC and System Admin LXC, perform the reload after activating the SMU in both LXCs so that they take effect simultaneously. To reload the router, use the hw-module location all reload command from the System Admin EXEC mode.

Step 6

show install active

Example:

RP/0/RP0/CPU0:router#show install active

Displays packages that are active.


RP/0/RP0/CPU0:skywarp-tb#show install active
Tue Dec 22 16:02:46.873 UTC
Node 0/RP0/CPU0 [RP]
  Boot Partition: xr_lv55
  Active Packages: 2
        ncs5k-xr-<release-number> version=<release-number> [Boot image]
        ncs5k-k9sec-1.0.0.0-<release-number>

From the result, verify that the same image and package versions are active on all RPs and LCs.

Step 7

install commit

Example:

RP/0/RP0/CPU0:router#install commit

Commits the XR newly active software. To commit both XR and System Admin software, use install commit system .


Installing Packages: Related Commands

Related Commands Purpose

show install log

Displays the log information for the install process; this can be used for troubleshooting in case of install failure.

show install package

Displays the details of the packages that have been added to the repository. Use this command to identify individual components of a package.

install prepare

Makes pre-activation checks on an inactive package, to prepare it for activation.

show install prepare

Displays the list of package that have been prepared and are ready for activation.

What to do next

  • After performing a system upgrade, upgrade FPD by using the upgrade hw-module location all fpd all command from the System Admin EXEC mode. The progress of FPD upgrade process can be monitored using the show hw-module fpd command in the System Admin EXEC mode. Reload the router after the FPD upgrade is completed.

  • Verify the installation using the install verify packages command.

  • Uninstall the packages or SMUs if their installation causes any issues on the router. See Uninstall Packages.


    Note

    ISO images cannot be uninstalled. However, you can perform a system downgrade by installing an older ISO version.


    Note

    If you are upgrading power supply modules for NC55-PWR-3KW-DC and NC55-PWR-3KW-2HV, ensure that you first upgrade SC IO FPGA by using upgrade hw-module location <SC0/SC1> fpd all command from Sysadmin prompt followed by the upgrade hw-module location pm-all fpd command, to upgrade FPD.

    Finally use hw-module location <SC0/SC1> reload command from Sysadmin prompt to reload the shelf controller.


Install Prepared Packages

A system upgrade or feature upgrade is performed by activating the ISO image file, packages, and SMUs. It is possible to prepare these installable files before activation. During the prepare phase, pre-activation checks are made and the components of the installable files are loaded on to the router setup. The prepare process runs in the background and the router is fully usable during this time. When the prepare phase is over, all the prepared files can be activated instantaneously. The advantages of preparing before activation are:

  • If the installable file is corrupted, the prepare process fails. This provides an early warning of the problem. If the corrupted file was activated directly, it might cause router malfunction.

  • Directly activating an ISO image for system upgrade takes considerable time during which the router is not usable. However, if the image is prepared before activation, not only does the prepare process run asynchronously, but when the prepared image is subsequently activated, the activation process too takes very less time. As a result, the router downtime is considerably reduced.

Complete this task to upgrade the system and install packages by making use of the prepare operation.

Note

Depending on whether you are installing a System Admin package or a XR package, execute the install commands in the System Admin EXEC mode or XR EXEC mode respectively. All install commands are applicable in both these modes. System Admin install operations can be done from XR mode.


Before you begin

  • If the installable file is corrupted, the prepare process fails. This provides an early warning of the problem. If the corrupted file was activated directly, it might cause router malfunction.

  • Directly activating an ISO image for system upgrade takes considerable time during which the router is not usable. However, if the image is prepared before activation, not only does the prepare process run asynchronously, but when the prepared image is subsequently activated, the activation process too takes very less time. As a result, the router downtime is considerably reduced.

SUMMARY STEPS

  1. Add the required ISO image and packages to the repository.
  2. show install repository
  3. Execute one of these:
    • install prepare package_name
    • install prepare id operation_id
  4. show install prepare
  5. install activate
  6. show install active
  7. install commit

DETAILED STEPS


Step 1

Add the required ISO image and packages to the repository.

For details, see Install Packages.
Step 2

show install repository

Example:

RP/0/RP0/CPU0:router#show install repository

Perform this step to verify that the required installable files are available in the repository. Packages are displayed only after the "install add" operation is complete.

Step 3

Execute one of these:

  • install prepare package_name
  • install prepare id operation_id

Example:

RP/0/RP0/CPU0:router#install prepare ncs5k-mcast-1.0.0.0-r60014I.x86_64.rpm
or
RP/0/RP0/CPU0:router#install prepare id 8

The prepare process takes place. This operation is performed in asynchronous mode. The install prepare command runs in the background, and the EXEC prompt is returned as soon as possible.

If you use the operation ID, all packages that were added in the specified operation are prepared together. For example, if 5 packages are added in operation 8, by executing install prepare id 8 , all 5 packages are prepared together. You do not have to prepare the packages individually.

Step 4

show install prepare

Example:

RP/0/RP0/CPU0:router#show install prepare

Displays packages that are prepared. From the result, verify that all the required packages have been prepared.

Step 5

install activate

Example:

RP/0/RP0/CPU0:router#install activate

All the packages that have been prepared are activated together to make the package configurations active on the router.

Note 
You should not specify any package name or operation ID in the CLI.

Activation of some SMUs require manual reload of the router. When such SMUs are activated, a warning message is displayed to perform reload. The components of the SMU get activated only after the reload is complete. Perform router reload immediately after the execution of the install activate command is completed.

Step 6

show install active

Example:

RP/0/RP0/CPU0:router#show install active

Displays packages that are active.


Node 0/RP0/CPU0 [RP]
  Boot Partition: xr_lv55
  Active Packages: 2
        ncs5k-xr-6.0.0.30I version=6.0.0.30I [Boot image]
        ncs5k-k9sec-1.0.0.0-r60030I

From the result, verify that on all RPs and LCs, the same image and package versions are active.

Step 7

install commit

Example:

RP/0/RP0/CPU0:router#install commit

Installing Packages: Related Commands

Related Commands Purpose

show install log

Displays the log information for the install process; this can be used for troubleshooting in case of install failure.

show install package

Displays the details of the packages that have been added to the repository. Use this command to identify individual components of a package.

install prepare clean

Clears the prepare operation and removes all the packages from the prepared state.

What to do next

  • After performing a system upgrade, upgrade FPD by using the upgrade hw-module location all fpd all command from the System Admin EXEC mode. The progress of FPD upgrade process can be monitored using the show hw-module fpd command in the System Admin EXEC mode. Reload the router after the FPD upgrade is completed.
  • Verify the installation using the install verify packages command.
  • Uninstall the packages or SMUs if their installation causes any issues on the router. See Uninstall Packages.

    Note

    ISO images cannot be uninstalled. However, you can perform a system downgrade by installing an older ISO version.


Uninstall Packages

Complete this task to uninstall a package. All router functionalities that are part of the uninstalled package are deactivated. Packages that are added in the XR LXC cannot be uninstalled from the System Admin LXC, and vice versa.


Note

Installed ISO images cannot be uninstalled. Also, kernel SMUs that install third party SMU on host, XR LXC and System Admin LXC, cannot be uninstalled. However, subsequent installation of ISO image or kernel SMU overwrites the existing installation.


The workflow for uninstalling a package is shown in this flowchart.

Figure 2. Uninstalling Packages Workflow


This task uninstalls XR LXC packages. If you need to uninstall System Admin packages, run the same commands from the System Admin EXEC mode.

SUMMARY STEPS

  1. show install active
  2. Execute one of these:
    • install deactivate package_name
    • install deactivate id operation_id
  3. show install inactive
  4. install remove package_name
  5. show install repository

DETAILED STEPS


Step 1

show install active

Example:

RP/0/RP0/CPU0:router#show install active

Displays active packages. Only active packages can be deactivated.


Node 0/RP0/CPU0 [RP]
  Boot Partition: xr_lv55
  Active Packages: 2
        ncs5k-xr-6.0.0.30I version=6.0.0.30I [Boot image]
        ncs5k-k9sec-1.0.0.0-r60030I

Step 2

Execute one of these:

  • install deactivate package_name
  • install deactivate id operation_id

Example:

RP/0/RP0/CPU0:router#install deactivate ncs5k-mcast-1.0.0.0-r60014I.x86_64.rpm ncs5k-iosxr-mpls-1.0.0.0-r60014I.x86_64.rpm
or
RP/0/RP0/CPU0:router#install deactivate id 8

The operation_id is the ID from install add operation. All features and software patches associated with the package are deactivated. You can specify multiple package names and deactivate them simultaneously.

If you use the operation ID, all packages that were added in the specified operation are deactivated together. You do not have to deactivate the packages individually. If System admin packages were added as a part of the install add operation (of the ID used in deactivate) then those packages will also be deactivated.

Step 3

show install inactive

Example:

RP/0/RP0/CPU0:router#show install inactive

The deactivated packages are now listed as inactive packages. Only inactive packages can be removed from the repository.

Step 4

install remove package_name

Example:

RP/0/RP0/CPU0:router#install remove ncs5k-mcast-1.0.0.0-r60014I.x86_64.rpm ncs5k-iosxr-mpls-1.0.0.0-r60014I.x86_64.rpm

The inactive packages are removed from the repository.

Use the install remove command with the id operation-id keyword and argument to remove all packages that were added for the specified operation ID.

Step 5

show install repository

Example:

RP/0/RP0/CPU0:router#show install repository

Displays packages available in the repository. The package that are removed are no longer displayed in the result.


What to do next

Install required packages. See Install Packages.