Auto Scale Solution for the ASA Virtual on Azure
Overview
The auto scale solution enables allocation of resources to match performance requirements and reduce costs. If the demand for resources increases, the system ensures that resources are allocated as required. If the demand for resources decreases, resources are deallocated to reduce costs.
The ASA virtual auto scale for Azure is a complete serverless implementation which makes use of serverless infrastructure provided by Azure (Logic App, Azure Functions, Load Balancers, Security Groups, Virtual Machine Scale Set, etc.).
Some of the key features of the ASA virtual auto scale for Azure implementation include:
-
Azure Resource Manager (ARM) template-based deployment.
-
Support for scaling metrics based on CPU.

Note
See Auto Scale Logic for more information.
-
Support for ASA virtual deployment and multi-availability zones.
-
Completely automated configuration automatically applied to scaled-out ASA virtual instances.
-
Support for Load Balancers and multi-availability zones.
-
Support for enabling and disabling the auto scale feature.
-
Cisco provides an auto scale for Azure deployment package to facilitate the deployment.
The ASA virtual auto scale solution on Azure supports two types of use cases configured using different topologies:
-
Auto scale using Sandwich Topology – The ASA virtual scale set is sandwiched between an Azure Internal load balancer (ILB) and an Azure External load balancer (ELB).
-
Auto scale with Azure Gateway load balancer (GWLB) – The Azure GWLB is integrated with Secure Firewall, public load balancer, and internal servers - to simplify deployment, management, and scaling of firewalls.
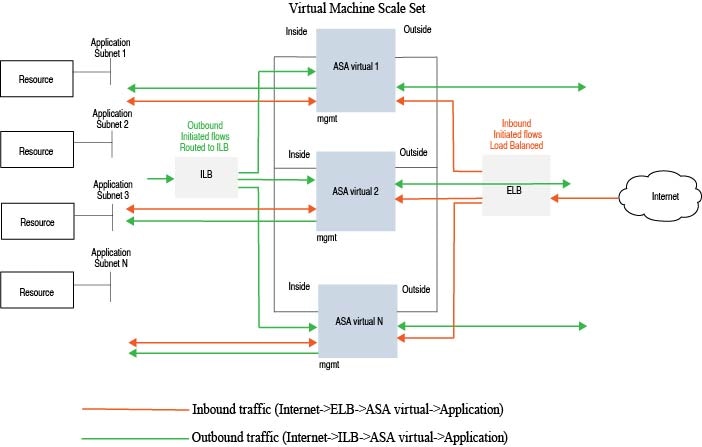
Auto Scale using Sandwich Topology Use Case
The ASA virtual auto scale for Azure is an automated horizontal scaling solution that positions an ASA virtual scale set sandwiched between an Azure Internal load balancer (ILB) and an Azure External load balancer (ELB).
-
The ELB distributes traffic from the Internet to ASA virtual instances in the scale set; the firewall then forwards traffic to application.
-
The ILB distributes outbound Internet traffic from an application to ASA virtual instances in the scale set; the firewall then forwards traffic to Internet.
-
A network packet will never pass through both (internal & external) load balancers in a single connection.
-
The number of ASA virtual instances in the scale set will be scaled and configured automatically based on load conditions.
Auto Scale with Azure Gateway Load Balancer Use Case
The Azure Gateway Load Balancer (GWLB) ensures that internet traffic to and from an Azure VM, such as an application server, is inspected by Secure Firewall without requiring any routing changes. This integration of the Azure GWLB with Secure Firewall simplifies deployment, management, and scaling of firewalls. This integration also reduces operational complexity and provides a single entry and exit point for traffic at the firewall. The applications and infrastructure can maintain visibility of source IP address, which is critical in some environments.
In the Azure GWLB Auto Scale use case, the ASA virtual uses only two interfaces: Management and one data interface.
Note |
|
Licensing
Both PAYG and BYOL are supported.
BYOL is supported.
Inbound Traffic Use Case and Topology
The following diagram displays the traffic flow for inbound traffic.

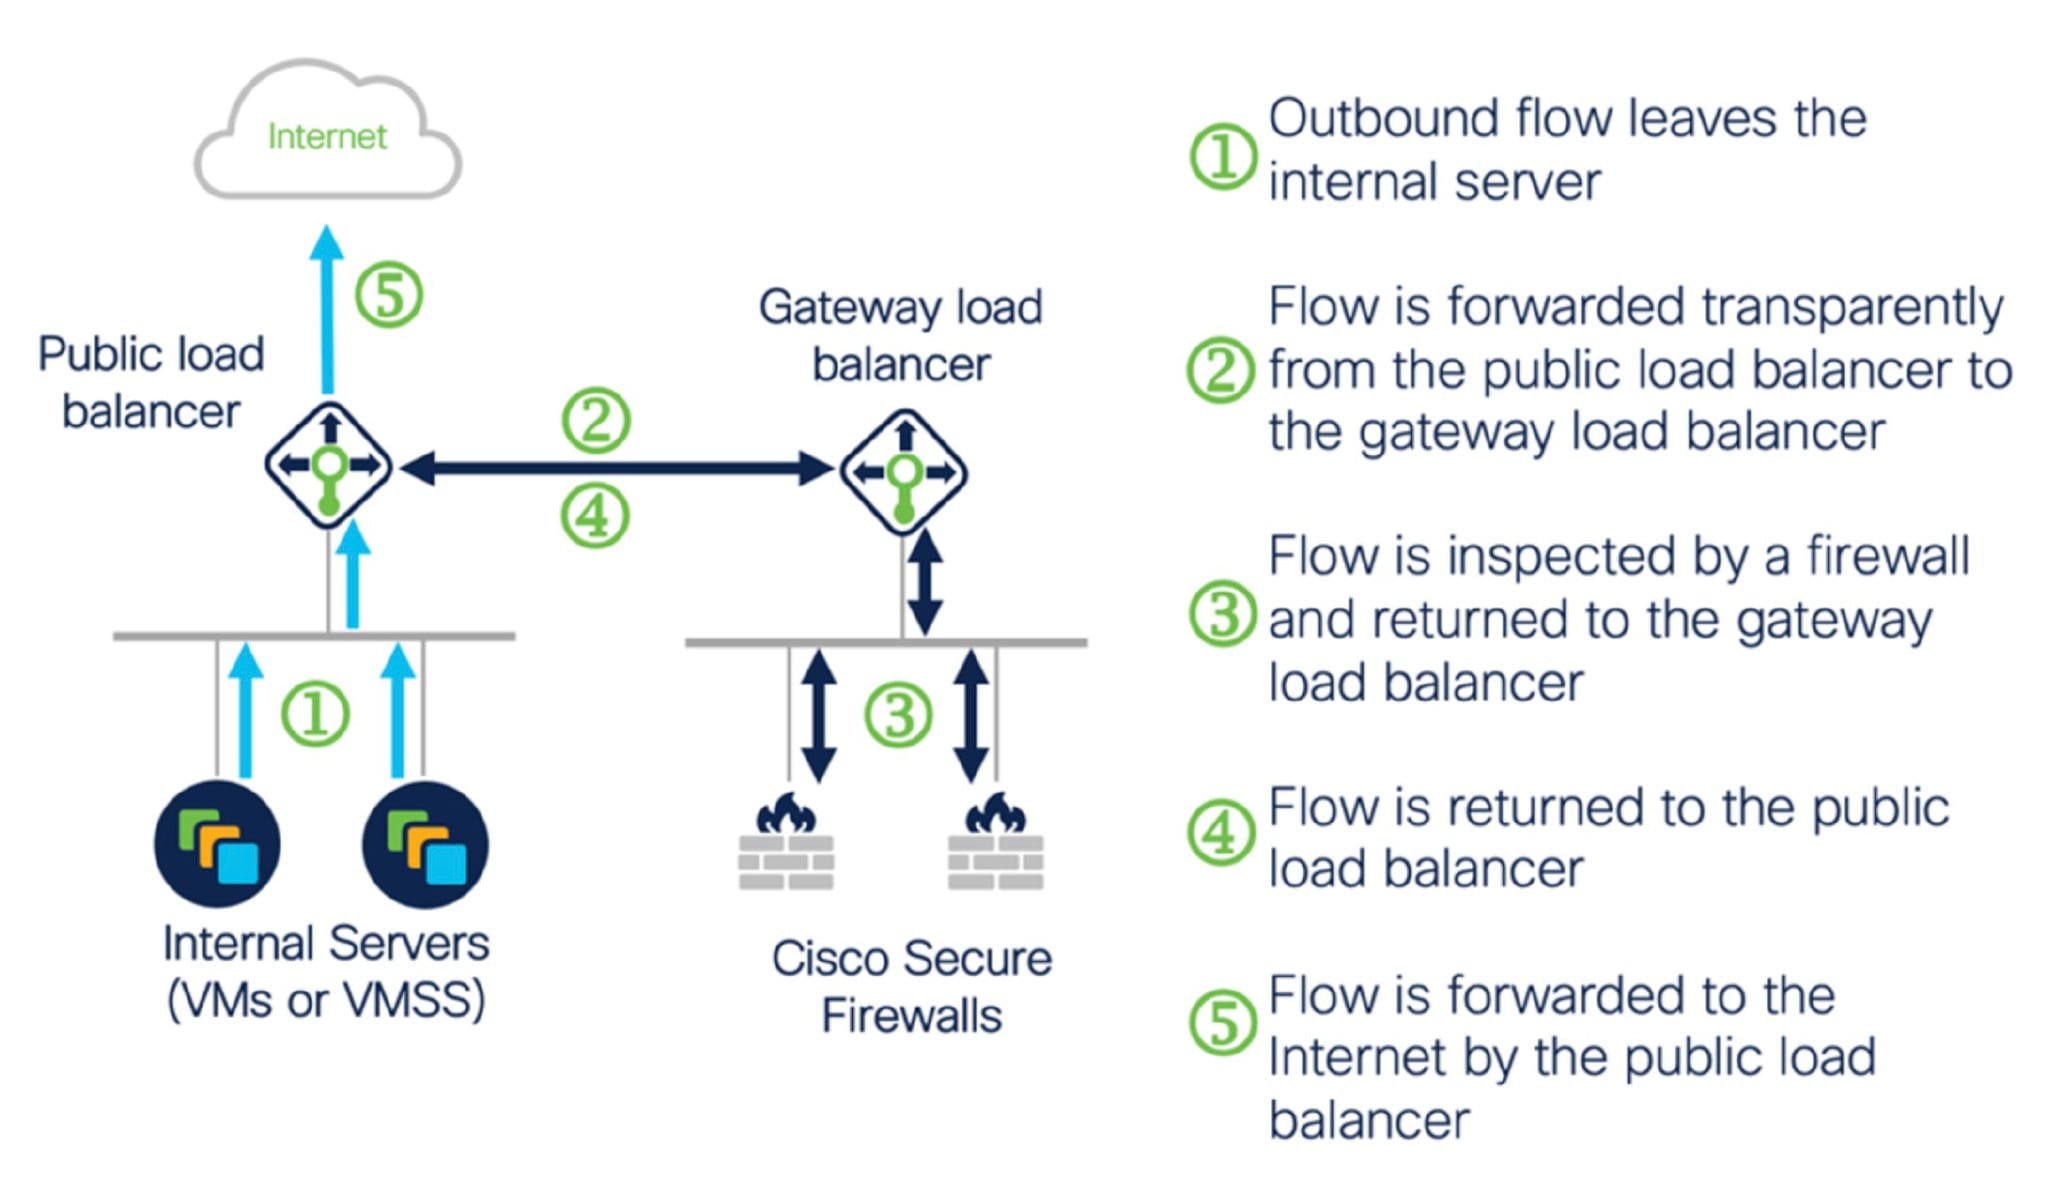
Outbound Traffic Use Case and Topology
The following diagram displays the traffic flow for outbound traffic.
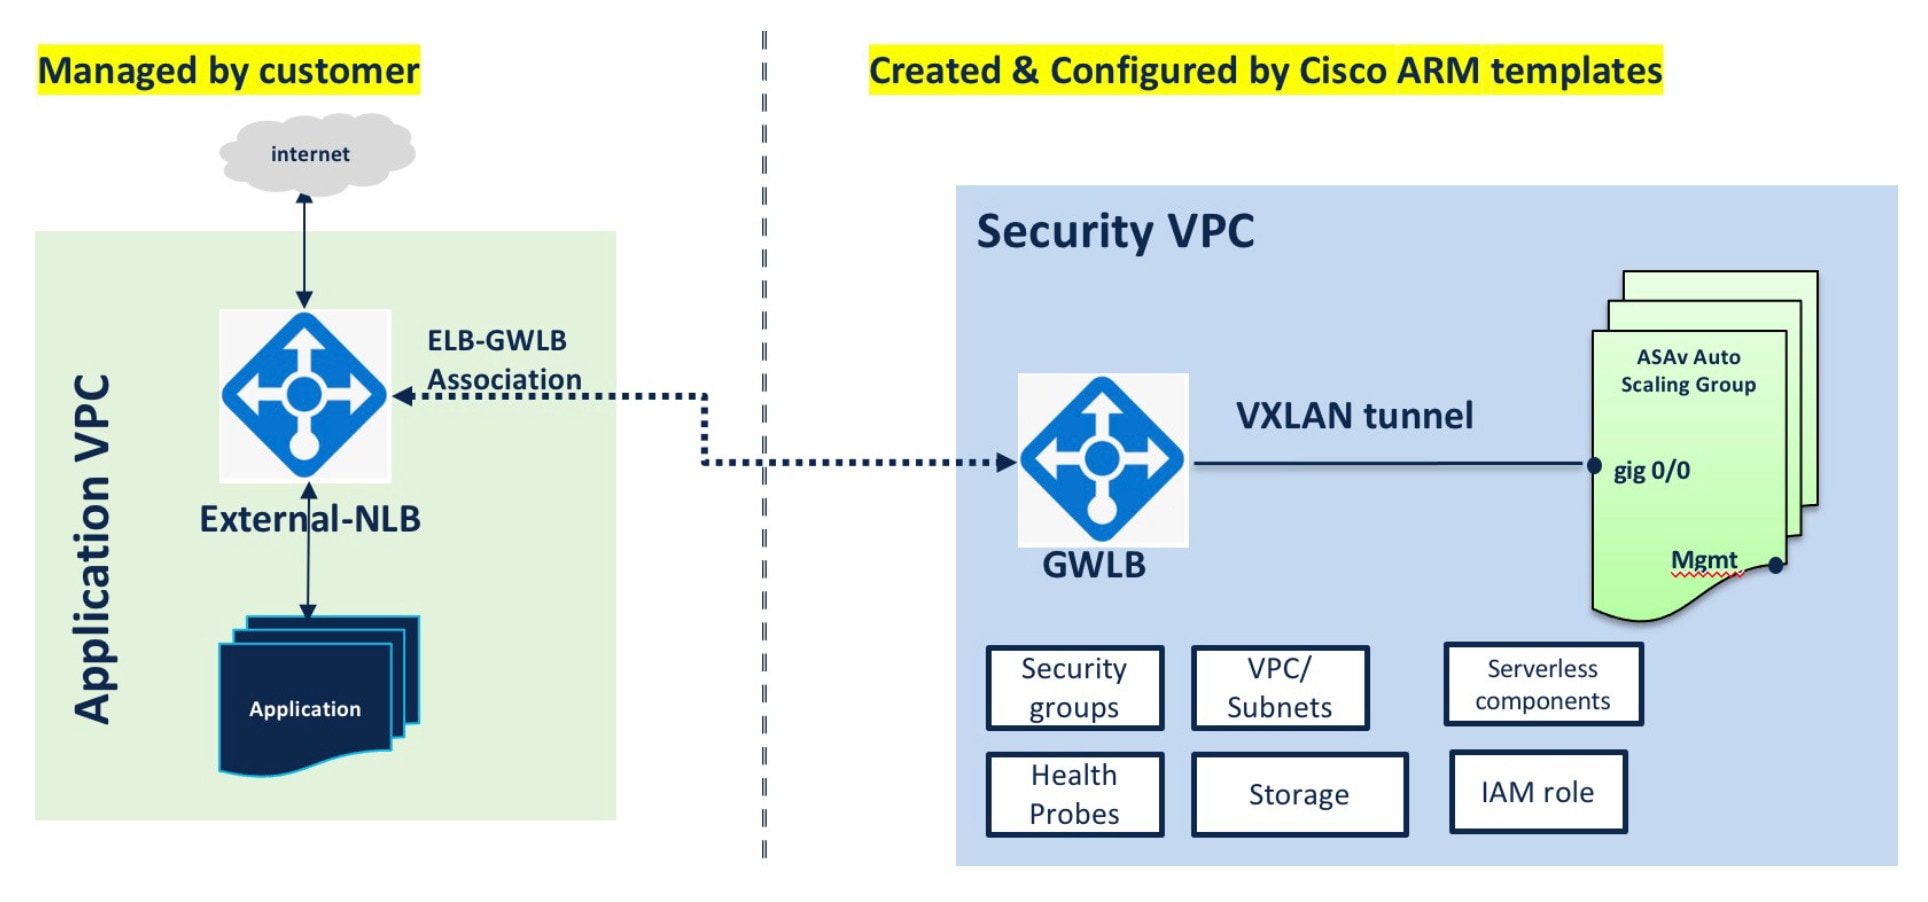
Traffic Flow between the Application VPC and Security VPC
In the diagram shown below, traffic is redirected from the existing topology to the firewalls for inspection by the external load balancer. The traffic is then routed to the newly created GWLB. Any traffic that is routed to the ELB is forwarded to the GWLB.
The GWLB then forwards the VXLAN-encapsulated traffic to a ASA virtual instance. You have to create two ASA virtual associations as the GWLB uses two separate VXLAN tunnels for ingress and egress traffic. The ASA virtual decapsulates the VXLAN-encapsulated traffic, inspects it, and routes the traffic to the GWLB. The GWLB then forwards the traffic to the ELB.
Scope
This document covers the detailed procedures to deploy the serverless components for the ASA virtual auto scale for Azure solution.
Important |
|


 Feedback