Cisco Accessories

Batteries

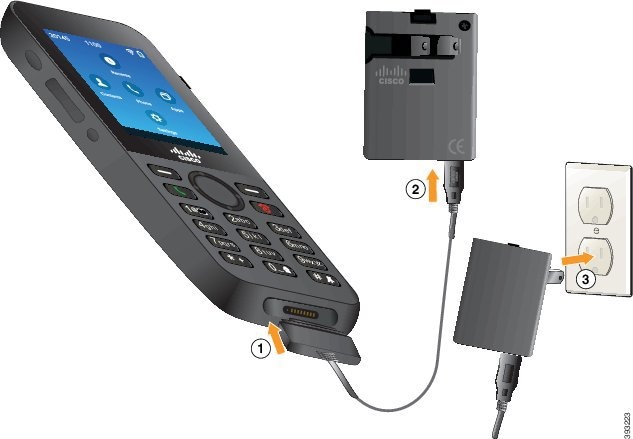
Your phone comes with a Lithium ion battery, and you can order spare batteries.

You can find the battery installation instructions in the Cisco Wireless IP Phone 8821 and 8821-EX User Guide.


Caution


Use only approved batteries. Use of unapproved batteries might be dangerous, and invalidates the warranty on your phone.


The fully charged battery provides the following hours of service:

  • Up to 11.5 hours of talk time (depends on phone firmware and charger version)

    The following table shows the differences in talk time when you use:

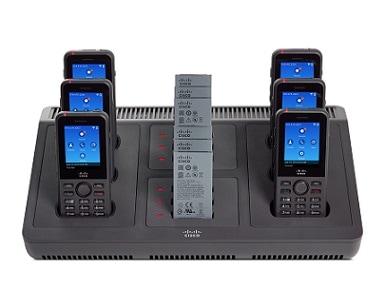
    • The new 4.35V Cisco Wireless IP Phone 8821 Desktop Charger and Cisco Wireless IP Phone 8821 Multi Charger

    • The Cisco Wireless IP Phone 8821-EX Desktop Charger and Cisco Wireless IP Phone 8821-EX Multi Charger

    Table 1. Comparison of Talk Times

    Condition

    Original Cisco Wireless IP Phone 8821 Desktop Charger and Cisco Wireless IP Phone 8821 Multi Charger

    New Cisco Wireless IP Phone 8821 Desktop Charger and Cisco Wireless IP Phone 8821 Multi Charger

    Cisco Wireless IP Phone 8821-EX Desktop Charger and Cisco Wireless IP Phone 8821-EX Multi Charger

    Phone charged in charger, with wall adapter, or with USB

    Phone running Firmware Release 11.0(4)SR3 or earlier

    9.5 hours

    9.5 hours

    9.5 hours

    Phone charged in charger, with wall adapter, or with USB

    Phone running Firmware Release 11.0(5) or later

    11.5 hours

    11.5 hours

    9.5 hours

    Spare battery charged in the charging slot

    9.5 hours

    11.5 hours

    9.5 hours

  • Up to 145 hours of standby time

Battery life depends on a number of factors including:

  • On time—The battery life is reduced when the phone is turned on. Calls, messages, application use, Bluetooth use, and actions like menu navigation use power.

  • Scan mode—Your phone can be set up to scan the access points in three different ways (Continuous, Auto, Single AP). If your phone uses Continuous or Auto scan modes, the phone requires more power, which reduces battery talk time.


Caution


The expected lifecycle for a battery is two years. Based on the average usage, this corresponds to approximately 500 charges. You can check the date printed on the battery to calculate the age of the battery. We recommend you to replace the battery when it reaches its end of life.


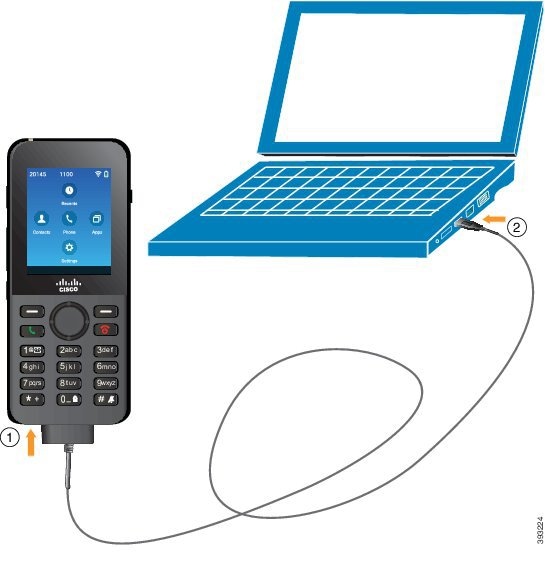
If you require longer talk times, you will find it useful to have a spare, charged battery.

For battery specifications, see the Cisco Wireless IP Phone 8821 Data Sheet and Cisco Wireless IP Phone 8821-EX Data Sheet at http://www.cisco.com/c/en/us/products/collaboration-endpoints/unified-ip-phone-8800-series/datasheet-listing.html

Damaged Battery Identification

Your phone battery can develop physical signs of damage. Physical signs include:

  • Swelling

  • Bending

  • Broken end caps


Caution


Check the battery and battery compartment for physical signs of damage before you replace your battery. Don't use a damaged battery in your phone. Properly dispose of the damaged battery and use a new one.


Swollen Battery

Identification

  • The battery doesn't sit flat on a table. It may rock if you touch the corners.

  • The installed battery is not flat in the battery compartment.

  • The back cover won't completely close (especially in the middle of the door)

  • The battery doesn't fall out of the battery compartment when you try to remove it. You may think that you need to pry the battery out of the compartment.


    Caution


    Don't try to pry the battery out of the compartment.


Examples

The next image shows a swollen battery from the end.

A side view of a swollen battery. The center is thicker than the edges.

The next image shows another swollen battery.

another swollen battery. One side is flat, but the other side is rounded.

The next image shows a swollen battery in the battery compartment. Notice that the battery isn't flush with the compartment walls around the battery perimeter.

Phone shows that a swollen battery doesn't lie flat in the battery compartment.

The next image shows the same swollen battery when the cover is put on. Notice that the middle of the cover is arched. The catches in the middle of the cover won't easily connect.

Phone shows how the center of the battery back door can't close when the battery is swollen

The battery may also swell along the length or width, which makes the battery hard to remove. Don't use any instrument to pry the battery out.

Bent Battery

Identification

The battery doesn't sit flat on a table. It may rock if you touch the corners.

Example

battery on a table to show a bend

End Caps are Broken or Damaged

Identification

The plastic caps at the ends of the battery aren't properly attached.

Example

battery with a broken end cap

Cisco Wireless IP Phone 8821 AC Power Adapter

The Cisco Wireless IP Phone 8821 AC Power Adapter enables you to quickly charge your phone battery. You can use the phone while you are charging the battery. When you order your phone, make sure that you order the power adapter for your region.

The battery takes approximately 3 hours to recharge using the AC Power Adapter.


Caution


Use only Cisco-specified AC power supplies for the Cisco Wireless IP Phone 882x Series.


Prepare the Power Adapter

The power adapter for your phone is compact. Before you use the power adapter, you have to unfold the prongs. After you use the adapter, you can fold in the prongs.

The power adapter for your region may also require an additional clip to allow the adapter to be plugged into the electrical outlet.

Procedure


Step 1

Catch the edge of a prong with your finger and pull the prong up until it clicks into position.

graphical representation of the step

Step 2

(Optional) Install the international power clip.

Step 3

(Optional) Before you close the adapter, remove the international power clip.

Step 4

(Optional) Hold the lever on the top of the adapter down and press the prongs down to close the adapter.

graphical representation of the step


Charge the Battery with the AC Power Supply

You can charge your phone using an AC power supply. When you use the power supply to charge your phone, the battery can take up to 3 hours to fully charge.

The wide connector on the USB cable connects to the phone using magnets to hold it secure. It has pins that you need to align correctly. If you hold the phone so that the screen is towards you, the battery icon on the connector is visible.

graphical representation of the procedure


Caution


Do not charge the phone in a hazardous environment.

Do not charge the phone if it is wet.


Before you begin

You need the USB power cable supplied with your phone.

You need to prepare the power adapter for use as described in Prepare the Power Adapter.

Procedure


Step 1

Plug the USB cable into the bottom of the phone with the pins aligned.

Step 2

Plug the USB cable into the power adapter.

Step 3

Plug the power adapter into the electrical outlet.


USB Cable

You can connect your phone to your computer using a special USB cable.

The wide connector on the USB cable connects to the phone with magnets to hold it secure. It has pins that you must align correctly. If you hold the phone so that the screen is toward you, the battery icon on the connector is visible.

Charge the Battery with the USB Cable and a USB Port on Your Computer

You can charge your phone using your computer. When you use the computer to charge your phone, the battery can take up to 6 hours to fully charge.

The wide connector on the USB cable connects to the phone using magnets to hold it secure. It has pins that you need to align correctly. If you hold the phone so that the screen is towards you, the battery icon on the connector is visible.

graphical representation of the procedure


Caution


Do not charge the phone in a hazardous environment.

Do not charge the phone if it is wet.


Procedure


Step 1

Connect the long connecter of the USB cable to the bottom of the phone with the pins aligned.

Step 2

Plug the other end into the USB port in the computer.


Desktop Chargers

You can use the Cisco Wireless IP Phone 8821 Desktop Charger to charge your Cisco Wireless IP Phone 8821 and spare phone battery. The charger works on AC power or from a charged spare phone battery. It can be secured with a standard laptop cable lock. This charger has a label on the back to show the maximum voltage (4.35 V).

You can use the Cisco Wireless IP Phone 8821-EX Desktop Charger to charge your Cisco Wireless IP Phone 8821-EX and spare phone battery. The charger works on AC power or from a charged spare phone battery. It can be secured with a standard laptop cable lock. The charger looks the same as the Cisco Wireless IP Phone 8821 Desktop Charger except that it shows the graphic of the Cisco Wireless IP Phone 8821-EX and doesn't have the voltage label.

The following figure shows the charger with a phone.

Figure 1. Cisco Wireless IP Phone 8821 and Cisco Wireless IP Phone 8821 Desktop Charger
Cisco Wireless IP Phone 8821 in the desktop charger

Caution


The Cisco Wireless IP Phone 8821 Desktop Charger can only charge the Cisco Wireless IP Phone 8821 and a spare battery for that phone. You can't charge the Cisco Wireless IP Phone 8821-EX or its spare batteries in the Cisco Wireless IP Phone 8821 Desktop Charger.


In this document, the term desktop charger refers to both chargers.

If your phone has a protective case, you don't need to remove the case before you charge the phone in the desktop charger. You adapt the charger to fit the phone.

You can use a USB to Ethernet adapter (dongle) to connect the desktop charger to the Ethernet for only automatic Wi-Fi profile provisioning and certificate enrollment purposes. You cannot use the dongle to make voice calls over the Ethernet. For more information on the USB port, see the Cisco Wireless IP Phone 8821 and 8821-EX Administration Guide.


Caution


Do not use chargers or handsfree mode in a Potentially Explosive Atmosphere.

Do not charge the phone if it is wet.


Built-in Speakerphone

The charger includes a speakerphone that you can use while the phone is docked. Use the phone volume buttons to control the speakerphone volume, and the Mute button on the charger itself. When the speakerphone is muted, the Mute button lights red.

Phone Charging Indications

When you put the phone into the charger, the phone indicates that the battery is charging with the red LED on the top of the phone. If the phone is turned on when you put it into the charger, you see a message on the screen. If the phone is turned off or the battery is too weak, you see an icon displayed on the screen. When the battery is charged, the phone LED is green.

Spare Battery Charging Indications

You can charge a spare battery with the additional charging port behind the main phone charging port. When you put a spare battery into the charger, the Battery LED (to the right of the phone) lights to show the charging status:

  • Red—The spare battery is charging.

  • Green—The spare battery is fully charged.

Set Up the Desktop Charger

Place the desktop charger on a stable work surface.

Before you begin

You need the cable that comes with the charger. This cable has a round barrel plug on one end and a USB connector on the other end.

You need the power adapter that comes with the charger.


Note


Don't use the power adapter that came with the phone; it doesn't work with the charger. Check the list of Cisco part numbers to make sure that you have the correct power adapter for your charger.


Procedure


Step 1

Plug the round barrel plug end of the cable into the desktop charger.

Step 2

Plug the USB end of the cable into the power adapter and plug the power adapter into the electrical outlet.


Charge Your Phone with the Desktop Charger

You can tell when your phone is charging in the charger when the phone LED lights red and a message or icon displays on the phone screen. When the battery is fully charged, the LED turns green. Your phone can take up to 3 hours to recharge.

If your phone has a protective case, you don't need to remove the case before you charge the phone in the desktop charger. You adapt the charger to fit the phone.

When you put the phone into the charger, make sure that you align the charging pins on the bottom of the phone with the connector in the charger. When the phone is correctly placed in the charger, it is held in place with magnets. If the LED does not light, then the alignment is not correct.


Caution


Do not charge the phone in a hazardous environment.

Do not charge the phone if it is wet.


Procedure


Step 1

(Optional) Adapt the charger for a phone in a case: Turn the charger so that the back is facing you, put three fingers about 3/4 of the way into the cup, press in, and lift. The cup should slide out.

graphical representation of the step

Note


You might need to use two hands to remove the cup the first time.

Step 2

Place your phone in the charging slot with the screen facing towards you. If your phone is in a case, press the phone into the charging slot to ensure that the phone connects with the contacts.

Make sure that the LED on the phone lights red. If the LED does not light up, remove the phone and reinsert it into the charger.

If your phone is in a case, the phone and case will tilt out because of the case.

Step 3

When you remove the phone from the charger, tilt the phone forward and lift it up to disconnect the connecter from the magnets.

graphical representation of the step

Step 4

(Optional) Slide the charging cup into the charger. Make sure that the cup is flush with the front and top of the charger.

graphical representation of the step


Charge Your Spare Battery with the Desktop Charger

You can charge a spare battery in the desktop charger. The battery can take up to 3 hours to charge.


Caution


Do not charge the battery in a hazardous environment.


When the battery is charging, the spare battery LED on the charger lights red. When the battery is charged, the spare battery LED on the charger lights green.

Procedure


Step 1

Hold the battery so that the Cisco label faces you, and the arrows on the battery point down.

Step 2

Place the spare battery in the slot behind the phone cradle and press down firmly.


Multichargers

You can charge up to six Cisco Wireless IP Phone 8821 and six spare batteries at the same time with the Cisco Wireless IP Phone 8821 Multi Charger. If your phone is in a protective case, you can charge it without removing the case. This charger has a label on the back to show the maximum voltage (4.35 V).

You can charge up to six Cisco Wireless IP Phone 8821-EX and six spare batteries at the same time with the Cisco Wireless IP Phone 8821-EX Multi Charger. If your phone is in a protective case, you can charge it without removing the case. The charger looks the same as the Cisco Wireless IP Phone 8821 Multi Charger except that it shows the graphic of the Cisco Wireless IP Phone 8821-EX and doesn't have the voltage label.

The following figure shows the multicharger. The phones are placed in the charging cups on the left and right, and the spare batteries are placed in the center.

Figure 2. Cisco Wireless IP Phone 8821 and Cisco Wireless IP Phone 8821 Multi Charger
Multicharger with six Cisco Wireless IP Phone 8821 and six spare batteries

You can place the multicharger on a work surface or mount it on a wall with the wall mount kit. You can also secure the multicharger with a standard laptop cable lock.


Caution


The Cisco Wireless IP Phone 8821 Multi Charger can only charge the Cisco Wireless IP Phone 8821 and a spare battery for that phone. You can't charge the Cisco Wireless IP Phone 8821-EX or its spare batteries in the Cisco Wireless IP Phone 8821 Multi Charger.


In this document, the term multicharger refers to both chargers.

The LED on the phone shows the charging status. When the battery is charging, the LED lights red. When the battery is charged, the LED lights green.

The LED beside the spare battery shows the charging status. When the battery is charging, the LED lights red. When the battery is charged, the LED lights green.

Battery slot LEDs can take several minutes to indicate that the battery is fully charged. If you move a fully-charged battery to another slot, the LED might initially light red before it turns green.


Caution


Do not use chargers in a Potentially Explosive Atmosphere.

Do not charge the phone if it is wet.


Set Up the Multicharger

The power jack is on the right side of the multicharger.

Procedure


Step 1

Plug the jack end of the power cord into the multicharger.

Step 2

Plug the other end of the power cord into the power adapter.

Step 3

Plug the power adapter into the electrical outlet.

Step 4

Place the multicharger on a stable work surface.


Install the Multicharger Wall Mount Kit

The wall mount kit comes with the following components:

  • bracket

  • package with 5 screws and 5 self-tapping wall anchors

Before you begin

You need the following tools:

  • Drill and a 0.25 inch drill bit

  • Pencil

  • Level

  • Philips #1 and #2 screwdrivers

You need the power cable and power adapter.

Procedure


Step 1

Determine the location for the bracket. The bottom right corner of the bracket must be less than 50 inches (127 cm) from an electrical outlet.

Step 2

Mount the wall bracket.

graphical representation of the next substeps
  1. Hold the bracket on the wall, as shown in the diagram.

  2. Use the level to ensure that the bracket is level and use a pencil to mark the screw holes.

  3. Install the anchors, using the drill and drill bit.

  4. Screw the bracket to the wall.

Step 3

Locate the post holders in the multicharger.

Step 4

Hold the multicharger so that the post holders are in front of the posts on the bracket, press the multicharger towards the wall, and then push the multicharger down so that the posts seat into the holder.

graphical representation of the step

Here is a close-up of the post holder.

graphical representation of the text

Step 5

Plug the jack end of the power cord into the multicharger.

Step 6

Plug the other end of the power cord into the power adapter.

Step 7

Plug the power adapter into the electrical outlet.


Charge Your Phone with the Multicharger

You can tell when your phone is charging in the multicharger when the phone LED lights red. When the battery is fully charged, the LED turns green. Your phone can take up to 3 hours to recharge.

If your phone has a protective case, you don't need to remove the case before you charge the phone in the multicharger. You adapt the multicharger to fit the phone.

When you put the phone into the multicharger, make sure that you align the charging pins on the bottom of the phone with the connector in the multicharger. If the LED does not light, then the alignment is not correct.


Caution


Do not charge the phone in a hazardous environment.

Do not charge the phone if it is wet.


Procedure


Step 1

(Optional) Adapt the charger for a phone in a case: Reach into the cup with three fingers, locate the slots on the inside of the cup, and use the slots to pull the cup out.

graphical representation of the step

Step 2

Place your phone in the empty charging slot. If your phone is in a case, press the phone into the charging slot to ensure that the phone connects with the contacts.

Make sure that the LED on the phone lights red. If the LED does not light up, remove the phone and reinsert it into the multicharger.

Step 3

(Optional) Slide the charging cup into the multicharger and press the cup into place so that the cup is flush with the top of the multicharger.


Charge Your Spare Battery with the Multicharger

You can charge a spare battery in the multicharger. The battery can take up to 3 hours to charge.


Caution


Do not charge the battery in a hazardous environment.


When the battery is charging, the Battery LED beside the battery lights red. When the battery is charged, the Battery LED lights green.

Procedure


Place the battery in an empty spare battery slot, aligning the battery contacts with the charger connecter.

If the Battery LED does not light red, remove the battery and reinsert it into the battery slot.


Carry Cases

You can put your phone into a carry case to make it easy to carry your wireless phone and to provide some protection for the phone. When your phone is in the case, you don't have to remove the case to charge the phone.

We have the following cases available:

  • Cisco Wireless IP Phone 8821 and 8821-EX Leather Case

  • Cisco Wireless IP Phone 8821 and 8821-EX Holster Case

You can attach a Cisco Wireless IP Phone 8821 and 8821-EX Belt Clip or a Cisco Wireless IP Phone 8821 and 8821-EX Pocket Clip to either case. The following picture shows the belt clip on the left and the pocket clip on the right.

graphical representation of the text

When you buy a case, we supply both clips and you can also order replacement clips.


Note


Cisco does not endorse, support, or test third party cases or covers for the 8821 Wireless Phones. Using your Cisco Wireless IP Phone 8821 with third party cases or covers may void your warranty.


Cisco Wireless IP Phone 8821 and 8821-EX Leather Case

You can slide the phone into the leather case to protect the phone and then attach the case to the belt clip or pocket clip. The button on the back of the case attaches to the clip. The following pictures show the front and back of the leather case.

graphical representation of the textgraphical representation of the text

You can also clip a lanyard to the metal ring on the top of the leather case

When your phone is in the case, you don't have to remove the case to charge the phone.

Cisco Wireless IP Phone 8821 and 8821-EX Holster Case

You can press the phone into the holster case to protect the phone and then attach the case to the belt clip or pocket clip. The button on the back of the case attaches to the case to the clip. The following pictures show the front and back of the holster case.

graphical representation of the textgraphical representation of the text

When your phone is in the case, you don't have to remove the case to charge the phone.

Silicone Case

You can use the Cisco Wireless IP Phone 8821 Silicone Case to protect your wireless phone. The case fits over either wireless phone model.

Figure 3. Cisco Wireless IP Phone 8821 and Cisco Wireless IP Phone 8821 Silicone Case
Silicone case on the wireless phone and the case by itself.

The case has these benefits:

  • Hypoallergenic

  • Antimicrobial

  • Resistant to wear from 15% alcohol, 75% alcohol, 2.5% hydrogen peroxide, mineral oil, soap, water, bleach, and dish soap.


    Note


    Use the lowest-strength cleaning agent to prolong the life and look of the case.


  • Reduces damage when the phone is dropped

  • Covers more of the phone than the other cases.

The case comes with an optional belt clip that you can slide onto the case.

The case doesn't need to be removed to charge the battery in the desktop charger or multicharger. You remove the cup in the charger to place the phone and case into the charger.

Install the Cisco Wireless IP Phone 8821 Silicone Case

You put the phone into the case through the screen opening in the case. If you need to remove the case, reverse the steps below.

Procedure


Step 1

Slide the bottom of the phone into the screen opening until the phone is completely in the case.

graphic representation of the step

Step 2

If the screen opening has rolled up, unroll it until it is flat.

Step 3

One corner at a time, slide the case corner up to cover the phone.

graphic representation of the stepgraphic representation of the step

Step 4

If the screen opening has rolled up, unroll it until it is flat.

Step 5

(Optional) If required, press the base of the belt clip in and slip the clip onto the post in the back of the case.

graphic representation of the step

Other Accessories

Cisco Wireless IP Phone 8821 and 8821-EX Lanyards

You can attach the lanyard to the top of the wireless phone.

The following graphic shows the original lanyard.

picture of the lanyard

To install the original lanyard, slip the loop of cord around the bar on the back of the phone and pass the lanyard through the loop.

graphical representation of the text

The following graphic shows how to install the new lanyard.

To install the new lanyard, thread the lanyard through the slot in the phone and secure the end in the clip.

Cisco Wireless 8821 Battery Door and Cisco Wireless 8821-EX Battery Door

You can replace the battery door if the gasket on the door gets damaged. If the gasket is damaged, dirt and liquids can get into the battery compartment and cause damage to the phone. Failure to replace a broken gasket voids the phone warranty.


Note


The battery doors are specific for the phone model. Be sure to order the correct version for your phone.


Cisco Accessory Part Numbers

You can buy accessories for your Cisco Wireless IP Phone 882x Series from your local dealer or corporate representative.

The following tables gives the part number for the Cisco accessories. For more information, see the product datasheets at http://www.cisco.com/c/en/us/products/collaboration-endpoints/unified-ip-phone-8800-series/datasheet-listing.html

Table 2. Phone Spares and Accessories

Product Name

Part Number

Cisco Wireless 8821 and 8821-EX Battery

CP-BATT-8821=

Cisco Wireless 8821 Battery Door

CP-BDOOR-8821=

Cisco Wireless 8821-EX Battery Door

CP-BDOOR-8821-EX=

Cisco Wireless IP Phone 8821 and 8821-EX Power Supply for North America

CP-PWR-8821-NA=

Cisco Wireless IP Phone 8821 and 8821-EX Power Supply for Argentina

CP-PWR-8821-AR=

Cisco Wireless IP Phone 8821 and 8821-EX Power Supply for Australia

CP-PWR-8821-AU=

Cisco Wireless IP Phone 8821 and 8821-EX Power Supply for Brazil

CP-PWR-8821-BZ=

Cisco Wireless IP Phone 8821 and 8821-EX Power Supply for Central Europe

CP-PWR-8821-CE=

Cisco Wireless IP Phone 8821 and 8821-EX Power Supply for India

CP-PWR-8821-IND=

Cisco Wireless IP Phone 8821 and 8821-EX Power Supply for Korea

CP-PWR-8821-KR=

Cisco Wireless IP Phone 8821 and 8821-EX Power Supply for Japan

CP-PWR-8821-JP=

Cisco Wireless IP Phone 8821 and 8821-EX Power Supply for Switzerland

CP-PWR-8821-SW=

Cisco Wireless IP Phone 8821 and 8821-EX Power Supply for UK

CP-PWR-8821-UK=

Cisco Wireless IP Phone 8821 and 8821-EX Holster Case with both belt and pocket clip

CP-HOLSTER-8821=

Cisco Wireless IP Phone 8821 and 8821-EX Leather Case with both belt and pocket clip

CP-LCASE-8821=

Cisco Wireless IP Phone 8821 and 8821-EX spare Pocket Clips set

CP-PCLIP-8821=

Cisco Wireless IP Phone 8821 and 8821-EX spare Belt Clips set

CP-BCLIP-8821=

Cisco Wireless IP Phone 8821 and 8821-EX Lanyard Set

CP-LANYARD=

Cisco Wireless IP Phone 8821 Silicone Case

CP-8821-SILCASE=

Table 3. Desktop Chargers and Spares

Name

Part Number

Cisco Wireless IP Phone 8821 Desktop Charger Only

CP-DSKCH-8821=

Cisco Wireless IP Phone 8821-EX Desktop Charger Only

CP-DSKCH-8821-EX

Cisco Wireless IP Phone 8821 Desktop Charger, includes power supply

CP-DSKCH-8821-BUN

Cisco Wireless IP Phone 8821-EX Desktop Charger bundle, with power cord and power supply

CP-DSKCH-8821EX-BN

Cisco Wireless IP Phone 8821 and 8821-EX Desktop Charger Power Supply for NA

CP-PWR-DC8821-NA=

Cisco Wireless IP Phone 8821 and 8821-EX Desktop Charger Power Supply for Argentina

CP-PWR-DC8821-AR=

Cisco Wireless IP Phone 8821 and 8821-EX Desktop Charger Power Supply Power Supply for Australia

CP-PWR-DC8821-AU=

Cisco Wireless IP Phone 8821 and 8821-EX Desktop Charger Power Supply Power Supply for Brazil

CP-PWR-DC8821-BZ=

Cisco Wireless IP Phone 8821 and 8821-EX Desktop Charger Power Supply Power Supply for Central Europe

CP-PWR-DC8821-CE=

Cisco Wireless IP Phone 8821 and 8821-EX Desktop Charger Power Supply Power Supply for India

CP-PWR-DC8821-IND=

Cisco Wireless IP Phone 8821 and 8821-EX Desktop Charger Power Supply Power Supply for Korea

CP-PWR-DC8821-KR=

Cisco Wireless IP Phone 8821 and 8821-EX Desktop Charger Power Supply Power Supply for Japan

CP-PWR-DC8821-JP=

Cisco Wireless IP Phone 8821 and 8821-EX Desktop Charger Power Supply Power Supply for Switzerland

CP-PWR-DC8821-SW=

Cisco Wireless IP Phone 8821 and 8821-EX Desktop Charger Power Supply Power Supply for United Kingdom

CP-PWR-DC8821-UK=

Table 4. Multichargers and Spares

Name

Part Number

Cisco Wireless IP Phone 8821 Multi Charger bundle, with power cube, power adapter and country cord

CP-MCHGR-8821-BUN

Cisco Wireless IP Phone 8821-EX Multi-Charger bundle, with power cube, power adapter and country cord

CP-MCHGR-8821EX-BN

Cisco Wireless IP Phone 8821 Multi Charger Only

CP-MCHGR-8821=

Cisco 8821-EX Multi-Charger Only

CP-MCHGR-8821-EX=

Cisco Wireless IP Phone 8821 and 8821-EX Multi Charger Wall Mount and Kit

CP-MCHGR-8821-WMK=

All countries power cube

CP-PWR-CUBE-6=

Power Cord, NA

CP-PWR-CORD-NA=

Power Cord, Argentina

CP-PWR-CORD-AR=

Power Cord, Australia

CP-PWR-CORD-AU=

Power Cord, Brazil

CP-PWR-CORD-BZ=

Power Cord, Central Europe

CP-PWR-CORD-CE=

Power Cord, India

CP-PWR-CORD-IN=

Power Cord, Korea

CP-PWR-CORD-KR=

Power Cord, Japan

CP-PWR-CORD-JP=

Power Cord, Asia Pacific

CP-PWR-CORD-AP=

Power Cord, South Africa

CP-PWR-CORD-SA=

Power Cord, Switzerland

CP-PWR-CORD-SW=

Power Cord, UK

CP-PWR-CORD-UK=

Desktop Charger Specifications

Table 5. Physical Specifications

Item

Description

Dimensions

(H x W x D)

3.0 x 7.3 x 4.0 in. (76 x 185 x 102 mm)

Weight

  • Desktop charger: 1.41 pounds (641 g)

  • Power adapter: 0.08 pounds (38 g)

  • Total weight: 1.49 pounds (679 g)

Power supply

  • Input: 100-240V, 0.2A, 50-60 Hz

  • Output: 5V, 2.0A

  • AC adapters (by geographical region)

Power consumption

10 watts

Operating temperature

32 to 104°F (0 to 40°C)

Storage temperature

-22 to 140°F (-30 to 60°C)

Relative humidity

10 to 95% (noncondensing)

Drop specification

Drop height: 750 mm (29.5 inch)

Vibration

0.41 Grms from 3 to 500 Hz with spectral break points of 0.0005 G2 / Hz at 10 Hz and 200 Hz and 5 dB/octave roll off at each end

Thermal shock

-22°F (-30°C) 24 hours; 158°F (70°C) 24 hours

Charging time

  • Battery only: 2–4 hours

  • Phone: set by the phone

Table 6. Safety and Compliance

Item

Description

Safety

  • UL 60950-1

  • CSA C22.2 No. 60950-1

  • EN 60950-1

  • IEC 60950-1

  • AS/NZS 60950.1

Electromagnetic compatibility (EMC) and electromagnetic interference (EMI)

  • CFR 47 Part 15 Class A

  • ICES-003 Class A

  • EN 55022 Class A

  • CISPR 22 Class A

  • VCCI Class A

  • AS/NZS CISPR22

  • CSPR 24

  • EN 55024

  • EN 50082-1

  • EN 61000-6-1

  • EN 61000-3-2

  • EN 61000-3-3

  • EN 61000-4-2

  • EN 61000-4-3

  • EN 61000-4-4

  • EN 61000-4-5

  • EN 61000-4-6

  • EN 61000-4-11

Multicharger Specifications

Table 7. Physical Specifications

Item

Description

Dimensions

(H x W x D)

14.17 x 9.06 x 4.14 in (360 x 230 x 105 mm)

Weight

  • Multi-charger: 5.65 lb (2.57 kg)

  • Power supply: 0.77 lb (0.35 kg)

  • Mounting bracket: 1.47 lb (0.67 kg)

Power supply

  • Input: 100-240VAC, 1.2A, 50–60 Hz

  • Output: 19V, 4.74A

  • AC adapters (by geographical region)

Power consumption

90 watts

Operating temperature

32 to 104°F (0 to 40°C)

Storage temperature

-22 to 140°F (-30 to 60°C)

Relative humidity

10 to 95% (noncondensing)

Drop specification

Drop height: 750 mm (29.5 inch)

Vibration

0.41 Grms from 3 to 500 Hz with spectral break points of 0.0005 G2 / Hz at 10 Hz and 200 Hz and 5 dB/octave roll off at each end

Thermal shock

-22°F (-30°C) 24 hours; 158°F (70°C) 24 hours

Charging time

  • Battery only: 2–4 hours

  • Phone: set by the phone

Table 8. Safety and Compliance

Item

Description

Safety

  • IEC 60950-1

  • EN 60950-1

  • UL 60950-1

  • CSA C22.2 No. 60950-1

  • AS/NZS 60950.1

Electromagnetic compatibility (EMC) and electromagnetic interference (EMI)

  • FCC Parer 15 (CFR 47) Class A

  • ICES-003 Class A

  • EN 55022 Class A

  • CISPR 22 Class A

  • AS/NZS CISPR22

  • VCCI Class A

  • CSPR 24

  • EN 55024

  • EN 61000-3-2

  • EN 61000-3-3

  • EN 61000-4-2

  • EN 61000-4-3

  • EN 61000-4-4

  • EN 61000-4-5

  • EN 61000-4-6

  • EN 61000-4-8

  • EN 61000-4-11

  • EN 61000-6-1

  • EN 61000-63

  • EN 60601-1-2