シリコン カバー
デスク フォンとハンドセットを保護するために、Cisco IP 電話のカバーを使用できます。
ケースには次の利点があります。
-
低刺激性
-
さまざまな洗剤による摩耗に強い。

(注)
低強度の洗浄剤を使用することで、ケースの耐用年数と外観を長く保ちます。
-
ハンドセットを落としたときのダメージを軽減します。
製品番号やその他の詳細情報については、電話機モデルのデータ シートを参照してください。Cisco IP 電話 8800 シリーズのデータ シートについては、https://www.cisco.com/c/en/us/products/collaboration-endpoints/unified-ip-phone-8800-series/datasheet-listing.html を参照してください。Cisco IP 電話 7800 シリーズのデータ シートについては、https://www.cisco.com/c/en/us/products/collaboration-endpoints/unified-ip-phone-7800-series/datasheet-listing.html を参照してください。
所有している電話機のモデルをチェックするには、[アプリケーション(Applications)] ![]() を押して、[電話情報(Phone information)] を選択します。[モデル番号(Model number)] フィールドに、電話機のモデルが表示されます。
を押して、[電話情報(Phone information)] を選択します。[モデル番号(Model number)] フィールドに、電話機のモデルが表示されます。
|
Cisco IP 電話 |
Cisco IP 電話シリコン カバー |
注記 |
||
|---|---|---|---|---|
|
Cisco IP 電話 7821 |
|
|||
|
Cisco IP 電話 7841 |
|
|||
|
Cisco IP 電話 8811、8841、8851、8851NR、8861、8861NR |
|
|
||
|
Cisco IP 電話 8845、8865、および 8865NR |
|
|
||
|
Cisco IP 電話ハンドセット |
|
Cisco IP 電話シリコン カバーの取り付け
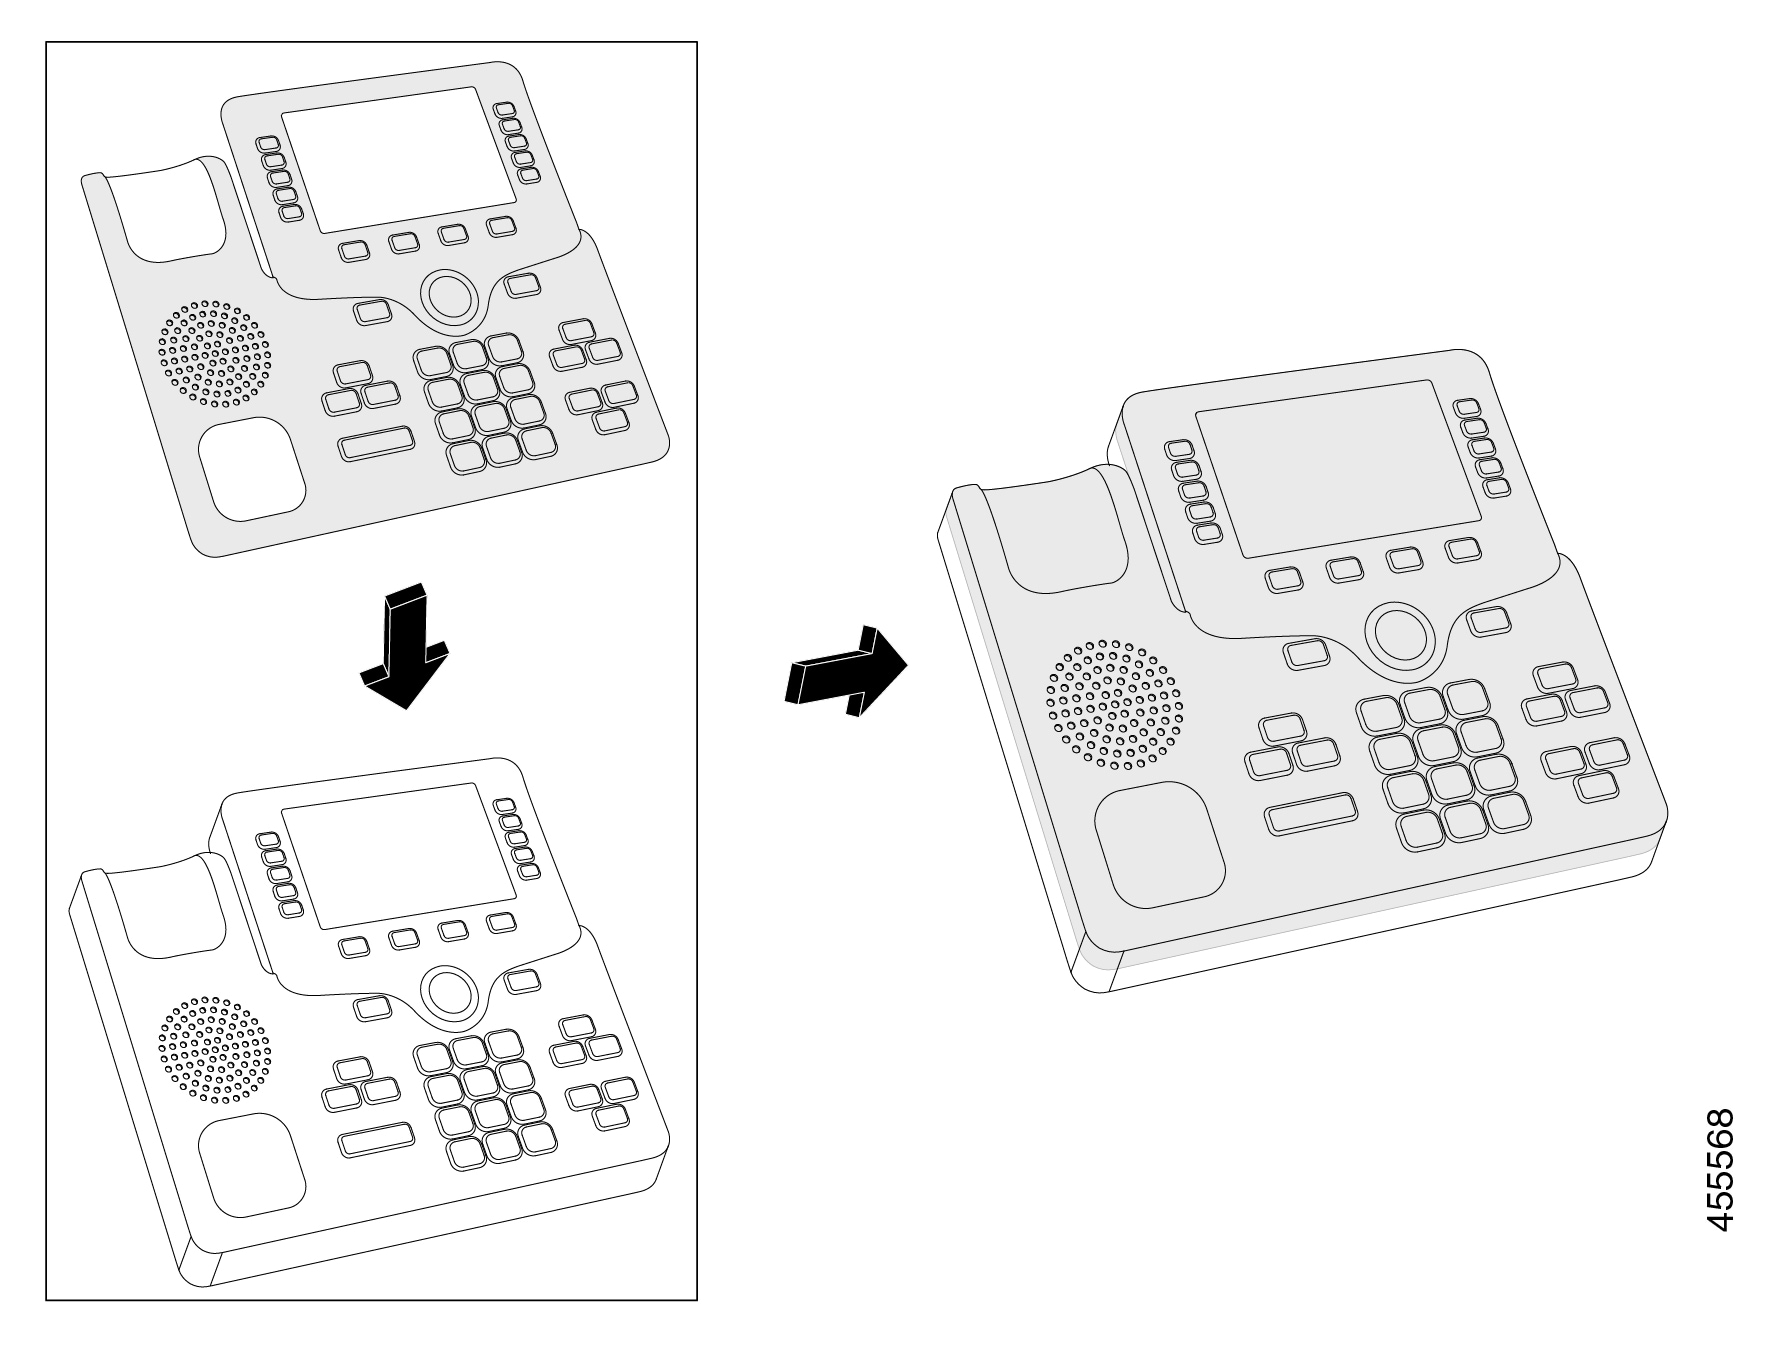
手順
| ステップ 1 |
電話機を自分に向けます。 |
| ステップ 2 |
クレードルからハンドセットを取り外します。 |
| ステップ 3 |
ハンドセットを左側にして、カバーを電話機に合わせます。 |
| ステップ 4 |
カバーを角に合わせて固定し、電話機をスライドさせます。カバーは、大きな抵抗なく電話機にしっかりとフィットするはずです。 |
| ステップ 5 |
ハンドセットを受け台に戻します。 |
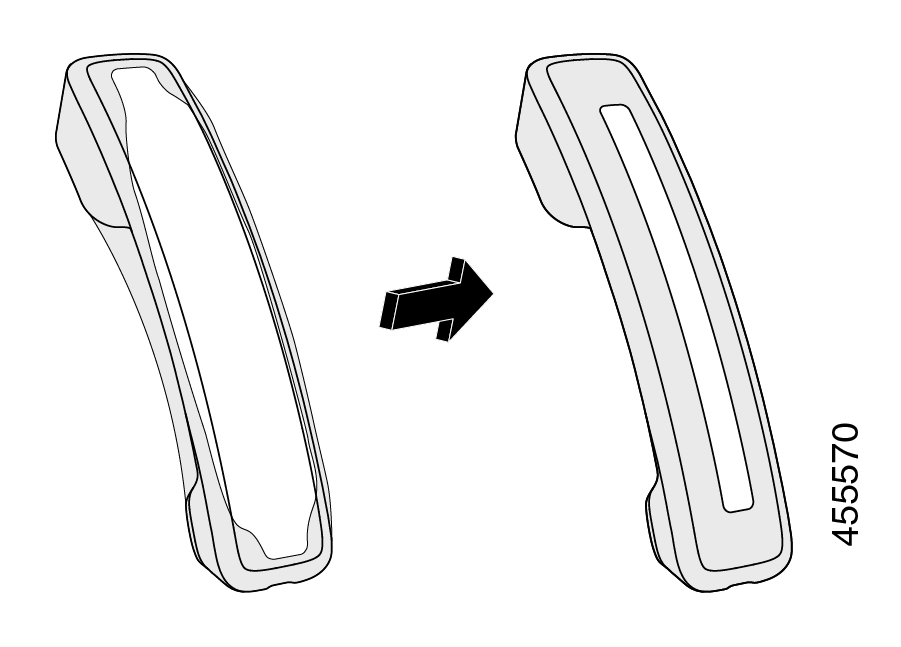
Cisco IP 電話ハンドセット カバーの取り付け
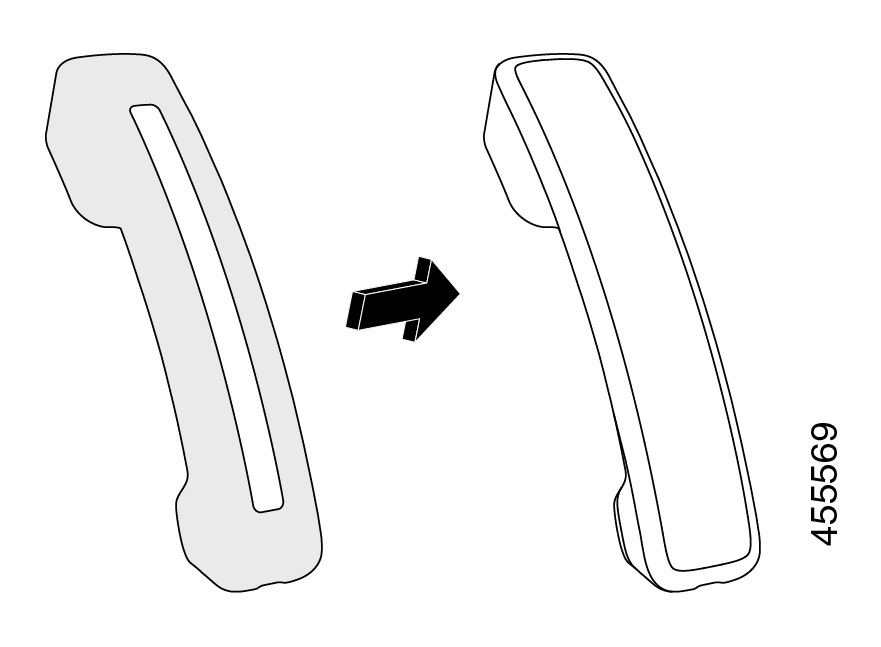
手順
| ステップ 1 |
電話機のクレードルからハンドセットを取り外します。 |
| ステップ 2 |
ハンドセットからケーブルを取り外します。 |
| ステップ 3 |
イヤー カップがカバーの中に完全に入るまで、ハンドセットの上にシリコン カバーをスライドさせます。 |
| ステップ 4 |
ハンドセットのもう一端にカバーを引っ張ります。
|
| ステップ 5 |
カバーがハンドセットに対しぴったりであり、ケーブル ポートが塞がれていない点を確認します。 |
| ステップ 6 |
ハンドセットを電話機に再接続してクレードルに戻します。 |
シリコン カバーのクリーニング
手順
| ステップ 1 |
シリコン カバーを取り外します。 |
||
| ステップ 2 |
カバーをクリーニングします。
|
||
| ステップ 3 |
カバーをしっかりと乾かします。完全に乾くまで、ケースに電話機を戻さないでください。 |
||
| ステップ 4 |
電話機をカバーに入れます。 |
 フィードバック