Introduction
This document describes deployment of Cisco Secure Firewall Threat Defense Virtual (FDM) on a virtual machine using Azure Marketplace and templates.
Prerequisites
Requirements
Cisco recommends that you have knowledge of these topics:
- Cisco Secure Firewall Management Center (FMC)
- Cisco Secure Firewall Threat Defense (FTD)
- Azure Account/Access
Components Used
The information in this document is based on these software versions:
- Cisco Secure Firewall Threat Defense Virtual versions: 7.4.1, 7.3.1, 7.2.7, 7.1.0, 7.0.6, and 6.4.0
The information in this document was created from the devices in a specific lab environment. All of the devices used in this document started with a cleared (default) configuration. If your network is live, ensure that you understand the potential impact of any command.
Configure
Customers have encountered issues when attempting to deploy a Firepower Device Manager (FDM) on a virtual machine from Azure, specifically when using the Azure Marketplace and templates.
Deploy FDM from Template on Azure Portal
To deploy the FDM from the Azure portal, use this procedure:
1. Navigate to the Azure portal and locate the Marketplace within Azure Services. Search for and select Cisco Secure Firewall Threat Defense Virtual - BYOL and PAYG.
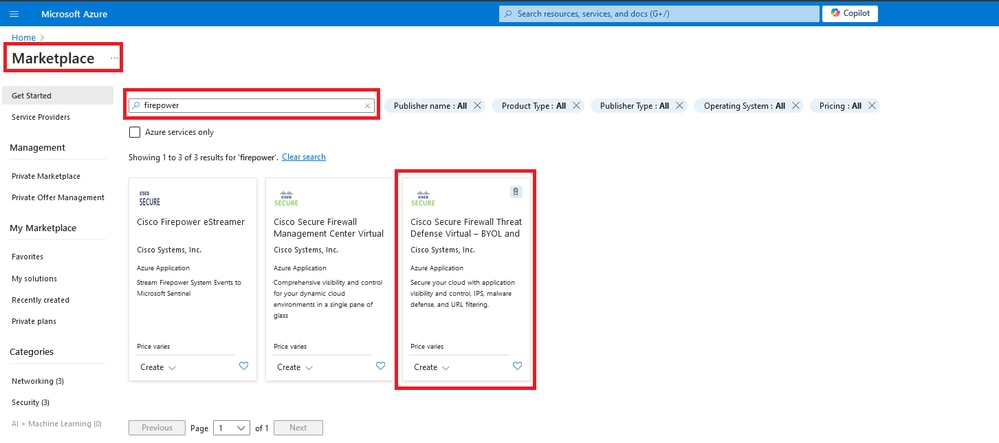 Search for Firepower and Select Cisco Secure Firewall Threat Defense Virtua - BOYL
2. Click Create to start the configuration process for the FTD.
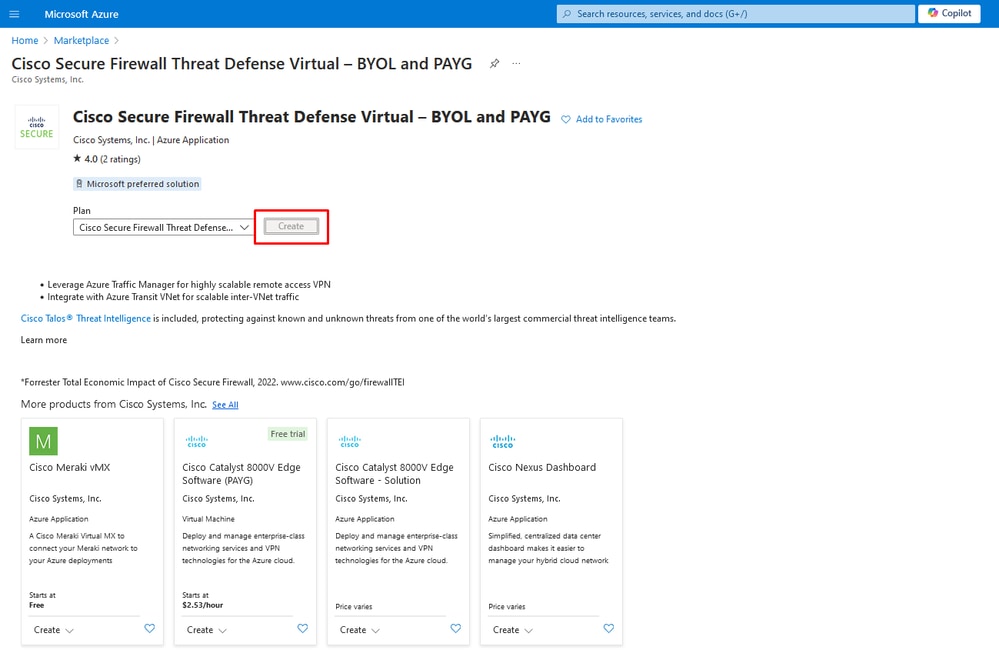 Create VM from Azure Portal
3. In the basic configuration page, create a Resource Group for the device, choose the region, and select a name for the VM.
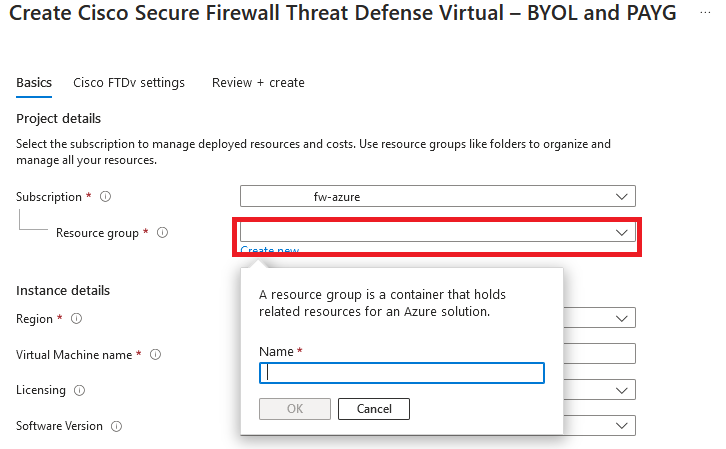 Create a new Resource Group
4. Choose the desired version for the VM deployment from the available options.
 Versions Available to Deploy on Azure Market
5. Set up a username for the Primary account, choose Password as the Authentication type, and set the Password for VM access and the Admin password.
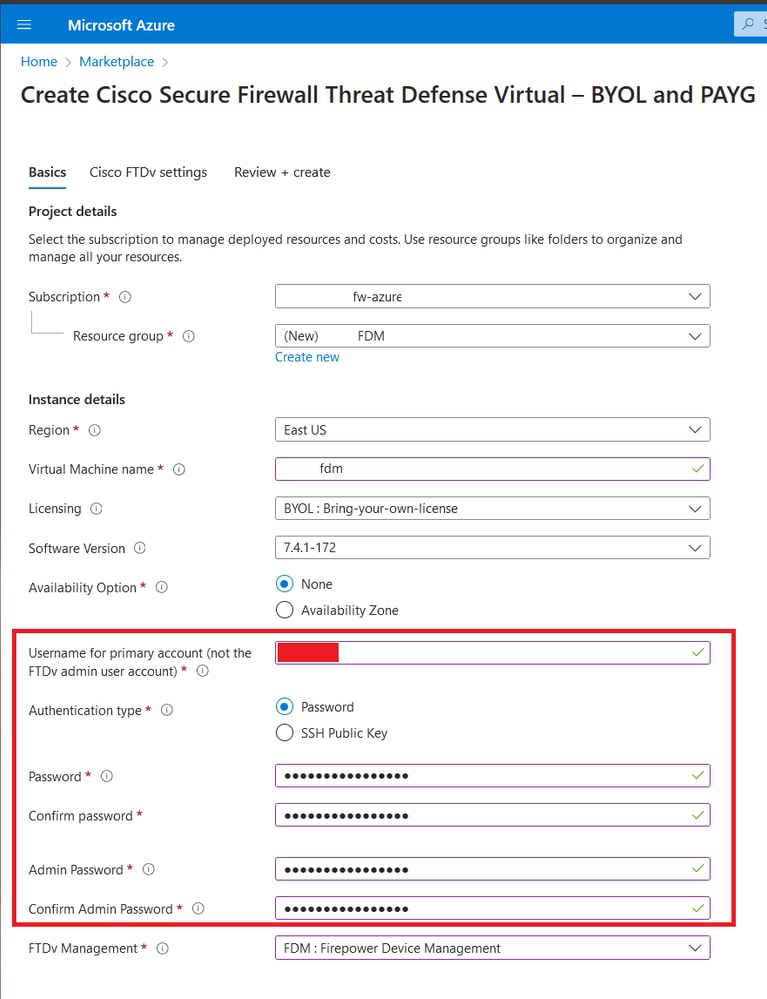 Username and Admin Passwords.
6. For management type, select FDM for the purpose of this document.
 Management Device.
7. In the Cisco FTDv Settings tab, review the VM size, Storage Account, Public IP Address, and DNS label, which are created by default after completing the basic configuration.
Ensure that the Virtual Network, Management subnet, and other Ethernet settings are correct.
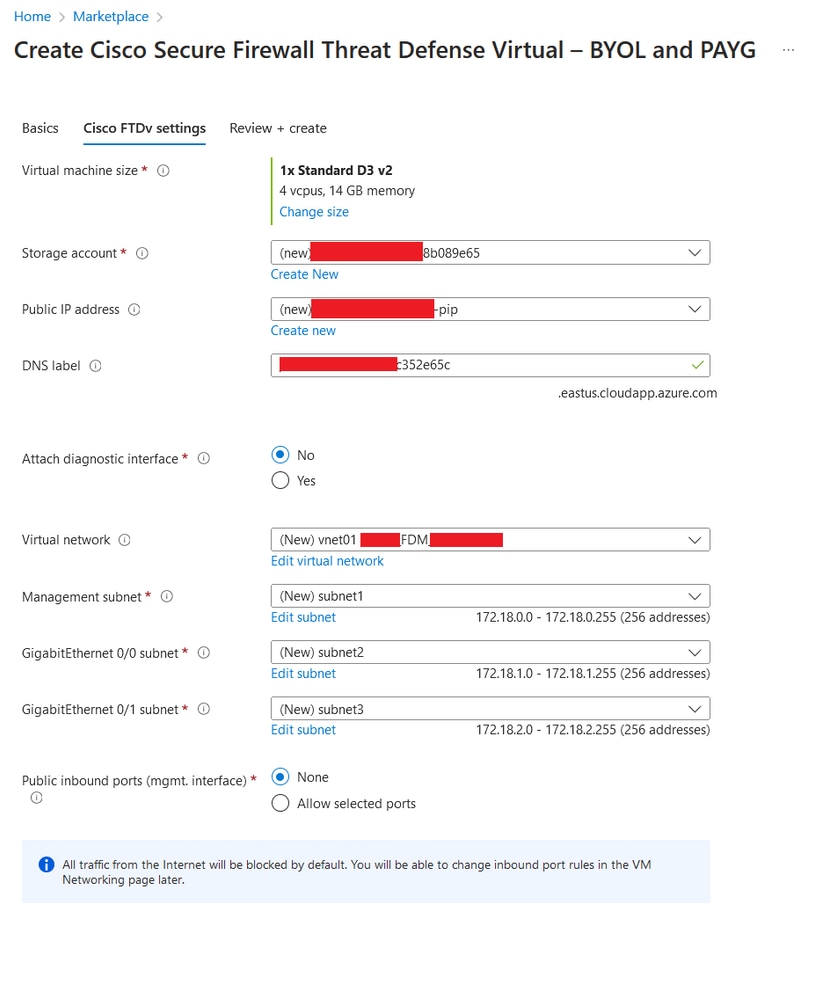 Cisco FTDv Settings.
8. Select Allow selected Port to enable ports SSH (22), SFTunnel (8305), and HTTPS (443) for HTTPS access to the VM and SFTunnel port for migrating the device to FMC.
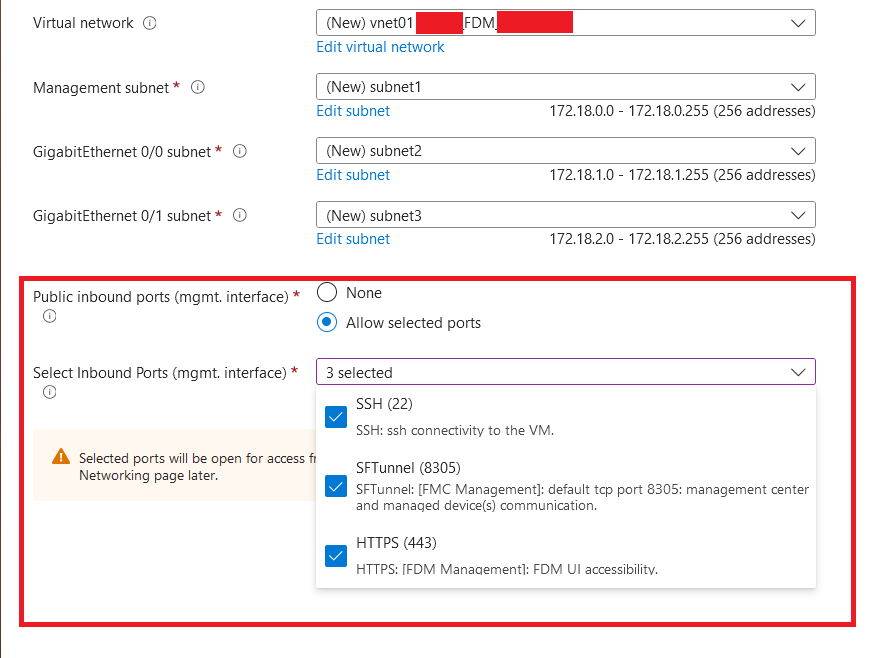 Ports to be allowed on Cisco FTDv
Verify Configuration for VM
9. Review the configuration in the Review + Create tab and create the VM.
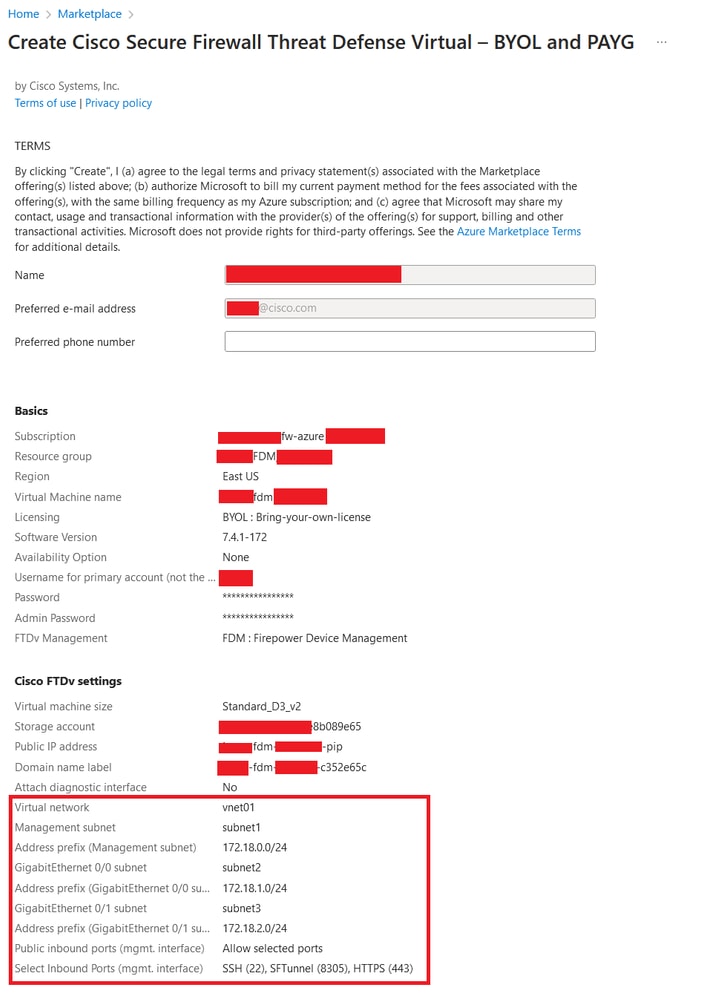 Review and Create.
At this point we can submit the VM creation.
10. Monitor the deployment progress in the Overview tab, where a message indicates Deployment is in progress.
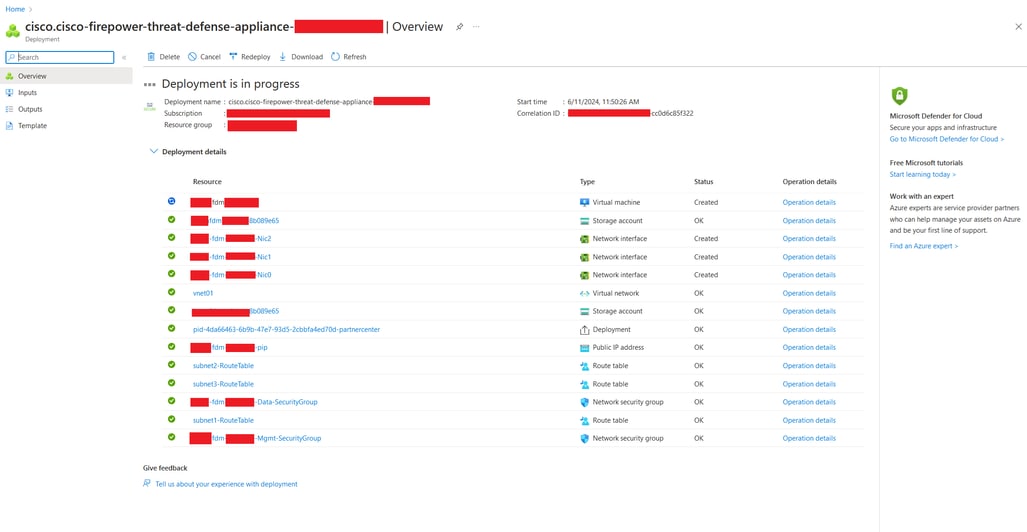 Deployment in progress.
Check VM Deployed on Azure
11. When the VM is created, locate it within the Virtual Machines section to find its characteristics and the assigned Public IP address.
 Virtual Machines Location
12. Use a browser to navigate to the assigned IP address of the device and begin the initial configuration of FDM.
 Public IP for FDM
Basic Configuration for FDM
13. Configure the basic settings by selecting an IP within the assigned range, setting up NTP, and registering the device with the license.
Here you can find the documentation for the FDM Initial Configuration .
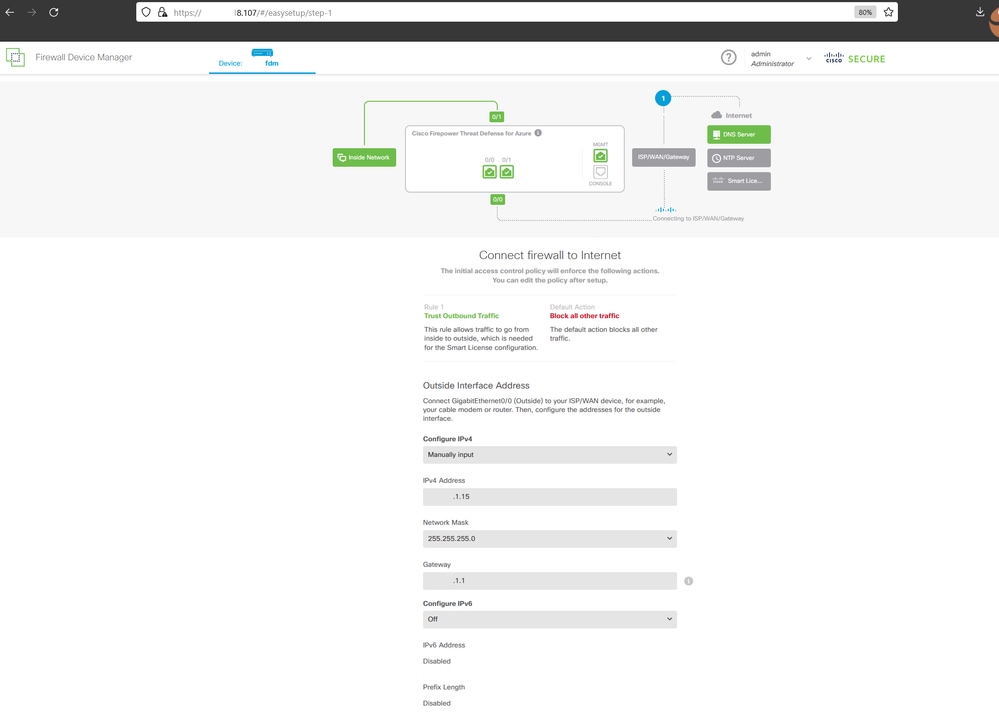 Basic Confituration on FDM
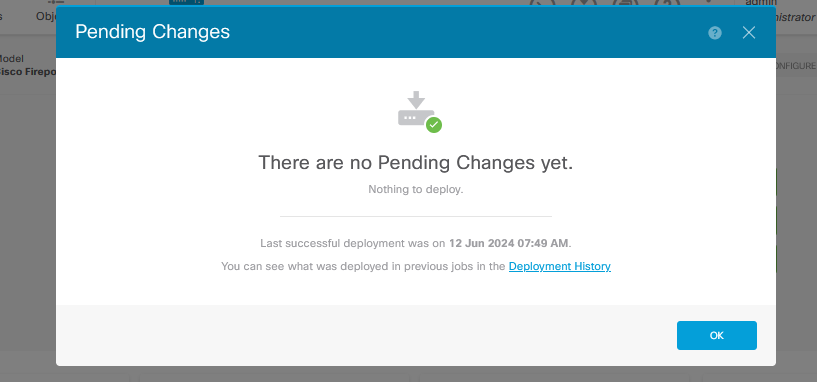
14. After registering the device, ensure no pending deployments remain.


 Feedback