Introduction
This document describes how to migrate a Firepower Device Manager (FDM) to Cloud-Delivered FMC (cdFMC) using Firepower Migration Tool (FMT) in CDO.
Prerequisites
Requirements
- Firepower Device Manager (FDM) 7.2+
- Cloud-delivered Firewall Management Center (cdFMC)
- Firepower Migration Tool (FMT) included in CDO
Components Used
This document was created based on the aforementioned requirements.
- Firepower Device Manager (FDM) on version 7.4.1
- Cloud-delivered Firewall Management Center (cdFMC)
- Cloud Defense Orchestrator (CDO)
The information in this document was created from the devices in a specific lab environment. All of the devices used in this document started with a cleared (default) configuration. If your network is live, ensure that you understand the potential impact of any command.
Background Information
CDO admin users can perform migrations of their devices to cdFMC when the devices are on version 7.2 or higher. In the migration described in this document, cdFMC is already enabled on CDO Tenant.
Configure
1.- Enable Cisco Cloud Services on FDM
To begin the migration, it is necessary to have the FDM device with no pending deployments and register to Cloud Services. In order to register to Cloud Services navigate to System Settings > See More > Cloud Services.
Within the Cloud Services section, you find device is not registered, therefore, it is necessary to perform the enrollment with the type Security/CDO Account. You must configure a Registration Key, then Register.
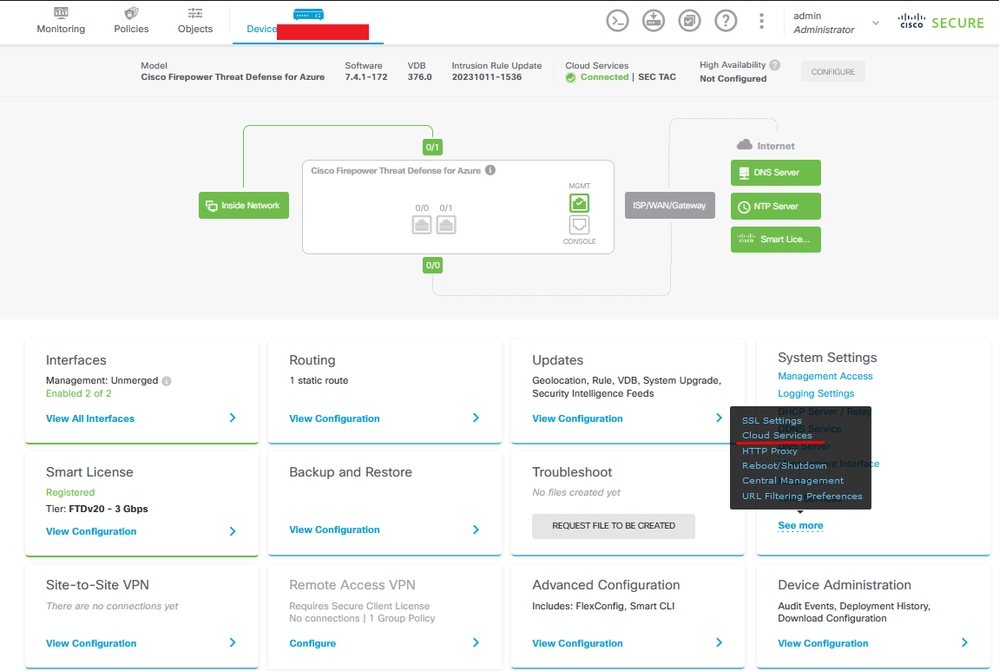 Registration Cloud Services
Over Cloud Services it is shown that is not registered. Select the CDO Account enrollment type and provide the Registration Key from CDO.
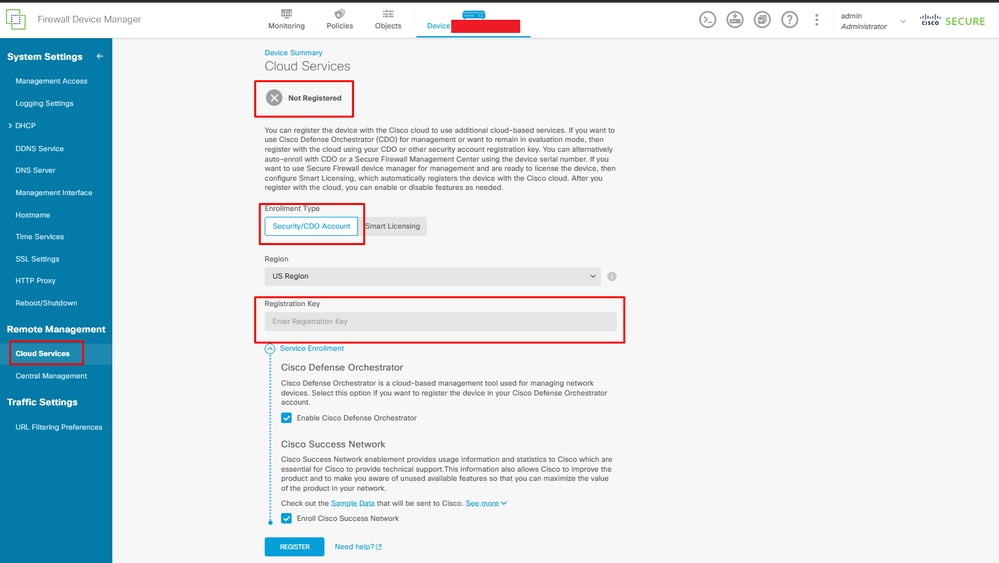 Registration to Cloud Services
The registration key can be found inside CDO. Navigate to CDO, go to Inventory > Add symbol.
A menu appears to select the type of device you have. Select the FTD option. You must have the FDM option enabled; otherwise, the corresponding migration cannot be performed. The type of registration uses Use Registration Key. In this option, the Registration Key appears in step number 3, which we must copy and paste into the FDM.
 Onboard FDM, add option
A menu appears to Select a Device or Service Type.
 Select Device or Service Type
For this document, Select Registration Key has been selected.
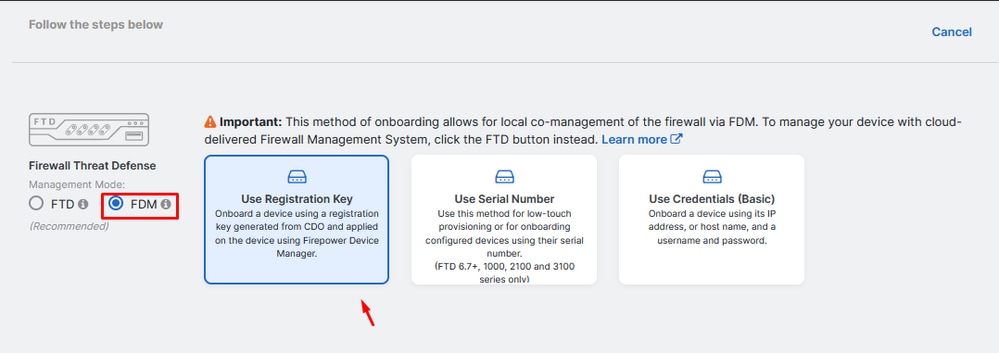 Registration Type
Here, it shows the Registration Key needed on the previous step.
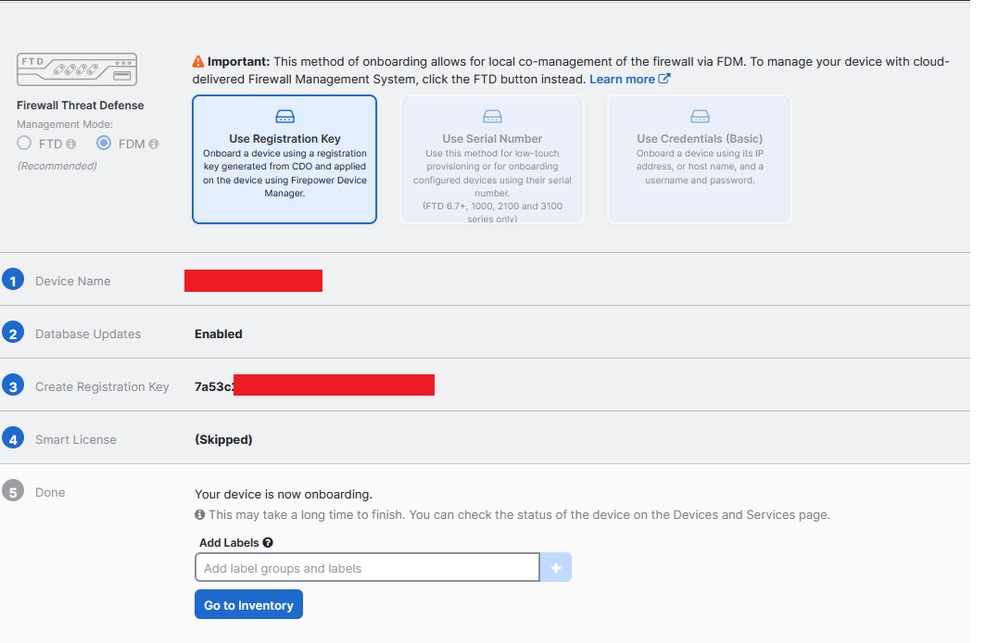 Registration Process
Once the Registration Key has been obtained, copy and paste it into the FDM and click Register. After registering the FDM within Cloud Services, it is displayed as Enabled as shown in the image.
The Smart License has been skipped as the device is going to be registered once the device is up and running.
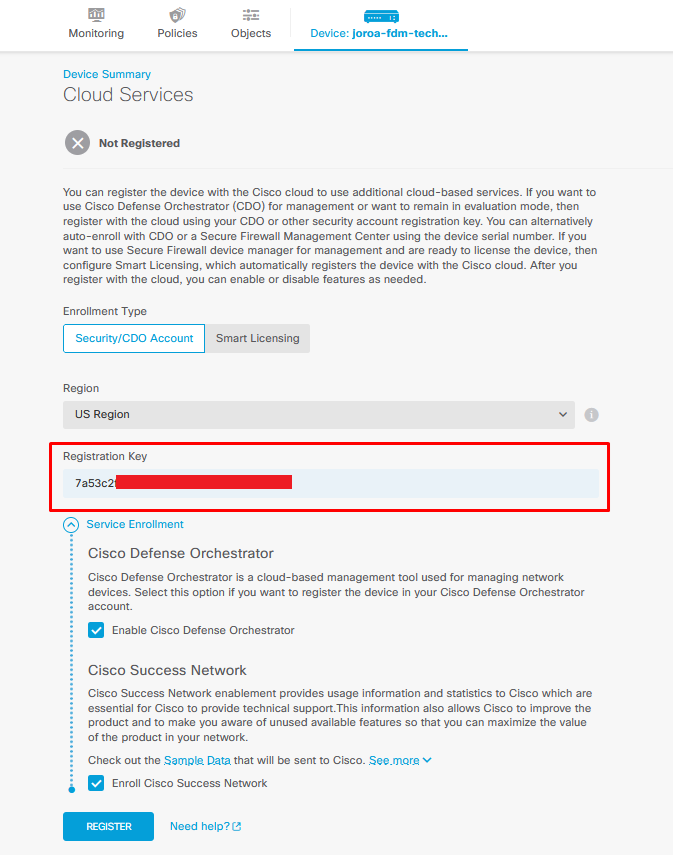 FDM Registration
When registering FDM, it shows the Tenancy, Cloud services connected, and Registered.
 FDM Registration Complete
Within CDO, in the Inventory menu, the FDM can be found in the process of being on-boarded and synchronizing. The progress and flow of this synchronization can be reviewed within the Workflows section.
Once this process is completed, it appears be displayed as Synced and Online.
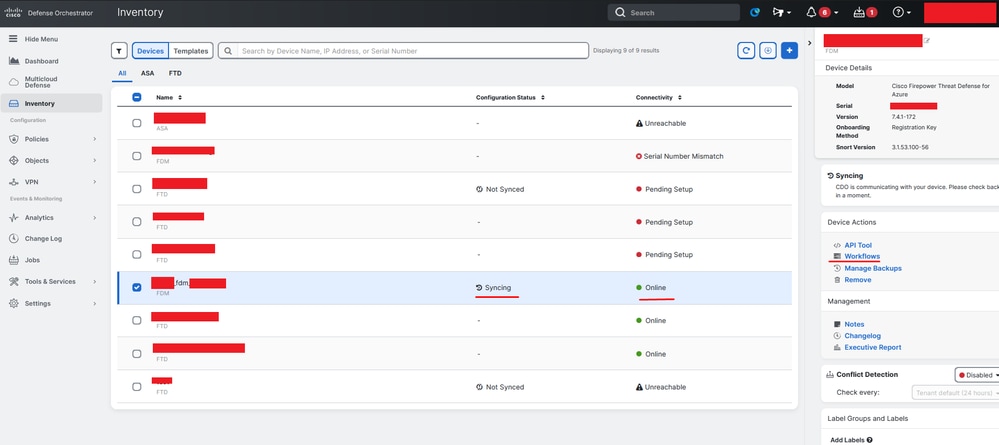 CDO Inventory FDM Onboarded
When the devices have been synchronized, it shows like Online and Synced.
 FDM Onboarded
When the FDM has been successfully on-boarded to CDO, we must log out of the FDM. After logging out of the FDM, navigate within CDO to Tools & Services > Migration > Firewall Migration Tool.

Click the Add symbol, and a random name appears, indicating that the name needs to be renamed to initiate the migration process.

After renaming, click on Launch to begin the migration.
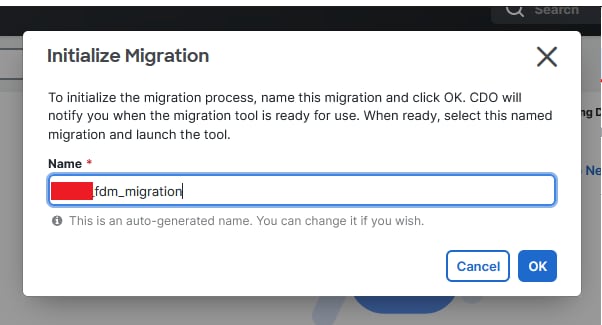 Initialize Migration
Click Launch to start the migration configuration.
 Migration Launch process
After clicking Launch, a window is going to open for the migration process where the option Cisco Secure Firewall Device Manager (7.2+) is selected. As previously mentioned, this option is enabled starting from version 7.2.
 FMT Select Source Configuration
Once selected, three different migration options are presented: Shared Configuration Only, Includes Device & Shared Configurations, and Includes Device & Shared Configurations to FTD New Hardware.
For this instance, the second option, Migrate Firepower Device Manager (Includes Device & Shared Configuration), is performed.
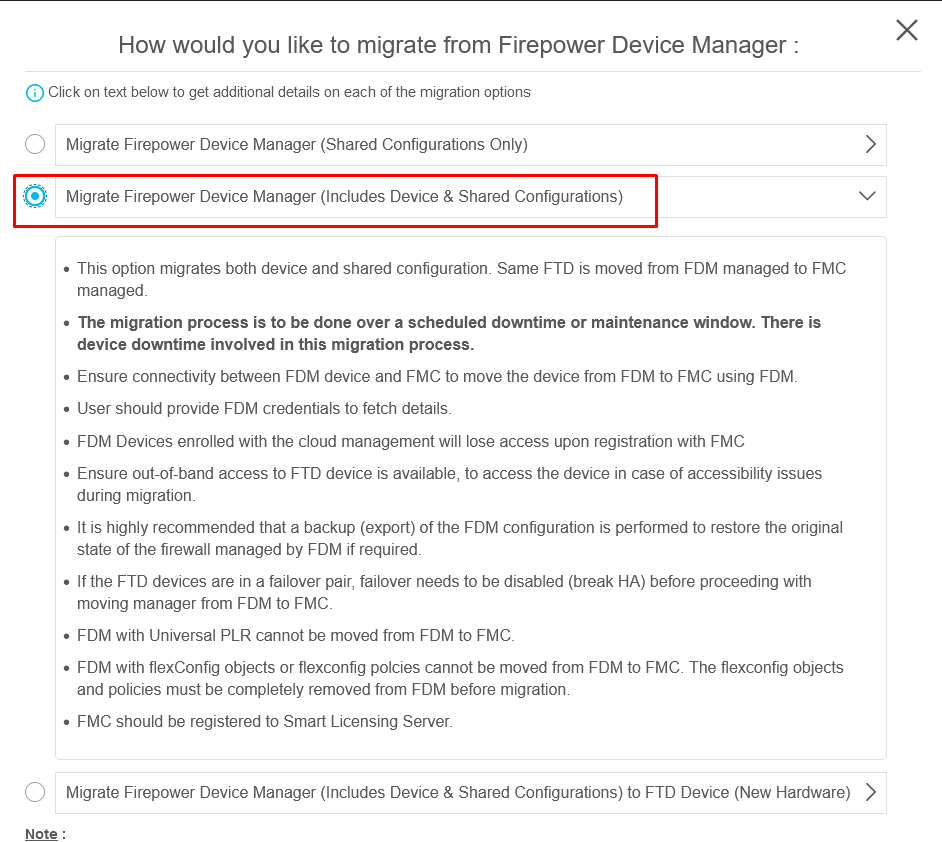 Migration Options
Once the migration method has been selected, proceed to select the device from the list provided.
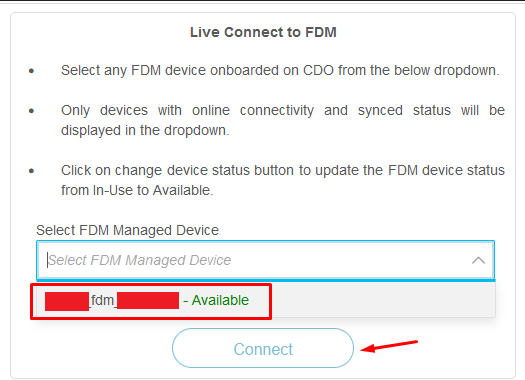 FDM Device Selection
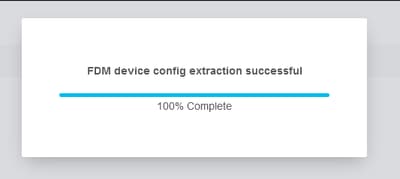 Config Extraction Completed
It is recommended to open the tab located at the top to review and understand at which step we are when the device has been selected.
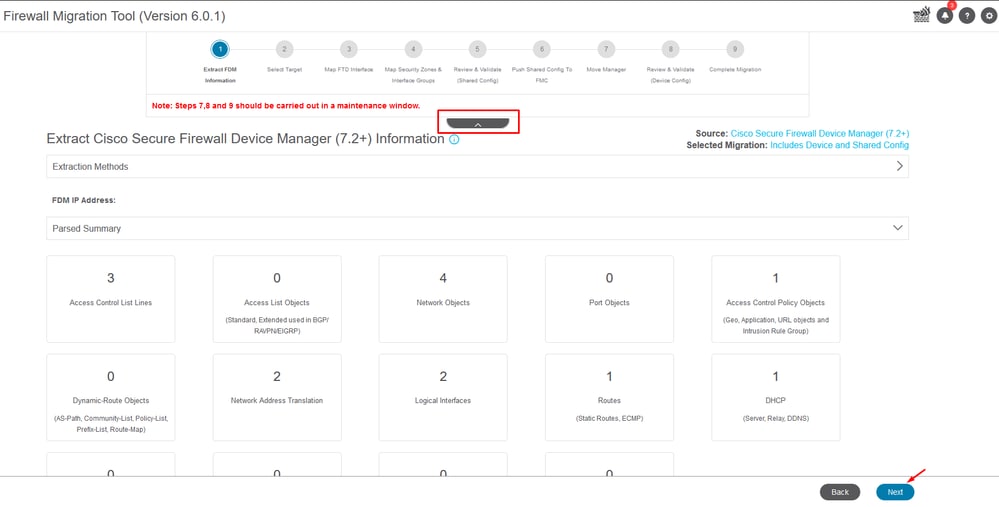 Steps for Migration Process
Being a new migration, select Cancel when prompted with the option "Do you want to use an Existing Access Control Policy, NAT or RAVPN Policy on FMC?"
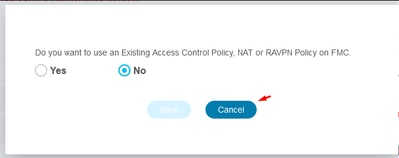 Cancel option for Existing Configuration
Afterwards, there are going to be options to select the Features to be migrated as shown in the image. Click Proceed.
 Features to be selected
Then Start Conversion.
 Start conversion.
Once the parsing process has concluded, two options can be used: Download the document and continue with the migration by clicking Next.
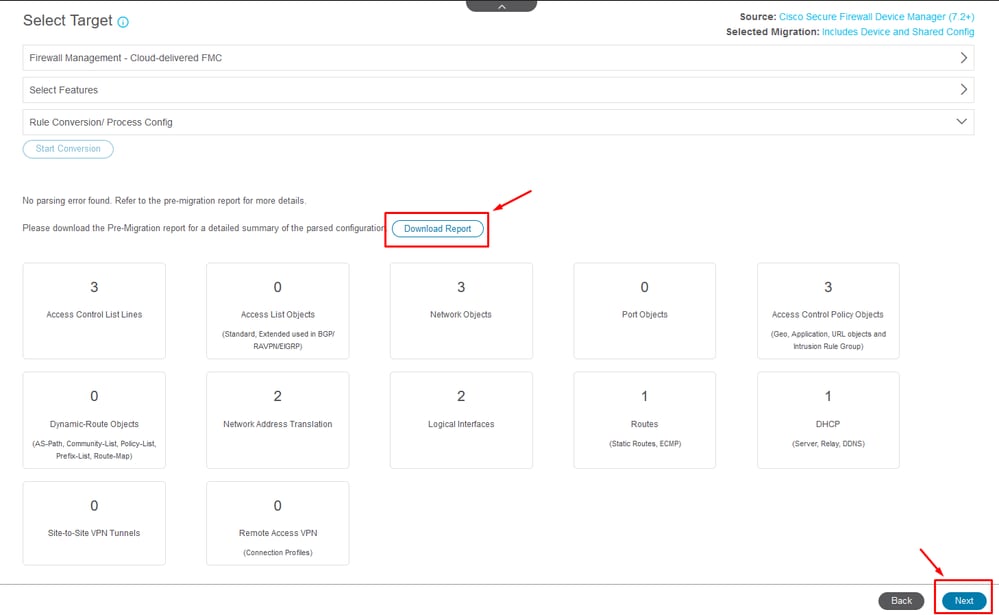 Download Report.
The device interfaces are set to be displayed. As a best practice, it is advisable to click Refresh to update the interfaces. Once validated, you can proceed by clicking Next.
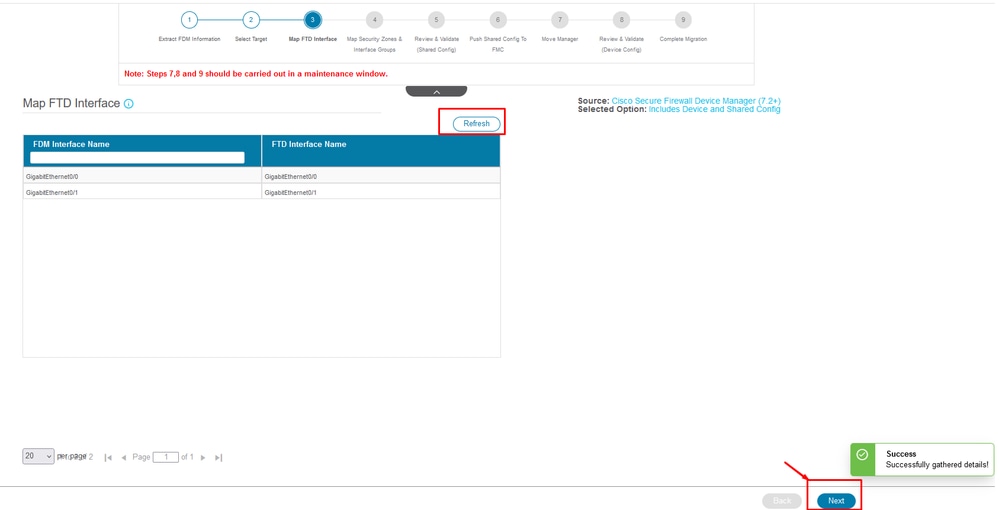 Interfaces Displayed
Navigate to the Security Zones and Interface Groups section, where you need to add manually with Add SZ & IG. For this example, Auto-Create has been chosen. This helps to automatically generate the interfaces within the FMC to which you are migrating. After finish, click on the Next button.
 Security Zones and Interface Groups
Auto-Create option maps FDM interfaces to existing FTD Security Zones and interfaces groups in FMC that have the same name.
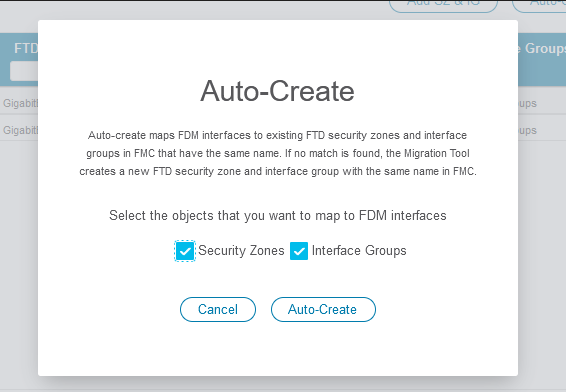 Auto-Create Option.
Then select Next.
 After Auto-Creation option.
In step 5, as shown in the top bar, take the time to examine the Access Control Policies (ACP), Objects, and NAT rules. Continue by carefully reviewing each item and then click on Validate to confirm that there are no issues with names or configurations.
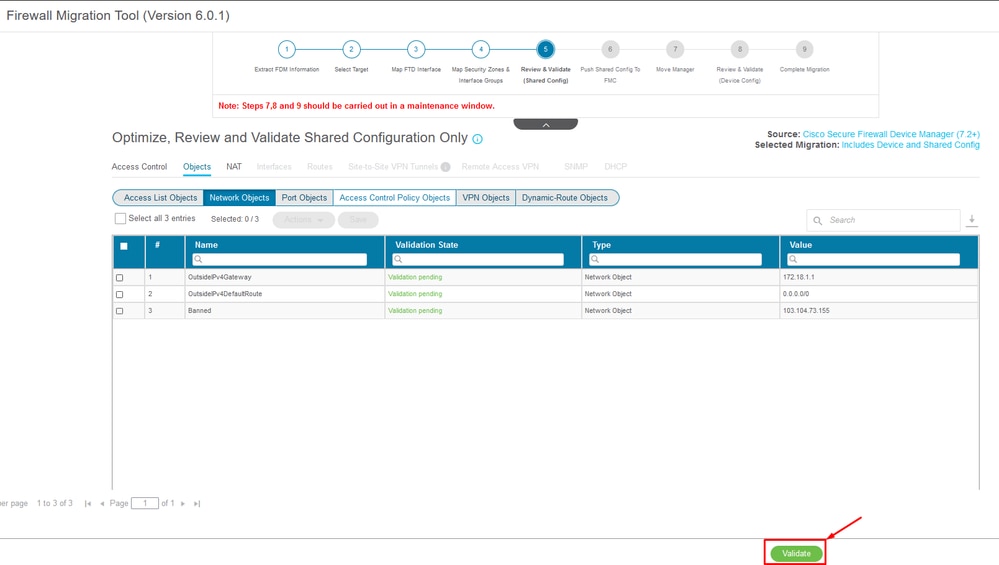 Access Control, Objects and NAT Configurations
Then Push Shared Configuration Only
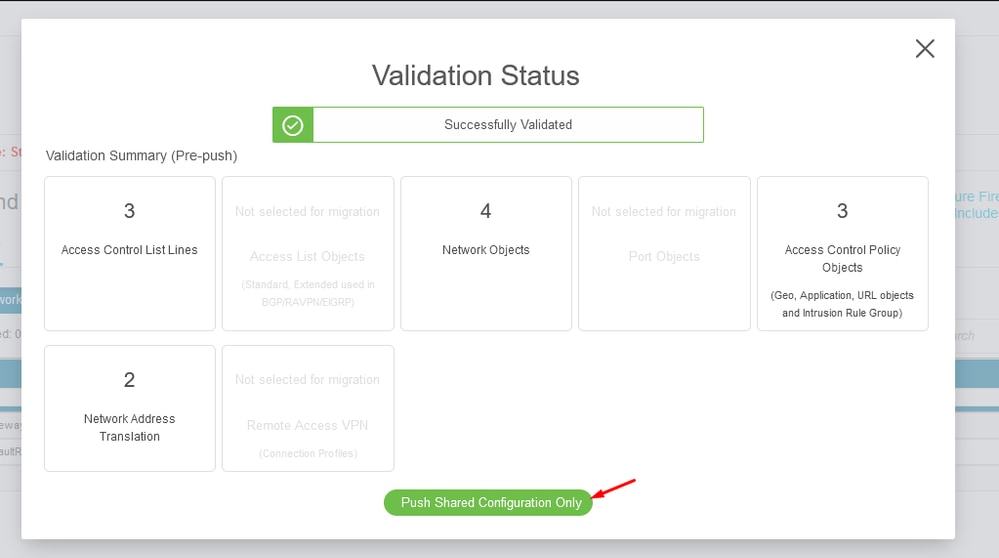 Push Shared Configuration Only
The percentage of completion and the specific task being worked on can be observed.
 Pushing Percentage
After completion of step 5, proceed to step 6, as displayed in the top bar, where the Push Shared Configuration to FMC takes place. At this, select the Next button to advance.
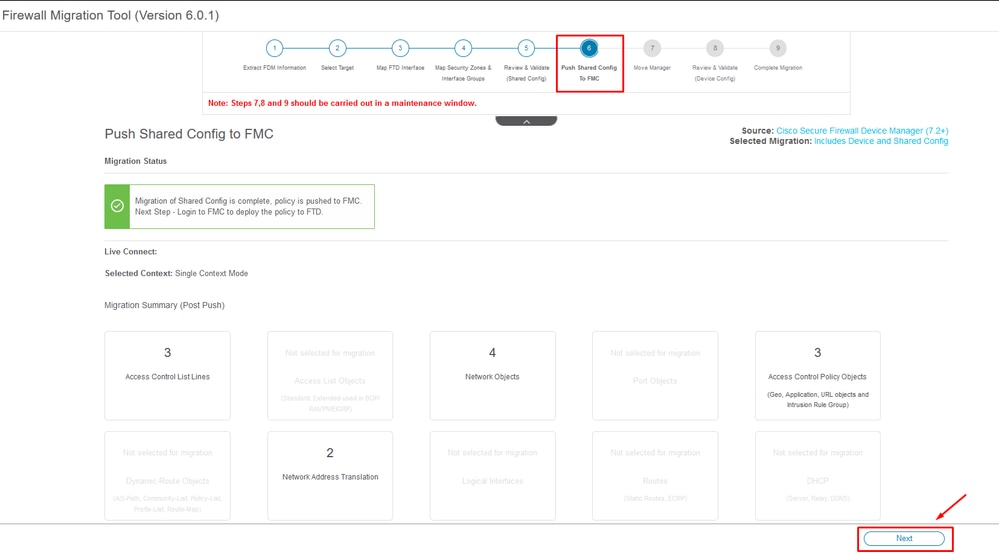 Push Shared Config to FMC Completed
This option triggers a confirmation message, prompting the continuation of the manager migration.
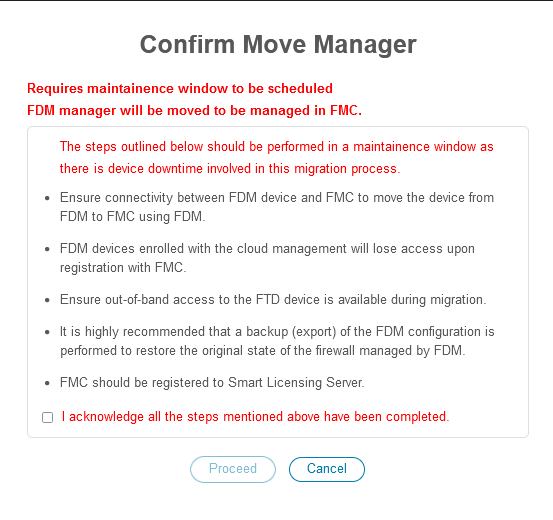 Confirm Move Manager
Proceeding with the manager migration requires having the Management Center ID and NAT ID at hand, which is essential. These IDs are retrievable by selecting Update Details. This action initiates a pop-up window where the desired name for the FDM representation within the cdFMC is entered, followed by saving the alterations.
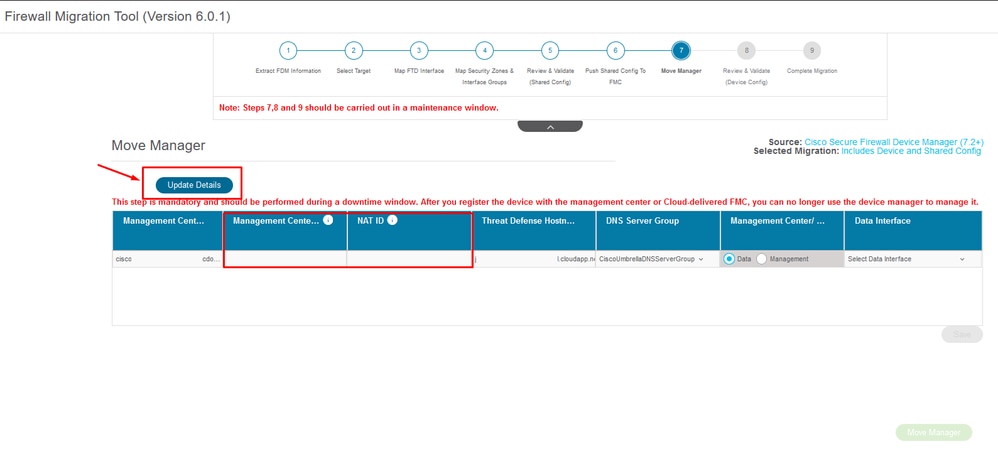 Manager Center ID & NAT ID
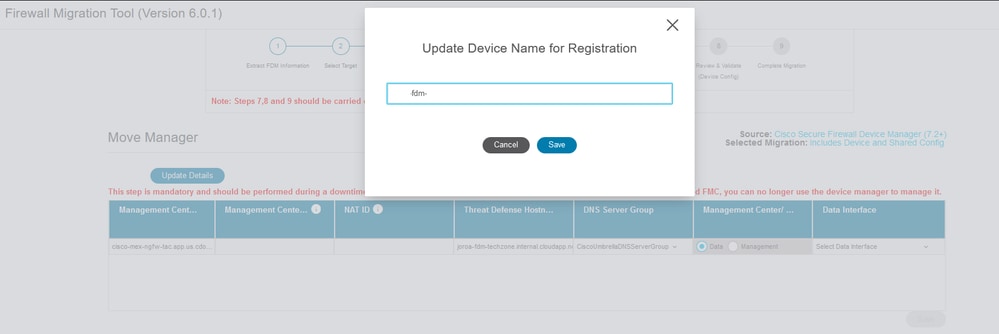 Update Device Name for Registration.
After this action, the IDs for the aforementioned fields are shown.

Warning: Do not make any changes to the Management Center Interface. By default, the Management option is selected, leave this option as the default setting.
 Managment Center ID & NAT ID.
After choosing Update Details option, the device it is going to start syncing.
 Syncing FDM Device
After the migration is finalized, the next step is to examine the interfaces, routes, and DHCP settings configured in the FDM by selecting Validate.
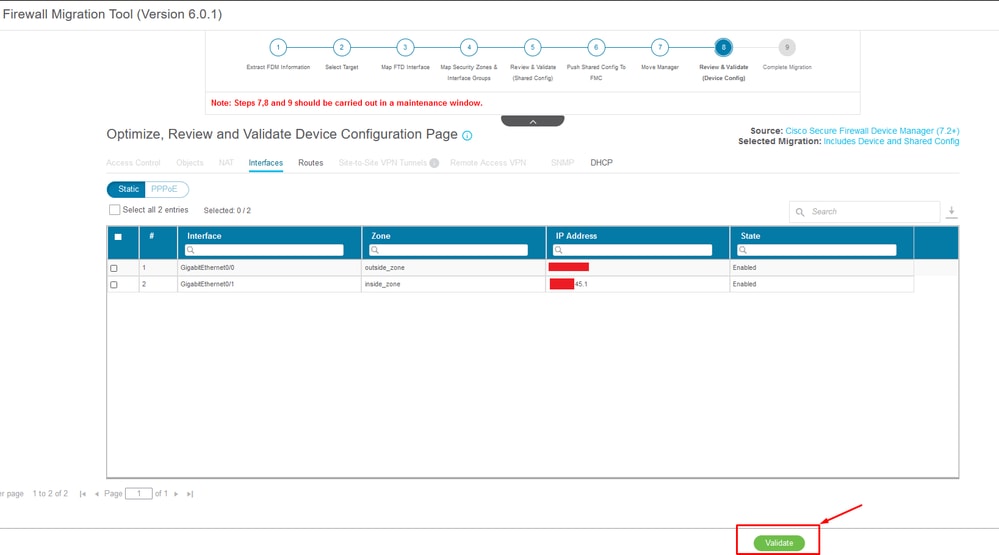 Validate FDM configuration Settings
After validation, choose Push Configuration to initiate the configuration push process, which is going to continue until the migration concludes. Additionally, it is possible to monitor the tasks that are being executed.
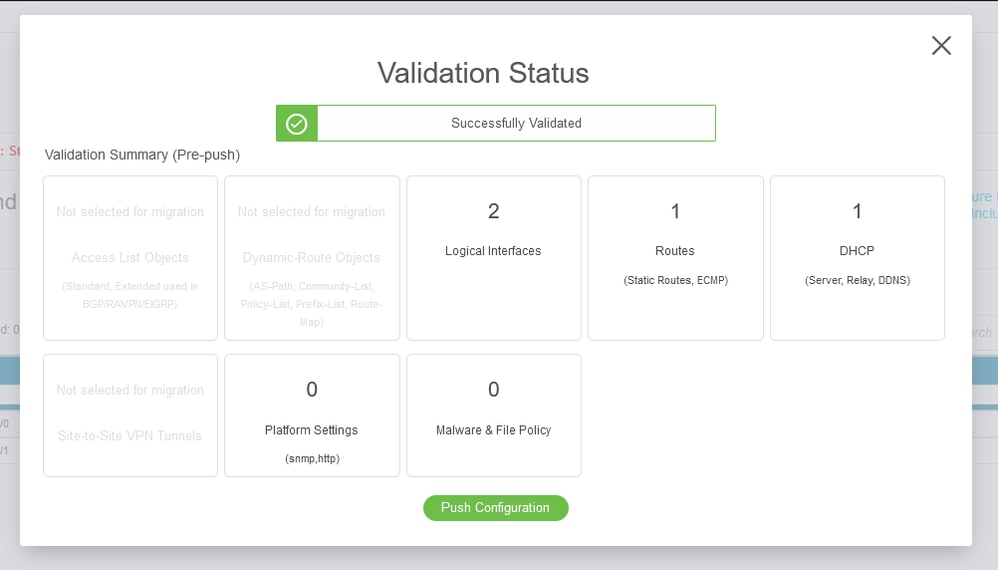 Validation Status - Push Configuration.
Pop-up window with the percentage pushing configuration.
 Pushing Percentage Completed
Upon completion, an option to initiate a new migration is presented, marking the end of the migration process from FDM to cdFMC.
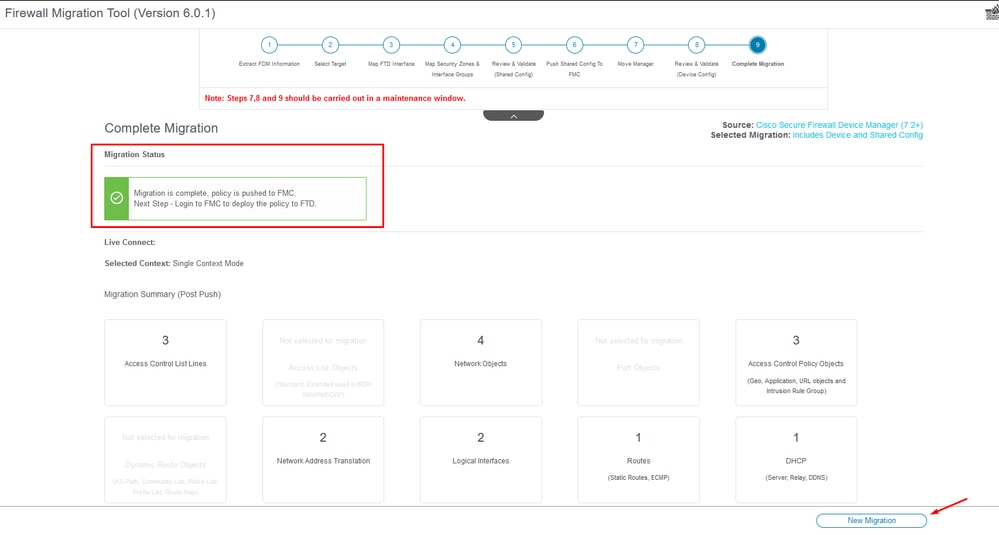 Complete Migration
Verify
To verify that the FDM has been successfully migrated to the cdFMC.
Navigate to CDO > Tools & Services > Firepower Management Center. There, you find the number of registered devices has increased.
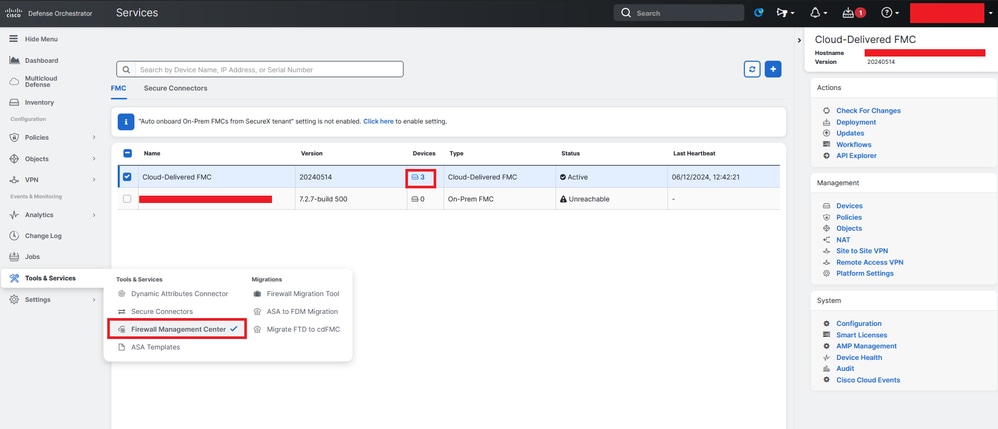 cdFMC Registered Devices
Check the device within Devices > Device Management. Additionally, within the tasks of the FMC, you can find when the device was successfully registered and the first deployment was completed successfully.
 cdFMC Registration Task Completed.
Device is on cdFMC > Device > Device Management.
 Device Registered on cdFMC
Access Control Policy migrated under Policies > Access Control.
 Migration Policy
Likewise, you can review the objects created in the FDM which were correctly migrated to the cdFMC.
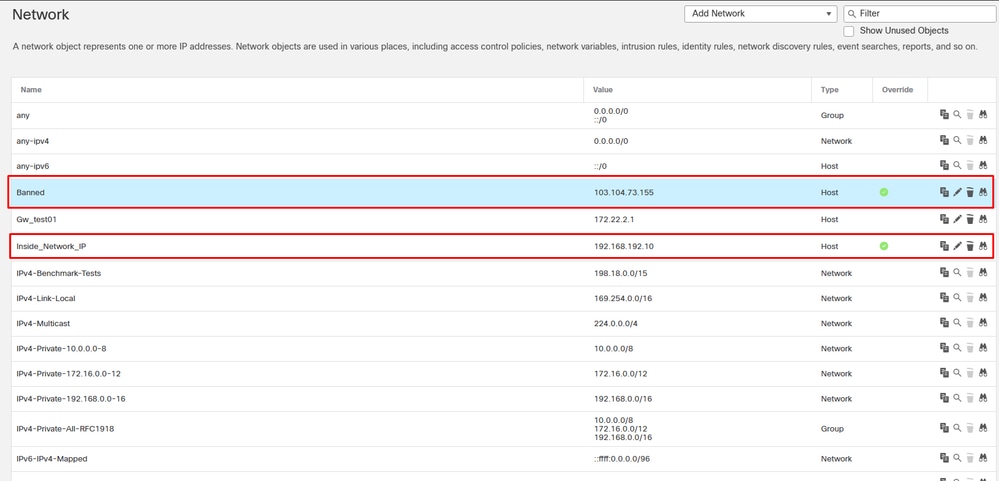 Objects Migrated from FDM to cdFMC
Object Management interfaces Migrated.
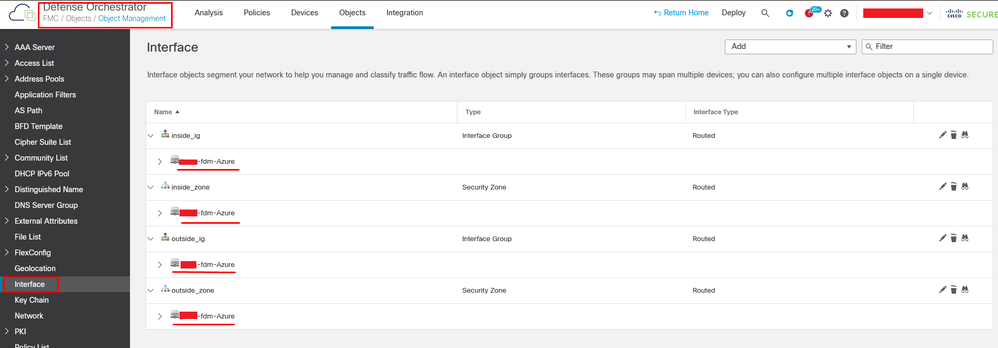 Object Management Intefaces Migrated.


 Feedback