Database Operations
| Feature Name | Release information | Description |
|---|---|---|
| Clear Smart PHY database without redeploying the cluster | Cisco Smart PHY, Release 23.1 | You can clear (delete) all the data within the Smart PHY database without having to redeploy the cluster. This operation is similar to a factory reset. |
|
Exporting Smart PHY Database to Local Computer |
Cisco Smart PHY, Release 23.2 |
You can export the Smart PHY database to you local computer. You can also import previously saved Smart PHY databases. |
Smart PHY stores all its inventory and provisioning data in an internal database. You can execute database import and export operations and view a history of previous operations from Smart PHY's Database Operations page.
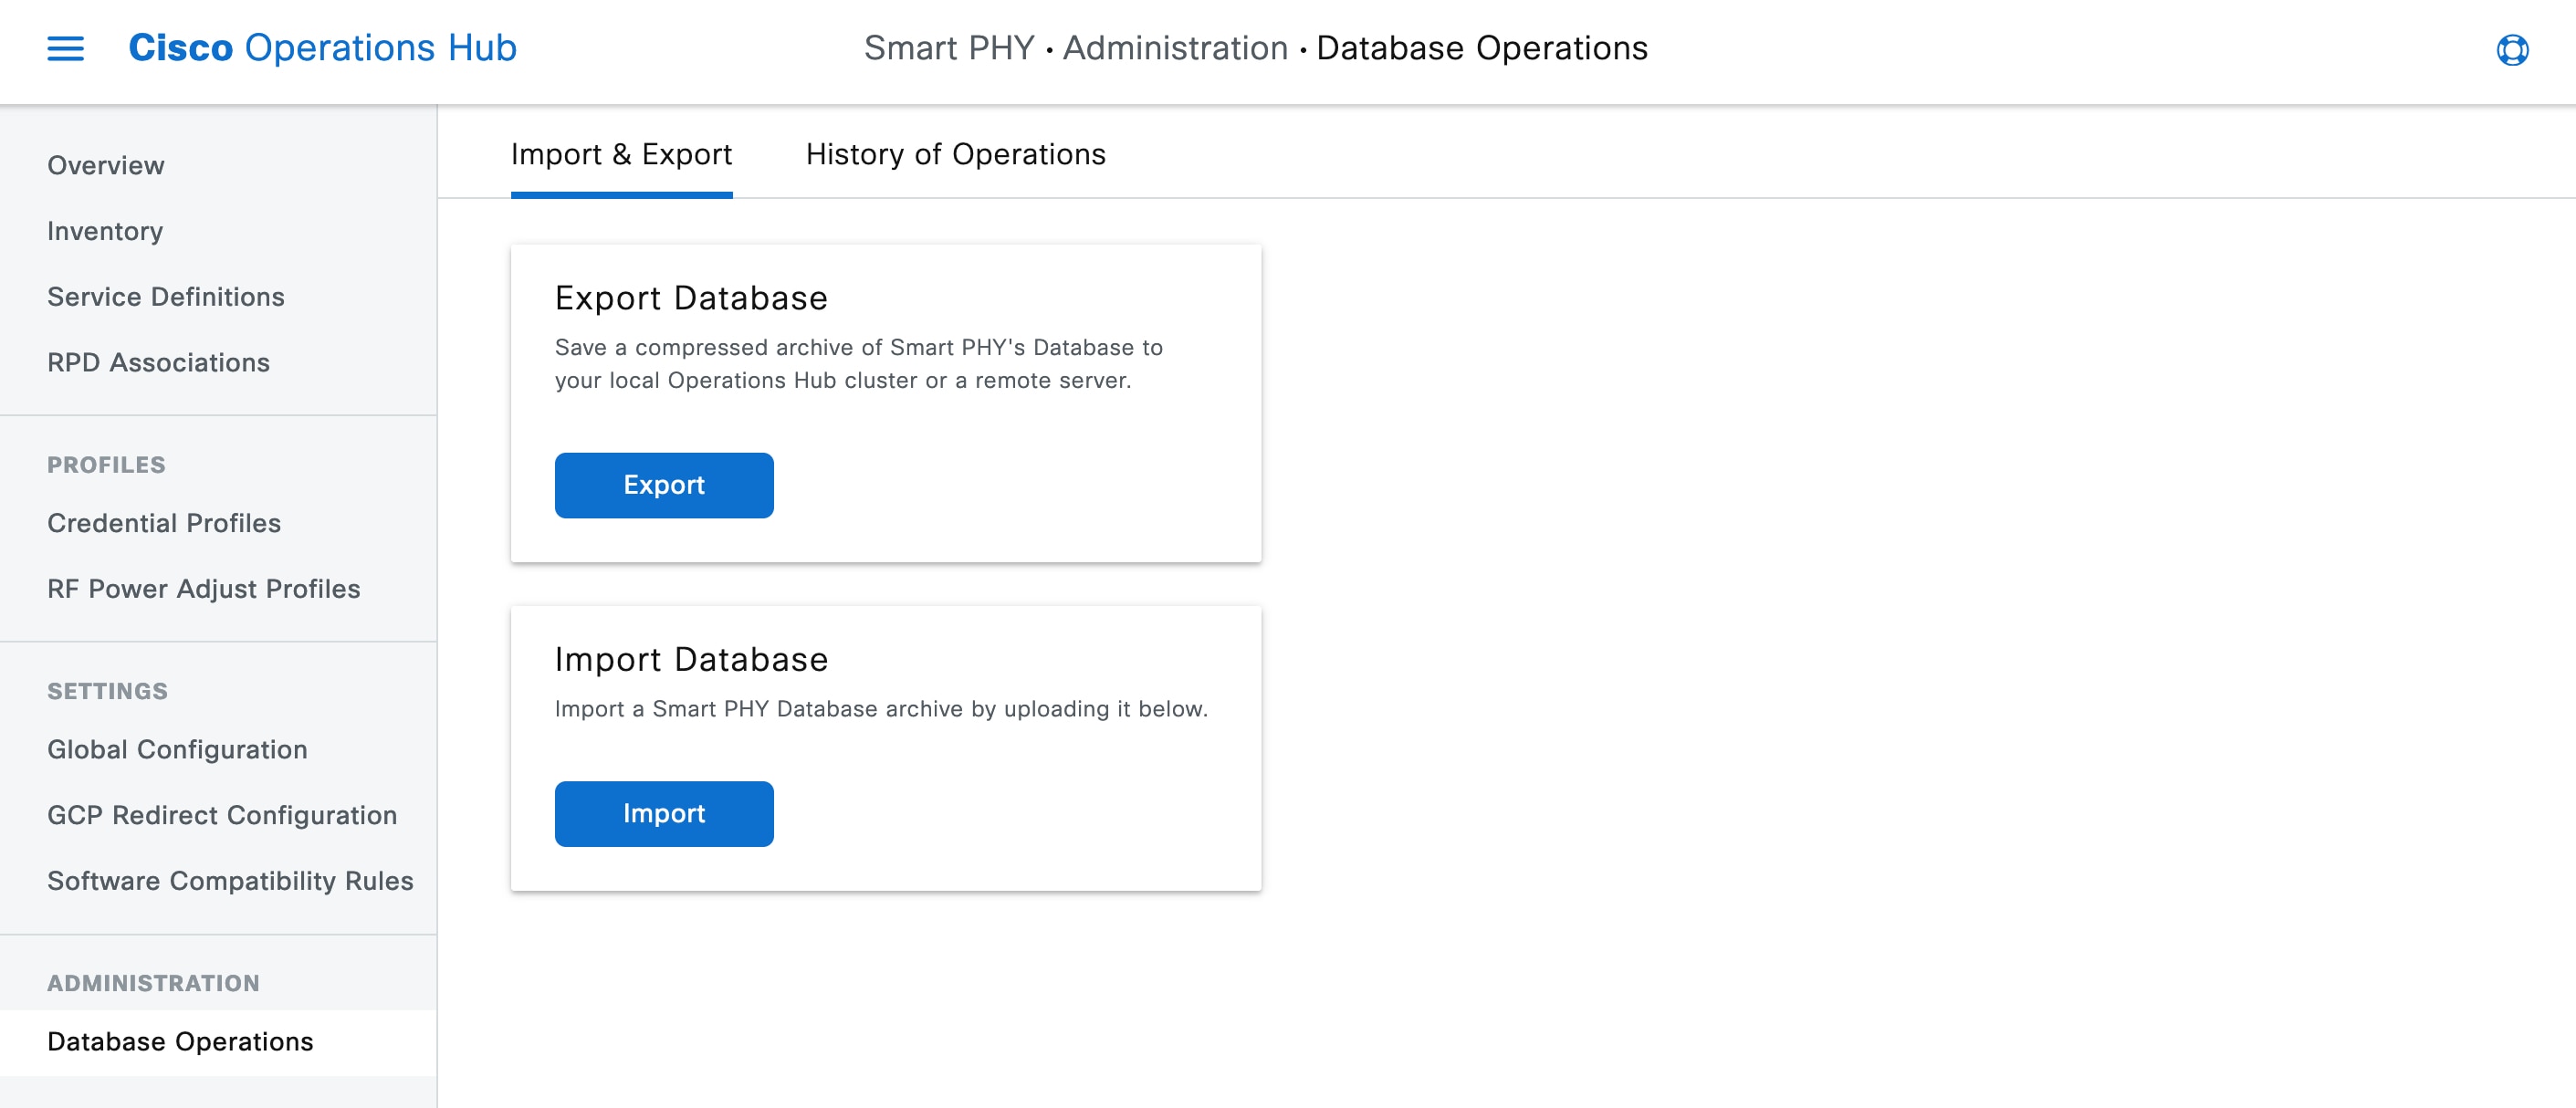
Exporting Smart PHY Database to Local Computer
Smart PHY's Database is compressed and saved to the /var/smartphy/backup directory on the local filesystem. The filename format is <cluster-name>_backup_<YYYYMMDD_HHMMSS>.tar.gz.
Use this task to export the database from local filesystem
Procedure
|
Step 1 |
At the main menu, click . The Import & Export page appears. |
|
Step 2 |
Click Export. The Export Database panel appears at the right side of the page. |
|
Step 3 |
Under Destination, select the My Computer radio button. If you wish to password protect the exported database, check the Password Protect Database checkbox, and then enter a password. |
|
Step 4 |
Click Export. Use the Import option to import previously saved Smart PHY databases. |
Exporting Smart PHY Database to Local Operations Hub Cluster
Smart PHY's Database is compressed and saved to the /var/smartphy/backup directory on the local filesystem. The filename format is <cluster-name>_backup_<YYYYMMDD_HHMMSS>.tar.gz.
Use this task to export the database from local filesystem
Procedure
|
Step 1 |
At the main menu, click . The Import & Export page appears. |
|
Step 2 |
Click Export. The Export Database panel appears at the right side of the page. |
|
Step 3 |
Under Destination, select the Local Operations Hub Cluster radio button. If you wish to password protect the exported database, check the Password Protect Database checkbox, and then enter a password. |
|
Step 4 |
Click Export. |
Exporting Database to a Remote Server
Smart PHY's Database is compressed and then copied to the specified file path on the remote server using SCP. The filename format is <cluster-name>_backup_<YYYYMMDD_HHMMSS>.tar.gz.
Procedure
|
Step 1 |
At the main menu, click . The Import & Export page appears. |
|
Step 2 |
Click Export. The Export Database panel appears at the right side of the page. |
|
Step 3 |
Under Destination, select the Remote Server radio button. Enter the following details for the remote server:
|
|
Step 4 |
Click Export. |
Importing Database
If you have not yet added inventory or provisioning data to your Smart PHY cluster, then you can import a previously exported Smart PHY Database.
Note: Smart PHY only allows database import operations to occur when its internal database is empty. If inventory or provisioning data is present in its internal database, then Smart PHY blocks database import operations.
This procedure imports a database.
Procedure
|
Step 1 |
At the main menu, click . The Import & Export page appears. |
|
Step 2 |
Click Import under the Import Database area. The Import Database window appears at the right side of the page. |
|
Step 3 |
Under Source, select either the Local Operations Hub cluster or Remote Server radio button.
|
|
Step 4 |
Click Import. Smart PHY allows database import operations to occur only when its internal database is empty. If the database isn’t empty, you’re prompted to erase the existing database. On confirmation, existing database is erased, GCP communication is disabled internally and the new database is imported. After importing the database, Smart PHY automatically reenables the GCP communication, verifies, and synchronizes the imported data. Once synchronizing is complete, all data including Smart PHY Inventory, Service Definition and RPD pairing information re-appears. |
Configuring SSH Private Key Profiles
|
Feature Name |
Release information |
Description |
|---|---|---|
|
SSH Private Key Profiles |
Cisco Smart PHY, Release 23.2 |
Smart PHY allows you to upload SSH Private Keys and then use those keys to securely connect to remote systems for Import and Export Database operations. |
Smart PHY allows you to manage SSH private key profiles and then securely connect to remote servers. These SSH profiles, which are stored securely in Operations Hub platform, can be used during export and import operations of Smart PHY databases.
Creating SSH Private Key Profiles
-
Access the SSH profiles page from the main menu, and select Smart PHY > Settings > SSH Private Key Profiles.
-
Enter SSH Profile Name, SSH User Name and upload the SSH Private Key (PEM file)
-
If SSH Private Key is encrypted with a passphrase, then enter a passphrase.
-
Click Create.
Note:
-
Only AES-128 CBC passphrase encryption is supported. If private key is passphrase encrypted with AES-128 CBC, the private key PEM file should have DEK-Info.
-
SSH private key can be of RSA-2048, RSA-4096 or AES-128-CBC encrypted PEM format.
The RSA PEM Key format example is given below:
-----BEGIN RSA PRIVATE KEY-----
<... Your Private Key ... >
-----END RSA PRIVATE KEY-----
When private key is passphrase encrypted:
-----BEGIN RSA PRIVATE KEY-----
Proc-Type: 4,ENCRYPTED
DEK-Info: AES-128-CBC,D6BF782F43A083F8303F55EEC3624D0B
...............................
-----END RSA PRIVATE KEY----
Validating SSH Private Key Profiles
Once an SSH private key profile is created, you can validate the profile. During validation, Operations Hub attempts to open an SSH session with the Remote Server using the SSH Private Key from the selected SSH Profile.
-
Access the SSH profiles page from the main menu, and select Smart PHY > Settings > SSH Private Key Profiles.
-
Select an SSH profile and click Validate.
-
Enter an IPv4 remote server IP Access the SSH profiles page from the main menu, and select address and click Validate.
Note: For the validation to be successful, the public key should be present in the remote server as part of SSH authorization keys. This enables passwordless login to the remote server.
Editing SSH Private Key Profiles
An SSH private key profile can be edited anytime.
-
Access the SSH profiles page from the main menu, and select Smart PHY > Settings > SSH Private Key Profiles.
-
Select an existing SSH private key profile and click Edit.
-
You can edit or correct any of the following parameters: SSH Profile Name, SSH User Name, SSH Private Key and optionally the SSH Private Key passphrase.

Note
The private key can't be edited. However, it can be replaced by pasting or uploading a new private key during the edit operation.
Deleting SSH Private Key Profiles
If you are not using an SSH private key profile, you can delete it.
-
Access the SSH private key profiles page from the main menu, and select Smart PHY > Settings > SSH Private Key Profiles.
-
Select one or more SSH private key profiles and click Delete.
Viewing History of Database Operations
Smart PHY maintains a history of all database Operations.
The history contains the following information:
-
Operation Status
-
Type of Operation (Import or Export)
-
Start Time
-
End Time
-
Result
This procedure enables you to view the history of database operations.
Procedure
|
Step 1 |
At the main menu, click . |
|
Step 2 |
Click the History of Operations tab to view the history of database operations. You can also perform the following tasks:
|
 Feedback