Installation Workflow
To set up Cisco Crosswork Optimization Engine and Cisco Crosswork Data Gateway complete the following installation tasks:
The documentation set for this product strives to use bias-free language. For the purposes of this documentation set, bias-free is defined as language that does not imply discrimination based on age, disability, gender, racial identity, ethnic identity, sexual orientation, socioeconomic status, and intersectionality. Exceptions may be present in the documentation due to language that is hardcoded in the user interfaces of the product software, language used based on RFP documentation, or language that is used by a referenced third-party product. Learn more about how Cisco is using Inclusive Language.
This section contains the following topics:
To set up Cisco Crosswork Optimization Engine and Cisco Crosswork Data Gateway complete the following installation tasks:
This section explains the procedure to install for the first time. You can install using one of the following methods:
For details on upgrading to a newer version, see Upgrade Workflow.
During installation, Cisco Crosswork Optimization Engine creates two special administrative IDs:
The virtual machine (VM) administrator, with the username cw-admin, and the default password cw-admin. Data center administrators use this ID to log in to and troubleshoot the Cisco Crosswork Optimization Engine VM. You will use it to verify that the VM has been properly set up (see Verify the VM Configuration).
The Crosswork administrator, with the username admin and the default password admin. Product administrators use this ID to log in to and configure the Cisco Crosswork Optimization Engine user interface, and to perform special operations, such as stopping and restarting services.
 Note |
These two administrative usernames are reserved and cannot be changed. The first time you log in using either of these administrative IDs, you will be prompted to change that ID's password. |
This section explains how to install Cisco Crosswork Optimization Engine using vCenter.
Before you begin, ensure that you have met all requirements stated in Virtual Machine Requirements.
Note the following:
VMware vCenter supports vSphere Web Client (flash mode) and vSphere Client (HTML5 mode). However, we recommend vSphere Web Client (flash mode) for the Cisco Crosswork Optimization Engine VM deployment. The vSphere Web Client (flash mode) is the method explained in this procedure. The vSphere Client (HTML5 mode) is supported only on VMware vCenter Server 6.7 Update 3g or later.
During the installation and first-time booting of the VM, the links to the specified gateways will be validated. VM configuration will fail if the links are inaccessible.
| Step 1 |
Download the latest available Cisco Crosswork Optimization Engine image file (*.ova) to your system.
|
||
| Step 2 |
With VMware ESXi running, log in to the VMware vSphere Web Client. |
||
| Step 3 |
On the left navigation pane, choose the ESXi host on which you want to deploy the VM. |
||
| Step 4 |
Choose . The VMware Deploy OVF Template window appears, with the first step, 1 - Select template, highlighted. |
||
| Step 5 |
Click Browse to navigate to the location where you downloaded the OVA image file and select it. Once selected, the file name is displayed in the window. |
||
| Step 6 |
Click Next. The Deploy OVF Template window is refreshed, with 2 - Select name and location now highlighted. |
||
| Step 7 |
Enter a name for the Cisco Crosswork Optimization Engine VM you are creating. We recommend that you include the Cisco Crosswork Optimization Engine version and build number in the name, for example: CW Optimization Engine 1.2.1 Build 123. |
||
| Step 8 |
Click Next. The Deploy OVF Template window is refreshed, with 3 - Select a resource highlighted. |
||
| Step 9 |
Select the Cisco Crosswork Optimization Engine VM’s host. |
||
| Step 10 |
Click Next. The VMware vCenter Server validates the OVA. Network speed will determine how long validation takes. After the validation is complete, the Deploy OVF Template window is refreshed, with 4 - Review details highlighted. |
||
| Step 11 |
Review the OVF template that you are deploying. Note that this information is gathered from the OVF, and cannot be modified. |
||
| Step 12 |
Click Next. The Deploy OVF Template window is refreshed, with 5 - Accept license agreements highlighted. |
||
| Step 13 |
Review the End User License Agreement and click Accept. |
||
| Step 14 |
Click Next The Deploy OVF Template window is refreshed, with 6 - Select configuration highlighted. |
||
| Step 15 |
Choose the desired deployment configuration (IPv4 Network, IPv6 Network, IPv4 Network on a Single Interface, or IPv6 Network on a Single Interface).
 |
||
| Step 16 |
Click Next. The Deploy OVF Template window is refreshed, with 7 - Select Storage highlighted. |
||
| Step 17 |
Choose the relevant option from the Select virtual disk format drop-down list. From the table, choose the datastore you want to use, and review its properties to ensure there is enough available storage.
|
||
| Step 18 |
Click Next. The Deploy OVF Template window is refreshed, with 8 - Select networks highlighted. |
||
| Step 19 |
From the Data Network and Management Network drop-down lists, choose an appropriate destination network. |
||
| Step 20 |
Click Next. The Deploy OVF Template window is refreshed, with 9 - Customize template highlighted. |
||
| Step 21 |
Expand the Management Network settings. |
||
| Step 22 |
Provide information for the IPv4 deployment (Management IPv4 Address, Management IPv4 Gateway, and Management IPv4 Netmask fields) or for the IPv6 deployment (Management IPv6 Address, Management IPv6 Gateway, and Management IPv6 Prefix fields) respectively. This selection should match what was selected on Step 15. |
||
| Step 23 |
Expand the Data Network settings. |
||
| Step 24 |
Provide information for the IPv4 deployment (Data IPv4 Address, Data IPv4 Gateway, and Data IPv4 Netmask fields) or the IPv6 deployment (Data IPv6 Address, Data IPv6 Gateway, and Data IPv6 Prefix fields) .
|
||
| Step 25 |
Expand the DNS and NTP Servers settings. |
||
| Step 26 |
According to your deployment configuration (IPv4 or IPv6), the fields that are displayed are different. Provide information in the following three fields:
|
||
| Step 27 |
Disk Configuration settings allow you to adjust the amount of storage space available to Cisco Crosswork Optimization Engine. The default settings should work for most environments. For assistance in adding additional storage, contact the Cisco Customer Experience team. |
||
| Step 28 |
Expand Crosswork Configuration and enter your legal disclaimer text (users will see this text if they log into the CLI). |
||
| Step 29 |
Expand the Crosswork Collection Configuration settings.  |
||
| Step 30 |
Click Next. The Deploy OVF Template window is refreshed, with 10 - Ready to Complete highlighted, as shown in the following figure (template name will depend on the version you are installing).  |
||
| Step 31 |
Review your settings and then click Finish if you are ready to begin deployment. Wait for the deployment to finish before continuing. To check the deployment status:
|
||
| Step 32 |
After the deployment tasks are complete, check the host's VM settings to permit boot from the Extensive Firmware Interface (EFI):
|
||
| Step 33 |
You can now power on the Cisco Crosswork Optimization Engine VM to complete the deployment process. Expand the host’s entry, click the Cisco Crosswork Optimization Engine VM, and then choose . From this point, it will take 20 minutes for the Cisco Crosswork Optimization Engine VM to become operational. Wait for the process to finish before attempting to use Crosswork. |
This is an alternative way to install Cisco Crosswork Optimization Engine. You can modify the parameters in the script as required and run the OVF tool.
Note |
|
#!/bin/bash

# ova path
OVA_PATH=<orchestrator path>

# Download crosswork.ova
# Change the path to a convenient location for download
ova_path=<ova path>

mkdir -p $ova_path

echo "Delete ova image if exists"
rm -rf $ova_path/*.ova

# Download crosswork.ova
cd $ova_path
echo "Downloading ova image"
wget -d --proxy=off -r -l1 -H -t1 -nd -N -np -A.ova -erobots=off ${OVA_PATH}
cd..
filename=`find $ova_path -name \*.ova`

# This deployment is for IPv4.
Deployment="cw_ipv4"
# For IPv4 Network on Single Interface configuration, the deployment value is "1intv4"
DM="thin"

corefs="100"
datafs="450"
logfs="10"

VM_NAME=<mention the VM name>

ManagementIPv4Address=<Management IPv4 Address>
ManagementIPv4Netmask=<Management IPv4 Netmask>
ManagementIPv4Gateway=<Management IPv4 Gateway>
RouterIPv4Address=<Router IPv4 Address>
RouterIPv4Netmask=<Router IPv4 Netmask>
RouterIPv4Gateway=<Router IPv4 Gateway>
DNSv4=<DNS>
NTP=<NTP>
Domain=<Domain Name>

Disclaimer=<Add a relevant disclaimer>

# Please replace this information according to your vcenter setup
VCENTER_LOGIN=<vCenter login details>
VCENTER_PATH=<vCenter path>
DS=<DS details>

ovftool --acceptAllEulas --skipManifestCheck --X:injectOvfEnv -ds=$DS --diskMode=$DM \
--overwrite --powerOffTarget --powerOn --noSSLVerify \
--allowExtraConfig \
--name="$VM_NAME" \
--net:"Data Network=Change Me" \
--deploymentOption="${Deployment}" \
--prop:"ManagementIPv4Address=${ManagementIPv4Address}" \
--prop:"ManagementIPv4Netmask=${ManagementIPv4Netmask}" \
--prop:"ManagementIPv4Gateway=${ManagementIPv4Gateway}" \
# If Deployment value is "1intv4", the following Data IP address, netmask and gateway parameters are removed
--prop:"DataIPv4Address=${RouterIPv4Address}" \
--prop:"DataIPv4Netmask=${RouterIPv4Netmask}" \
--prop:"DataIPv4Gateway=${RouterIPv4Gateway}" \
--prop:"DNSv4=${DNSv4}" \
--net:"Management Network=VM Network" \
--prop:"NTP=${NTP}" \
--prop:"Domain=${Domain}" \
--prop:corefs=${corefs} \
--prop:ddatafs=${datafs} \
--prop:logfs=${logfs} \
--prop:"Disclaimer=${Disclaimer}" \
--sourceType=OVA \
"$filename" \
vi://$VCENTER_LOGIN/$VCENTER_PATH
#!/bin/bash

# ova path
OVA_PATH=<Orchestrator path>

# Download crosswork.ova
# Change the path to a convenient location for download
ova_path=<OVA path>

mkdir -p $ova_path

echo "Delete ova image if exists"
rm -rf $ova_path/*.ova

# Download crosswork.ova
cd $ova_path
echo "Downloading ova image"
wget -d --proxy=off -r -l1 -H -t1 -nd -N -np -A.ova -erobots=off ${OVA_PATH}
cd..
filename=`find $ova_path -name \*.ova`

# This deployment is for IPv6.
Deployment="cw_ipv6"
# For IPv6 Network on Single Interface configuration, the deployment value is "1intv6"
DM="thin"

corefs="100"
datafs="450"
logfs="10"

VM_NAME=<VM name>

ManagementIPv6Address=<Management IPv6 Address>
ManagementIPv6Netmask=<Management IPv6 Netmask>
ManagementIPv6Gateway=<Management IPv6 Gateway>
RouterIPv6Address=<Router IPv6 Address>
RouterIPv6Netmask=<Router IPv6 Netmask>
RouterIPv6Gateway=<Router IPv6 Gateway>
DNSv6=<DNS>
NTP=<NTP>
Domain=<Domain Name>

Disclaimer=<Add a relevant disclaimer>

# Please replace this information according to your vcenter setup
VCENTER_LOGIN=<vCenter login details>
VCENTER_PATH=<vCenter path>
DS=<DS details>

ovftool --acceptAllEulas --skipManifestCheck --X:injectOvfEnv -ds=$DS --diskMode=$DM \
--overwrite --powerOffTarget --powerOn --noSSLVerify \
--allowExtraConfig \
--name="$VM_NAME" \
--net:"Data Network=Change Me" \
--deploymentOption="${Deployment}" \
--prop:"ManagementIPv6Address=${ManagementIPv6Address}" \
--prop:"ManagementIPv6Netmask=${ManagementIPv6Netmask}" \
--prop:"ManagementIPv6Gateway=${ManagementIPv6Gateway}" \
# If Deployment value is "1intv6", the following Data IP address, netmask and gateway parameters are removed
--prop:"DataIPv6Address=${RouterIPv6Address}" \
--prop:"DataIPv6Netmask=${RouterIPv6Netmask}" \
--prop:"DataIPv6Gateway=${RouterIPv6Gateway}" \
--prop:"DNSv6=${DNSv6}" \
--net:"Management Network=VM Network" \
--prop:"NTP=${NTP}" \
--prop:"Domain=${Domain}" \
--prop:corefs=${corefs} \
--prop:ddatafs=${datafs} \
--prop:logfs=${logfs} \
--prop:"Disclaimer=${Disclaimer}" \
--sourceType=OVA \
"$filename" \
vi://$VCENTER_LOGIN/$VCENTER_PATH
Before trying to log in to the new installation, verify that the VM is properly configured. You will be prompted to change the VM administrator's password during first login using the console.
| Step 1 |
After the VM is powered on, wait for 20 minutes, and then launch the console. |
| Step 2 |
At the login prompt, enter the default administrator username, cw-admin, and the corresponding default password, cw-admin. When prompted to change the password, enter the default password again for verification, and then enter and confirm the new password as prompted. Follow the instructions on the screen to create a strong password. |
| Step 3 |
If you see instructions to check firstBoot.log, use the command sudo cat /var/log/firstBoot.log to view the log file. If you find any discrepancy and want to investigate further, see Troubleshoot the Installation. After you have identified the error, perform the following:
|
To log in to the Cisco Crosswork Optimization Engine GUI from a browser, perform these steps. If you are unable to display the GUI, see Troubleshoot the Installation.
| Step 1 |
Launch one of the supported browsers (see Supported Web Browsers). |
||||
| Step 2 |
In the browser's address bar, enter: or
The Log In window opens.
|
||||
| Step 3 |
Log in to Cisco Crosswork Optimization Engine as follows:
|
||||
| Step 4 |
To exit the GUI, close the browser window or click |
The following table lists common problems that you might experience while installing Cisco Crosswork Optimization Engine, and the approaches to you can take to identify the source of the problems and solving them.
Note |
You need to login as a super user to perform troubleshooting. |
|
Issue |
Action |
|---|---|
|
Cannot connect to the VM |
|
|
VM cannot be reached by the provided gateways due to IP misconfiguration. You will see error messages in the login banner indicating this problem when you try to connect to the VM using SSH by following the steps described in Verify the VM Configuration. |
Redeploy the VM from scratch, using the correct IP configuration. |
|
Configure NTP after installation |
|
|
You need to configure NTP after deploying the VM, either because an incorrect NTP address was entered, or the NTP server is down. |
1. Edit the /etc/chrony/chrony.conf file. Add the pool line at the bottom of the file, with relevant NTP server details, as in this example: 2. Restart the chronyd service (systemctl restart chronyd). 3. Please verify that the NTP server has been configured (use the command chronyc sources). |
|
Cannot display the GUI |
|
|
Browser does not display the login window. |
1. Make sure you are using a supported browser (see Supported Web Browsers and that you entered the correct IP address in the browser (this should be the same as the management IP4 address and port number (30603) you entered during installation). 2. Log in to the VM using SSH, as explained in Verify the VM Configuration. 3. At the prompt, enter the command collect. This generates a file. 4. Open a ticket with the Cisco Customer Experience team and attach the file to the ticket. |
|
Unable to resolve other network addresses on the local network. |
1. While connected to the VM, open the file /etc/resolv.conf and check that it contains the correct DNS name server and search domain. 2. If it does not, redeploy the VM using the correct DNS name server and search domain configuration. |
|
Running the kubectl get nodes command does not display the correct VM management IP address. |
1. While connected to the VM, open the /etc/hosts file and check if the IP address assigned to the VM is correct. 2. If the address is wrong, redeploy the VM using the correct management IP address. |
|
Running kubectl get nodes command does not display a Ready status for the VM IPv4 address. |
1. While connected to the VM, check the login banner for error messages. 2. If there are error messages in the login banner, they will be recorded in the /var/log/firstBoot.log file, along with the recommended remediation steps. Open the log and follow the steps given for the error messages found in the banner. 3. If this does not help, run kubectl get pods --namespace kube-system and look for mismatched "Ready" counts. |
|
Running kubectl get pods --namespace kube-system displays one or more system containers that are not in "Running" status. |
1. Check for user input errors in the /var/log/boot.log file and perform the log's recommended remediation steps. 2. If this does not help, please contact the Cisco Customer Experience team. |
|
Running kubectl get pods displays one or more system containers that are not launched properly. |
Contact the Cisco Customer Experience team. |
|
GUI access issues |
|
|
I cannot log in. |
1. Make sure that you are using the Crosswork administrator default user ID and password (admin and admin, respectively). 2. If the Crosswork administrator default password has been changed, use the new password. |
|
I can log in, but cannot access some features. |
Make sure that all the applications and their underlying services are up and running by choosing and checking the status of the applications and services. See the topic "Monitor Cisco Crosswork Infrastructure and Resources" in the Cisco Crosswork Optimization Engine User Guide . |
|
Crosswork Manager shows that one or more applications or their underlying services are not running. |
1. In Crosswork Manager, check the description of the application or service issue and, if possible, try restarting the application or service. See the topic "Monitor Cisco Crosswork Infrastructure and Resources" in the Cisco Crosswork Optimization Engine User Guide . 2. Gather the log and metric information about the application or service with issues. See the topic "View, Control and Log Cisco Crosswork Applications and Services" in the Cisco Crosswork Optimization Engine User Guide . 3. Contact the Cisco Customer Experience team. |
|
CPU Overcommitment |
|
|
CPU or memory overcommitment occurs when the number of vCPUs that are running on a host is larger than the total number of physical processor cores in that host. VMware vCenter and ESXi allow this to provide flexibility in deploying and running the VMs on physical hosts. It is natural to assume that the vCenter users will try to maximize the physical resources usage by deploying and running a reasonably high number of VMs on a specific ESXi host. However, it can lead to a problem manifested in a "soft lockup" situation, where a VM will not be able to get a vCPU allocated in a reasonable amount of time. |
|
Cisco Crosswork Data Gateway is initially deployed as a VM called Base VM (containing only enough software to register itself with Crosswork).
Before installing Cisco Crosswork Data Gateway, we recommend that you become familiar with the information provided in Cisco Crosswork Data Gateway OVF Parameters and Deployment Scenarios.
You can use either of the following ways to install Cisco Crosswork Data Gateway:
Before you begin installing Cisco Crosswork Data Gateway, read below about OVF parameters and possible deployment scenarios.
Note |
Although Cisco Crosswork Data Gateway supports both IPv6 and IPv4, it is recommended to use IPv4 as Cisco Crosswork Optimization Engine supports only IPv4. * Denotes the mandatory parameters. Others are optional. You might choose them based on the kind of deployment scenrio you require. Deployment scenarios are explained wherever applicable. ** Denotes parameters that can be entered during install or addressed using additional procedures. |
|
OVF Parameter |
Description |
Deployment Scenario |
||||||
|---|---|---|---|---|---|---|---|---|
|
Host Information |
||||||||
|
Hostname* |
Hostname of the server specified as a fully qualified domain name (FQDN).
|
|||||||
|
Description* |
A detailed description of the Cisco Crosswork Data Gateway instance. |
|||||||
|
Label |
Label used by Crosswork to categorize and group multiple Cisco Crosswork Data Gateway instances. |
|||||||
|
Active vNICs |
Number of vNICs to use for sending traffic. |
You can choose to use either 1, 2, or 3 vNICs as per the following combinations:
|
||||||
|
Private Key URI |
SCP URI to private key file for session key signing. You can retrieve this using SCP (user@host:path/to/file). |
Crosswork uses self-signed certificates for handshake with Cisco Crosswork Data Gateway. These certificates are generated upon installation. However, if you want to use third-party or your own certificate files, then you must input these three parameters.
|
||||||
|
Certificate File URI |
SCP URI to PEM formatted signing certificate chain for this VM. You can retrieve this using SCP (user@host:path/to/file). |
|||||||
|
Certificate File and Key Passphrase |
SCP user passphrase to retrieve the Cisco Crosswork Data Gateway PEM formatted certificate file and private key. |
|||||||
|
Passphrases |
||||||||
|
dg-admin Password* |
The password you have chosen for the dg-admin user. |
|||||||
|
dg-oper Password* |
The password you have chosen for the dg-oper user. |
|||||||
|
||||||||
|
1vNIC0 IPv4 Address |
||||||||
|
vNIC0 IPv4 Method* |
How the vNIC0 interface gets its IPv4 address. |
|||||||
|
vNIC0 IPv4 Address |
IPv4 address of the vNIC0 interface. |
|||||||
|
vNIC0 IPv4 Netmask |
IPv4 netmask of the vNIC0 interface in dotted quad format. |
|||||||
|
vNIC0 IPv4 Gateway |
IPv4 address of the vNIC0 gateway. |
|||||||
|
1vNIC0 IPv6 Address |
||||||||
|
vNIC0 IPv6 Method* |
How the vNIC0 interface gets its IPv6 address. |
|||||||
|
vNIC0 IPv6 Address |
IPv6 address of the vNIC0 interface. |
|||||||
|
vNIC0 IPv6 Netmask |
IPv6 prefix of the vNIC0 interface. |
|||||||
|
vNIC0 IPv6 Gateway |
IPv6 address of the vNIC0 gateway. |
|||||||
|
1vNIC1 IPv4 Address |
||||||||
|
vNIC1 IPv4 Method* |
How the vNIC1 interface gets its IPv4 address. |
|||||||
|
vNIC1 IPv4 Address |
IPv4 address of the vNIC1 interface. |
|||||||
|
vNIC1 IPv4 Netmask |
IPv4 netmask of the vNIC1 interface in dotted quad format. |
|||||||
|
vNIC1 IPv4 Gateway |
IPv4 address of the vNIC1 gateway. |
|||||||
|
1vNIC1 IPv6 Address |
||||||||
|
vNIC1 IPv6 Method* |
How the vNIC1 interface gets its IPv6 address. |
|||||||
|
vNIC1 IPv6 Address |
IPv6 address of the vNIC1 interface. |
|||||||
|
vNIC1 IPv6 Netmask |
IPv6 netmask of the vNIC1 interface in dotted quad format. |
|||||||
|
vNIC1 IPv6 Gateway |
IPv6 address of the vNIC1 gateway. |
|||||||
|
1vNIC2 IPv4 Address |
||||||||
|
vNIC2 IPv4 Method* |
How the vNIC2 interface gets its IPv4 address. |
|||||||
|
vNIC2 IPv4 Address |
IPv4 address of the vNIC2 interface. |
|||||||
|
vNIC2 IPv4 Netmask |
IPv4 netmask of the vNIC2 interface in dotted quad format. |
|||||||
|
vNIC2 IPv4 Gateway |
IPv4 address of the vNIC2 gateway. |
|||||||
|
1vNIC2 IPv6 Address |
||||||||
|
vNIC2 IPv6 Method* |
How the vNIC2 interface gets its IPv6 address. |
|||||||
|
vNIC2 IPv6 Address |
IPv6 address of the vNIC2 interface. |
|||||||
|
vNIC2 IPv6 Netmask |
IPv6 netmask of the vNIC2 interface in dotted quad format. |
|||||||
|
vNIC2 IPv6 Gateway |
IPv6 address of the vNIC2 gateway. |
|||||||
|
DNS and NTP |
||||||||
|
DNS Address* |
Space-delimited list of IPv4/IPv6 addresses of the DNS server accesible from the management interface. |
|||||||
|
DNS Search Domain* |
DNS search domain |
|||||||
|
NTP Servers* |
Space-delimited list of IPv4/IPv6 addresses or hostnames of the NTP servers accessible from the management interface. |
You must enter a value here, such as pool.ntp.org. NTP server is critical for time synchronization between Cisco Crosswork Data Gateway VM, Cisco Crosswork Optimization Engine, and devices. Using a non-functional or dummy address may cause issues when Crosswork and Cisco Crosswork Data Gateway try to communicate with each other. If you are not using an NTP server, ensure that time gap between Cisco Crosswork Data Gateway and Cisco Crosswork Optimization Engine is not more than 10 minutes. Else, Cisco Crosswork Data Gateway will fail to connect. |
||||||
|
Syslog Servers |
||||||||
|
Server Address |
IPv4 or IPv6 address of a syslog server accessible from the management interface.
|
If you want to use an external syslog server, you must specify these 7 settings.
|
||||||
|
Syslog Port |
Port number of the syslog server. |
|||||||
|
Syslog Protocol |
Use UDP, TCP, or RELP when sending syslog. |
|||||||
|
Use Syslog over TLS? |
Use TLS to encrypt syslog traffic. |
|||||||
|
TLS Peer Name |
Syslog server's hostname exactly as entered in the server certificate SubjectAltName or subject common name. |
|||||||
|
Syslog Root Certificate File URI |
PEM formatted root cert of syslog server retrieved using SCP. |
|||||||
|
Syslog Certificate File Passphrase |
Password of SCP user to retrieve Syslog certificate chain. |
|||||||
|
Controller Settings |
||||||||
|
Controller IP* |
IP address of the Crosswork controller i.e., Cisco Crosswork Optimization Engine.
|
|||||||
|
Controller Port* |
Port of the Crosswork controller i.e., Cisco Crosswork Optimization Engine. |
|||||||
|
Controller Signing Certificate File URI** |
PEM formatted root cert of Cisco Crosswork Optimization Engine to validate signing certs retrived using SCP. PEM file is generated by Crosswork and is available at the following location:
|
The Controller Signing Certificate File is required for the Cisco Crosswork Data Gateway to become functional. The certificate file is automatically imported once Cisco Crosswork Data Gateway boots up for the first time if you specify these parameters during the installation. If you do not specify these parameters during installation, then you must import the certificate file manually by following the procedure Import Controller Signing Certificate File. |
||||||
|
SSL/TLS Certificate File URI |
Crosswork controller PEM formatted SSL/TLS certificate file retrieved using SCP. |
|||||||
|
Controller Certificate File Passphrase** |
Password of SCP user (cw-admin) to retrieve Cisco Crosswork Optimization Engine certificate chain. |
This is required if you are providing a controller signing certificate file URI. |
||||||
|
Proxy Server URL |
URL of management network proxy server. |
If you want to use a proxy server, you must specify these parameters. |
||||||
|
Proxy Server Bypass List |
Space-delimited list of subnets and domains that will not be sent to the proxy server. |
|||||||
|
Authenticated Proxy Username |
Username for authenticated proxy servers. |
|||||||
|
Authenticated Proxy Passphrase |
Passphrase for authenticated proxy servers. |
|||||||
|
HTTPS Proxy SSL/TLS Certificate File URI |
HTTPS proxy PEM formatted SSL/TLS certificate file retrieved using SCP. |
|||||||
|
HTTPS Proxy SSL/TLS Certificate File passphrase |
Password of SCP user to retrieve proxy certificate chain. |
|||||||
|
Auto Enrollment Package |
||||||||
|
Enrollment Destination Host and Path** |
SCP host and path to transfer the enrollment package using SCP (user@host:/path/to/file ). |
Enrollment package is required for enrolling Cisco Crosswork Data Gateway with Crosswork. The enrollment package is automatically transferred once Cisco Crosswork Data Gateway boots up for the first time if you specify these parameters during the installation. If you do not specify these parameters during installation, then you must export enrollment package manually by following the procedure Export Enrollment Package. |
||||||
|
Enrollment Passphrase** |
SCP user passphrase to transfer enrollment package. |
|||||||
1Either an IPv4 or IPv6 address must be specified for the interface(s) you choose to use. Selecting None for both will result in a non-functional deployment.
Note |
If you are not using the default SCP port 22, you can specify the port as a part of the SCP command. For example, where 55 is a custom port. |
During installation, Cisco Crosswork Data Gateway creates two default accounts:
A Cisco Crosswork Data Gateway administrator, with the username dg-admin and password set during installation. The product administrator uses this ID to log in to and troubleshoot Cisco Crosswork Data Gateway.
A Cisco Crosswork Data Gateway operator, with the username dg-oper and password set during installation. This is a read-only user and has permissions to perform all ‘read’ operations and some limited ‘action’ commands. To know what operations an operator can perform, see the "Permissions Per Role" table in the Cisco Crosswork Optimization Engine 1.2.1 User Guide.
Note |
These two pre-defined usernames are reserved and cannot be changed. Change of password would be allowed from the console for both the accounts. In case of lost or forgotten passwords, the user would have to create a new VM, destroy the current VM, and re-enroll the new one on the Cisco Crosswork Optimization Engine. |
Ensure the following:
You are creating the Cisco Crosswork Data Gateway VM on a recommended VMware version (See Virtual Machine (VM) Requirementsfor supported versions). To know which vCenter build you have, check the vSphere web client under the Help menu.
The Cisco Crosswork Data Gateway VM has allocated a minimum of 32 GB of RAM, 8 vCPUs, and 50 GB of hard drive space.
| Step 1 |
Download the Cisco Crosswork Data Gateway 1.1.3 image file from CCO (*.ova).
|
||||
| Step 2 |
Connect to vCenter vSphere Client. Then select Actions > Deploy OVF Template |
||||
| Step 3 |
The VMware Deploy OVF Template wizard appears and highlights the first step, 1 Select template. |
||||
| Step 4 |
Click Next to go to 2 Select name and location, as shown in the following figure.
|
||||
| Step 5 |
Click Next to go to 3 Select a resource. Choose the VM’s host. |
||||
| Step 6 |
Click Next. The VMware vCenter Server validates the OVA. Network speed will determine how long validation takes. When the validation is complete, the wizard moves to 4 Review details. Review the OVA’s information and then click Next. Take a moment to review the OVF template you are deploying.
|
||||
| Step 7 |
Click Next to go to 5 accept license agreements. Review the End User License Agreement and click Accept. |
||||
| Step 8 |
Click Next to go to 6 Select configuration, as shown in the following figure. To install Cisco Crosswork Data Gateway, you must select Crosswork On Premise from the Configuration dropdown.  |
||||
| Step 9 |
Click Next to go to 7 Select storage, as shown in the following figure.
|
||||
| Step 10 |
Click Next to go to 8 Select networks, as shown in the following figure. In the dropdown table at the top of the page, choose the appropriate destination network for each source network, vNIC2, vNIC1, and vNIC0 respectively.  |
||||
| Step 11 |
Click Next to go to 9 Customize template, with the Host Information Settings already expanded. As per the deployment scenario chosen by you in Section: Cisco Crosswork Data Gateway OVF Parameters and Deployment Scenarios, enter the information for the parameters:
|
||||
| Step 12 |
Click Next to go to 10 Ready to complete, as shown in the following figure. Review your settings and then click Finish if you are ready to begin deployment.  |
||||
| Step 13 |
Wait for the deployment to finish before continuing. To check the deployment status:
Wait for the deployment status to become 100%.
|
||||
| Step 14 |
Once the deployment status is 100%, power on the VM to complete the deployment process. Expand the host’s entry so you can click the VM and then choose Actions > Power > Power On, as shown in the following figure:  Wait for at least 5 minutes for the Cisco Crosswork Data Gateway VM to come up and then login via vCenter or SSH as explained in the Section Log In and Log Out. |
This is an alternative way to install Cisco Crosswork Data Gateway. You can modify mandatory/optional parameters in the script as per your requirement and run the OVF Tool.
Below is a sample script for installing using this method:
#!/usr/bin/env bash

# robot.ova path

ROBOT_OVA_PATH="<mention the orchestrator path>"

VM_NAME="dg-141"
DM="thin"
Deployment="onpremise"

ActiveVnics="3"

Hostname="Hostname"
Vnic0IPv4Address="<Vnic0_ipv4_address>"
Vnic0IPv4Gateway="<Vnic0_ipv4_gateway>"
Vnic0IPv4Netmask="<Vnic0_ipv4_netmask>"
Vnic0IPv4Method="Static"
Vnic1IPv4Address="<Vnic1_ipv4_address>"
Vnic1IPv4Gateway="<Vnic1_ipv4_gateway>"
Vnic1IPv4Netmask="<Vnic1_ipv4_netmask>"
Vnic1IPv4Method="Static"
Vnic2IPv4Address="<Vnic2_ipv4_address>"
Vnic2IPv4Gateway="<Vnic2_ipv4_gateway>"
Vnic2IPv4Netmask="<Vnic2_ipv4_netmask>"
Vnic2IPv4Method="Static"
DNS="<DNS_ip_address>"
NTP="<NTP Server>"
Domain="cisco.com"


ControllerIP="<controller_ipv4_address>"
ControllerPort="<controller_port>"
ControllerSignCertChain="cw-admin@<management_ip_address>:/home/cw-admin/controller.pem"
ControllerCertChainPwd="<Password>"

Description="Description for Cisco Crosswork Data Gatewayi : "dg-141""
Label="Label for Cisco Crosswork Data Gateway dg-141"

dg_adminPassword="<dg-admin_password>"
dg_operPassword="<dg-oper_password>"

EnrollmentURI="<enrollment_package_URI>"
EnrollmentPassphrase="<password>"

ProxyUsername="<username_for_proxy>"
ProxyPassphrase="<password_for_proxy>"

SyslogAddress="<syslog_server_address>"
SyslogPort=<syslog_server_port>
SyslogProtocol="<syslog_server_protocol>"
SyslogTLS=False
SyslogPeerName="<syslog_server_peer_name>"
SyslogCertChain="<syslog_server_root_certificate>"
SyslogCertChainPwd="<password>"

# Please replace this information according to your vcenter setup
VCENTER_LOGIN="<vCenter login details>"
VCENTER_PATH="<vCenter path>"
DS="<DS details>"

ovftool --acceptAllEulas --X:injectOvfEnv --skipManifestCheck --overwrite --noSSLVerify --powerOffTarget --powerOn \
--allowExtraConfig --extraConfig:firmware=efi --extraConfig:uefi.secureBoot.enabled=true \
--datastore="$DS" --diskMode="$DM" \
--name=$VM_NAME \
--net:"vNIC0=VM Network" \
--net:"vNIC1=DPortGroupVC-1" \
--net:"vNIC2=DPortGroupVC-2" \
--deploymentOption=$Deployment \
--prop:"ControllerIP=$ControllerIP" \
--prop:"ControllerPort=$ControllerPort" \
--prop:"ControllerSignCertChain=$ControllerSignCertChain" \
--prop:"ControllerTlsCertChain=$ControllerTlsCertChain" \
--prop:"ControllerCertChainPwd=$ControllerCertChainPwd" \
--prop:"EnrollmentURI=$EnrollmentURI" \
--prop:"EnrollmentPassphrase=$EnrollmentPassphrase" \
--prop:"Hostname=$Hostname" \
--prop:"Description=$Description" \
--prop:"Label=$Label" \
--prop:"ActiveVnics=$ActiveVnics" \
--prop:"Vnic0IPv4Address=$Vnic0IPv4Address" \
--prop:"Vnic0IPv4Gateway=$Vnic0IPv4Gateway" \
--prop:"Vnic0IPv4Netmask=$Vnic0IPv4Netmask" \
--prop:"Vnic0IPv4Method=$Vnic0IPv4Method" \
--prop:"Vnic1IPv4Address=$Vnic1IPv4Address" \
--prop:"Vnic1IPv4Gateway=$Vnic1IPv4Gateway" \
--prop:"Vnic1IPv4Netmask=$Vnic1IPv4Netmask" \
--prop:"Vnic1IPv4Method=$Vnic1IPv4Method" \
--prop:"Vnic2IPv4Address=$Vnic2IPv4Address" \
--prop:"Vnic2IPv4Gateway=$Vnic2IPv4Gateway" \
--prop:"Vnic2IPv4Netmask=$Vnic2IPv4Netmask" \
--prop:"Vnic2IPv4Method=$Vnic2IPv4Method" \
--prop:"DNS=$DNS" \
--prop:"NTP=$NTP" \
--prop:"dg-adminPassword=$dg_adminPassword" \
--prop:"dg-operPassword=$dg_operPassword" \
--prop:"Domain=$Domain" $ROBOT_OVA_PATH "vi://$VCENTER_LOGIN/$VCENTER_PATH"| Step 1 |
Open a command prompt. |
| Step 2 |
Navigate to the location where you installed the OVF Tool. |
| Step 3 |
Run the OVF Tool using the following command:
For example, OR if you want to execute a file containing the command and arguments, run the following command: |
After the Cisco Crosswork Data Gateway is installed, complete the following tasks in the order of their listing:
You can use either of the following two ways to access Cisco Crosswork Data Gateway:
Follow these steps to log in via vCenter:
| Step 1 |
Locate the VM in vCenter and then right click and select Open Console. The Cisco Crosswork Data Gateway flash screen comes up. |
| Step 2 |
Enter username ( |
Note |
The SSH process is protected from brute force attacks by blocking the client IP after a number of login failures. Failures such as incorrect username or password, connection disconnect, or algorithm mismatch are counted against the IP. Up to 4 failures within a 20 minute window will cause the client IP to be blocked for at least 7 minutes. Continuing to accumulate failures will cause the blocked time to be increased. Each client IP is tracked separately. |
Follow these steps to login via SSH.
| Step 1 |
Run the following command: ssh <username>@<ManagementNetworkIP> where ManagementNetworkIP is the management network IP address. For example, To login as adminstrator user: ssh dg-admin@<ManagementNetworkIP> To login as operator user: ssh dg-oper@<ManagementNetworkIP> The Cisco Crosswork Data Gateway flash screen opens prompting for password. |
| Step 2 |
Input the corresponding password (the one that you created during installation process) and press Enter. |
To log out, select option l Logout from the Main Menu and press Enter or click OK.

Every Cisco Crosswork Data Gateway instance must be identified by means of an immutable identifier. This requires generation of a Cisco Crosswork Data Gateway enrollment package. The enrollment package can be generated using any of the following two methods:
By supplying Auto Enrollment Package OVF parameters during installation process (see Auto Enrollment Package under OVF deployment scenarios and Step 11 l. of Install Crosswork Data Gateway via vCenter)
By using the Export Enrollment Package option from the interactive menu (see Export Enrollment Package)
The enrollment package is a JSON document created from the information obtained through the OVF template populated by the user during installation. It includes the all necessary information about Cisco Crosswork Data Gateway required for registering, such as Certificate, UUID of the Cisco Crosswork Data Gateway instance, and metadata like Cisco Crosswork Data Gateway instance name, creation time, version info, and so on.
If you opted not to export the enrollment package during install, then you must export it before you can enroll the Cisco Crosswork Data Gateway instance with Crosswork. The steps to do so are described in Export Enrollment Package.
Note |
The enrollment package is unique to each Cisco Crosswork Data Gateway instance. |
A sample enrollment package JSON file is shown below:
{
  "name": "dg116.cisco.com",
  "description": "CDG Base VM for Automation",
  "profile": {
    "cpu": 8,
    "memory": 31,
    "nics": 3
  },
  "interfaces": [
    {
      "name": "eth0",
      "mac": "00:50:56:9e:09:7a",
      "ipv4Address": "<ip_address>/24"
    },
    {
      "name": "eth1",
      "mac": "00:50:56:9e:67:c3",
      "ipv4Address": "<ip_address>/16"
    },
    {
      "name": "eth2",
      "mac": "00:50:56:9e:83:83",
      "ipv4Address": "<ip_address>/16"
    }
  ],
  "certChain": [
    "<cert_chain>"
  ],
  "version": "1.1.0 (branch dg110dev - build number 152)",
  "duuid": "d58fe482-fdca-468b-a7ad-dfbfa916e58b"
}
Note |
The value shown for memory represents the usable amount for user processes, not the total VM amount. The Cisco Crosswork Data Gateway operating system reserves about 700MB from the total VM memory for itself, which is excluded from memory reporting tools. It is expected for the memory value reported here to be 1GB less than the full amount allocated to the VM due to operating system reservation and rounding. |
To enroll the Cisco Crosswork Data Gateway with Cisco Crosswork Optimization Engine, you must have a copy of the enrollment package on your local computer.
Note |
This is needed only if you have not specified Auto Enrollment Package Transfer settings in the OVF template. Otherwise, the file will be copied to the SCP URI destination you selected after the VM boots. |
Follow these steps:
| Step 1 |
Log into the Cisco Crosswork Data Gateway Base VM as explained in Section Log In and Log Out. |
||
| Step 2 |
From the Main Menu, select 1 Export Enrollment Package and click OK.  |
||
| Step 3 |
Enter the SCP URI for exporting the enrollment package and click OK.
 |
||
| Step 4 |
Enter the SCP passphrase (the SCP user password) and click OK.  The enrollment package is exported. |
||
| Step 5 |
If you could not copy the enrollment package directly to your local computer, manually copy the enrollment package from the SCP server to your local computer. |
||
| Step 6 |
Proceed with importing the Controller Signing Certificate file. |
For Cisco Crosswork Data Gateway to become functional, you must import the Controller Signing Certificate file.
Note |
This is needed only if you have not specified Controller Signing Certificate File URI under the Controller Settings in the OVF template. Otherwise, the file will be automatically imported after the VM boots. |
| Step 1 |
From the Cisco Crosswork Data Gateway VM's interactive menu, select 3 Change Current System Settings and click OK. The Change System Settings menu opens.  |
| Step 2 |
Select 7 Import Certificate and click OK. The Import Certificates menu opens. |
| Step 3 |
Select 1 Controller Signing Certificate File and click OK.  |
| Step 4 |
Enter the SCP URI for the certificate file and click OK. An example URI is given below:
 |
| Step 5 |
Enter the SCP passphrase (the SCP user pasword) and click OK. The certificate file is imported. |
| Step 6 |
Follow the next procedure to check if the certificate is installed. |
Follow the steps to view the signing certificate.
| Step 1 |
From the Cisco Crosswork Data Gateway VM's interactive menu, select 2 Show System Settings and click OK. The Show Current System Settings menu opens.  |
| Step 2 |
Select 7 Certificates and click OK. The Show Certificates menu opens.  This image 447106.jpg is not available in preview/cisco.com |
| Step 3 |
Select 2 Controller Signing Certificate File and click OK. Cisco Crosswork Data Gateway displays the default certificate if no new certificate has been imported. Otherwise, it displays the new certificate if it was successfully imported. |
| Step 4 |
Once you have confirmed that the correct certificate is imported, proceed with enrolling Cisco Crosswork Data Gateway with Cisco Crosswork Optimization Engine. |
| Step 1 |
Log into Cisco Crosswork Optimization Engine as described in Section Log In to the GUI From a Browser. |
||
| Step 2 |
From the Main Menu, select Admin > Data Gateway Management. The Data Gateway Management page opens. |
||
| Step 3 |
Click the Add button.  The Enroll New Data Gateway dialog opens. |
||
| Step 4 |
Click Browse and navigate to the folder to which you copied the enrollment package and select it.  |
||
| Step 5 |
Select the Data gateway admin state in which you want to bring up the Cisco Crosswork Data Gateway:
 The Enroll New Data Gateway dialog displays a summary of the selected enrollment package:
It also displays additional details:
|
||
| Step 6 |
Click Enroll.Cisco Crosswork Data Gateway displays the following message upon successful enrollment:  Once you click Enroll, a dialog pops up asking if you want to attach devices now or later. It is recommended to choose Later as devices must only be attached once the operational state of the Cisco Crosswork Data Gateway instance is Up.
 |
The Operational Status of a Cisco Crosswork Data Gateway instance is shown as "Degraded" until it establishes a connection with Cisco Crosswork Optimization Engine and downloads collector binary files. While it depends on the bandwidth between the Cisco Crosswork Data Gateway instance and Cisco Crosswork Optimization Engine, this operation typically takes less than 5 minutes. Click the ![]() icon in the Data Gateways pane to refresh the pane to reflect the latest operational status of the Cisco Crosswork Data Gateway instance and wait for it to become Up. If the Cisco Crosswork Data Gateway instance fails to enroll, contact Cisco CX for assistance.
icon in the Data Gateways pane to refresh the pane to reflect the latest operational status of the Cisco Crosswork Data Gateway instance and wait for it to become Up. If the Cisco Crosswork Data Gateway instance fails to enroll, contact Cisco CX for assistance.
During the enrollment process, the enrollment package is uploaded to the controller application, i.e., Cisco Crosswork Optimization Engine, which then instantiates a new Cisco Crosswork Data Gateway instance in its database and waits for a "first-sign-of-life" from the Cisco Crosswork Data Gateway.
Session Establishment
Once the connectivity is established, the Cisco Crosswork Data Gateway instance confirms the identity of the controller and offers its own proof of identity via signed certificates during this initial connection.
Download of Configuration Files
Once the session is established, Cisco Crosswork Data Gateway downloads the following configuration files:
|
boot-config |
A json response created by Crosswork that contains a list of services (docker containers) and functional images should be downloaded on that particular Cisco Crosswork Data Gateway instance. |
|
docker-compose |
A YAML file that contains instructions and order to start up the right set of services and functional images. |
Download of Functional Images
A functional image represents a collection profile for a protocol, i.e., CLI, SNMP, or MDT. Cisco Crosswork Data Gateway downloads the following functional images:
|
CLI Collection |
To connect to a device using SSH/Telnet, collect show commands output, and send it to the designated output destination. |
|
SNMP Collection |
To connect to a device using SNMP protocol, collect SNMP responses, receive SNMP traps, and send them to a designated output destination. |
|
MDT Collection |
To connect to a device and collect model-driven telemetry or event-driven telemetry events, and send them to a designated output destination. |
After the downloads, Cisco Crosswork Data Gateway boots the containers.
Cisco Crosswork Data Gateway is now ready to collect data.
The following table lists common problems that might be experienced while installing or enrolling Cisco Crosswork Data Gateway, and provides approaches to identifying the source of the problem and solving it.
|
Issue |
Action |
|---|---|
|
1. Cannot enroll Cisco Crosswork Data Gateway with Crosswork |
|
|
Cisco Crosswork Data Gateway cannot be enrolled with Cisco Crosswork Optimization Engine due to an NTP issue, i.e., there is a clock-drift between the two. The clock-drift might be with either Cisco Crosswork Data Gateway or Cisco Crosswork Optimization Engine. Also, on the NTP servers for Cisco Crosswork Optimization Engine and Cisco Crosswork Data Gateway, the initial time is set to the ESXi server. For this reason, the ESXi server must also have NTP configured. Sync the clock time on the host and retry. |
1. Log into the Cisco Crosswork Data Gateway VM. 2. From the main menu, go to 5 Troubleshooting > Run show-tech. Enter the destination to save the tarball containing logs and vitals and click OK. In the show-tech logs (in file 3. From the main menu, go to 3 Change Current System Settings > 1 Configure NTP. Configure NTP to sync with the clock time on the Cisco Crosswork Optimization Engine server and try re-enrolling Cisco Crosswork Data Gateway. It is also possible that the Cisco Crosswork Optimization Engine's NTP server might be down or its address might be incorrect. To configure NTP on the Cisco Crosswork Optimization Engine side, see Configure NTP after installation. |
|
2. Cisco Crosswork Data Gateway remains in degraded state for more than 10 minutes with reason stated as "Could not collect vitals" |
|
|
Cisco Crosswork Data Gateway remains in degraded state for more than 10 minutes with reason stated as "Could not collect vitals" due to certificate errors. |
1. Log into the Cisco Crosswork Data Gateway VM. 2. From the main menu, select 5 Troubleshooting > Run show-tech. Enter the destination to save the tarball containing logs and vitals and click OK. In the show-tech logs (in file 1. From the main menu, select 3 Change Current System Settings > 7 Import Certification. 2. From the Import Certificates menu, select 1 Controller Signing Certificate File and click OK. 3. Enter the SCP URI for the certificate file and click OK. |
|
3. Cisco Crosswork Data Gateway remains in degraded state for more than 10 minutes with reason stated as "gRPC connection cannot be established" |
|
|
Cisco Crosswork Data Gateway remains in degraded state for more than 10 minutes with reason stated as "gRPC connection cannot be established" due to certificate errors. |
1. Re-upload the certificate file as explained in the troubleshooting scenario 2. above. 2. Reboot the Cisco Crosswork Data Gateway VM following the steps below: a. From the main menu, select 5 Troubleshooting and click OK. b. From the Troubleshooting menu, select 7 Reboot VM and click OK. c. Once the reboot is complete, check if the Cisco Crosswork Data Gateway's operational status is Up. |
| Step 1 |
Log in to Crosswork UI as described in Log In to the GUI From a Browser. |
| Step 2 |
From the navigation panel, select Admin > Data Gateway Management. The Data Gateway Management page opens. |
| Step 3 |
In the Data Gateways panel, select the Cisco Crosswork Data Gateway VM you want to remove and click Delete button.  |
| Step 4 |
A Cisco Crosswork Data Gateway instance must be in maintenance mode to be deleted. Click Switch & Continue when prompted to switch to maintenance mode. 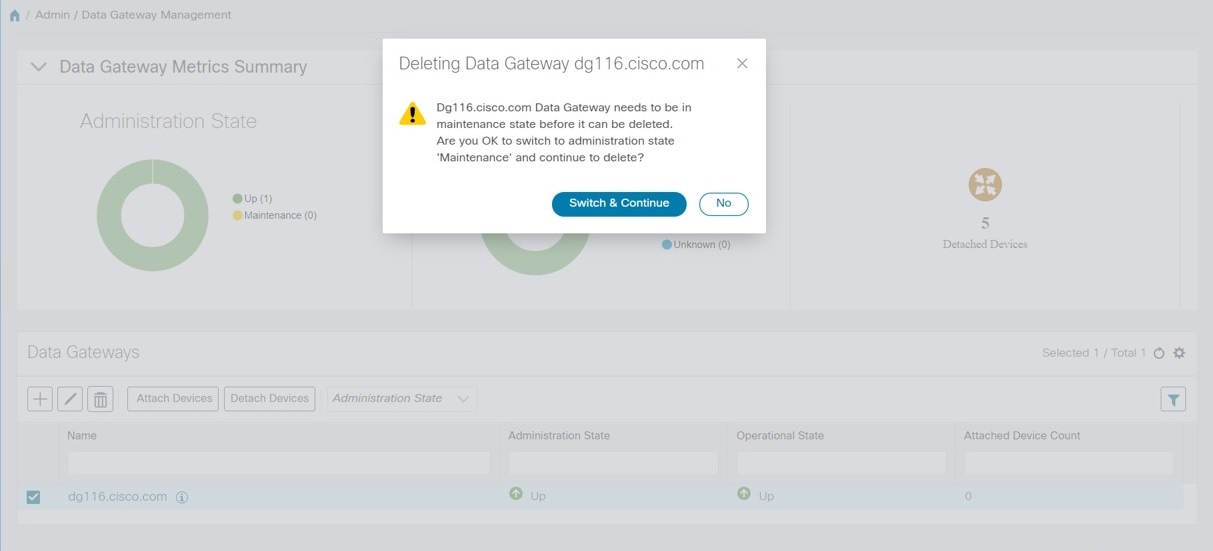 The selected Cisco Crosswork Data Gateway VM is deleted.  |


 Feedback