Installing Cisco Business Dashboard Lite

This chapter contains the following:

Installation

To install the Cisco Business Dashboard Lite application perform the following steps:

Procedure


Step 1

Download and install the latest version of Cisco Business Dashboard Lite setup file from Download page.

Note


Only support installing on 64Bit OS: Windows10, Windows11, Windows Server 2019 and Windows Server 2022.

If there is already a Cisco Business Dashboard Lite application running, please close it before installation.

Java and MongoDB are automatically bundled with the download.

Step 2

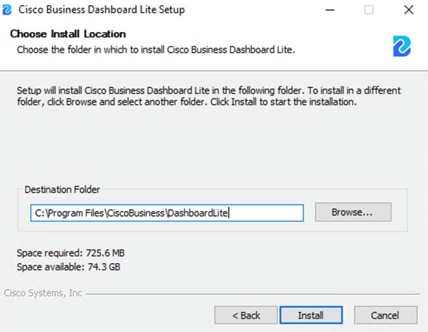
Double click the executable file (cisco-business-dashboard-lite-<version>-windows-x86_64.exe) and follow the instructions to finish installation.
Note


You can choose destination folder which is the location to put all the binary files while all user data reside under %LOCALAPPDATA%\CiscoBusiness\DashboardLite

Step 3

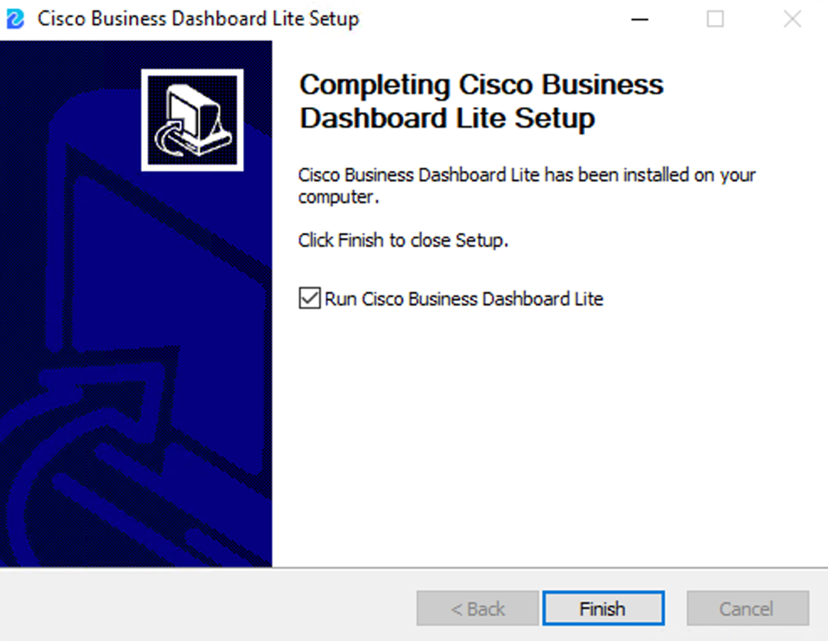
After installation, the Cisco Business Dashboard Lite application can be launched immediately with checkbox selected or double click the link icon on Desktop.

Note


Please refer to the Cisco Business Dashboard Lite Quick Start Guide for details of how to manage the application and perform initial setup.


Windows Firewall Rules

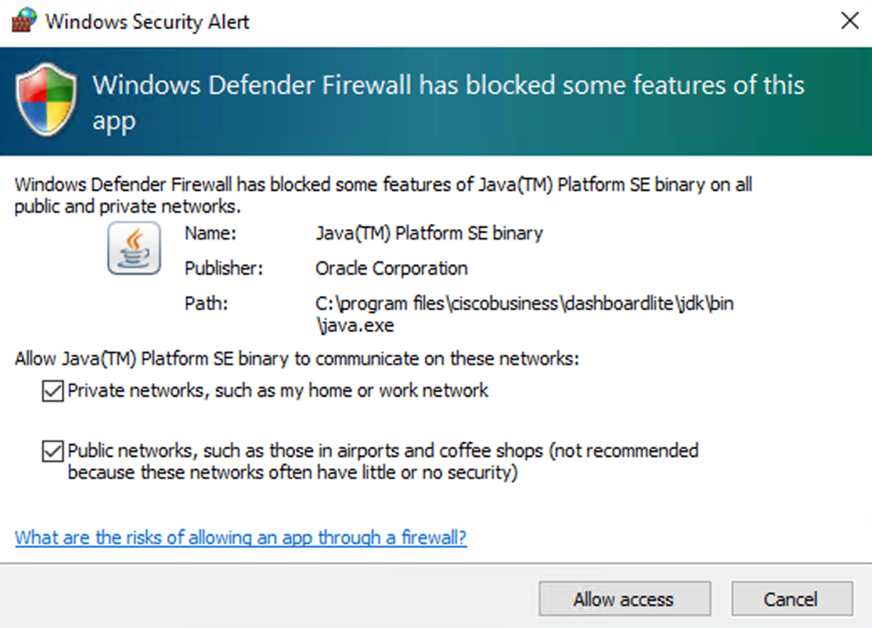
Cisco Business Dashboard Lite needs to be able to communicate with the devices on the network and allowed through the Windows Firewall. So Java programs need to be allowed through the Windows Firewall.

'Windows Security Alert' will show up the first time application is launched. Make sure to click 'Allow access'.

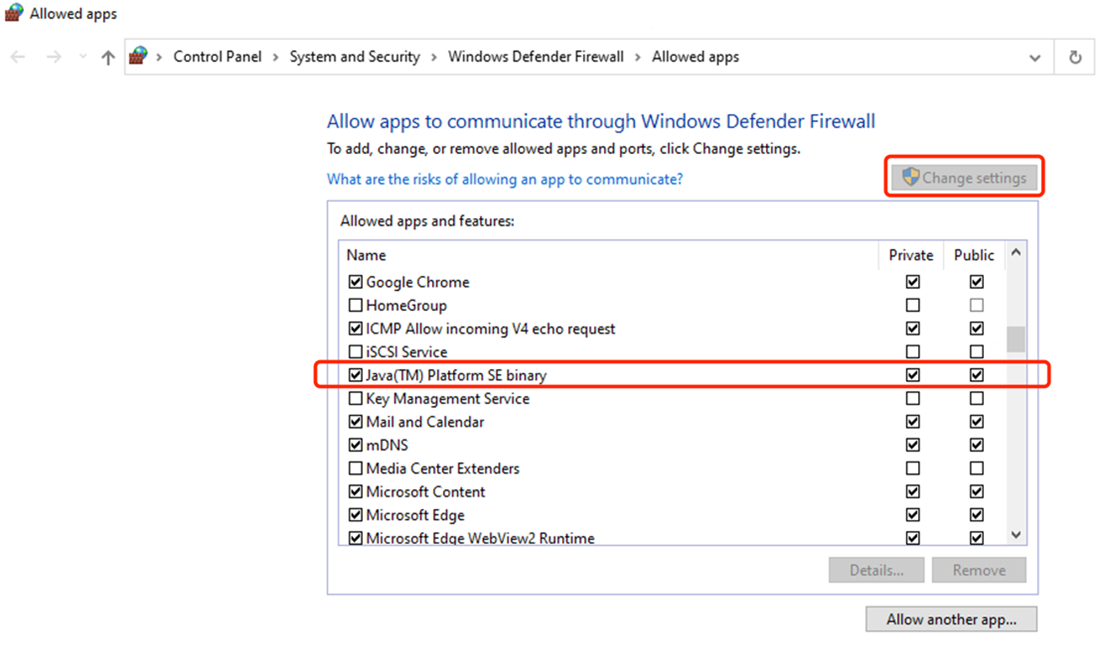
You can also do this configuration through Control Panel > System and Security > Windows Defender Firewall > Allowed apps:


Note


If 3rd party Anti-Virus/Firewall software is running in your OS, please make sure to allow port 4443/TCP and 5353/UDP.