Easy VPN Server

The Easy VPN Server feature allows a remote end user to communicate using IP Security (IPsec) with any Cisco IOS VPN gateway. Centrally managed IPsec policies are “pushed” to the client device by the server, thereby minimizing end-user configurations.


Note


Security threats, as well as the cryptographic technologies to help protect against them, are constantly changing. For more information about the latest Cisco cryptographic recommendations, see the Next Generation Encryption (NGE) white paper.


Finding Feature Information

Your software release may not support all the features documented in this module. For the latest caveats and feature information, see Bug Search Tool and the release notes for your platform and software release. To find information about the features documented in this module, and to see a list of the releases in which each feature is supported, see the feature information table at the end of this module.

Use Cisco Feature Navigator to find information about platform support and Cisco software image support. To access Cisco Feature Navigator, go to www.cisco.com/​go/​cfn. An account on Cisco.com is not required.

Restrictions for Easy VPN Server

Unsupported Protocols

The table below outlines IPsec protocol options and attributes that are not supported by Cisco VPN clients. These options and attributes should not be configured on the device for these clients.

Table 1 Unsupported IPsec Protocol Options and Attributes

Options

Attributes

Authentication types

  • Authentication with public key encryption
  • Digital Signature Standard (DSS)

Diffie-Hellman (DH) groups

1

IPsec protocol identifier

IPSEC_AH

IPsec protocol mode

Transport mode

Miscellaneous

  • Manual keys
  • Perfect Forward Secrecy (PFS)

Cisco Secure VPN Client 1.x Restrictions

When used with the Easy VPN Server feature, the Cisco Secure VPN Client 1.x has the following restrictions:

  • It does not support dead peer detection (DPD) or any other keepalive scheme.
  • It does not support initial contact.
  • This feature cannot use per-group attribute policy profiles such as IP addresses and Domain Name Service (DNS). Thus, customers must continue to use the existing, globally defined parameters for the IP address assignment, Windows Internet Naming Service (WINS), DNS, and preshared keys.

Multicast and Static NAT

Multicast and static Network Address Translation (NAT) are supported only for Easy VPN servers using dynamic virtual tunnel interfaces (DVTIs).

Virtual IPsec Interface Restrictions

The Virtual IPsec Interface Support feature works only with a Cisco software VPN Client version 4.x or later and an Easy VPN remote device that is configured to use a virtual interface.

Cisco Tunnel Control Protocol Restrictions

  • If a port is being used for Cisco Tunnel Control Protocol, the port cannot be used for other applications.
  • Cisco Tunnel Control Protocol can be used on only ten ports at a time.
  • Cisco Tunnel Control Protocol is supported on only Easy VPN servers.
  • If a Cisco Tunnel Control Protocol connection is set up on a port, Cisco Tunnel Control Protocol cannot be disabled on that port because doing so causes the existing connection to stop receiving traffic.
  • High Availability of Cisco Tunnel Control Protocol is not supported on the Easy VPN server.

Universal Client Mode

The Easy VPN Server feature does not support universal client mode using Dynamic Host Configuration Protocol (DHCP).

Information About Easy VPN Server

Easy VPN Server Operation

When the client initiates a connection with a Cisco IOS VPN device, the “conversation” that occurs between the peers consists of device authentication via Internet Key Exchange (IKE), followed by user authentication using IKE Extended Authentication (Xauth), VPN policy push (using Mode Configuration), and IPsec security association (SA) creation. An overview of this process is as follows:

  • The client initiates IKE Phase 1 via aggressive mode (AM) if a preshared key is to be used for authentication; the client initiates main mode (MM) if digital certificates are used. If the client identifies itself with a preshared key, the accompanying group name entered in the configuration GUI (ID_KEY_ID) is used to identify the group profile associated with this client. If digital certificates are used, the organizational unit (OU) field of a distinguished name (DN) is used to identify the group profile.

    Note


    Because the client may be configured for preshared key authentication, which initiates IKE AM, Cisco recommends that the administrator change the identity of the Cisco IOS VPN device via the crypto isakmp identity hostname command. This client configuration will not affect certificate authentication via IKE MM.


  • The client attempts to establish an IKE SA between its public IP address and the public IP address of the Cisco IOS VPN device. It is proposed that every combination of encryption, hash algorithms, authentication methods and D-H group sizes must be used to reduce the amount of manual configuration on the client.
  • Depending on its IKE policy configuration, the Cisco IOS VPN device will determine which proposal is acceptable to continue negotiating Phase 1.

    Tip


    IKE policy is global for the Cisco IOS VPN device and can consist of several proposals. In the case of multiple proposals, the Cisco IOS VPN device will use the first match, so you should always list your most secure policies first.


    Note


    Device authentication ends and user authentication begins at this point.


  • After the IKE SA is successfully established, and if the Cisco IOS VPN device is configured for Xauth, the client waits for a “username/password” challenge and then responds to the challenge of the peer. The information that is entered is checked against authentication entities using AAA protocols such as RADIUS and TACACS+. Token cards may also be used via AAA proxy. During Xauth, a user-specific attribute may be retrieved if the credentials of that user are validated via RADIUS.

    Note


    VPN devices that are configured to handle remote clients should always be configured to enforce user authentication.


  • If the Cisco IOS VPN device indicates that authentication was successful, the client requests further configuration parameters from the peer. The remaining system parameters (for example, the IP address, DNS, and split tunnel attributes) are pushed to the client at this time using Mode Configuration.

    Note


    The IP address pool and group preshared key (if Rivest, Shamir, and Adelman [RSA] signatures are not being used) are the only required parameters in a group profile; all other parameters are optional.


  • After each client is assigned an internal IP address via Mode Configuration, the Cisco IOS VPN device must know how to route packets through the appropriate VPN tunnel. Reverse route injection (RRI) will ensure that a static route is created on the Cisco IOS VPN device for each client internal IP address.

    Note


    Cisco recommends that you enable RRI on the crypto map (static or dynamic) for the support of VPN clients unless the crypto map is being applied to a generic routing encapsulation (GRE) tunnel that is already being used to distribute routing information.


  • After the configuration parameters have been successfully received by the client, IKE quick mode is initiated to negotiate the IPsec SA establishment.
  • After IPsec SAs are created, the connection is complete.

RADIUS Support for Group Profiles

Group policy information is stored in a profile that can be defined locally in the device configuration or on a RADIUS server that is accessible by the Cisco IOS VPN device. If RADIUS is used, you must configure access to the server and allow the Cisco IOS VPN device to send requests to the server.

To define group policy attributes for RADIUS, you must perform the following task on your RADIUS server: Define a user that has a name equal to the group name as defined in the client GUI. For example, if users will be connecting to the Cisco IOS VPN device using the group name “sales,” you will need a user whose name is “sales.” The password for this user is “cisco,” which is a special identifier that is used by the device for RADIUS purposes. The username must then be made a member of a group in which the correct policy is defined. For simplicity, Cisco recommends that the group name be the same as the username.

For a Cisco Secure Access Control Server

If you are using a Cisco Secure access control server (ACS), you may configure your remote access VPN group profiles on this server. To perform this task, you must ensure that IETF RADIUS attributes are selected for group configuration as shown in the figure below. (This figure also shows the compulsory attributes required for a remote access VPN group.) All values must be entered except the Tunnel-Password attribute, which is actually the preshared key for IKE purposes; if digital certificates are preferred, this attribute may be omitted.

Figure 1. IETF RADIUS Attributes Selection for Group Configuration

In addition to the compulsory attributes shown in the figure, other values can be entered that represent the group policy that is pushed to the remote client via Mode Configuration. The figure below shows an example of a group policy. All attributes are optional except the addr-pool, key-exchange=preshared-key, and key-exchange=ike attributes. The values of the attributes are the same as the settings used if the policy is defined locally on the device rather than in a RADIUS server (These values are explained in the “Defining Group Policy Information for Mode Configuration Push” section).

Figure 2. Cisco Secure ACS Group Policy Setup

After the group profile is created, a user who is a member of the group should be added. (Remember that the defined username maps to the group name as defined on the remote client, and the password defined for the username in the RADIUS database must be “cisco.”) If digital certificates are the preferred method of IKE authentication, the username should reflect the OU field in the certificate presented by the remote client.

For All Other RADIUS Servers

Ensure that your RADIUS server allows you to define attribute-value (AV) pairs. (For an example, see the “Example: Configuring Cisco IOS for Easy VPN Server” section.)


Note


If digital certificates are used, the username defined in RADIUS must be equal to the OU field of the DN of the certificate of the client.


RADIUS Support for User Profiles

Attributes may be applied on a per-user basis. If you apply attributes on a per-user basis, you can override a group attribute value with an individual user attribute. The attributes are retrieved at the time that user authentication via Xauth occurs. The attributes are then combined with group attributes and applied during Mode Configuration.

User-based attributes are available only if RADIUS is being used for user authentication.

To define user policy attributes for RADIUS, you must perform the following task on your RADIUS server: Define a user or add attributes to the existing profile of a user in your RADIUS database. The password for the user will be used during Xauth user authentication, or you may proxy to a third-party server, such as a token card server.

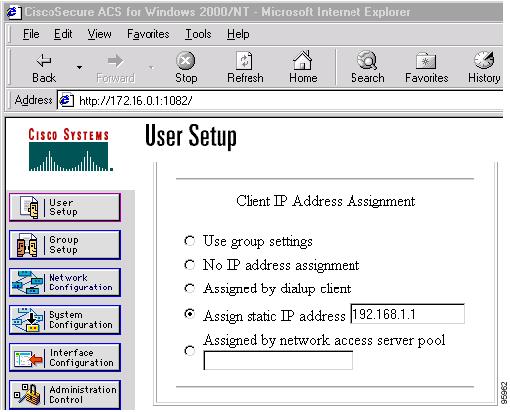
The figure below shows how Cisco Secure ACS may be used for user authentication and for the assignment of a Framed-IP-Address attribute that may be pushed to the client. The presence of this attribute means that the local address pool defined for the group to which that user belongs will be overridden.

Figure 3. Cisco Secure ACS User Profile Setup

For All Other RADIUS Servers

Ensure that your RADIUS server allows you to define AV pairs. (See “Example: Configuring Cisco IOS for Easy VPN Server” section.)

Easy VPN Server Supported Protocols

The table below outlines supported IPsec protocol options and attributes that can be configured for this feature. (See the Unsupported Protocols section in the Restrictions for Easy VPN Server for unsupported options and attributes.)

Table 2 Supported IPsec Protocol Options and Attributes

Options

Attributes

Authentication algorithms

  • Hashed Message Authentication Codes with message digest algorithm 5 (HMAC-MD5)
  • HMAC-Secure Hash Algorithm 1 (HMAC-SHA1)

Authentication types

  • Preshared keys
  • RSA digital signatures

D-H groups

Encryption algorithms (IKE)

  • Data Encryption Standard (DES)
  • Triple Data Encryption Standard (3DES)

Encryption algorithms (IPsec)

  • DES
  • 3DES
  • NULL

IPsec protocol identifiers

  • Encapsulating Security Payload (ESP)
  • IP Lempel-Ziv-Stac compression (IPCOMP-LZS)

IPsec protocol mode

Tunnel mode

Table 3 AAA protocols and services supported by Easy VPN Server

AAA Service

Database Type

RADIUS

TACACS+

Local

Authentication

Yes

Yes

Yes

Authorization

Yes

Yes

Yes

Accounting

Yes

Yes

No

We recommend choosing RADIUS over TACACS+. Easy VPN does not support other AAA protocols such as LDAP and Kerberos.

Functions Supported by Easy VPN Server

Mode Configuration Version 6 Support

Mode Configuration Version 6 is supported for more attributes (as described in an IETF draft submission).

Xauth Version 6 Support

Cisco software supports XAuth version 6. Xauth for user authentication is based on an IETF draft submission.

Internet Key Exchange (IKE) Dead Peer Detection (DPD)

The client implements a keepalive scheme—IKE DPD.

DPD allows two IPsec peers to determine whether the other is still “alive” during the lifetime of a VPN connection. DPD is useful because a host may reboot, or the dialup link of a remote user may disconnect without notifying the peer that the VPN connection has gone away. When an IPsec host determines that a VPN connection no longer exists, the host can notify a user, attempt to switch to another IPsec host, or clean up valuable resources that were allocated for the peer that no longer exists.

A Cisco VPN device can be configured to send and reply to DPD messages. DPD messages are sent if no other traffic is being passed through the VPN tunnel. If a configured amount of time has elapsed since the last inbound data was received, DPD will send a message (“DPD R-U-THERE”) the next time it sends outbound IPsec data to the peer. DPD messages are unidirectional and are automatically sent by Cisco VPN clients. DPD must be configured on the device only if the device wants to send DPD messages to the VPN client to determine the health of the client.

Split Tunneling Control

Remote clients can support split tunneling, which enables a client to have intranet and Internet access at the same time. If split tunneling is not configured, the client will direct all traffic through the tunnel, even traffic destined for the Internet.


Note


The split tunnel access control list (ACL) has a limit of 50 access control entries (ACEs). If more than 50 ACEs are configured in a split tunnel ACL, only the first 50 ACEs are considered. These ACEs are sent to the client during Mode Configuration.


Initial Contact

If a client is suddenly disconnected, the gateway may not be notified. Consequently, removal of connection information (IKE and IPsec SAs) for that client will not immediately occur. Thus, if the client attempts to reconnect to the gateway, the gateway will refuse the connection because the previous connection information is still valid.

To avoid such a scenario, Cisco introduced a new capability called initial contact that is supported by all Cisco VPN products. If a client or device is connecting to another Cisco gateway for the first time, an initial contact message is sent that tells the receiver to ignore and delete any old connection information that has been maintained for that newly connecting peer. Initial contact ensures that connection attempts are not refused because of SA synchronization problems, which are often identified via invalid security parameter index (SPI) messages and which require devices to have their connections cleared.

Group-Based Policy Control

Policy attributes such as IP addresses, DNS, and split tunnel access can be provided on a per-group or per-user basis.

User-Based Policy Control

Attributes may be applied on a per-user basis. You can override a group attribute value with an individual user attribute. The attributes are retrieved at the time that user authentication via XAuth occurs. They are then combined with group attributes and applied during Mode Configuration.

Effective with Cisco IOS Release 12.3(4)T, attributes can be applied on a per-user basis after the user has been authenticated. These attributes can override any similar group attributes. User-based attributes are available only if RADIUS is used as the database.

Framed-IP-Address

To select the Framed-IP-Address attribute for CiscoSecure for NT, under the user profile choose the “use this IP address” option under addressing and manually enter the address. (You should check the method of configuring a framed IP address with your own RADIUS server because this procedure will vary.)


Note


If a framed IP address is present, and a local pool address is also configured for the group that the user belongs to, the framed IP address will override the local pool setting.


DHCP Client Proxy

Easy VPN servers assign an IP address to a remote device using either a local pool that is configured on another device or the framed IP address attribute that is defined in RADIUS. Effective with Cisco IOS Release 12.4(9)T, the DHCP Client Proxy feature provides the option of configuring an Easy VPN server to obtain an IP address from a DHCP server. The IP address is pushed to the remote device using Mode Configuration.


Note


This feature does not allow the DHCP server to push the DNS, WINS server, or domain name to the remote client.


To configure DHCP Client Proxy, see the “Configuring an Easy VPN Server to Obtain an IP Address from a DHCP Server.”

Benefits of DHCP Client Proxy
  • This feature helps in creating dynamic Domain Name System (DDNS) entries when a DNS server exists in conjunction with the DHCP server.
  • The user is not restricted to IP address pools.
User-Save-Password

As per the group description, the User-Save-Password attribute can be received in addition to the group variant (Save-Password) attribute, but if it is received it will override the value asserted by the group.

The following is an output example of a RADIUS AV pair for the User-Save-Password attribute:

ipsec:user-save-password=1
User-Include-Local-LAN

As per the group description, the User-Include-Local-LAN attribute can be received in addition to the group variant (Include-Local-LAN), but if it is received, it will override the value asserted by the group.

The following is an output example of a RADIUS AV pair for the User-Include-Local LAN attribute:

ipsec:user-include-local-lan=1
User-VPN-Group

The User-VPN-Group attribute is a replacement for the group lock attribute. It allows support for both the preshared key and the RSA signature authentication mechanisms such as certificates.

If you need to check that the group a user is attempting to connect to is indeed the group the user belongs to, use the User-VPN-Group attribute. The administrator sets this attribute to a string, which is the group that the user belongs to. The group the user belongs to is matched against the VPN group as defined by the group name (ID_KEY_ID) for preshared keys or by the OU field of a certificate. If the groups do not match, the client connection is terminated.

This feature works only with AAA RADIUS. Local XAuth authentication must still use the Group-Lock attribute.

The following is an output example of a RADIUS AV pair for the User-VPN-Group attribute:

ipsec:user-vpn-group=cisco
Group-Lock

If you are using preshared keys (no certificates or other RSA signature authentication mechanisms) with RADIUS or local AAA, you can continue to use the Group-Lock attribute. If you are using preshared keys (no certificates or other RSA signature authentication mechanisms) with RADIUS only, you can either continue to use the Group-Lock attribute or you can use the User-VPN-Group attribute.

Group Lock Feature Operation

The group lock feature, introduced in Cisco IOS 12.2(13)T, allows you to perform an extra authentication check during Xauth. With this feature enabled, the user must enter a username, group name, and user password during Xauth to authenticate. The username and group name can be entered in any of the following formats: “username/group name,” “username\group name,” “username%group name,” or “username group name.” The server compares the group name entered during Xauth with the group name sent for preshared key device authentication. If they do not match, the server denies the connection. To enable this feature, use the group-lock command for the group.

Cisco software does not strip the @group from the Xauth username, so the username user@group must exist in the local or external AAA database pointed to by the Internet Security Association Key Management Protocol (ISAKMP) profile selected at Phase 1 (machine group authentication).


Caution


Do not use the Group-Lock attribute if you are using RSA signature authentication mechanisms such as certificates. Use the User-VPN-Group attribute instead. The User-VPN-Group attribute is recommended regardless of whether preshared keys or the RSA signature is used as the method of authentication when an external AAA database is used.


Session Monitoring for VPN Group Access

It is possible to mimic the functionality provided by some RADIUS servers for limiting the maximum number of connections to a specific server group and also for limiting the number of simultaneous logins for users in that group. After user-defined thresholds are defined in each VPN group, connections will be denied until counts drop below these thresholds.

If you use a RADIUS server, such as CiscoSecure ACS, Cisco recommends that you enable this session control on the RADIUS server if the functionality is provided. In this way, usage can be controlled across a number of servers by one central repository. When this feature is enabled on the device, only connections to groups on that specific device are monitored. Load-sharing scenarios are not accurately accounted for.

To configure session monitoring using CLI, use the crypto isakmp client configuration group command and the max-users and max-logins commands.

The following is an output example of RADIUS AV pairs that have been added to the relevant group:

ipsec:max-users=1000
ipsec:max-logins=1

Virtual IPsec Interface Support on a Server

The Virtual IPsec Interface Support on a Server feature allows you to selectively send traffic to different Easy VPN concentrators (servers) and to the Internet.

Before Cisco IOS Release 12.4(4)T, at the tunnel-up/tunnel-down transition, attributes that were pushed during the mode configuration had to be parsed and applied. When such attributes resulted in the configurations being applied on the interface, the existing configuration had to be overridden.

With the Virtual IPsec Interface Support on a Server feature, the tunnel-up configuration can be applied to separate interfaces, making it easier to support separate features at tunnel-up. Features that are applied to the traffic going into the tunnel can be separate from the features that are applied to traffic that is not going through the tunnel (for example, split-tunnel traffic and traffic leaving the device when the tunnel is not up). When the Easy VPN negotiation is successful, the line protocol state of the virtual-access interface gets changed to up. When the Easy VPN tunnel goes down because the SA expires or is deleted, the line protocol state of the virtual access interfaces changes to down.


Note


The Virtual IPsec Interface Support on a Server feature does not support multicast.


For more information about this feature, see the “Cisco Easy VPN Remote” module. (This feature is configured on the Easy VPN remote device.)

For information about the IPsec Virtual Tunnel Interface feature, see the “IPsec Virtual Tunnel Interface” module in the Security for VPNs with IPsec Configuration Guide.

Virtual Tunnel Interface per-User Attribute Support

Effective with Cisco IOS Release 12.4(9)T, the Virtual Tunnel Interface feature provides per-user attribute support for Easy VPN servers.

For more information about this feature, see the “IPsec Virtual Tunnel Interface” module in the Security for VPNs with IPsec Configuration Guide .

Banner, Auto-Update, and Browser Proxy

The following sections describe support for attributes that aid in the management of the Cisco Easy VPN remote device:

Banner

An Easy VPN server can be configured to push the banner to the Easy VPN remote device. A banner is needed for the web-based activation feature. The banner is displayed when the Easy VPN tunnel is up on the Easy VPN remote console or as an HTML page in the case of web-based activation.

Auto-Update

An Easy VPN server can be configured to provide an automated mechanism for software and firmware upgrades on an Easy VPN remote device.

Browser Proxy

An Easy VPN server can be configured so that an Easy VPN remote device can access resources on the corporate network. Using this feature, the user does not have to manually modify the proxy settings of the web browser when connecting to the corporate network using the Cisco IOS VPN Client or manually revert the proxy settings upon disconnecting.

Configuration Management Enhancements

Pushing a Configuration URL Through a Mode-Configuration Exchange

When remote devices connect to a corporate gateway for creating an IPsec VPN tunnel, some policy and configuration information has to be applied to the remote device when the VPN tunnel is active to allow the remote device to become a part of the corporate VPN.

The Pushing a Configuration URL Through a Mode-Configuration Exchange feature provides a mode-configuration attribute that “pushes” a URL from the concentrator (server) to the Cisco IOS Easy VPN remote device. The URL contains the configuration information that the remote device has to download and apply to the running configuration, and it contains the Cisco IOS CLI listing. (For more information about Cisco IOS CLI listing, see Cisco IOS documentation for the configuration url command.) The CLI for this feature is configured on the concentrator.

The configuration that is pushed to the remote device is persistent by default. That is, the configuration is applied when the IPsec tunnel is “up,” but it is not withdrawn when the IPsec tunnel goes “down.” However, a section of the configuration can be written that is transient in nature, in which case the configuration of the section is reverted when the tunnel is disconnected.

There are no restrictions on where the configuration distribution server is physically located. However, Cisco recommends that a secure protocol such as Secure HTTP (HTTPS) be used to retrieve the configuration. The configuration server can be located in the corporate network, and because the transfer happens through the IPsec tunnel, insecure access protocols (HTTP) can be used.

Regarding backward compatibility, the remote device asks for the CONFIGURATION-URL and CONFIGURATION-VERSION attributes. Because the CONFIGURATION-URL and CONFIGURATION-VERSION attributes are not mandatory attributes, the server sends them only if it has them configured for the group. There is no built-in restriction to push the configuration, but bootstrap configurations (such as for the IP address) cannot be sent because those configurations are required to set up the Easy VPN tunnel, and the CONFIGURATION-URL comes into effect only after the Easy VPN tunnel comes up.

After the Configuration Has Been Acquired by the Easy VPN Remote Device

After the configuration has been acquired by the Easy VPN remote device, the remote device sends a new ISAKMP notification to the Easy VPN server. The notification contains several manageability information messages about the client (remote device). The Easy VPN server takes two actions when this information is received:

  • The Easy VPN server caches the information in its peer database. The information can be displayed by using the show crypto isakmp peer config command. This command output displays all manageability information that is sent by the client (remote device).
  • If accounting is enabled, the Easy VPN server sends an accounting update record that contains the manageability information messages about the remote device to the accounting RADIUS server. This accounting update is later available in the accounting log of the RADIUS server.
How to Configure This Feature

The commands that are used to configure this feature and the CONFIGURATION-URL and CONFIGURATION-VERSION attributes are described in the crypto isakmp client configuration group command documentation.

Per-User AAA Policy Download with PKI

With the Support of Per-User AAA Policy Download with PKI feature, user attributes are obtained from the AAA server and pushed to the remote device through Mode Configuration. The username that is used to get the attributes is retrieved from the remote device certificate.

Per-User Attribute Support for Easy VPN Servers

The Per-User Attribute Support for Easy VPN Servers feature provides users with the ability to support per-user attributes on Easy VPN servers. These attributes are applied on the virtual access interface.

Local Easy VPN AAA Server

For a local Easy VPN AAA server, the per-user attributes can be applied at the group level or at the user level using the CLI.

To configure per-user attributes for a local Easy VPN server, see “Configuring Per-User Attributes on a Local Easy VPN AAA Server.”

Remote Easy VPN AAA Server

Attribute value (AV) pairs can be defined on a remote Easy VPN AAA server as shown in the following example:

cisco-avpair = “ip:outacl#101=permit tcp any any established
Per-User Attributes

The following per-user attributes are defined in the AAA server and are applicable to IPsec:

  • inacl
  • interface-config
  • outacl
  • policy-route
  • prefix
  • route
  • rte-fltr-in
  • rte-fltr-out
  • sub-policy-In
  • sub-policy-Out

Syslog Message Enhancements

Syslog messages were added for Easy VPN in Cisco IOS Release 12.4(4)T. The syslog messages can be enabled on your server by using the CLI. The format of the syslog messages is as follows:

timestamp: %CRYPTO-6-VPN_TUNNEL_STATUS: (Server)  <event message>  User=<username>  Group=<groupname>  Client_public_addr=<ip_addr> Server_public_addr=<ip addr>

For an authentication-passed event, the syslog message looks like the following:

Jul 25 23:33:06.847: %CRYPTO-6-VPN_TUNNEL_STATUS: (Server) Authentication PASS
ED User=blue Group=Cisco1760group Client_public_addr=10.20.20.1 Server_public_addr=10.20.20.2 

Three of the messages (Max users, Max logins, and Group do not exist) are authorization issues and are printed only with the group name in the format because the authorization check occurs before mode configuration. Therefore, the peer information is not yet present and cannot be printed. The following is an example of a “Group does not exist” message.

*Jun 30 18:02:58.107: %CRYPTO-6-VPN_TUNNEL_STATUS: Group: group_1 does not exist
Supported Easy VPN Syslog Messages

Both ezvpn_connection_up and ezvpn_connection_down were already supported in a previous release of syslog messages. The enhancements in Cisco IOS Release 12.4(4)T follow the same format, but new syslogs are introduced. The added syslogs are as follows:

  • ACL associated with Ezvpn policy but NOT defined (hence, no split tunneling possible)
  • Authentication Failed (AAA Not Contactable)
  • Authentication Passed
  • Authentication Rejected
    • Access restricted via incoming interface
    • Group does not exist
    • Group Lock Enabled
    • Incorrect Username or Password
    • Max Users exceeded/Max Logins exceeded
    • Number of Retries exceeded
  • Incorrect firewall record being sent by Client (incorrect vendor, or product, or capability)
  • IP Pool Not present/No Free IP Address available in the pool
  • Save password Turned ON

Network Admission Control Support for Easy VPN

Network Admission Control was introduced in Cisco IOS Release 12.3(8)T as a way to determine whether a PC client should be allowed to connect to the LAN. Network Admission Control uses Extensible Authentication Protocol over UDP (EAPoUDP) to query the Cisco trust agent on the PC and allows a PC to access the network if the client status is healthy. Different policies can be applied on the server to deny or limit access of PCs that are infected.

Effective with Cisco IOS Release 12.4(4)T, Network Admission Control can be used to also monitor the status of remote PC clients. After the Easy VPN tunnel comes up and the PC starts to send traffic, the traffic is intercepted at the Easy VPN server, and the posture validation process starts. The posture validation process consists of sending an EAPoUDP request over the Easy VPN tunnel and querying the Cisco trust agent. The authentication server is configured inside the trusted network, behind the IPsec aggregator.

The configuration of an Easy VPN server that has Network Admission Control enabled is shown in the output in “Example: Network Admission Control.”

Central Policy Push Firewall Policy Push

The Easy VPN server supports Central Policy Push (CPP) Firewall Policy Push feature, which allows administrators to push policies that enforce security to the Cisco Easy VPN Client and related firewall software.

A split tunnel enables access to corporate networks, but it also allows a remote device to be exposed to attacks from the Internet. The Central Policy Push (CPP) Firewall Policy Push feature enables the server to determine whether to allow or deny a tunnel if the remote device does not have a required firewall, thereby reducing exposure to attacks.

The following firewall types are supported:

  • Cisco-Integrated-firewall (central-policy-push)
  • Cisco-Security-Agent (check-presence)
  • Zonelabs-Zonealarm (both)
  • Zonelabs-ZonealarmPro (both)

The server can be used either to check the presence of a firewall on the client (remote device) using the check-presence option or to specify the specifics of the firewall policies that must be applied by the client using the central-policy-push.


Note


The policy check-presence command and keyword, which are used with this feature, replace the firewall are-u-there command functionality that was supported before Cisco IOS Release 12.4(6)T. The firewall are-u-there command is supported for backward compatibility.


For information on enabling this feature, see the “Defining a CPP Firewall Policy Push Using a Local AAA Server” and “Applying a CPP Firewall Policy Push to the Configuration Group.”

Syslog Support for CPP Firewall Policy Push

Syslog support can be enabled using the crypto logging ezvpn command on your device. CPP syslog messages will be printed for the following error conditions:

  • If a policy is configured on a group configuration (using the firewall policy command), but a global policy with the same name is not defined (using the crypto isakmp client firewall command), the syslog message is as follows:
    Policy enabled on group configuration but not defined
    Tunnel setup proceeds as normal (with the firewall).
  • If an incorrect firewall request (vendor/product/cap incorrect order) is received, the syslog message is as follows:
    Incorrect firewall record received from client
  • If a policy mismatch occurs between the Cisco VPN Client and the server, the syslog is as follows:
    CPP policy mismatch between client and headend

Password Aging

Prior to Cisco IOS Release 12.4(6)T, EasyVPN remote devices (clients) sent username and password values to the Easy VPN server, which in turn sent them to the AAA subsystem. The AAA subsystem generated an authentication request to the RADIUS server. If the password had expired, the RADIUS server replied with an authentication failure. The reason for the failure was not passed back to the AAA subsystem. The user was denied access due to authentication failure, but did not know that the failure was due to password expiration.

Effective with Cisco IOS Release 12.4(6)T, if you have configured the Password Aging feature, the EasyVPN client is notified when a password has expired, and you are prompted to enter a new password. To configure the Password Aging feature, see the section “Configuring Password Aging.”

For more information about the Password Aging feature, see the “Related Documents” section.

Split DNS

Effective with Cisco IOS Release 12.4(9)T, split DNS functionality is available on Easy VPN servers. This feature enables the Easy VPN hardware client to use primary and secondary DNS values to resolve DNS queries. These values are pushed by the Easy VPN server to the Easy VPN remote device. To configure this feature on your server, use the split-dns command (see the “Defining Group Policy Information for Mode Configuration Push”). Configuring this command adds the split-dns attribute to the policy group. The attribute will include the list of domain names that you configured. All other names will be resolved using the public DNS server.

For more information about configuring split DNS, see the document “Configuring Split and Dynamic DNS on the Cisco VPN 3000 Concentrator.”

Cisco Tunneling Control Protocol

The Cisco Tunneling Control Protocol (cTCP) feature can be used for situations in which an Easy VPN remote device is operating in an environment in which standard IPsec does not function or does not function transparently without modification to existing firewall rules. These situations include the following:

  • Small or home office device performing Network Address Translation (NAT) or Port Address Translation (PAT)
  • PAT-provided IP address behind a larger device (for example, in a corporation)
  • Non-NAT firewall (packet filtering or stateful)
  • Proxy server

The firewall should be configured to allow the headend to accept Cisco Tunneling Control Protocol connections on the configured Cisco Tunneling Control Protocol port. This configuration is enabled on the Easy VPN server. If the firewall is not configured, the Cisco Tunneling Control Protocol traffic is not allowed.


Note


Cisco Tunneling Control Protocol traffic is actually TCP traffic. Cisco Tunneling Control Protocol packets are IKE or Encapsulating Security Payload (ESP) packets that are being transmitted over TCP.


The Cisco Tunneling Control Protocol server sends a gratuitous ACK message to the client whenever the data received from the client over the established cTCP session reaches 3 kilobytes (KB) in size. A similar procedure is followed by the client. By default, this gratuitous ACK message is sent to keep the NAT or firewall sessions between the Cisco Tunneling Control Protocol server and Cisco Tunneling Control Protocol client alive. The data size at which gratuitous ACK messages are sent is not configurable.

Keepalives that are sent by a client or server do not keep the sessions alive when the server or client sends data at a high speed.

The Cisco Tunneling Control Protocol server sending ACK message ensures that NAT or firewall sessions do not drop packets when there is one-way traffic and the data is lengthy. It also ensures that an acknowledgment is provided from the device receiving the data.

VRF Assignment by a AAA Server

To assign VPN Routing and Forwarding (VRF) to Easy VPN users, enable the following attributes on a AAA server:

Cisco-avpair “ip:interface-config=ip vrf forwarding example1”
Cisco-avpair “ip:interface-config=ip unnumbered loopback10”

How to Configure Easy VPN Server

Enabling Policy Lookup via AAA

SUMMARY STEPS

    1.    enable

    2.    configure terminal

    3.    aaa new-model

    4.    aaa authentication password-prompt text-string

    5.    aaa authentication username-prompt text-string

    6.    aaa authentication login [list-name method1] [method2...]

    7.    aaa authorization network list-name local group radius

    8.    username name password encryption-type encrypted-password

    9.    exit


DETAILED STEPS
      Command or Action Purpose
    Step 1 enable


    Example:
    Device> enable
     

    Enables privileged EXEC mode.

    • Enter your password if prompted.
     
    Step 2 configure terminal


    Example:
    Device# configure terminal
     

    Enters global configuration mode.

     
    Step 3 aaa new-model


    Example:
    Device(config)# aaa new-model
     

    Enables AAA.

     
    Step 4 aaa authentication password-prompt text-string


    Example:
    Device(config)# aaa authentication password-prompt "Enter your password now:" 
     

    (Optional) Changes the text displayed when users are prompted for a password.

     
    Step 5 aaa authentication username-prompt text-string


    Example:
    Device(config)# aaa authentication username-prompt "Enter your name here:"
     

    (Optional) Changes the text displayed when users are prompted to enter a username.

     
    Step 6 aaa authentication login [list-name method1] [method2...]


    Example:
    Device(config)# aaa authentication login userlist local group radius
     

    Sets AAA authentication at login.

    • A local and RADIUS server may be used together and will be tried in order.
    Note   

    This command must be enabled to enforce Xauth.

     
    Step 7 aaa authorization network list-name local group radius


    Example:
    Device(config)# aaa authorization network grouplist local group radius
     

    Enables group policy lookup.

    • A local and RADIUS server may be used together and will be tried in order.
     
    Step 8 username name password encryption-type encrypted-password


    Example:
    Device(config)# username server_r password 7 121F0A18
     

    (Optional) Defines local users for Xauth if RADIUS or TACACS+ is not used.

    Note   

    Use this command only if no external validation repository will be used.

     
    Step 9 exit


    Example:
    Device(config)# exit
     

    Exits global configuration mode and returns to privileged EXEC mode.


    Defining Group Policy Information for Mode Configuration Push

    Although users can belong to only one group per connection, they may belong to specific groups with different policy requirements. Thus, users may decide to connect to the client using a different group ID by changing their client profile on the VPN device. To define the policy attributes that are pushed to the client via Mode Configuration, perform the following steps.

    SUMMARY STEPS

      1.    enable

      2.    configure terminal

      3.    crypto isakmp client configuration group {group-name | default}

      4.    key name

      5.    dns primary-server secondary-server

      6.    wins primary-server secondary-server

      7.    domain name

      8.    pool name

      9.    netmask name

      10.    acl number

      11.    access-restrict interface-name

      12.    Do one of the following:

      • policy check-presence
      • firewall are-u-there

      13.    group-lock

      14.    include-local-lan

      15.    save-password

      16.    backup-gateway

      17.    pfs

      18.    end


    DETAILED STEPS
        Command or Action Purpose
      Step 1 enable


      Example:
      Device> enable
       

      Enables privileged EXEC mode.

      • Enter your password if prompted.
       
      Step 2 configure terminal


      Example:
       Device# configure terminal
       

      Enters global configuration mode.

       
      Step 3 crypto isakmp client configuration group {group-name | default}


      Example:
      Device(config)# crypto isakmp client configuration group group1
       

      Specifies the policy profile of the group that will be defined and enters ISAKMP group configuration mode.

      • If no specific group matches and a default group is defined, users will automatically be given the policy of the default group.
       
      Step 4 key name


      Example:
      Device(config-isakmp-group)# key group1
       

      Specifies the IKE preshared key for the group policy attribute definition.

      Note   

      This command must be enabled if the client identifies itself with a preshared key.

       
      Step 5 dns primary-server secondary-server


      Example:
      Device(config-isakmp-group)# dns 10.2.2.2 10.3.3.3
       

      (Optional) Specifies the primary and secondary DNS servers for the group.

       
      Step 6 wins primary-server secondary-server


      Example:
      Device(config-isakmp-group)# wins 10.10.10.10 10.12.12.12
       

      (Optional) Specifies the primary and secondary WINS servers for the group.

       
      Step 7 domain name


      Example:
      Device(config-isakmp-group)# domain example.com
       

      (Optional) Specifies the DNS domain to which a group belongs.

       
      Step 8 pool name


      Example:
      Device(config-isakmp-group)# pool pool1
       

      Defines a local pool address.

      • Although a user must define at least one pool name, a separate pool may be defined for each group policy.
      Note   

      This command must be defined and refer to a valid IP local pool address or the client connection will fail.

       
      Step 9 netmask name


      Example:
      Device(config-isakmp-group)# netmask 255.255.255.255
       

      (Optional) Specifies that a subnet mask be downloaded to the client for local connectivity.

      Note   

      Some VPN clients use the default mask for their particular classes of address. However, for a device, the host-based mask is typically used (/32). If you want to override the default mask, use the netmask command.

       
      Step 10 acl number


      Example:
      Device(config-isakmp-group)# acl 199
       

      (Optional) Configures split tunneling.

      • The number argument specifies a group of access control list (ACL) rules that represent protected subnets for split tunneling purposes.
       
      Step 11 access-restrict interface-name


      Example:
      Device(config-isakmp-group)# access-restrict fastethernet0/0
       

      Restricts clients in a group to an interface.

       
      Step 12 Do one of the following:
      • policy check-presence
      • firewall are-u-there


      Example:
      Device(config-isakmp-group)# policy check-presence


      Example:
      Device(config-isakmp-group)# firewall are-u-there
       

      (Optional) Denotes that the server should check for the presence of the specified firewall (as shown as the firewall type on the client).

      or

      Adds the firewall are-u-there attribute to the server group if your PC is running the Black Ice or Zone Alarm personal firewalls.

      Note   

      The policy command and check-presence keyword were added in Cisco IOS Release 12.4(6)T. Cisco recommends that the policy command be used instead of the firewall are-u-there command because the policy command is supported in local AAA and remote AAA configurations. The firewall are-u-there command can be figured only locally and is supported for backward compatibility.

       
      Step 13 group-lock


      Example:
      Device(config-isakmp-group)# group-lock
       

      Enforces the group lock feature.

       
      Step 14 include-local-lan


      Example:
      Device(config-isakmp-group)# include-local-lan
       

      (Optional) Configures the Include-Local-LAN attribute to allow a nonsplit-tunneling connection to access the local subnetwork at the same time as the client.

       
      Step 15 save-password


      Example:
      Device(config-isakmp-group)# save-password
       

      (Optional) Saves your Xauth password locally on your PC.

       
      Step 16 backup-gateway


      Example:
      Device(config-isakmp-group)# backup-gateway
       

      (Optional) Pushes a list of backup gateways to the client device.

      • These gateways are tried sequentially when the previous gateway fails. The gateways may be specified using IP addresses or hostnames.
       
      Step 17 pfs


      Example:
      Device(config-isakmp-group)# pfs
       

      (Optional) Notifies the client of the central-site policy regarding whether Password Forward Secrecy (PFS) is required for any IPsec SA.

      • Because the client device does not have a user interface option to enable or disable PFS negotiation, the server will notify the client device of the central site policy using this parameter. The Diffie-Hellman (D-H) group that is proposed for PFS will be the same that was negotiated in Phase 1 of the IKE negotiation.
       
      Step 18 end


      Example:
      Device(config-isakmp-group)# end
       

      Exits ISAKMP group configuration mode and returns to privileged EXEC mode.


      Enabling VPN Session Monitoring

      If you want to restrict the maximum number of connections to the device per VPN group and the maximum number of simultaneous logins per user, perform this task.

      SUMMARY STEPS

        1.    enable

        2.    configure terminal

        3.    crypto isakmp client configuration group group-name

        4.    exit

        5.    max-logins number-of-logins

        6.    max-users number-of-users

        7.    exit


      DETAILED STEPS
          Command or Action Purpose
        Step 1 enable


        Example:
        Device> enable
         

        Enables privileged EXEC mode.

        • Enter your password if prompted.
         
        Step 2 configure terminal


        Example:
        Device# configure terminal
         

        Enters global configuration mode.

         
        Step 3 crypto isakmp client configuration group group-name


        Example:
        Device(config)# crypto isakmp client configuration group group1
         

        Specifies the policy profile of the group that will be defined and enters ISAKMP group configuration mode.

        • group-name—Group definition that identifies which policy is enforced for users.
         
        Step 4 exit


        Example:
        Device(config-isakmp-group)# exit
         

        Exits ISAKMP group configuration mode.

         
        Step 5 max-logins number-of-logins


        Example:
        Device(config)# max-logins 10
         

        (Optional) Limits the number of simultaneous logins for users in a specific server group.

         
        Step 6 max-users number-of-users


        Example:
        Device(config)# max-users 1000
         

        (Optional) Limits the number of connections to a specific server group.

         
        Step 7 exit


        Example:
        Device(config)# exit
         

        Exits global configuration mode and returns to privileged EXEC mode.


        Verifying a VPN Session

        SUMMARY STEPS

          1.    enable

          2.    show crypto session group

          3.    show crypto session summary


        DETAILED STEPS
            Command or Action Purpose
          Step 1 enable


          Example:
          Device> enable
           

          Enables privileged EXEC mode.

          • Enter your password if prompted.
           
          Step 2 show crypto session group


          Example:
          Device# show crypto session group
           

          Displays groups that are currently active on the VPN device.

           
          Step 3 show crypto session summary


          Example:
          Device# show crypto session summary
           

          Displays groups that are currently active on the VPN device and the users that are connected for each of those groups.


          Applying Mode Configuration and Xauth

          Mode Configuration and Xauth must be applied to a crypto map to be enforced. To apply Mode Configuration and Xauth to a crypto map, perform the following steps.

          SUMMARY STEPS

            1.    enable

            2.    configure terminal

            3.    crypto map tag client configuration address [initiate | respond]

            4.    crypto map map-name isakmp authorization list list-name

            5.    crypto map map-name client authentication list list-name

            6.    exit


          DETAILED STEPS
              Command or Action Purpose
            Step 1 enable


            Example:
            Device> enable
             

            Enables privileged EXEC mode.

            • Enter your password if prompted.
             
            Step 2 configure terminal


            Example:
            Device# configure terminal
             

            Enters global configuration mode.

             
            Step 3 crypto map tag client configuration address [initiate | respond]


            Example:
            Device(config)# crypto map dyn client configuration address initiate 
             

            Configures the device to initiate or reply to Mode Configuration requests.

            Note   

            Cisco clients require the respond keyword to be used; however, if the Cisco Secure VPN Client 1.x is used, the initiate keyword must be used; the initiate and respond keywords may be used.

             
            Step 4 crypto map map-name isakmp authorization list list-name


            Example:
            Device(config)# crypto map ikessaaamap isakmp authorization list ikessaaalist 
             

            Enables IKE querying for group policy when requested by the client.

            • The list-name argument is used by AAA to determine which storage source is used to find the policy (local or RADIUS) as defined in the aaa authorization network command.
             
            Step 5 crypto map map-name client authentication list list-name


            Example:
            Device(config)# crypto map xauthmap client authentication list xauthlist 
             

            Enforces Xauth.

            • The list-name argument is used to determine the appropriate username and password storage location (local or RADIUS) as defined in the aaa authentication login command.
             
            Step 6 exit


            Example:
            Device(config)# exit
             

            Exits global configuration mode and returns to privileged EXEC mode.


            Enabling Reverse Route Injection (RRI) for the Client

            To enable RRI on the crypto map (static or dynamic) for VPN client support, perform the following steps.

            SUMMARY STEPS

              1.    enable

              2.    configure terminal

              3.    Do one of the following:

              • crypto dynamic map-name seq-num
              • crypto map map-name seq-num ipsec-isakmp

              4.    set peer ip-address

              5.    set transform-set transform-set-name

              6.    reverse-route

              7.    match address

              8.    end


            DETAILED STEPS
                Command or Action Purpose
              Step 1 enable


              Example:
              Device> enable
               

              Enables privileged EXEC mode

              • Enter your password if prompted.
               
              Step 2 configure terminal


              Example:
              Device# configure terminal
               

              Enters global configuration mode.

               
              Step 3 Do one of the following:
              • crypto dynamic map-name seq-num
              • crypto map map-name seq-num ipsec-isakmp


              Example:
              Device(config)# crypto dynamic mymap 10


              Example:
              Device(config)# crypto map yourmap 15 ipsec-isakmp
               

              Creates a dynamic crypto map entry and enters crypto map configuration mode.

              or

              Adds a dynamic crypto map set to a static crypto map set and enters crypto map configuration mode.

               
              Step 4 set peer ip-address


              Example:
              Device(config-crypto-map)# set peer 10.20.20.20
               

              Specifies an IPsec peer IP address in a crypto map entry.

              • This step is optional when configuring dynamic crypto map entries.
               
              Step 5 set transform-set transform-set-name


              Example:
              Device(config-crypto-map)# set transform-set dessha
               

              Specifies which transform sets are allowed for the crypto map entry.

              • Lists multiple transform sets in the order of priority (highest priority first).
              Note   

              This list is the only configuration statement required in dynamic crypto map entries.

               
              Step 6 reverse-route


              Example:
              Device(config-crypto-map)# reverse-route
               

              Creates source proxy information.

               
              Step 7 match address


              Example:
              Device(config-crypto-map)# match address
               

              Specifies an extended access list for a crypto map entry.

              • This step is optional when configuring dynamic crypto map entries.
               
              Step 8 end


              Example:
              Device(config-crypto-map)# end
               

              Exits crypto map configuration mode and returns to privileged EXEC mode.


              Enabling IKE Dead Peer Detection

              To enable a Cisco IOS VPN gateway (instead of the client) to send IKE DPD messages, perform the following steps.

              SUMMARY STEPS

                1.    enable

                2.    configure terminal

                3.    crypto isakmp keepalive seconds retries

                4.    exit


              DETAILED STEPS
                  Command or Action Purpose
                Step 1 enable


                Example:
                Device> enable
                 

                Enables privileged EXEC mode.

                • Enter your password if prompted.
                 
                Step 2 configure terminal


                Example:
                Device# configure terminal
                 

                Enters global configuration mode.

                 
                Step 3 crypto isakmp keepalive seconds retries


                Example:
                Device(config)# crypto isakmp keepalive 20 10
                 

                Allows the gateway to send DPD messages to the device.

                • The seconds argument specifies the number of seconds between DPD messages (the range is from 1 to 3600).
                • The retries argument specifies the number of seconds between retries if DPD messages fail (the range is from 2 to 60).
                 
                Step 4 exit


                Example:
                Device(config)# exit
                 

                Exits global configuration mode and returns to privileged EXEC mode.


                Configuring RADIUS Server Support

                To configure access to the RADIUS server and allow the Cisco IOS VPN device to send requests to the server, perform the following steps.

                SUMMARY STEPS

                  1.    enable

                  2.    configure terminal

                  3.    radius server host ip-address [auth-port port-number] [acct-port port-number] [key string]

                  4.    exit


                DETAILED STEPS
                    Command or Action Purpose
                  Step 1 enable


                  Example:
                  Device> enable
                   

                  Enables privileged EXEC mode.

                  • Enter your password if prompted.
                   
                  Step 2 configure terminal


                  Example:
                  Device# configure terminal
                   

                  Enters global configuration mode.

                   
                  Step 3 radius server host ip-address [auth-port port-number] [acct-port port-number] [key string]


                  Example:
                  Device(config)# radius server host 192.168.1.1. auth-port 1645 acct-port 1646 key XXXX
                   

                  Specifies a RADIUS server host.

                  Note   

                  This step is required if you choose to store group policy information in a RADIUS server.

                   
                  Step 4 exit


                  Example:
                  Device(config)# exit
                   

                  Exits global configuration mode and returns to privileged EXEC mode.


                  Verifying Easy VPN Server

                  To verify your configurations for this feature, perform the following steps.

                  SUMMARY STEPS

                    1.    enable

                    2.    show crypto map [interface interface | tag map-name]


                  DETAILED STEPS
                      Command or Action Purpose
                    Step 1 enable


                    Example:
                    Device> enable
                     

                    Enables privileged EXEC mode.

                    • Enter your password if prompted.
                     
                    Step 2 show crypto map [interface interface | tag map-name]


                    Example:
                    Device# show crypto map interface ethernet 0
                     

                    Displays the crypto map configuration.


                    Configuring a Banner

                    To configure an Easy VPN server to push a banner to an Easy VPN remote device, perform the following steps.

                    SUMMARY STEPS

                      1.    enable

                      2.    configure terminal

                      3.    crypto isakmp client configuration group group-name

                      4.    banner c banner-text c

                      5.    end


                    DETAILED STEPS
                        Command or Action Purpose
                      Step 1 enable


                      Example:
                      Device> enable
                       

                      Enables privileged EXEC mode.

                      • Enter your password if prompted.
                       
                      Step 2 configure terminal


                      Example:
                      Device# configure terminal
                       

                      Enters global configuration mode.

                       
                      Step 3 crypto isakmp client configuration group group-name


                      Example:
                      Device(config)# crypto isakmp client configuration group Group1
                       

                      Specifies to which group a policy profile will be defined and enters ISAKMP group configuration mode.

                       
                      Step 4 banner c banner-text c


                      Example:
                      Device(config-isakmp-group)# banner c The quick brown fox jumped over the lazy dog c
                       

                      Specifies the text of the banner.

                       
                      Step 5 end


                      Example:
                      Device(config-isakmp-group)# end
                       

                      Exits ISAKMP group configuration mode and returns to privileged EXEC mode.


                      Configuring Auto Upgrade

                      To configure an Easy VPN server to provide an automated mechanism to make software and firmware upgrades automatically available to an Easy VPN remote device, perform the following steps.

                      SUMMARY STEPS

                        1.    enable

                        2.    configure terminal

                        3.    crypto isakmp client configuration group group-name

                        4.    auto-update client type-of-system url url rev review-version

                        5.    end


                      DETAILED STEPS
                          Command or Action Purpose
                        Step 1 enable


                        Example:
                        Device> enable
                         

                        Enables privileged EXEC mode.

                        • Enter your password if prompted.
                         
                        Step 2 configure terminal


                        Example:
                        Device# configure terminal
                         

                        Enters global configuration mode.

                         
                        Step 3 crypto isakmp client configuration group group-name


                        Example:
                        Device(config)# crypto isakmp client configuration group Group2
                         

                        Specifies to which group a policy profile will be defined and enters ISAKMP group configuration mode.

                         
                        Step 4 auto-update client type-of-system url url rev review-version


                        Example:
                        Device(config-isakmp-group)# auto-update client Win2000 url http:www.example.com/newclient rev 3.0.1(Rel), 3.1(Rel)
                         

                        Configures autoupdate parameters for an Easy VPN remote device.

                         
                        Step 5 end


                        Example:
                        Device(config-isakmp-group)# end
                         

                        Exits ISAKMP group configuration mode and returns to privileged EXEC mode.


                        Configuring Browser Proxy

                        To configure an EasyVPN server so that the Easy VPN remote device can access resources on the corporate network when using Cisco IOS VPN Client software, perform the following steps. With this configuration, the user does not have to manually modify the proxy settings of the web browser when connecting and does not have to manually revert the proxy settings when disconnecting.

                        SUMMARY STEPS

                          1.    enable

                          2.    configure terminal

                          3.    crypto isakmp client configuration browser-proxy browser-proxy-name

                          4.    proxy proxy-parameter

                          5.    end


                        DETAILED STEPS
                            Command or Action Purpose
                          Step 1 enable


                          Example:
                          Device> enable
                           

                          Enables privileged EXEC mode.

                          • Enter your password if prompted.
                           
                          Step 2 configure terminal


                          Example:
                          Device# configure terminal
                           

                          Enters global configuration mode.

                           
                          Step 3 crypto isakmp client configuration browser-proxy browser-proxy-name


                          Example:
                          Device(config)# crypto isakmp client configuration browser-proxy bproxy
                           

                          Configures browser-proxy parameters for an Easy VPN remote device and enters ISAKMP browser proxy configuration mode.

                           
                          Step 4 proxy proxy-parameter


                          Example:
                          Device(config-ikmp-browser-proxy)# proxy auto-detect
                           

                          Configures proxy parameters for an Easy VPN remote device.

                           
                          Step 5 end


                          Example:
                          Device(config-ikmp-browser-proxy)# end
                           

                          Exits ISAKMP browser proxy configuration mode and returns to privileged EXEC mode.


                          Configuring the Pushing of a Configuration URL Through a Mode-Configuration Exchange

                          To configure an Easy VPN server to push a configuration URL through a Mode-Configuration exchange, perform the following steps.

                          SUMMARY STEPS

                            1.    enable

                            2.    configure terminal

                            3.    crypto isakmp client configuration group group-name

                            4.    configuration url url

                            5.    configuration version version-number

                            6.    end


                          DETAILED STEPS
                              Command or Action Purpose
                            Step 1 enable


                            Example:
                            Device> enable
                             

                            Enables privileged EXEC mode.

                            • Enter your password if prompted.
                             
                            Step 2 configure terminal


                            Example:
                            Device# configure terminal
                             

                            Enters global configuration mode.

                             
                            Step 3 crypto isakmp client configuration group group-name


                            Example:
                            Device(config)# crypto isakmp client configuration group Group1
                             

                            Specifies to which group a policy profile will be defined and enters ISAKMP group configuration mode.

                             
                            Step 4 configuration url url


                            Example:
                            Device(config-isakmp-group)# configuration url http://10.10.88.8/easy.cfg
                             

                            Specifies the URL the remote device must use to get the configuration from the server.

                            • The URL must be a non-NULL-terminated ASCII string that specifies the complete path of the configuration file.
                             
                            Step 5 configuration version version-number


                            Example:
                            Device(config-isakmp-group)# configuration version 10
                             

                            Specifies the version of the configuration.

                            • The version number will be an unsigned integer in the range 1 through 32767.
                             
                            Step 6 end


                            Example:
                            Device(config-isakmp-group)# end
                             

                            Exits ISAKMP group configuration mode and returns to privileged EXEC mode.


                            Configuring Per-User AAA Download with PKI—Configuring the Crypto PKI Trustpoint

                            To configure a AAA server to push user attributes to a remote device, perform the following steps.

                            Before You Begin

                            Before configuring a AAA server to push user attributes to a remote device, you must have configured AAA. The crypto Public Key Infrastructure (PKI) trustpoint must also be configured. Preferably the trustpoint configuration should contain the authorization username command.

                            SUMMARY STEPS

                              1.    enable

                              2.    configure terminal

                              3.    crypto pki trustpoint name

                              4.    enrollment url url

                              5.    revocation-check none

                              6.    rsakeypair key-label

                              7.    authorization username subjectname subjectname

                              8.    end


                            DETAILED STEPS
                                Command or Action Purpose
                              Step 1 enable


                              Example:
                              Device> enable
                               

                              Enables privileged EXEC mode.

                              • Enter your password if prompted.
                               
                              Step 2 configure terminal


                              Example:
                              Device# configure terminal
                               

                              Enters global configuration mode.

                               
                              Step 3 crypto pki trustpoint name


                              Example:
                              Device(config)# crypto pki trustpoint ca-server
                               

                              Declares the trustpoint that your device should use and enters CA-trustpoint configuration mode.

                               
                              Step 4 enrollment url url


                              Example:
                              Device(config-ca-trustpoint)# enrollment url http://10.7.7.2:80
                               

                              Specifies the URL of the certification authority (CA) server to which to send enrollment requests.

                               
                              Step 5 revocation-check none


                              Example:
                              Device(config-ca-trustpoint)# revocation-check none
                               

                              Checks the revocation status of a certificate.

                               
                              Step 6 rsakeypair key-label


                              Example:
                              Device(config-ca-trustpoint)# rsakeypair rsa-pair
                               

                              Specifies which key pair to associate with the certificate.

                               
                              Step 7 authorization username subjectname subjectname


                              Example:
                              Device(config-ca-trustpoint)# authorization username subjectname commonname
                               

                              Specifies the parameters for the different certificate fields that are used to build the AAA username.

                               
                              Step 8 end


                              Example:
                              Device(config-ca-trustpoint)# end
                               

                              Exits CA-trustpoint configuration mode and returns to privileged EXEC mode.


                              Configuring the Actual Per-User AAA Download with PKI

                              SUMMARY STEPS

                                1.    enable

                                2.    configure terminal

                                3.    crypto isakmp policy priority

                                4.    group {1 | 2 }

                                5.    exit

                                6.    crypto isakmp profile profile-name

                                7.    match certificate certificate-map

                                8.    client pki authorization list listname

                                9.    client configuration address {initiate | respond}

                                10.    virtual-template template-number

                                11.    exit

                                12.    crypto ipsec transform-set transform-set-name transform1 [transform2] [transform3] [transform4]

                                13.    crypto ipsec profile name

                                14.    set transform-set transform-set-name

                                15.    exit


                              DETAILED STEPS
                                  Command or Action Purpose
                                Step 1 enable


                                Example:
                                Device> enable
                                 

                                Enables privileged EXEC mode.

                                • Enter your password if prompted.
                                 
                                Step 2 configure terminal


                                Example:
                                Device# configure terminal
                                 

                                Enters global configuration mode.

                                 
                                Step 3 crypto isakmp policy priority


                                Example:
                                Device(config)# crypto isakmp policy 10
                                 

                                Defines an IKE policy and enters ISAKMP policy configuration mode.

                                 
                                Step 4 group {1 | 2 }


                                Example:
                                Device(config-isakmp-policy)# group 2
                                 

                                Specifies the Diffie-Hellman group identifier within an IKE policy.

                                 
                                Step 5 exit


                                Example:
                                Device(config-isakmp-policy)# exit
                                 

                                Exits ISAKMP policy configuration mode.

                                 
                                Step 6 crypto isakmp profile profile-name


                                Example:
                                Device(config)# crypto isakmp profile ISA-PROF
                                 

                                Defines an ISAKMP profile, audits IPsec user sessions, and enters ISAKMP profile configuration mode.

                                 
                                Step 7 match certificate certificate-map


                                Example:
                                Device(config-isakmp-profile)# match certificate cert_map
                                 

                                Assigns an ISAKMP profile to a peer on the basis of the contents of arbitrary fields in the certificate.

                                 
                                Step 8 client pki authorization list listname


                                Example:
                                Device(config-isakmp-profile)# client pki authorization list usrgrp
                                 

                                Specifies the authorization list of AAA servers that will be used for obtaining per-user AAA attributes on the basis of the username constructed from the certificate.

                                 
                                Step 9 client configuration address {initiate | respond}


                                Example:
                                Device(config-isakmp-profile)# client configuration address respond
                                 

                                Configures IKE configuration mode in the ISAKMP profile.

                                 
                                Step 10 virtual-template template-number


                                Example:
                                Device(config-isakmp-profile)# virtual-template 2
                                 

                                Specifies the virtual template to clone virtual access interfaces.

                                 
                                Step 11 exit


                                Example:
                                Device(config-isakmp-profile)# exit
                                 

                                Exits ISAKMP profile configuration mode.

                                 
                                Step 12 crypto ipsec transform-set transform-set-name transform1 [transform2] [transform3] [transform4]


                                Example:
                                Device(config)# crypto ipsec transform-set trans2 esp-aes esp-sha-hmac1
                                 

                                Defines a transform set—an acceptable combination of security protocols and algorithms.

                                 
                                Step 13 crypto ipsec profile name


                                Example:
                                Device(config)# crypto ipsec profile IPSEC_PROF
                                 

                                Defines the IPsec parameters that are to be used for IPsec encryption between two IPsec devices.

                                 
                                Step 14 set transform-set transform-set-name


                                Example:
                                Device(config)# set transform-set trans2
                                 

                                Specifies the transform sets to be used with the crypto map entry.

                                 
                                Step 15 exit


                                Example:
                                Device(config)# exit
                                 

                                Exits global configuration mode and returns to privileged EXEC mode.


                                Configuring Per-User Attributes on a Local Easy VPN AAA Server

                                SUMMARY STEPS

                                  1.    enable

                                  2.    configure terminal

                                  3.    aaa attribute list list-name

                                  4.    attribute type name value [service service] [protocol protocol]

                                  5.    exit

                                  6.    crypto isakmp client configuration group group-name

                                  7.    crypto aaa attribute list list-name

                                  8.    end


                                DETAILED STEPS
                                    Command or Action Purpose
                                  Step 1 enable


                                  Example:
                                  Device> enable
                                   

                                  Enables privileged EXEC mode.

                                  • Enter your password if prompted.
                                   
                                  Step 2 configure terminal


                                  Example:
                                  Device# configure terminal
                                   

                                  Enters global configuration mode.

                                   
                                  Step 3 aaa attribute list list-name


                                  Example:
                                  Device(config)# aaa attribute list list1
                                   

                                  Defines a AAA attribute list locally on a device and enters attribute list configuration mode.

                                   
                                  Step 4 attribute type name value [service service] [protocol protocol]


                                  Example:
                                  Device(config-attr-list)# attribute type attribute xxxx service ike protocol ip
                                   

                                  Defines an attribute type that is to be added to an attribute list locally on a device.

                                   
                                  Step 5 exit


                                  Example:
                                  Device(config-attr-list)# exit
                                   

                                  Exits attribute list configuration mode.

                                   
                                  Step 6 crypto isakmp client configuration group group-name


                                  Example:
                                  Device(config)# crypto isakmp client configuration group group1
                                   

                                  Specifies the group to which a policy profile will be defined and enters ISAKMP group configuration mode.

                                   
                                  Step 7 crypto aaa attribute list list-name


                                  Example:
                                  Device(config-isakmp-group)# crypto aaa attribute list listname1
                                   

                                  Defines a AAA attribute list locally on a device.

                                   
                                  Step 8 end


                                  Example:
                                  Device(config-isakmp-group)# end
                                   

                                  Exits ISAKMP group configuration mode and returns to privileged EXEC mode.


                                  Enabling Easy VPN Syslog Messages

                                  SUMMARY STEPS

                                    1.    enable

                                    2.    configure terminal

                                    3.    crypto logging ezvpn [group group-name]

                                    4.    exit


                                  DETAILED STEPS
                                      Command or Action Purpose
                                    Step 1 enable


                                    Example:
                                    Device> enable
                                     

                                    Enables privileged EXEC mode.

                                    • Enter your password if prompted.
                                     
                                    Step 2 configure terminal


                                    Example:
                                    Device# configure terminal
                                     

                                    Enters global configuration mode.

                                     
                                    Step 3 crypto logging ezvpn [group group-name]


                                    Example:
                                    Device(config)# crypto logging ezvpn group group1
                                     

                                    Enables Easy VPN syslog messages on a server.

                                    • The group keyword and group-name argument are optional. If a group name is not provided, syslog messages are enabled for all Easy VPN connections to the server. If a group name is provided, syslog messages are enabled for that particular group only.
                                     
                                    Step 4 exit


                                    Example:
                                    Device(config)# exit
                                     

                                    Exits global configuration mode and returns to privileged EXEC mode.


                                    Defining a CPP Firewall Policy Push Using a Local AAA Server

                                    To define a CPP firewall policy push on a server to allow or deny a tunnel on the basis of whether a remote device has a required firewall for a local AAA server, perform the following steps.

                                    SUMMARY STEPS

                                      1.    enable

                                      2.    configure terminal

                                      3.    crypto isakmp client firewall policy-name required | optional firewall-type

                                      4.    policy {check-presence | central-policy-push access-list {in | out} {access-list-name | access-list-number}}

                                      5.    end


                                    DETAILED STEPS
                                        Command or Action Purpose
                                      Step 1 enable


                                      Example:
                                      Device> enable
                                       

                                      Enables privileged EXEC mode.

                                      • Enter your password if prompted.
                                       
                                      Step 2 configure terminal


                                      Example:
                                      Device# configure terminal
                                       

                                      Enters global configuration mode.

                                       
                                      Step 3 crypto isakmp client firewall policy-name required | optional firewall-type


                                      Example:
                                      Device(config)# crypto isakmp client firewall hw-client-g-cpp required Cisco-Security-Agent
                                       

                                      Defines the CPP firewall push policy on a server and enters ISAKMP client firewall configuration mode.

                                      • policy-name—Uniquely identifies a policy. A policy name can be associated with the Easy VPN client group configuration of the server (local group configuration) or on the AAA server.
                                      • required—Policy is mandatory. If the CPP policy is defined as mandatory and is included in the Easy VPN server configuration, the tunnel setup is allowed only if the client confirms this policy. Otherwise, the tunnel is terminated.
                                      • optional—Policy is optional. If the CPP policy is defined as optional, and is included in the Easy VPN server configuration, the tunnel setup is continued even if the client does not confirm the defined policy.
                                      • firewall-type—Type of firewall (see the crypto isakmp client firewall command for a list of firewall types).
                                       
                                      Step 4 policy {check-presence | central-policy-push access-list {in | out} {access-list-name | access-list-number}}


                                      Example:
                                      Device(config-isakmp-client-fw)# policy central-policy-push access-list out acl1
                                       

                                      Defines the CPP firewall policy push.

                                      • check-presence—Denotes that the server should check for the presence of the specified firewall as shown by the value of the firewall-type argument on the client.
                                      • central-policy-push—The configuration following this keyword specifies the actual policy, such as the input and output access lists that have to be applied by the client firewall, which is of the type specified by the value of the firewall-type argument.
                                      • access-list {in | out}—Defines the inbound and outbound access lists.
                                      • access-list-name | access-list-number--Name or number of the access list.
                                       
                                      Step 5 end


                                      Example:
                                      Device(config-isakmp-client-fw)# end
                                       

                                      Exits ISAKMP client firewall configuration mode and returns to privileged EXEC mode.


                                      What to Do Next

                                      Apply the CPP firewall policy push to the configured group.

                                      Applying a CPP Firewall Policy Push to the Configuration Group

                                      After the CPP firewall policy push is defined, it must be applied to the configuration group.

                                      SUMMARY STEPS

                                        1.    enable

                                        2.    configure terminal

                                        3.    crypto isakmp client configuration group group-name

                                        4.    firewall policy policy-name

                                        5.    end


                                      DETAILED STEPS
                                          Command or Action Purpose
                                        Step 1 enable


                                        Example:
                                        Device> enable
                                         

                                        Enables privileged EXEC mode.

                                        • Enter your password if prompted.
                                         
                                        Step 2 configure terminal


                                        Example:
                                        Device# configure terminal
                                         

                                        Enters global configuration mode.

                                         
                                        Step 3 crypto isakmp client configuration group group-name


                                        Example:
                                        Device(config)# crypto isakmp client configuration group hw-client-g
                                         

                                        Specifies to which group a policy profile will be defined and enters ISAKMP group configuration mode.

                                         
                                        Step 4 firewall policy policy-name


                                        Example:
                                        Device(config-isakmp-group)# firewall policy hw-client-g-cpp
                                         

                                        Specifies the CPP firewall push policy name for the crypto ISAKMP client configuration group on a local authentication AAA server.

                                         
                                        Step 5 end


                                        Example:
                                        Device(config-isakmp-group)# end
                                         

                                        Exits ISAKMP group configuration mode and returns to privileged EXEC mode.


                                        Defining a CPP Firewall Policy Push Using a Remote AAA Server

                                        The steps to define a CPP firewall policy push using a remote AAA server is similar to defining a CPP firewall policy push using a local AAA server. See the section Defining a CPP Firewall Policy Push Using a Local AAA Server.

                                        What to Do Next

                                        After defining the CPP firewall policy push, you should add the Vendor Specific Attributes (VSA) CPP policy under the group definition.

                                        Adding the VSA CPP-Policy Under the Group Definition

                                        To add the Vendor-Specific Attributes (VSA) CPP policy under the group definition that is defined in RADIUS, perform the following step.

                                        SUMMARY STEPS

                                          1.    Add the VSA “cpp-policy” under the group definition that is defined in RADIUS.


                                        DETAILED STEPS
                                            Command or Action Purpose
                                          Step 1 Add the VSA “cpp-policy” under the group definition that is defined in RADIUS.

                                          Example:
                                          ipsec:cpp-policy=“Enterprise Firewall”
                                           

                                          Defines the CPP firewall push policy for a remote server.


                                          Verifying CPP Firewall Policy Push

                                          SUMMARY STEPS

                                            1.    enable

                                            2.    debug crypto isakmp


                                          DETAILED STEPS
                                              Command or Action Purpose
                                            Step 1 enable


                                            Example:
                                            Device> enable
                                             

                                            Enables privileged EXEC mode.

                                            • Enter your password if prompted.
                                             
                                            Step 2 debug crypto isakmp


                                            Example:
                                            Device# debug crypto isakmp
                                             

                                            Displays messages about IKE events.


                                            Configuring Password Aging

                                            To configure the Password Aging feature so that the Easy VPN client is notified if the password has expired, perform the following steps.


                                            Note


                                            The following restrictions apply to the Password Aging feature:
                                            • It works only with VPN software clients. It does not work with VPN client hardware.
                                            • It works only with RADIUS servers.

                                            SUMMARY STEPS

                                              1.    enable

                                              2.    configure terminal

                                              3.    aaa new-model

                                              4.    aaa authentication login list-name password-expiry method1 [method2...]

                                              5.    radius-server host ip-address auth-port port-number acct-port port-number key string

                                              6.    crypto isakmp profile profile-name

                                              7.    client authentication list list-name

                                              8.    end


                                            DETAILED STEPS
                                                Command or Action Purpose
                                              Step 1 enable


                                              Example:
                                              Device> enable
                                               

                                              Enables privileged EXEC mode.

                                              • Enter your password if prompted.
                                               
                                              Step 2 configure terminal


                                              Example:
                                              Device# configure terminal
                                               

                                              Enters global configuration mode.

                                               
                                              Step 3 aaa new-model


                                              Example:
                                              Device(config)# aaa new-model
                                               

                                              Enables AAA.

                                               
                                              Step 4 aaa authentication login list-name password-expiry method1 [method2...]


                                              Example:
                                              Device(config)# aaa authentication login userauth password-expiry group radius
                                               

                                              Configures the authentication list so that the Password Aging feature is enabled.

                                               
                                              Step 5 radius-server host ip-address auth-port port-number acct-port port-number key string


                                              Example:
                                              Device(config)# radius-server host 172.19.217.96 255.255.255.0 auth-port 1645 acct-port 1646 key cisco radius-server vsa send authentication
                                               

                                              Configures the RADIUS server.

                                               
                                              Step 6 crypto isakmp profile profile-name


                                              Example:
                                              Device(config)# crypto isakmp profile ISA-PROF
                                               

                                              Defines an ISAKMP profile and enters ISAKMP profile configuration mode.

                                               
                                              Step 7 client authentication list list-name


                                              Example:
                                              Device(config-isakmp-profile)# client authentication list userauth
                                               

                                              Configures IKE extended authentication (Xauth) in an ISAKMP profile and includes the authentication list defined in Step 4.

                                               
                                              Step 8 end


                                              Example:
                                              Device(config-isakmp-profile)# end
                                               

                                              Exits ISAKMP profile configuration mode and returns to privileged EXEC mode.


                                              Configuring Split DNS

                                              Before You Begin

                                              Before the Split DNS feature can work, the following commands must be configured on the Easy VPN remote:

                                              • ip dns server
                                              • ip domain-lookup
                                              SUMMARY STEPS

                                                1.    enable

                                                2.    configure terminal

                                                3.    crypto isakmp client configuration group {group-name | default}

                                                4.    dns primary-server secondary-server

                                                5.    split-dns domain-name

                                                6.    end


                                              DETAILED STEPS
                                                  Command or Action Purpose
                                                Step 1 enable


                                                Example:
                                                Device> enable
                                                 

                                                Enables privileged EXEC mode.

                                                • Enter your password if prompted.
                                                 
                                                Step 2 configure terminal


                                                Example:
                                                Device# configure terminal
                                                 

                                                Enters global configuration mode.

                                                 
                                                Step 3 crypto isakmp client configuration group {group-name | default}


                                                Example:
                                                Device(config)# crypto isakmp client configuration group group1
                                                 

                                                Specifies the policy profile of the group that will be defined and enters ISAKMP group configuration mode.

                                                • If no specific group matches and a default group is defined, users will automatically be given the policy of a default group.
                                                 
                                                Step 4 dns primary-server secondary-server


                                                Example:
                                                Device(config-isakmp-group)# dns 10.2.2.2 10.3.3.3
                                                 

                                                Specifies the primary and secondary DNS servers for the group.

                                                 
                                                Step 5 split-dns domain-name


                                                Example:
                                                Device(config-isakmp-group)# split-dns example.com
                                                 

                                                Specifies a domain name that must be tunneled or resolved to the private network.

                                                 
                                                Step 6 end


                                                Example:
                                                Device(config-isakmp-group)# end
                                                 

                                                Exits ISAKMP group configuration mode and returns to privileged EXEC mode.


                                                Verifying Split DNS

                                                To verify a split DNS configuration, perform the following steps (the show commands can be used one at a time or together).

                                                SUMMARY STEPS

                                                  1.    enable

                                                  2.    show ip dns name-list [name-list-number]

                                                  3.    show ip dns view [vrf vrf-name] [default | view-name]

                                                  4.    show ip dns view-list [view-list-name]


                                                DETAILED STEPS
                                                    Command or Action Purpose
                                                  Step 1 enable


                                                  Example:
                                                  Device> enable
                                                   

                                                  Enables privileged EXEC mode.

                                                  • Enter your password if prompted.
                                                   
                                                  Step 2 show ip dns name-list [name-list-number]


                                                  Example:
                                                  Device# show ip dns name-list 1
                                                   

                                                  Displays information about DNS name lists.

                                                   
                                                  Step 3 show ip dns view [vrf vrf-name] [default | view-name]


                                                  Example:
                                                  Device# show ip dns view default
                                                   

                                                  Displays information about DNS views.

                                                   
                                                  Step 4 show ip dns view-list [view-list-name]


                                                  Example:
                                                  Device# show ip dns view-list ezvpn-internal-viewlist
                                                   

                                                  Displays information about DNS view lists.


                                                  Monitoring and Maintaining Split DNS

                                                  SUMMARY STEPS

                                                    1.    enable

                                                    2.    debug ip dns name-list

                                                    3.    debug ip dns view

                                                    4.    debug ip dns view-list


                                                  DETAILED STEPS
                                                      Command or Action Purpose
                                                    Step 1 enable


                                                    Example:
                                                    Device> enable
                                                     

                                                    Enables privileged EXEC mode.

                                                    • Enter your password if prompted.
                                                     
                                                    Step 2 debug ip dns name-list


                                                    Example:
                                                    Device# debug ip dns name-list
                                                     

                                                    Enables debugging output for Domain Name System (DNS) name-list events.

                                                     
                                                    Step 3 debug ip dns view


                                                    Example:
                                                    Device# debug ip dns view
                                                     

                                                    Enables debugging output for DNS view events.

                                                     
                                                    Step 4 debug ip dns view-list


                                                    Example:
                                                    Device# debug ip dns view-list
                                                     

                                                    Enables debugging output for DNS view-list events.


                                                    Configuring an Easy VPN Server to Obtain an IP Address from a DHCP Server

                                                    The Easy VPN server selects the method for address assignment in the following order of precedence:

                                                    1. Selects the Framed IP address
                                                    2. Uses the IP address from the authentication server (group/user)
                                                    3. Uses the global IKE address pools
                                                    4. Uses DHCP

                                                    Note


                                                    To enable the Easy VPN server to obtain an IP address from a DHCP server, remove other address assignments.


                                                    SUMMARY STEPS

                                                      1.    enable

                                                      2.    configure terminal

                                                      3.    crypto isakmp client configuration group group-name

                                                      4.    dhcp server {ip-address | hostname}

                                                      5.    dhcp timeout seconds

                                                      6.    dhcp giaddr scope

                                                      7.    end


                                                    DETAILED STEPS
                                                        Command or Action Purpose
                                                      Step 1 enable


                                                      Example:
                                                      Device> enable
                                                       

                                                      Enables privileged EXEC mode.

                                                      • Enter your password if prompted.
                                                       
                                                      Step 2 configure terminal


                                                      Example:
                                                      Device# configure terminal
                                                       

                                                      Enters global configuration mode.

                                                       
                                                      Step 3 crypto isakmp client configuration group group-name


                                                      Example:
                                                      Device(config)# crypto isakmp client configuration group group1
                                                       

                                                      Specifies to which group a policy profile will be defined and enters ISAKMP group configuration mode where you specify characteristics for the group policy.

                                                       
                                                      Step 4 dhcp server {ip-address | hostname}


                                                      Example:
                                                      Device(config-isakmp-group)# dhcp server 10.10.1.2
                                                       

                                                      Specifies a primary (and backup) DHCP server to allocate IP addresses to users entering a particular public data network (PDN) access point.

                                                       
                                                      Step 5 dhcp timeout seconds


                                                      Example:
                                                      Device(config-isakmp-group)# dhcp timeout 6
                                                       

                                                      Sets the wait time in seconds before the next DHCP server on the list is tried.

                                                       
                                                      Step 6 dhcp giaddr scope


                                                      Example:
                                                      Device(config-isakmp-group)# dhcp giaddr 10.1.1.4
                                                       

                                                      Specifies the gigabit address for the DHCP scope.

                                                       
                                                      Step 7 end


                                                      Example:
                                                      Device(config-isakmp-group)# end
                                                       

                                                      Exits ISAKMP group configuration mode and returns to privileged EXEC mode.


                                                      Verifying DHCP Client Proxy

                                                      To verify your DHCP client proxy configuration, perform the following steps (use the show commands one at a time or together).

                                                      SUMMARY STEPS

                                                        1.    enable

                                                        2.    show dhcp lease

                                                        3.    show ip dhcp pool

                                                        4.    show ip dhcp binding


                                                      DETAILED STEPS
                                                          Command or Action Purpose
                                                        Step 1 enable


                                                        Example:
                                                        Device> enable
                                                         

                                                        Enables privileged EXEC mode.

                                                        • Enter your password if prompted.
                                                         
                                                        Step 2 show dhcp lease


                                                        Example:
                                                        Device# show dhcp lease
                                                         

                                                        Displays information about the DHCP address pools.

                                                        Note   

                                                        Use this command when an external DHCP is used.

                                                         
                                                        Step 3 show ip dhcp pool


                                                        Example:
                                                        Device# show ip dhcp pool
                                                         

                                                        Displays information about the DHCP address pools.

                                                        Note   

                                                        This command is applicable only when the Easy VPN server is also the DHCP server (generally not the case because the DHCP server usually is an external server).

                                                         
                                                        Step 4 show ip dhcp binding


                                                        Example:
                                                        Device# show ip dhcp binding
                                                         

                                                        Displays address bindings on the DHCP server.

                                                        Note   

                                                        This command is applicable only when the Easy VPN server is also the DHCP server (generally not the case because the DHCP server usually is an external server).


                                                        Monitoring and Maintaining DHCP Client Proxy

                                                        To monitor and maintain your DHCP client proxy configuration, perform the following steps (use the debug commands one at a time or together).

                                                        SUMMARY STEPS

                                                          1.    enable

                                                          2.    debug crypto isakmp

                                                          3.    debug dhcp

                                                          4.    debug dhcp detail

                                                          5.    debug ip dhcp server events


                                                        DETAILED STEPS
                                                            Command or Action Purpose
                                                          Step 1 enable


                                                          Example:
                                                          Device> enable
                                                           

                                                          Enables privileged EXEC mode.

                                                          • Enter your password if prompted.
                                                           
                                                          Step 2 debug crypto isakmp


                                                          Example:
                                                          Device# debug crypto isakmp
                                                           

                                                          Displays messages about Internet Key Exchange (IKE) events.

                                                           
                                                          Step 3 debug dhcp


                                                          Example:
                                                          Device# debug dhcp
                                                           

                                                          Reports server events such as address assignments and database updates.

                                                           
                                                          Step 4 debug dhcp detail


                                                          Example:
                                                          Device# debug dhcp detail
                                                           

                                                          Displays detailed DHCP debugging information.

                                                           
                                                          Step 5 debug ip dhcp server events


                                                          Example:
                                                          Device# debug ip dhcp server events
                                                           

                                                          Reports server events such as address assignments and database updates.

                                                          Note   

                                                          This command is applicable only when the Easy VPN server is also the DHCP server (generally not the case because the DHCP server usually is an external server).


                                                          Configuring Cisco Tunneling Control Protocol

                                                          Before You Begin

                                                          Before configuring Cisco Tunneling Control Protocol, ensure that crypto IPsec is configured.

                                                          SUMMARY STEPS

                                                            1.    enable

                                                            2.    configure terminal

                                                            3.    crypto ctcp port [port-number]

                                                            4.    exit


                                                          DETAILED STEPS
                                                              Command or Action Purpose
                                                            Step 1 enable


                                                            Example:
                                                            Device> enable
                                                             

                                                            Enables privileged EXEC mode.

                                                            • Enter your password if prompted.
                                                             
                                                            Step 2 configure terminal


                                                            Example:
                                                            Device# configure terminal
                                                             

                                                            Enters global configuration mode.

                                                             
                                                            Step 3 crypto ctcp port [port-number]


                                                            Example:
                                                            Device(config)# crypto ctcp port 120
                                                             

                                                            Configures Cisco Tunneling Control Protocol encapsulation for Easy VPN.

                                                            • Up to ten port numbers can be configured.
                                                            • If the port-number argument is not configured, Cisco Tunneling Control Protocol is enabled on port 80 by default.
                                                             
                                                            Step 4 exit


                                                            Example:
                                                            Device(config)# exit
                                                             

                                                            Exits global configuration mode and returns to privileged EXEC mode.


                                                            Verifying Cisco Tunneling Control Protocol

                                                            To verify your Cisco Tunneling Control Protocol configuration, perform the following steps.

                                                            SUMMARY STEPS

                                                              1.    enable

                                                              2.    show crypto ctcp [peer]


                                                            DETAILED STEPS
                                                                Command or Action Purpose
                                                              Step 1 enable


                                                              Example:
                                                              Device> enable
                                                               

                                                              Enables privileged EXEC mode.

                                                              • Enter your password if prompted.
                                                               
                                                              Step 2 show crypto ctcp [peer]


                                                              Example:
                                                              Device# show crypto ctcp peer
                                                               

                                                              Displays information about a specific Cisco Tunneling Control Protocol peer.


                                                              Monitoring and Maintaining a Cisco Tunneling Control Protocol Configuration

                                                              To monitor and maintain your Cisco Tunneling Control Protocol configuration, perform the following steps.

                                                              SUMMARY STEPS

                                                                1.    enable

                                                                2.    debug crypto ctcp


                                                              DETAILED STEPS
                                                                  Command or Action Purpose
                                                                Step 1 enable


                                                                Example:
                                                                Device> enable
                                                                 

                                                                Enables privileged EXEC mode.

                                                                • Enter your password if prompted.
                                                                 
                                                                Step 2 debug crypto ctcp


                                                                Example:
                                                                Device# debug crypto ctcp
                                                                 

                                                                Displays information about a Cisco Tunneling Control Protocol session.


                                                                Clearing a Cisco Tunneling Control Protocol Configuration

                                                                To clear a Cisco Tunneling Control Protocol configuration, perform the following steps.

                                                                SUMMARY STEPS

                                                                  1.    enable

                                                                  2.    clear crypto ctcp [peer ip-address]


                                                                DETAILED STEPS
                                                                    Command or Action Purpose
                                                                  Step 1 enable


                                                                  Example:
                                                                  Device> enable
                                                                   

                                                                  Enables privileged EXEC mode.

                                                                  • Enter your password if prompted.
                                                                   
                                                                  Step 2 clear crypto ctcp [peer ip-address]


                                                                  Example:
                                                                  Device# clear crypto ctcp peer 10.76.23.21
                                                                   

                                                                  Displays information about a Cisco Tunneling Control Protocol session.


                                                                  Troubleshooting a Cisco Tunneling Control Protocol Configuration

                                                                  To troubleshoot a Cisco Tunneling Control Protocol configuration, perform the following steps.

                                                                  SUMMARY STEPS

                                                                    1.    To ensure that the Cisco Tunneling Control Protocol session is in the CTCP_ACK_RECEIVED state, use the show crypto ctcp command.

                                                                    2.    If the Cisco Tunneling Control Protocol session is not in the CTCP_ACK_RECEIVED state, enable the debug crypto ctcp command and then try using the show crypto ctcp command again.

                                                                    3.    If no Cisco Tunneling Control Protocol bugs are seen, ensure that the firewall is allowing the Cisco Tunneling Control Protocol packets to get to the server (check the firewall configuration).

                                                                    4.    If the firewall configuration is correct, debugging is enabled, and you do not see any Cisco Tunneling Control Protocol debugs on your console, you must find out why the Cisco Tunneling Control Protocol port on the device is not receiving packets. If you do not see any Cisco Tunneling Control Protocol debugs and a Cisco Tunneling Control Protocol session has not been set up, Cisco Tunneling Control Protocol packets that are actually TCP packets could have been delivered to a TCP stack instead of to the Cisco Tunneling Control Protocol port. By enabling the debug ip packet and debug ip tcp packet commands, you may be able to determine whether the packet is being given to the TCP stack.


                                                                  DETAILED STEPS
                                                                    Step 1   To ensure that the Cisco Tunneling Control Protocol session is in the CTCP_ACK_RECEIVED state, use the show crypto ctcp command.
                                                                    Step 2   If the Cisco Tunneling Control Protocol session is not in the CTCP_ACK_RECEIVED state, enable the debug crypto ctcp command and then try using the show crypto ctcp command again.
                                                                    Step 3   If no Cisco Tunneling Control Protocol bugs are seen, ensure that the firewall is allowing the Cisco Tunneling Control Protocol packets to get to the server (check the firewall configuration).
                                                                    Step 4   If the firewall configuration is correct, debugging is enabled, and you do not see any Cisco Tunneling Control Protocol debugs on your console, you must find out why the Cisco Tunneling Control Protocol port on the device is not receiving packets. If you do not see any Cisco Tunneling Control Protocol debugs and a Cisco Tunneling Control Protocol session has not been set up, Cisco Tunneling Control Protocol packets that are actually TCP packets could have been delivered to a TCP stack instead of to the Cisco Tunneling Control Protocol port. By enabling the debug ip packet and debug ip tcp packet commands, you may be able to determine whether the packet is being given to the TCP stack.

                                                                    Configuration Examples for Easy VPN Server

                                                                    Example: Configuring Cisco IOS Software for Easy VPN Server

                                                                    The following example shows how to define group policy information locally for mode configuration. In this example, a group name is named “cisco” and another group name is named “default.” The policy is enforced for all users who do not offer a group name that matches “cisco.”

                                                                    ! Enable policy look-up via AAA. For authentication and authorization, send requests to
                                                                    ! RADIUS first, then try local policy.
                                                                    aaa new-model
                                                                    aaa authentication login userlist group radius local
                                                                    aaa authorization network grouplist group radius local
                                                                    enable password XXXX
                                                                    !
                                                                    username cisco password 0 cisco
                                                                    clock timezone PST -8
                                                                    ip subnet-zero
                                                                    ! Configure IKE policies, which are assessed in order so that the first policy that
                                                                    matches the proposal of the client will be used.
                                                                    crypto isakmp policy 1
                                                                     group 2
                                                                    !
                                                                    crypto isakmp policy 3
                                                                     hash md5
                                                                     authentication pre-share
                                                                     group 2
                                                                    crypto isakmp identity hostname
                                                                    !
                                                                    ! Define “cisco” group policy information for mode config push.
                                                                    crypto isakmp client configuration group cisco
                                                                     key cisco
                                                                     dns 10.2.2.2 10.2.2.3
                                                                     wins 10.6.6.6
                                                                     domain cisco.com
                                                                     pool pool1
                                                                     acl 199
                                                                    ! Define default group policy for mode config push.
                                                                    crypto isakmp client configuration group default
                                                                     key cisco
                                                                     dns 10.2.2.2 10.3.2.3
                                                                     pool pool1
                                                                     acl 199
                                                                    !
                                                                    !
                                                                    crypto ipsec transform-set dessha esp-des esp-sha-hmac 
                                                                    !
                                                                    crypto dynamic-map mode 1
                                                                     set transform-set dessha 
                                                                    !
                                                                    ! Apply mode config and xauth to crypto map “mode.” The list names that are defined here
                                                                    ! must match the list names that are defined in the AAA section of the config.
                                                                    crypto map mode client authentication list userlist
                                                                    crypto map mode isakmp authorization list grouplist
                                                                    crypto map mode client configuration address respond
                                                                    crypto map mode 1 ipsec-isakmp dynamic mode 
                                                                    !
                                                                    !
                                                                    controller ISA 1/1
                                                                    !
                                                                    !         
                                                                    interface FastEthernet0/0
                                                                     ip address 10.6.1.8 255.255.0.0
                                                                     ip route-cache
                                                                     ip mroute-cache
                                                                     duplex auto
                                                                     speed auto
                                                                     crypto map mode
                                                                    !
                                                                    interface FastEthernet0/1
                                                                     ip address 192.168.1.28 255.255.255.0
                                                                     no ip route-cache
                                                                     no ip mroute-cache
                                                                     duplex auto
                                                                     speed auto
                                                                    ! Specify IP address pools for internal IP address allocation to clients.
                                                                    ip local pool pool1 192.168.2.1 192.168.2.10
                                                                    ip classless
                                                                    ip route 0.0.0.0 0.0.0.0 10.6.0.1
                                                                    !
                                                                    ! Define access lists for each subnet that should be protected.
                                                                    access-list 199 permit ip 192.168.1.0 0.0.0.255 any
                                                                    access-list 199 permit ip 192.168.3.0 0.0.0.255 any
                                                                    !
                                                                    ! Specify a RADIUS server host and configure access to the server.
                                                                    radius-server host 192.168.1.1 auth-port 1645 acct-port 1646 key XXXXX
                                                                    radius-server retransmit 3
                                                                    !
                                                                    !
                                                                    line con 0
                                                                     exec-timeout 0 0
                                                                     length 25
                                                                     transport input none
                                                                    line aux 0
                                                                    line vty 5 15
                                                                    !

                                                                    Example: RADIUS Group Profile with IPsec AV Pairs

                                                                    The following is an example of a standard RADIUS group profile that includes RADIUS IPsec AV pairs. To get the group authorization attributes, “cisco” must be used as the password.

                                                                    client_r Password = "cisco"
                                                                     Service-Type = Outbound
                                                                           
                                                                     cisco-avpair = "ipsec:tunnel-type*ESP"
                                                                     cisco-avpair = "ipsec:key-exchange=ike"
                                                                     cisco-avpair = "ipsec:tunnel-password=lab"
                                                                     cisco-avpair = "ipsec:addr-pool=pool1"
                                                                     cisco-avpair = "ipsec:default-domain=cisco"
                                                                     cisco-avpair = "ipsec:inacl=101"
                                                                     cisco-avpair = "ipsec:access-restrict=fastethernet 0/0"
                                                                     cisco-avpair = "ipsec:group-lock=1"
                                                                     cisco-avpair = "ipsec:dns-servers=10.1.1.1 10.2.2.2"
                                                                     cisco-avpair = "ipsec:firewall=1"
                                                                     cisco-avpair = "ipsec:include-local-lan=1"
                                                                     cisco-avpair = "ipsec:save-password=1"
                                                                     cisco-avpair = "ipsec:wins-servers=10.3.3.3 10.4.4.4"
                                                                     cisco-avpair = "ipsec:split-dns=example.com"
                                                                     cisco-avpair = "ipsec:ipsec-backup-gateway=10.1.1.1"
                                                                     cisco-avpair = "ipsec:ipsec-backup-gateway=10.1.1.2"
                                                                     cisco-avpair = "ipsec:pfs=1"
                                                                     cisco-avpair = "ipsec:cpp-policy="Enterprise Firewall"
                                                                     cisco-avpair = “ipsec:auto-update=”Win http://www.example.com 4.0.1”
                                                                     cisco-avpair = “ipsec:browser-proxy=bproxy_profile_A”
                                                                     cisco-avpair = "ipsec:banner=Xauth banner text here"

                                                                    The following is an example of a RADIUS user profile that is set up for a group that has group-lock configured. The username is entered in the same format as the user@domain format.

                                                                    abc@example.com Password = "abcll1111"
                                                                    cisco-avpair = "ipsec:user-include-local-lan=1"
                                                                    cisco-avpair = "ipsec:user-save-password=1"
                                                                    Framed-IP-Address = 10.10.10.10

                                                                    Example: RADIUS User Profile with IPsec AV Pairs

                                                                    The following is an example of a standard RADIUS user profile that includes RADIUS IPsec AV pairs. These user attributes will be obtained during Xauth.

                                                                    ualluall Password = "uall1234"
                                                                            cisco-avpair = "ipsec:user-vpn-group=unity"
                                                                            cisco-avpair = "ipsec:user-include-local-lan=1"
                                                                            cisco-avpair = "ipsec:user-save-password=1"
                                                                            Framed-IP-Address = 10.10.10.10

                                                                    Example: Backup Gateway with Maximum Logins and Maximum Users

                                                                    The following example shows that five backup gateways have been configured, that the maximum number of users has been set to 250, and that the maximum number of logins has been set to 2:

                                                                    crypto isakmp client configuration group sdm
                                                                     key 6 RMZPPMRQMSdiZNJg`EBbCWTKSTi\d[
                                                                     pool POOL1
                                                                     acl 150
                                                                     backup-gateway 172.16.12.12
                                                                     backup-gateway 172.16.12.13
                                                                     backup-gateway 172.16.12.14
                                                                     backup-gateway 172.16.12.130
                                                                     backup-gateway 172.16.12.131
                                                                     max-users 250
                                                                     max-logins 2
                                                                    

                                                                    Example: Easy VPN with an IPsec Virtual Tunnel Interface

                                                                    The following output shows that Easy VPN has been configured with an IPsec virtual tunnel interface.

                                                                    !
                                                                    version 12.4
                                                                    service timestamps debug datetime msec
                                                                    service timestamps log datetime msec
                                                                    no service password-encryption
                                                                    !
                                                                    hostname Router
                                                                    !
                                                                    boot-start-marker
                                                                    boot-end-marker
                                                                    !
                                                                    !
                                                                    aaa new-model
                                                                    !
                                                                    !
                                                                    aaa authentication login default local
                                                                    aaa authorization network default local 
                                                                    !
                                                                    aaa session-id common
                                                                    !
                                                                    resource policy
                                                                    !         
                                                                    clock timezone IST 0
                                                                    ip subnet-zero
                                                                    ip cef
                                                                    no ip domain lookup
                                                                    no ip dhcp use vrf connected
                                                                    !
                                                                    username lab password 0 lab
                                                                    !
                                                                    crypto isakmp policy 3
                                                                     authentication pre-share
                                                                     group 2
                                                                    crypto isakmp xauth timeout 90
                                                                    !
                                                                    crypto isakmp client configuration group easy
                                                                     key cisco
                                                                     domain foo.com
                                                                     pool dpool
                                                                     acl 101
                                                                    crypto isakmp profile vi
                                                                       match identity group easy
                                                                       isakmp authorization list default
                                                                       client configuration address respond
                                                                       client configuration group easy
                                                                       virtual-template 1
                                                                    !
                                                                    !
                                                                    crypto ipsec transform-set set esp-3des esp-sha-hmac 
                                                                    !
                                                                    crypto ipsec profile vi
                                                                     set transform-set set 
                                                                     set isakmp-profile vi
                                                                    !
                                                                    !
                                                                    interface Loopback0
                                                                     ip address 10.4.0.1 255.255.255.0
                                                                    !
                                                                    interface Ethernet0/0
                                                                     ip address 10.3.0.2 255.255.255.0
                                                                     no keepalive
                                                                     no cdp enable
                                                                    interface Ethernet1/0
                                                                     no ip address
                                                                     no keepalive
                                                                     no cdp enable
                                                                    !
                                                                    interface Virtual-Template1 type tunnel
                                                                     ip unnumbered Ethernet0/0
                                                                     tunnel mode ipsec ipv4
                                                                     tunnel protection ipsec profile vi
                                                                    !
                                                                    ip local pool dpool 10.5.0.1 10.5.0.10
                                                                    !
                                                                    ip classless
                                                                    ip route 10.2.0.0 255.255.255.0 10.3.0.1
                                                                    no ip http server
                                                                    no ip http secure-server
                                                                    !         
                                                                    !
                                                                    access-list 101 permit ip 10.4.0.0 0.0.0.255 any
                                                                    no cdp run
                                                                    !
                                                                    !
                                                                    line con 0
                                                                    line aux 0
                                                                    line vty 0 4
                                                                    !
                                                                    end

                                                                    Example: Pushing a Configuration URL Through a Mode-Configuration Exchange

                                                                    The following show crypto ipsec client ezvpn command output displays the mode configuration URL location and version:

                                                                    Device# show crypto ipsec client ezvpn
                                                                    
                                                                    Easy VPN Remote Phase: 5
                                                                    Tunnel name : branch
                                                                    Inside interface list: Vlan1
                                                                    Outside interface: FastEthernet0
                                                                    Current State: IPSEC_ACTIVE
                                                                    Last Event: SOCKET_UP
                                                                    Address: 172.16.1.209
                                                                    Mask: 255.255.255.255
                                                                    Default Domain: cisco.com
                                                                    Save Password: Allowed
                                                                    Configuration URL [version]: tftp://172.16.30.2/branch.cfg [11]
                                                                    Config status: applied, Last successfully applied version: 11
                                                                    Current EzVPN Peer: 192.168.10.1
                                                                    

                                                                    The following show crypto isakmp peers config command output displays all manageability information that is sent by the remote device:

                                                                    Device# show crypto isakmp peers config
                                                                    
                                                                    Client-Public-Addr=192.168.10.2:500; Client-Assigned-Addr=172.16.1.209; Client-Group=branch; Client-User=branch; Client-Hostname=branch.; Client-Platform=Cisco 1711; Client-Serial=FOC080210E2 (412454448); Client-Config-Version=11; Client-Flash=33292284; Client-Available-Flash=10202680; Client-Memory=95969280; Client-Free-Memory=14992140; Client-Image=flash:c1700-advipservicesk9-mz.ef90241;
                                                                    Client-Public-Addr=192.168.10.3:500; Client-Assigned-Addr=172.16.1.121; Client-Group=store; Client-User=store; Client-Hostname=831-storerouter.; Client-Platform=Cisco C831; Client-Serial=FOC08472UXR (1908379618); Client-Config-Version=2; Client-Flash=24903676; Client-Available-Flash=5875028; Client-Memory=45298688; Client-Free-Memory=6295596; Client-Image=flash:c831-k9o3y6-mz.ef90241

                                                                    Example: Per-User AAA Policy Download with PKI

                                                                    The following output from the show running-config shows that the Per-User AAA Policy Download with PKI feature has been configured on the Easy VPN server:

                                                                    Device# show running-config
                                                                    
                                                                    Building configuration...
                                                                    Current configuration : 7040 bytes
                                                                    !
                                                                    ! Last configuration change at 21:06:51 UTC Tue Jun 28 2005
                                                                    !
                                                                    version 12.4
                                                                    no service pad
                                                                    service timestamps debug uptime
                                                                    service timestamps log uptime
                                                                    no service password-encryption
                                                                    !
                                                                    hostname GEN
                                                                    !
                                                                    boot-start-marker
                                                                    boot-end-marker
                                                                    !
                                                                    !
                                                                    aaa new-model
                                                                    !
                                                                    !
                                                                    aaa group server radius usrgrppki
                                                                     server 10.76.248.201 auth-port 1645 acct-port 1646
                                                                    !
                                                                    aaa authentication login xauth group usrgrppki
                                                                    aaa authentication login usrgrp group usrgrppki
                                                                    aaa authorization network usrgrp group usrgrppki 
                                                                    !
                                                                    aaa session-id common
                                                                    !
                                                                    resource policy
                                                                    !
                                                                    ip subnet-zero
                                                                    !
                                                                    !
                                                                    ip cef
                                                                    !
                                                                    !
                                                                    ip address-pool local
                                                                    !
                                                                    !
                                                                    crypto pki trustpoint ca-server
                                                                     enrollment url http://10.7.7.2:80
                                                                     revocation-check none
                                                                     rsakeypair rsa-pair
                                                                     ! Specify the field within the certificate that will be used as a username to do a per-user AAA lookup into the RADIUS database. In this example, the contents of the  commonname will be used to do a AAA lookup. In the absence of this statement, by default  the contents of the “unstructured name” field in the certificate is used for AAA lookup.
                                                                     authorization username subjectname commonname
                                                                    !
                                                                    !
                                                                    crypto pki certificate map CERT-MAP 1
                                                                     subject-name co yourname
                                                                     name co yourname
                                                                    !
                                                                    crypto pki certificate chain ca-server
                                                                     certificate 02
                                                                      308201EE 30820157 A0030201 02020102 300D0609 2A864886 F70D0101 04050030 
                                                                      14311230 10060355 04031309 63612D73 65727665 72301E17 0D303530 36323832 
                                                                      30303731 345A170D 30363036 32383230 30373134 5A301531 13301106 092A8648 
                                                                      86F70D01 09021604 47454E2E 30819F30 0D06092A 864886F7 0D010101 05000381 
                                                                      8D003081 89028181 00ABF8F0 FDFFDF8D F22098D6 A48EE0C3 F505DD96 C0022EA4 
                                                                      EAB95EE8 1F97F450 990BB0E6 F2B7151F C5C79391 93822FE4 DEE5B00C A03412BB 
                                                                      9B715AAD D6C31F93 D8802658 AF9A8866 63811942 913D0C02 C3E328CC 1C046E94 
                                                                      F73B7C1A 4497F86E 74A627BC B809A3ED 293C15F2 8DCFA217 5160F9A4 09D52044 
                                                                      350F85AF 08B357F5 D7020301 0001A34F 304D300B 0603551D 0F040403 0205A030 
                                                                      1F060355 1D230418 30168014 F9BC4498 3DA4D51D 451EFEFD 5B1F5F73 8D7B1C9B 
                                                                      301D0603 551D0E04 1604146B F6B2DFD1 1FE237FF 23294129 E55D9C48 CCB04630 
                                                                      0D06092A 864886F7 0D010104 05000381 81004AFF 2BE300C1 15D0B191 C20D06E0 
                                                                      260305A6 9DF610BB 24211516 5AE73B62 78E01FE4 0785776D 3ADFA3E2 CE064432 
                                                                      1C93E82D 93B5F2AB 9661EDD3 499C49A8 F87CA553 9132F239 1D50187D 21CC3148 
                                                                      681F5043 2F2685BC F544F4FF 8DF535CB E55B5F36 31FFF025 8969D9F8 418C8AB7 
                                                                      C569B022 46C3C63A 22DD6516 C503D6C8 3D81
                                                                      quit
                                                                     certificate ca 01
                                                                      30820201 3082016A A0030201 02020101 300D0609 2A864886 F70D0101 04050030 
                                                                      14311230 10060355 04031309 63612D73 65727665 72301E17 0D303530 36323832 
                                                                      30303535 375A170D 30383036 32373230 30353537 5A301431 12301006 03550403 
                                                                      13096361 2D736572 76657230 819F300D 06092A86 4886F70D 01010105 0003818D 
                                                                      00308189 02818100 BA1A4413 96339C6B D36BD720 D25C9A44 E0627A29 97E06F2A 
                                                                      69B268ED 08C7144E 7058948D BEA512D4 40588B87 322C5D79 689427CA 5C54B3BA 
                                                                      82FAEC53 F6AC0B5C 615D032C 910CA203 AC6AB681 290D9EED D31EB185 8D98E1E7 
                                                                      FF73613C 32290FD6 A0CBDC40 6E4D6B39 DE1D86BA DE77A55E F15299FF 97D7C185 
                                                                      919F81C1 30027E0F 02030100 01A36330 61300F06 03551D13 0101FF04 05300301 
                                                                      01FF300E 0603551D 0F0101FF 04040302 0186301F 0603551D 23041830 168014F9 
                                                                      BC44983D A4D51D45 1EFEFD5B 1F5F738D 7B1C9B30 1D060355 1D0E0416 0414F9BC 
                                                                      44983DA4 D51D451E FEFD5B1F 5F738D7B 1C9B300D 06092A86 4886F70D 01010405 
                                                                      00038181 003EF397 F4D98BDE A4322FAF 4737800F 1671F77E BD6C45AE FB91B28C 
                                                                      F04C98F0 135A40C6 635FDC29 63C73373 5D5BBC9A F1BBD235 F66CE1AD 6B4BFC7A 
                                                                      AB18C8CC 1AB93AF3 7AC67436 930E9C81 F43F7570 A8FE09AE 3DEA01D1 DA6BD0CB 
                                                                      83F9A77F 1DFAFE5E 2F1F206B F1FDD8BE 6BB57A3C 8D03115D B1F64A3F 7A7557C1 
                                                                      09B0A34A DB
                                                                      quit
                                                                    !
                                                                    !
                                                                    crypto isakmp policy 10
                                                                     group 2
                                                                    crypto isakmp keepalive 10
                                                                    crypto isakmp profile ISA-PROF
                                                                       match certificate CERT-MAP
                                                                       isakmp authorization list usrgrp
                                                                       client pki authorization list usrgrp
                                                                       client configuration address respond
                                                                       client configuration group pkiuser
                                                                       virtual-template 2
                                                                    !
                                                                    !
                                                                    crypto ipsec transform-set trans2 esp-3des esp-sha-hmac 
                                                                    !
                                                                    crypto ipsec profile IPSEC_PROF
                                                                     set transform-set trans2 
                                                                    !
                                                                    crypto ipsec profile ISC_IPSEC_PROFILE_1
                                                                     set transform-set trans2 
                                                                    !         
                                                                    !
                                                                    crypto call admission limit ike sa 40
                                                                    !
                                                                    !
                                                                    interface Loopback0
                                                                     ip address 10.3.0.1 255.255.255.255
                                                                     no ip route-cache cef
                                                                     no ip route-cache
                                                                    !
                                                                    interface Loopback1
                                                                     ip address 10.76.0.1 255.255.255.255
                                                                     no ip route-cache cef
                                                                     no ip route-cache
                                                                    !
                                                                    interface Ethernet3/0
                                                                     ip address 10.76.248.209 255.255.255.255
                                                                     no ip route-cache cef
                                                                     no ip route-cache
                                                                     duplex half
                                                                    !
                                                                    !
                                                                    interface Ethernet3/2
                                                                     ip address 10.2.0.1 255.255.255.0
                                                                     no ip route-cache cef
                                                                     no ip route-cache
                                                                     duplex half
                                                                    !
                                                                    !
                                                                    interface Serial4/0
                                                                     no ip address
                                                                     no ip route-cache cef
                                                                     no ip route-cache
                                                                     shutdown
                                                                     serial restart-delay 0
                                                                    !
                                                                    interface Serial4/1
                                                                     no ip address
                                                                     no ip route-cache cef
                                                                     no ip route-cache
                                                                     shutdown
                                                                     serial restart-delay 0
                                                                    !
                                                                    interface Serial4/2
                                                                     no ip address
                                                                     no ip route-cache cef
                                                                     no ip route-cache
                                                                     shutdown
                                                                     serial restart-delay 0
                                                                    !         
                                                                    interface Serial4/3
                                                                     no ip address
                                                                     no ip route-cache cef
                                                                     no ip route-cache
                                                                     shutdown
                                                                     serial restart-delay 0
                                                                    !
                                                                    interface FastEthernet5/0
                                                                     ip address 10.9.4.77 255.255.255.255
                                                                     no ip route-cache cef
                                                                     no ip route-cache
                                                                     duplex half
                                                                    !
                                                                    interface FastEthernet6/0
                                                                     ip address 10.7.7.1 255.255.255.0
                                                                     no ip route-cache cef
                                                                     no ip route-cache
                                                                     duplex full
                                                                    !
                                                                    interface Virtual-Template1 
                                                                     no ip address
                                                                    !
                                                                    interface Virtual-Template2 type tunnel
                                                                     ip unnumbered Loopback0
                                                                     tunnel source Ethernet3/2
                                                                     tunnel mode ipsec ipv4
                                                                     tunnel protection ipsec profile IPSEC_PROF
                                                                    !
                                                                    router eigrp 20
                                                                     network 172.16.0.0
                                                                     auto-summary
                                                                    !
                                                                    ip local pool ourpool 10.6.6.6
                                                                    ip default-gateway 10.9.4.1
                                                                    ip classless
                                                                    ip route 10.1.0.1 255.255.255.255 10.0.0.2
                                                                    ip route 10.2.3.0 255.255.0.0 10.2.4.4
                                                                    ip route 10.9.1.0 255.255.0.0 10.4.0.1
                                                                    ip route 10.76.0.0 255.255.0.0 10.76.248.129
                                                                    ip route 10.11.1.1 255.255.255.0 10.7.7.2
                                                                    !
                                                                    no ip http server
                                                                    no ip http secure-server
                                                                    !
                                                                    !
                                                                    logging alarm informational
                                                                    arp 10.9.4.1 0011.bcb4.d40a ARPA
                                                                    !
                                                                    !
                                                                    radius-server host 10.76.248.201 auth-port 1645 acct-port 1646 key cisco
                                                                    !
                                                                    control-plane
                                                                    !
                                                                    !
                                                                    gatekeeper
                                                                     shutdown
                                                                    !
                                                                    !
                                                                    line con 0
                                                                     stopbits 1
                                                                    line aux 0
                                                                     stopbits 1
                                                                    line vty 0 4
                                                                    !         
                                                                    !
                                                                    end

                                                                    Example: Per-User Attributes on an Easy VPN Server

                                                                    The following example shows that per-user attributes have been configured on an Easy VPN server:

                                                                    !
                                                                    aaa new-model
                                                                    !
                                                                    !
                                                                    aaa authentication login default local
                                                                    aaa authentication login noAAA none
                                                                    aaa authorization network default local 
                                                                    !
                                                                    aaa attribute list per-group
                                                                     attribute type inacl "per-group-acl" service ike protocol ip mandatory
                                                                    !
                                                                    aaa session-id common
                                                                    !
                                                                    resource policy
                                                                    !
                                                                    ip subnet-zero
                                                                    !
                                                                    !
                                                                    ip cef
                                                                    !
                                                                    !
                                                                    username example password 0 example
                                                                    !
                                                                    !
                                                                    crypto isakmp policy 3
                                                                     authentication pre-share
                                                                     group 2
                                                                    crypto isakmp xauth timeout 90
                                                                    !
                                                                    crypto isakmp client configuration group PerUserAAA
                                                                     key cisco
                                                                     pool dpool
                                                                     crypto aaa attribute list per-group
                                                                    !
                                                                    crypto isakmp profile vi
                                                                     match identity group PerUserAAA
                                                                     isakmp authorization list default
                                                                     client configuration address respond
                                                                     client configuration group PerUserAAA
                                                                     virtual-template 1
                                                                    !
                                                                    !
                                                                    crypto ipsec transform-set set esp-3des esp-sha-hmac 
                                                                    !
                                                                    crypto ipsec profile vi
                                                                     set transform-set set 
                                                                     set isakmp-profile vi
                                                                    !
                                                                    !
                                                                    interface GigabitEthernet0/0
                                                                     description 'EzVPN Peer'
                                                                     ip address 192.168.1.1 255.255.255.128
                                                                     duplex full
                                                                     speed 100
                                                                     media-type rj45
                                                                     no negotiation auto
                                                                    !
                                                                    interface GigabitEthernet0/1
                                                                     no ip address
                                                                     shutdown
                                                                     duplex auto
                                                                     speed auto
                                                                     media-type rj45
                                                                     no negotiation auto
                                                                    interface Virtual-Template1 type tunnel
                                                                     ip unnumbered GigabitEthernet0/0
                                                                     tunnel mode ipsec ipv4
                                                                     tunnel protection ipsec profile vi
                                                                    !
                                                                    ip local pool dpool 10.5.0.1 10.5.0.10
                                                                    ip classless
                                                                    !
                                                                    no ip http server
                                                                    no ip http secure-server
                                                                    !
                                                                    !
                                                                    ip access-list extended per-group-acl
                                                                     permit tcp any any
                                                                     deny   icmp any any
                                                                    logging alarm informational
                                                                    logging trap debugging
                                                                    !
                                                                    control-plane
                                                                    !
                                                                    gatekeeper
                                                                     shutdown
                                                                    !
                                                                    line con 0
                                                                    line aux 0
                                                                     stopbits 1
                                                                    line vty 0 4
                                                                    !
                                                                    !
                                                                    end

                                                                    Example: Network Admission Control

                                                                    The following is output for an Easy VPN server that has been enabled with Network Admission Control:


                                                                    Note


                                                                    Network Admission Control is supported on an Easy VPN server only when the server uses IPsec virtual interfaces. Network Admission Control is enabled on the virtual template interface and applies to all clients that use this virtual template interface.


                                                                    Device# show running-config
                                                                    
                                                                    Building configuration...
                                                                    Current configuration : 5091 bytes
                                                                    !
                                                                    version 12.4
                                                                    !
                                                                    hostname Router
                                                                    !
                                                                    aaa new-model
                                                                    !
                                                                    !
                                                                    aaa authentication login userlist local
                                                                    !
                                                                    aaa authentication eou default group radius
                                                                    aaa authorization network hw-client-groupname local
                                                                    aaa accounting update newinfo
                                                                    aaa accounting network acclist start-stop broadcast group radius
                                                                    aaa session-id common
                                                                    !
                                                                    !
                                                                    ! Note 1: EAPoUDP packets will use the IP address of the loopback interface when sending the EAPoUDP hello to the Easy VPN client. Using the IP address ensures that the returning EAPoUDP packets come back encrypted and are associated with the correct virtual access interface. The ip admission (ip admission source-interface Loopback10) command is optional. Instead of using this command, you can specify the IP address of the virtual template to be an address in the inside network space as shown in the configuration of the virtual template below in Note 2.
                                                                    ip admission source-interface Loopback10
                                                                    ip admission name test eapoudp inactivity-time 60
                                                                    !
                                                                    !
                                                                    eou clientless username cisco
                                                                    eou clientless password cisco
                                                                    eou allow ip-station-id
                                                                    eou logging
                                                                    !
                                                                    username lab password 0 lab
                                                                    username lab@easy password 0 lab
                                                                    !
                                                                    !
                                                                    crypto isakmp policy 3
                                                                      encr 3des
                                                                      authentication pre-share
                                                                      group 2
                                                                    !
                                                                    !
                                                                    crypto isakmp key 0 cisco address 10.53.0.1
                                                                    crypto isakmp client configuration group easy
                                                                      key cisco
                                                                      domain cisco.com
                                                                      pool dynpool
                                                                      acl split-acl
                                                                      group-lock
                                                                      configuration url tftp://10.13.0.9/Config-URL_TFTP.cfg
                                                                      configuration version 111
                                                                    !
                                                                    crypto isakmp profile vi
                                                                        match identity group easy
                                                                        client authentication list userlist
                                                                        isakmp authorization list hw-client-groupname
                                                                        client configuration address respond
                                                                        client configuration group easy
                                                                        accounting acclist
                                                                        virtual-template 2
                                                                    !
                                                                    crypto ipsec security-association lifetime seconds 120
                                                                    crypto ipsec transform-set set esp-3des esp-sha-hmac
                                                                    crypto ipsec transform-set aes-trans esp-aes esp-sha-hmac
                                                                    crypto ipsec transform-set transform-1 esp-des esp-sha-hmac
                                                                    crypto ipsec profile vi
                                                                      set security-association lifetime seconds 3600
                                                                      set transform-set set aes-trans transform-1
                                                                      set isakmp-profile vi
                                                                    !
                                                                    !
                                                                    crypto dynamic-map dynmap 1
                                                                      set transform-set aes-trans transform-1
                                                                      reverse-route
                                                                    !
                                                                    interface Loopback10
                                                                      ip address 10.61.0.1 255.255.255.255
                                                                    !
                                                                    interface FastEthernet0/0
                                                                      ip address 10.13.11.173 255.255.255.255
                                                                      duplex auto
                                                                      speed auto
                                                                    !
                                                                    interface FastEthernet0/1
                                                                      ip address 10.55.0.1 255.255.255.255
                                                                      duplex auto
                                                                      speed auto
                                                                    !
                                                                    !
                                                                    interface Virtual-Template2 type tunnel
                                                                    ! Note2: Use the IP address of the loopback10. This ensures that the EAPoUDP packets that are attached to virtual-access interfaces that are cloned from this virtual template carry the source address of the loopback address and that response packets from the VPN client come back encrypted.
                                                                    !
                                                                      ip unnumbered Loopback10
                                                                    ! Enable Network Admission Control for remote VPN clients.
                                                                      ip admission test
                                                                      tunnel mode ipsec ipv4
                                                                      tunnel protection ipsec profile vi
                                                                    !
                                                                    !
                                                                    ip local pool dynpool 172.16.2.65 172.16.2.70
                                                                    ip classless
                                                                    ip access-list extended ClientException
                                                                      permit ip any host 10.61.0.1
                                                                    ip access-list extended split-acl
                                                                      permit ip host 10.13.11.185 any
                                                                      permit ip 10.61.0.0 255.255.255.255 any
                                                                      permit ip 10.71.0.0 255.255.255.255 any
                                                                      permit ip 10.71.0.0 255.255.255.255 10.52.0.0 0.255.255.255
                                                                      permit ip 10.55.0.0 255.255.255.255 any
                                                                    !
                                                                    ip radius source-interface FastEthernet0/0
                                                                    access-list 102 permit esp any any
                                                                    access-list 102 permit ahp any any
                                                                    access-list 102 permit udp any any eq 21862
                                                                    access-list 102 permit ospf any any
                                                                    access-list 102 deny ip any any
                                                                    access-list 195 deny ospf any any
                                                                    access-list 195 permit ip 10.61.0.0 255.255.255.255 10.51.0.0 255.255.255.255
                                                                    !
                                                                    !
                                                                    radius-server attribute 6 on-for-login-auth
                                                                    radius-server attribute 8 include-in-access-req
                                                                    radius-server host 10.13.11.185 auth-port 1645 acct-port 1646 key cisco
                                                                    radius-server vsa send accounting
                                                                    radius-server vsa send authentication
                                                                    !
                                                                    end

                                                                    Example: Configuring Password Aging

                                                                    The following example shows that password aging has been configured so that if the password expires the Easy VPN client is notified:

                                                                    Current configuration : 4455 bytes
                                                                    !
                                                                    version 12.4
                                                                    service timestamps debug datetime msec
                                                                    service timestamps log datetime msec
                                                                    no service password-encryption
                                                                    !
                                                                    hostname xinl-gateway
                                                                    !
                                                                    boot-start-marker
                                                                    boot system flash c2800nm-advsecurityk9-mz.124-7.9.T
                                                                    boot-end-marker
                                                                    !
                                                                    !
                                                                    aaa new-model
                                                                    !
                                                                    !
                                                                    aaa authentication login USERAUTH passwd-expiry group radius aaa authorization network branch local !
                                                                    aaa session-id common
                                                                    !
                                                                    ip cef
                                                                    username cisco privilege 15 secret 5 $1$A3HU$bCWjlkrEztDJx6JJzSnMV1 !
                                                                    !
                                                                    crypto isakmp policy 1
                                                                      encr 3des
                                                                      authentication pre-share
                                                                      group 2
                                                                    crypto isakmp client configuration address-pool local dynpool !
                                                                    crypto isakmp client configuration group branch
                                                                      key cisco
                                                                      domain cisco.com
                                                                      pool dynpool
                                                                    !
                                                                    !
                                                                    crypto ipsec transform-set transform-1 esp-3des esp-sha-hmac !
                                                                    crypto isakmp profile profile2
                                                                       client authentication list USERAUTH
                                                                       match identity group branch
                                                                       isakmp authorization list branch
                                                                       client configuration address respond
                                                                       virtual-template 1
                                                                    crypto ipsec profile vi
                                                                      set transform-set transform-1
                                                                    interface GigabitEthernet0/0
                                                                      description $ETH-LAN$$ETH-SW-LAUNCH$$INTF-INFO-GE 0/0$
                                                                      ip address 192.168.1.100 255.255.255.0
                                                                      duplex auto
                                                                      speed auto
                                                                      crypto map dynmap
                                                                    !
                                                                    interface GigabitEthernet0/1
                                                                      description $ES_LAN$
                                                                      ip address 172.19.217.96 255.255.255.0
                                                                      duplex auto
                                                                      speed auto
                                                                    !
                                                                    !interface Virtual-Template1 type tunnel
                                                                      ip unnumbered Ethernet0/0
                                                                      no clns route-cache
                                                                      tunnel mode ipsec ipv4
                                                                      tunnel protection ipsec profile vi
                                                                    !
                                                                    ip local pool dpool 10.0.0.1 10.0.0.3
                                                                    !
                                                                    radius-server host 172.19.220.149 auth-port 1645 acct-port 1646 key cisco radius-server vsa send authentication !
                                                                    control-plane
                                                                    !
                                                                    !
                                                                    end

                                                                    Example: Split DNS

                                                                    In the following example, the split tunnel list named “101” contains the 10.168.0.0/16 network. This network information must be included so that the DNS requests to the internal DNS server of 10.168.1.1 are encrypted.

                                                                    crypto isakmp client configuration group home
                                                                     key abcd
                                                                     acl 101
                                                                     dns 10.168.1.1. 10.168.1.2

                                                                    show Output

                                                                    The following show command output example shows that www.example1.com and www.example2.com have been added to the policy group:

                                                                    Device# show running-config
                                                                     | security group
                                                                    
                                                                     crypto isakmp client configuration group 831server
                                                                     key abcd
                                                                     dns 10.104.128.248
                                                                     split-dns www.example1.com
                                                                     split-dns www.example2.com
                                                                     group home2 key abcd
                                                                    

                                                                    The following show command output example displays currently configured DNS views:

                                                                    Device# show ip dns view
                                                                    
                                                                    DNS View default parameters:
                                                                    Logging is off
                                                                    DNS Resolver settings:
                                                                      Domain lookup is enabled
                                                                      Default domain name: cisco.com
                                                                      Domain search list:
                                                                      Lookup timeout: 3 seconds
                                                                      Lookup retries: 2
                                                                      Domain name-servers:
                                                                        172.16.168.183
                                                                    DNS Server settings:
                                                                      Forwarding of queries is enabled
                                                                      Forwarder addresses:
                                                                    DNS View ezvpn-internal-view parameters:
                                                                    Logging is off
                                                                    DNS Resolver settings:
                                                                      Domain lookup is enabled
                                                                      Default domain name: 
                                                                      Domain search list:
                                                                      Lookup timeout: 3 seconds
                                                                      Lookup retries: 2
                                                                      Domain name-servers:
                                                                        10.104.128.248
                                                                    DNS Server settings:
                                                                      Forwarding of queries is enabled
                                                                      Forwarder addresses:
                                                                    

                                                                    The following show command output example displays currently configured DNS view lists:

                                                                    Device# show ip dns view-list
                                                                    
                                                                    View-list ezvpn-internal-viewlist:
                                                                      View ezvpn-internal-view:
                                                                        Evaluation order: 10
                                                                        Restrict to ip dns name-list: 1
                                                                      View default:
                                                                        Evaluation order: 20
                                                                    

                                                                    The following show command output displays DNS name lists:

                                                                    Device# show ip dns name-list
                                                                    
                                                                    ip dns name-list 1
                                                                        permit www.example1.com
                                                                        permit www.example2.com

                                                                    Example: DHCP Client Proxy

                                                                    The following examples display DHCP client proxy output information using show and debug commands.

                                                                    show Output


                                                                    Note


                                                                    Before you can use the show ip dhcp command, the DHCP server must be a Cisco IOS server.


                                                                    The following show ip dhcp pool command output provides information about the DHCP parameters:

                                                                    Device# show ip dhcp pool
                                                                    
                                                                    Pool dynpool :
                                                                     Utilization mark (high/low)    : 100 / 0
                                                                     Subnet size (first/next)       : 0 / 0
                                                                     Total addresses                : 254
                                                                     Leased addresses               : 1
                                                                     Pending event                  : none
                                                                     1 subnet is currently in the pool:
                                                                     Current index    IP address range          Leased addresses
                                                                                      10.3.3.1 - 10.3.3.254     1
                                                                     No relay targets associated with class aclass
                                                                    

                                                                    The following show ip dhcp binding command output provides information about the DHCP bindings:

                                                                    Device# show ip dhcp binding
                                                                    
                                                                    Bindings from all pools not associated with VRF:
                                                                    IP address          Client-ID/                       Lease expiration      Type
                                                                                        Hardware address/User name
                                                                                        10.3.3.5  0065.7a76.706e.2d63.   Apr 04 2006 06:01 AM  Automatic                     6c69.656e.74

                                                                    debug Output

                                                                    The following example shows how the debug crypto isakmp and debug ip dhcp server events commands can be used to troubleshoot your DHCP client proxy support configuration:

                                                                    *Apr  3 06:01:32.047: ISAKMP: Config payload REQUEST *Apr  3 06:01:32.047: ISAKMP:(1002):checking request:
                                                                    *Apr  3 06:01:32.047: ISAKMP:    IP4_ADDRESS
                                                                    *Apr  3 06:01:32.047: ISAKMP:    IP4_NETMASK
                                                                    *Apr  3 06:01:32.047: ISAKMP:    MODECFG_CONFIG_URL
                                                                    *Apr  3 06:01:32.047: ISAKMP:    MODECFG_CONFIG_VERSION
                                                                    *Apr  3 06:01:32.047: ISAKMP:    IP4_DNS
                                                                    *Apr  3 06:01:32.047: ISAKMP:    IP4_DNS
                                                                    *Apr  3 06:01:32.047: ISAKMP:    IP4_NBNS
                                                                    *Apr  3 06:01:32.047: ISAKMP:    IP4_NBNS
                                                                    *Apr  3 06:01:32.047: ISAKMP:    SPLIT_INCLUDE
                                                                    *Apr  3 06:01:32.047: ISAKMP:    SPLIT_DNS
                                                                    *Apr  3 06:01:32.047: ISAKMP:    DEFAULT_DOMAIN
                                                                    *Apr  3 06:01:32.047: ISAKMP:    MODECFG_SAVEPWD
                                                                    *Apr  3 06:01:32.047: ISAKMP:    INCLUDE_LOCAL_LAN
                                                                    *Apr  3 06:01:32.047: ISAKMP:    PFS
                                                                    *Apr  3 06:01:32.047: ISAKMP:    BACKUP_SERVER
                                                                    *Apr  3 06:01:32.047: ISAKMP:    APPLICATION_VERSION
                                                                    *Apr  3 06:01:32.047: ISAKMP:    MODECFG_BANNER
                                                                    *Apr  3 06:01:32.047: ISAKMP:    MODECFG_IPSEC_INT_CONF
                                                                    *Apr  3 06:01:32.047: ISAKMP:    MODECFG_HOSTNAME
                                                                    *Apr  3 06:01:32.047: ISAKMP/author: Author request for group homesuccessfully sent to AAA *Apr  3 06:01:32.047: ISAKMP:(1002):Input = IKE_MESG_FROM_PEER, IKE_CFG_REQUEST
                                                                    *Apr  3 06:01:32.047: ISAKMP:(1002):Old State = IKE_P1_COMPLETE  New State = IKE_CONFIG_AUTHOR_AAA_AWAIT
                                                                    *Apr  3 06:01:32.047: ISAKMP:(1002):attributes sent in message:
                                                                    *Apr  3 06:01:32.047:         Address: 10.2.0.0
                                                                    *Apr  3 06:01:32.047: Requesting DHCP Server0 address 10.3.3.3 *Apr  3 06:01:32.047: DHCPD: Sending notification of DISCOVER:
                                                                    *Apr  3 06:01:32.047:   DHCPD: htype 1 chaddr aabb.cc00.6600
                                                                    *Apr  3 06:01:32.047:   DHCPD: circuit id 00000000
                                                                    *Apr  3 06:01:32.047: DHCPD: Seeing if there is an internally specified pool class:
                                                                    *Apr  3 06:01:32.047:   DHCPD: htype 1 chaddr aabb.cc00.6600
                                                                    *Apr  3 06:01:32.047:   DHCPD: circuit id 00000000
                                                                    *Apr  3 06:01:34.063: DHCPD: Adding binding to radix tree (10.3.3.5) *Apr  3 06:01:34.063: DHCPD: Adding binding to hash tree *Apr  3 06:01:34.063: DHCPD: assigned IP address 10.3.3.5 to client 0065.7a76.706e.2d63.6c69.656e.74.
                                                                    *Apr  3 06:01:34.071: DHCPD: Sending notification of ASSIGNMENT:
                                                                    *Apr  3 06:01:34.071:  DHCPD: address 10.3.3.5 mask 255.255.255.0
                                                                    *Apr  3 06:01:34.071:   DHCPD: htype 1 chaddr aabb.cc00.6600
                                                                    *Apr  3 06:01:34.071:   DHCPD: lease time remaining (secs) = 86400
                                                                    *Apr  3 06:01:34.183: Obtained DHCP address 10.3.3.5 *Apr  3 06:01:34.183: ISAKMP:(1002):allocating address 10.3.3.5 *Apr  3 06:01:34.183: ISAKMP: Sending private address: 10.3.3.5 *Apr  3 06:01:34.183: ISAKMP: Sending subnet mask: 255.255.255.0

                                                                    Example: Cisco Tunneling Control Protocol Session

                                                                    The following debug crypto ctcp command output displays information about a cTCP session, including comments about the output:

                                                                    Device# debug crypto ctcp
                                                                    
                                                                    ! In the following two lines, a cTCP SYN packet is received from the client, and the cTCP connection is created.
                                                                    *Sep 26 11:14:37.135: cTCP: Connection[648B50C0] 10.76.235.21:3519 10.76.248.239:10000: created
                                                                    *Sep 26 11:14:37.135: cTCP: SYN from 10.76.235.21:3519
                                                                    ! In the following line, the SYN acknowledgement is sent to the client.
                                                                    *Sep 26 11:14:37.135: cTCP: Sending SYN(680723B2)ACK(100C637) to 10.76.235.21:3519
                                                                    ! In the following two lines, an acknowledgement is received, and connection setup is complete. IKE packets should now be received on this newly created cTCP session.
                                                                    *Sep 26 11:14:37.135: cTCP: Connection[648B50C0] 10.76.235.21:3519 10.76.248.239:10000:  found
                                                                    *Sep 26 11:14:37.135: cTCP: ACK from 10.76.235.21:3519
                                                                    *Sep 26 11:14:37.727: cTCP: Connection[648B50C0] 10.76.235.21:3519 10.76.248.239:10000:  found
                                                                    *Sep 26 11:14:37.731: cTCP: updating PEER Seq number to 16828803l
                                                                    *Sep 26 11:14:37.731: cTCP: Pak with contiguous buffer
                                                                    *Sep 26 11:14:37.731: cTCP: mangling IKE packet from peer: 10.76.235.21:500->3519   10.76.248.239:500->500
                                                                    *Sep 26 11:14:37.731: cTCP: Connection[648B50C0] 10.76.235.21:3519 10.76.248.239:10000:  found
                                                                    *Sep 26 11:14:37.799: cTCP: demangling outbound IKE packet: 10.76.248.239:500->500   10.76.235.21:3519->500
                                                                    *Sep 26 11:14:37.799: cTCP: encapsulating IKE packet
                                                                    *Sep 26 11:14:37.799: cTCP: updating LOCAL Seq number to 1745298727l
                                                                    ! The above lines show that after the required number of IKE packets are exchanged, IKE and IPsec SAs are created.
                                                                    *Sep 26 11:14:40.335: cTCP: updating PEER Seq number to 16830431l
                                                                    *Sep 26 11:14:40.335: cTCP: Pak with particles
                                                                    *Sep 26 11:14:40.335: cTCP: encapsulating pak
                                                                    *Sep 26 11:14:40.339: cTCP: datagramstart 0xF2036D8, network_start 0xF2036D8, size 112
                                                                    *Sep 26 11:14:40.339: cTCP: Pak with contiguous buffer
                                                                    *Sep 26 11:14:40.339:  cTCP: allocated new buffer
                                                                    *Sep 26 11:14:40.339: cTCP: updating LOCAL Seq number to 1745299535l
                                                                    *Sep 26 11:14:40.339: IP: s=10.76.248.239 (local), d=10.76.235.21 (FastEthernet1/1), len 148, cTCP
                                                                    ! The above lines show that Encapsulating Security Payload (ESP) packets are now being sent and received.

                                                                    Example: VRF Assignment by a AAA Server

                                                                    The following output example shows that neither a VRF nor an IP address has been defined:

                                                                    aaa new-model
                                                                    aaa authentication login VPN group radius
                                                                    aaa authorization network VPN group radius 
                                                                    !
                                                                    ip vrf example1
                                                                     rd 1:1
                                                                    !
                                                                    crypto isakmp profile example1
                                                                     match identity group example1group
                                                                     client authentication list VPN
                                                                     isakmp authorization list VPN
                                                                     client configuration address respond
                                                                     virtual-template 10
                                                                    !
                                                                    crypto ipsec transform-set TS esp-3des esp-sha-hmac 
                                                                    !
                                                                    crypto ipsec profile example1
                                                                     set transform-set TS 
                                                                     set isakmp-profile example1
                                                                    !
                                                                    interface Virtual-Template10 type tunnel
                                                                    ! The next line shows that neither VRF nor an IP address has been defined.
                                                                     no ip address
                                                                    tunnel mode ipsec ipv4
                                                                    tunnel protection ipsec profile example1

                                                                    Additional References

                                                                    Related Documents

                                                                    Related Topic

                                                                    Document Title

                                                                    Cisco IOS commands

                                                                    Cisco IOS Master Commands List, All Releases

                                                                    Security commands: complete command syntax, command mode, command history, defaults, usage guidelines, and examples

                                                                    Configuring and Assigning the Easy VPN Remote Configuration

                                                                    Cisco Easy VPN Remote

                                                                    General information on IPsec and VPN

                                                                    IPsec protocol options and attributes

                                                                    Configuring Internet Key Exchange for IPsec VPNs

                                                                    IPsec virtual tunnels

                                                                    IPsec Virtual Tunnel Interface

                                                                    Network Admission Control

                                                                    Network Admission Control

                                                                    Reverse route injection

                                                                    Reverse Route Injection

                                                                    Recommended cryptographic algorithms

                                                                    Next Generation Encryption

                                                                    Technical Assistance

                                                                    Description

                                                                    Link

                                                                    The Cisco Support and Documentation website provides online resources to download documentation, software, and tools. Use these resources to install and configure the software and to troubleshoot and resolve technical issues with Cisco products and technologies. Access to most tools on the Cisco Support and Documentation website requires a Cisco.com user ID and password.

                                                                    http:/​/​www.cisco.com/​cisco/​web/​support/​index.html

                                                                    Feature Information for Easy VPN Server

                                                                    Table 4 Feature Information for Easy VPN Server

                                                                    Feature Name

                                                                    Releases

                                                                    Feature Information

                                                                    Easy VPN Server

                                                                    12.2(8)T

                                                                    The Easy VPN Server feature introduces server support for the Cisco VPN Client Release 3.x and later software clients and Cisco VPN hardware clients (such as the Cisco 800, Cisco 900, Cisco 1700, VPN 3002, and PIX 501 devices). This feature allows a remote end user to communicate using IPsec with any Cisco IOS VPN gateway. Centrally managed IPsec policies are “pushed” to the client device by the server, thereby minimizing end-user configurations.

                                                                    12.3(2)T

                                                                    RADIUS support for user profiles, user-based policy control, session monitoring for VPN group access, backup-gateway list, and PFS was added.

                                                                    12.3(7)T

                                                                    The netmask command was integrated for use on the Easy VPN server.

                                                                    12.4(2)T

                                                                    12.2(33)SXH

                                                                    The Banner, Auto-Update, and Browser Proxy Enhancements feature was added in this release.

                                                                    12.4(6)T

                                                                    The Central Policy Push Firewall Policy Push feature was added.

                                                                    12.2(33)SRA

                                                                    This feature was integrated into Cisco IOS Release 12.2(33)SRA.

                                                                    12.4(9)T

                                                                    The following features were added in this release:

                                                                    • Cisco Tunneling Control Protocol
                                                                    • DHCP Client Proxy
                                                                    • Per-User Attribute Support for Easy VPN Servers
                                                                    • Split DNS
                                                                    • Virtual Tunnel Interface Per-User Attribute Support for Easy VPN Servers
                                                                    • VRF Assignment by a AAA Server

                                                                    The following commands were introduced or modified: crypto aaa attribute list, crypto isakmp client configuration group, debug ip dns, dhcp-server (isakmp), dhcp-timeout, show ip dns name-list, show ip dns view, show ip dns view-list.

                                                                    DHCP Client Proxy Enhancements

                                                                    12.4(11)T

                                                                    The DHCP Client Proxy feature was updated to include manageability enhancements for remote access VPNs.

                                                                    The following commands were modified: clear crypto session, crypto isakmp client configuration group, debug crypto condition, show crypto debug-condition, show crypto isakmp peers, show crypto isakmp profile, show crypto isakmp sa, show crypto session.

                                                                    Glossary

                                                                    AAA—authentication, authorization, and accounting. Framework of security services that provides the method for identifying users (authentication), for remote access control (authorization), and for collecting and sending security server information used for billing, auditing, and reporting (accounting).

                                                                    aggressive mode (AM)—Mode during Internet Key Exchange negotiation. Compared to main mode (MM), AM eliminates several steps, which makes it faster but less secure than MM. Cisco IOS software will respond in aggressive mode to an Internet Key Exchange (IKE) peer that initiates aggressive mode.

                                                                    AV pair—attribute-value pair.

                                                                    IKE—Internet Key Exchange. Hybrid protocol that implements Oakley key exchange and Skeme key exchange inside the ISAKMP framework. Although IKE can be used with other protocols, its initial implementation was with IPsec. IKE provides authentication of the IPsec peers, negotiates IPsec keys, and negotiates IPsec security associations.

                                                                    IPsec—IP Security Protocol. Framework of open standards that provides data confidentiality, data integrity, and data authentication between participating peers. IPsec provides these security services at the IP layer. IPsec uses IKE to handle negotiation of protocols and algorithms based on local policy and to generate the encryption and authentication keys to be used by IPsec. IPsec can be used to protect one or more data flows between a pair of hosts, between a pair of security gateways, or between a security gateway and a host.

                                                                    ISAKMP—Internet Security Association Key Management Protocol. Protocol framework that defines payload formats, the mechanics of implementing a key exchange protocol, and the negotiation of a security association.

                                                                    MM—main mode. Mode that is slower than aggressive mode but more secure and more flexible than aggressive mode because it can offer an IKE peer more security proposals. The default action for IKE authentication (Rivest, Shamir, and Adelman signature (rsa-sig), RSA encryption (rsa-encr), or preshared) is to initiate main mode.

                                                                    policy push—Allows administrators to push policies that enforce security to the Cisco Easy VPN (software) Client and related firewall software.

                                                                    reverse route injection (RRI)—Simplified network design for VPNs on which there is a requirement for redundancy or load balancing. RRI works with both dynamic and static crypto maps.

                                                                    In the dynamic case, as remote peers establish IPsec security associations with an RRI enabled device, a static route is created for each subnet or host protected by that remote peer. For static crypto maps, a static route is created for each destination of an extended access-list rule.

                                                                    SA—security association. Description of how two or more entities will utilize security services to communicate securely. For example, an IPsec SA defines the encryption algorithm (if used), the authentication algorithm, and the shared session key to be used during the IPsec connection.

                                                                    Both IPsec and IKE require and use SAs to identify the parameters of their connections. IKE can negotiate and establish its own SA. The IPsec SA is established either by IKE or by manual user configuration.

                                                                    VPN—Virtual Private Network. Framework that consists of multiple peers transmitting private data securely to one another over an otherwise public infrastructure. In this framework, inbound and outbound network traffic is protected using protocols that tunnel and encrypt all data. This framework permits networks to extend beyond their local topology, while remote users are provided with the appearance and functionality of a direct network connection.