- Preface
- Overview
- GUI Overview
- Configuring Primary Authentication
- Configuring RBAC
- Configuring Trusted Points
- Configuring System Profiles
- Configuring VM Managers
- Configuring Tenants
- Configuring InterCloud Resources
- Configuring Service Policies and Profiles
- Configuring Device Policies and Profiles
- Configuring Managed Resources
- Configuring Administrative Operations
- Index
GUI Overview
Prime Network Services Controller provides a browser-based interface that enables you to configure managed endpoints, perform administrative operational tasks, and define and apply policies and profiles. You can also use the GUI to manage and provision compute and edge firewalls, such as VSGs and ASA 1000Vs.
The following topics provide an overview of the Prime Network Services Controller user interface.
- Firewall Access
- Login URL
- User Interface Components
- Toolbar
- Field Aids
- Idle Timeout Period
- Search
- Clone
Firewall Access
Login URL
The default HTTPS URL for logging into the Prime Network Services Controller user interface is https://server-ip-address, where server-ip-address is the IP address assigned to the Prime Network Services Controller server. The IP address is the address for the management port.
 Note |
If you log in using HTTP, you are automatically redirected to the HTTPS link. |
User Interface Components
When you log into Prime Network Services Controller, the user interface is displayed with the components described in the following table:
| Component | Description |
|---|---|
Title |
Displays "Cisco Prime Network Services Controller." |
Toolbar |
Allows you to set an idle timeout value, obtain Prime Network Services Controller version information, access online help, provide product feedback, and log out. |
Tabs |
|
Navigation pane |
Provides navigation to all objects in the Prime Network Services Controller instance. The navigation pane is displayed on the left side of the screen below the tabs. The objects that are displayed in the navigation pane depend on the selected tab. |
Content pane |
Displays information and provides options for the object that is selected in the navigation pane. |
Toolbar
| Option | Description |
|---|---|
(username) |
Username of the current Prime Network Services Controller session. |
Preferences |
Enables you to specify the amount of time that the Prime Network Services Controller session can remain inactive before the session times out. The value that you specify applies to the system from which you logged into Prime Network Services Controller. |
Log Out |
Logs you out of the current session. |
About |
Provides Prime Network Services Controller version information. |
Help |
Launches online help for the currently displayed screen. |
Feedback |
Allows you to provide feedback on Prime Network Services Controller. |
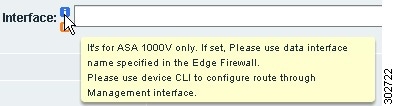
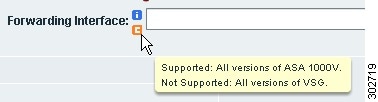
Field Aids
Prime Network Services Controller includes the following aids to assist you in your tasks, whether configuring policies and profiles, troubleshooting faults, or looking for additional information for a particular window or dialog box.


Idle Timeout Period
The Preferences dialog box allows you to specify the length of time, from 5 to 60 minutes, that a Prime Network Services Controller session on your current machine can remain idle before the session is closed. The value that you enter applies to the system that you used to log into Prime Network Services Controller.
Search
The Search tab enables you to search for instances of organizations in Prime Network Services Controller. From the search result, you can expand an organization's hierarchy and launch devices and polices in that organization.
Note |
Searching for organization names does not work if the organization names contain special characters. |
Clone
You can create a clone for an organization, policy, policy set, or profile at a destination of your choice. The hierarchy of an organization's clone or the names of the elements in it cannot be changed. After a clone is created, it cannot be renamed or moved to another location.
| Step 1 | Based on the element you want to clone, do one of the following: |
| Step 2 | Right-click the element to be cloned and choose Clone. |
| Step 3 |
In the Clone dialog box that appears:
The clone appears in the destination you chose. |
 Feedback