VPN Console: Find Menu
Available Languages
Table Of Contents
VPN Console: Find Menu
The Find menu item allows you to search for a string of characters corresponding to a node name. When a match is found, the appropriate node is expanded (if not already expanded) and the found item is highlighted.
Figure 5-1, "Find Menu," provides a view of the Find menu. Selections from this menu are used to search for a specific category.
Figure 5-1 Find Menu
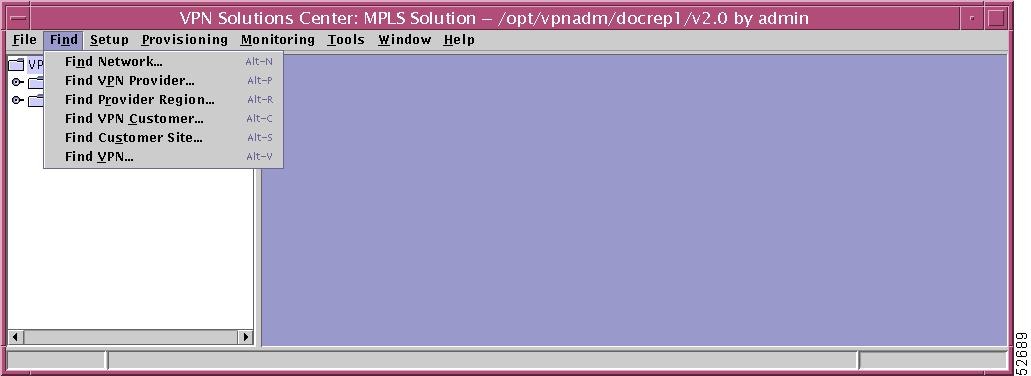
The Find menu includes the following categories:
•
Find VPN.
From each of these categories, you proceed to a Find window, as described in the "Find Window" section.
Find Network
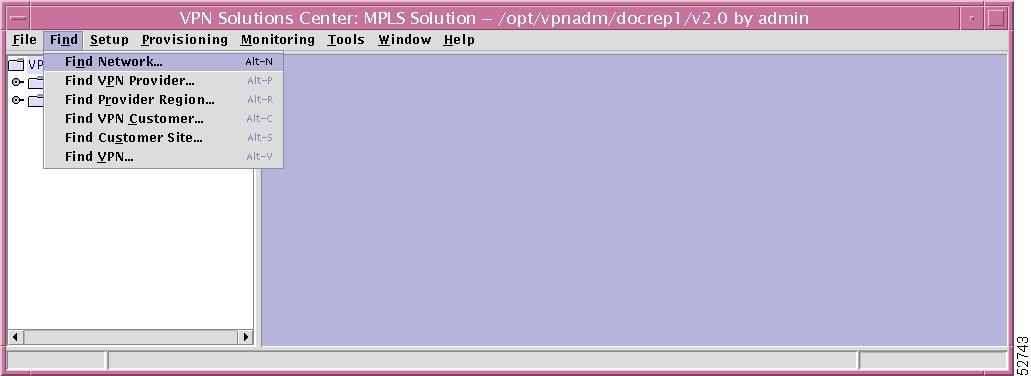
This section explains how to search for a string of characters in the name of a network. Implement the following steps:
Step 1

Note
Figure 5-2 Find Network
Step 2
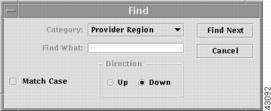
Figure 5-3 Find

In this window, the default Category is Network. However, in the drop down menu, you can also choose a category that matches any of the other Find choices or All, which allows you to search through all of the available categories.
Step 3
Find VPN Provider
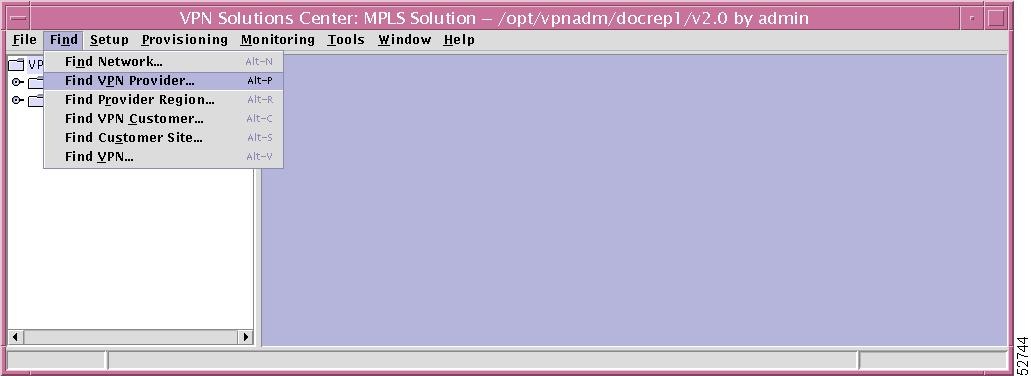
This section explains how to search for a string of characters in the name of a VPN Service Provider. Implement the following steps:
Step 1
Note
Figure 5-4 Find VPN Provider
Step 2
Figure 5-5 Find

In this window, the default Category is VPN Provider. However, in the drop down menu, you can also choose a category that matches any of the other Find choices or All, which allows you to search through all of the available categories.
Step 3
Find Provider Region
This section explains how to search for a string of characters in the name of a VPN Service Provider region. Implement the following steps:
Step 1
Note
Figure 5-6 Find Provider Region

Step 2
Figure 5-7 Find
In this window, the default Category is Provider Region. However, in the drop down menu, you can also choose a category that matches any of the other Find choices or All, which allows you to search through all of the available categories.
Step 3
Find VPN Customer
This section explains how to search for a string of characters in the name of a VPN customer. Implement the following steps:
Step 1
Note
Figure 5-8 Find VPN Customer

Step 2
Figure 5-9 Find

In this window, the default Category is VPN Customer. However, in the drop down menu, you can also choose a category that matches any of the other Find choices or All, which allows you to search through all of the available categories.
Step 3
Find Customer Site
This section explains how to search for a string of characters in the name of a customer site. Implement the following steps:
Step 1
Note
Figure 5-10 Find Customer Site

Step 2
Figure 5-11 Find

In this window, the default Category is Customer Site. However, in the drop down menu, you can also choose a category that matches any of the other Find choices or All, which allows you to search through all of the available categories.
Step 3
Find VPN
This section explains how to search for a string of characters in the name of a VPN. Implement the following steps:
Step 1
Note
Figure 5-12 Find VPN

Step 2
Figure 5-13 Find

In this window, the default Category is VPN. However, in the drop down menu, you can also choose a category that matches any of the other Find choices or All, which allows you to search through all of the available categories.
Step 3
Find Window
In addition to the Category choices described in each of the Find menu items, you can proceed in the Find window with the following steps:
Step 1
Figure 5-14 Find with Category Drop Down Menu Expanded

Step 2
Step 3
Step 4
Note
Step 5
Step 6
Figure 5-15 Example of Match Found

Step 7
 Feedback