Procedure with the Sensor management extension
This section explains how to install the Cisco IC3000 thanks to the sensor management extension. You will:
-
Retrieve the sensor management extension on cisco.com.
-
Install the sensor management extension on Cisco Cyber Vision.
-
Connect to the Cisco IC3000 with the serial console and check its firmware version and management interface IP address.
-
Create a new sensor on Cisco Cyber Vision through the Cisco device deployment and proceed to its configuration.
Requirements
The hardware must have an access set to the Local Manager and to the CLI (ssh or console port).
Required material and information:
-
An Admin or Product access to Cisco Cyber Vision.
-
The network information of the Collection network interface (IP address, subnet mask and gateway).
-
A RJ45 or mini USB console cable.
-
A serial console emulator, like PuTTY.

Note
To be able to use the Cisco Cyber Vision sensor management extension, an IP address reachable by the Center Collection interface must be set on the Collection VLAN.
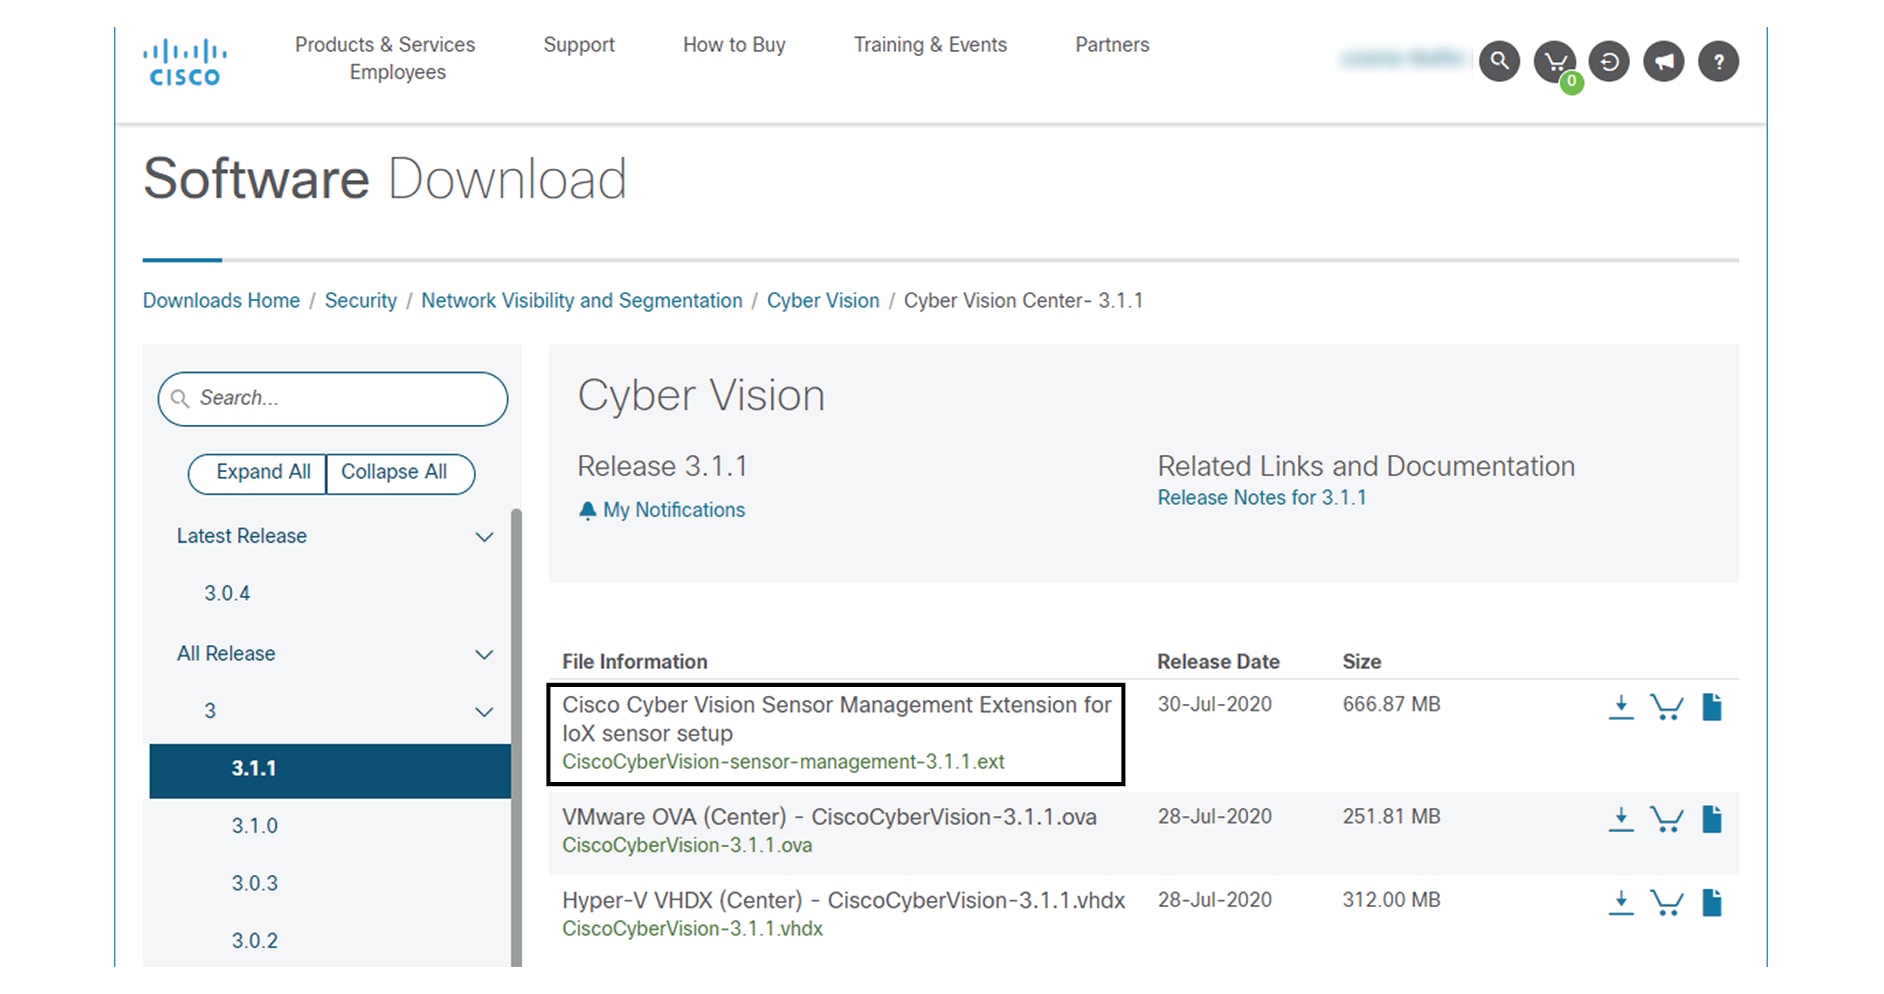
Retrieve the sensor management extension file
-
On cisco.com, navigate to Cisco Cyber Vision's Software Download page.
-
Download Cisco Cyber Vision Sensor Management Extension for IoX sensor setup. Version of the extension must be the same as the version of the center.
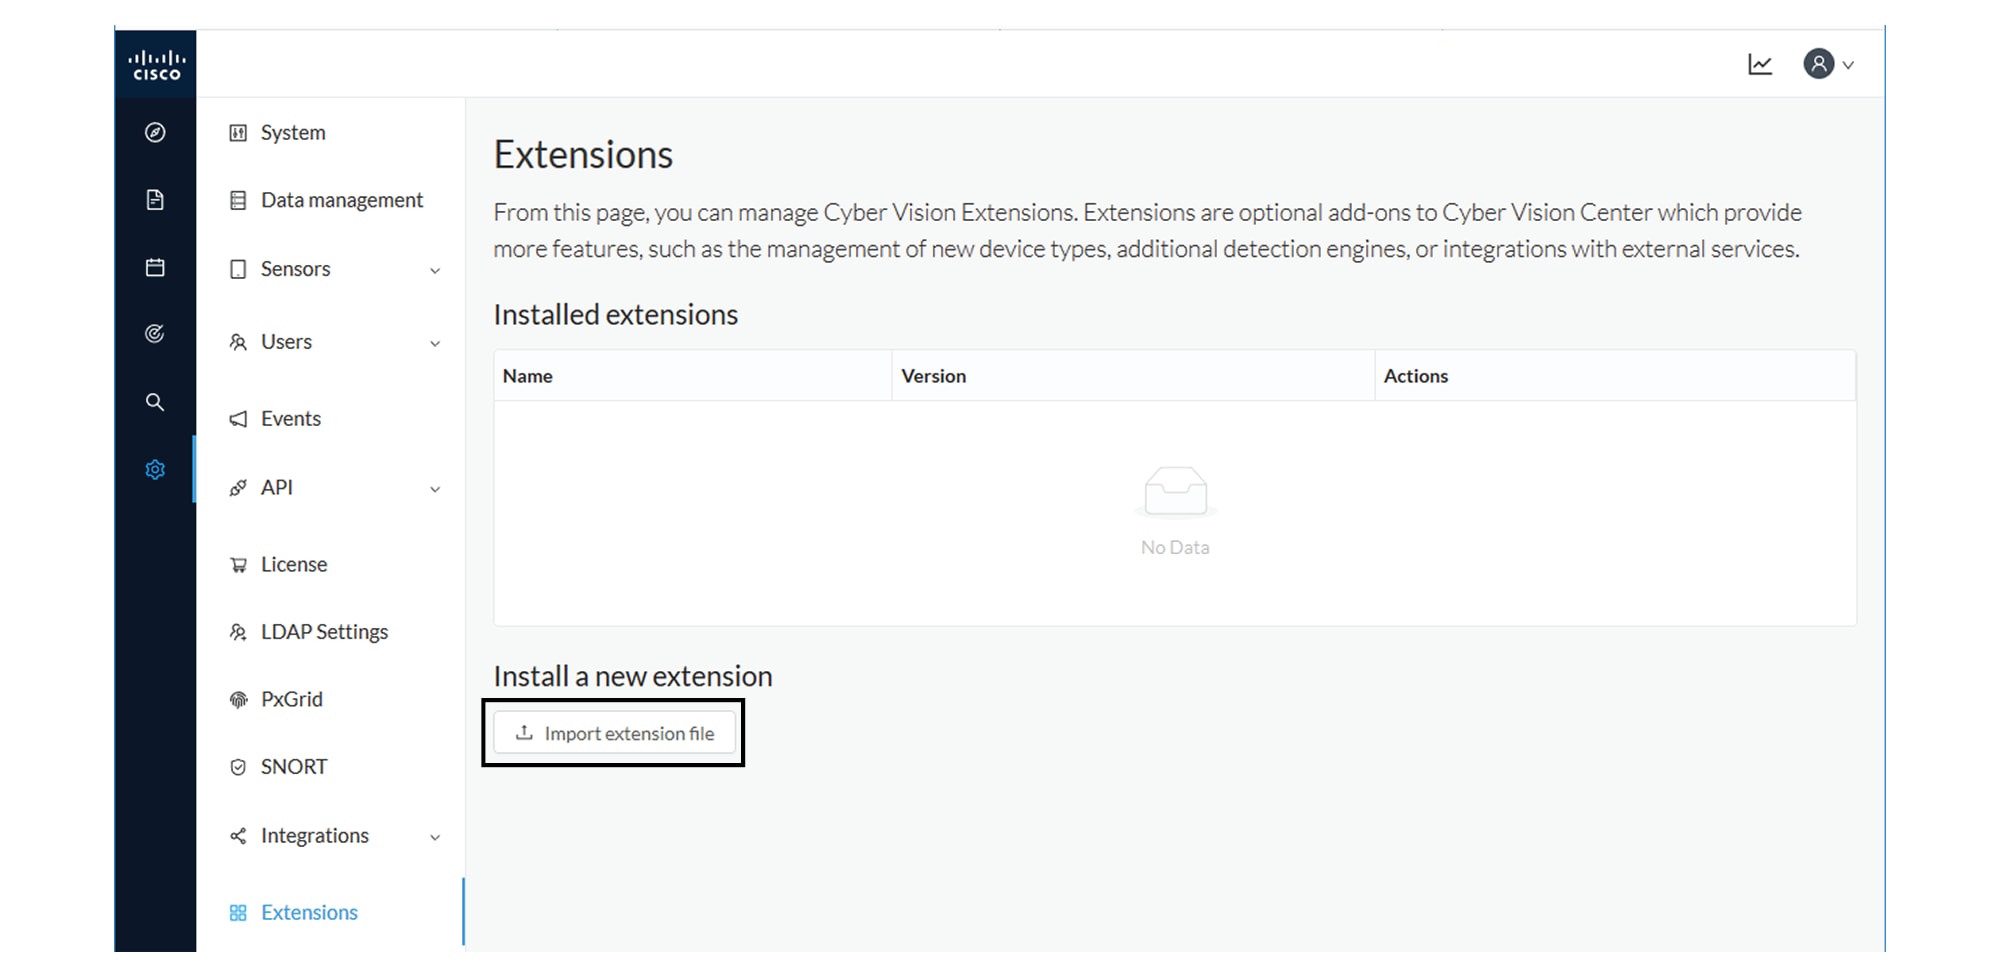
Install the sensor management extension
-
In Cisco Cyber Vision, navigate to Admin > Extensions.
-
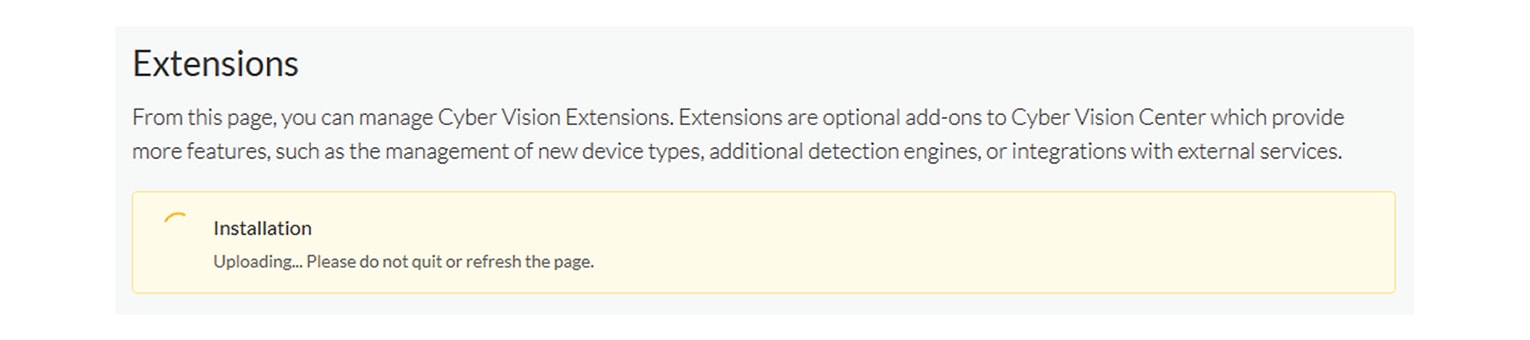
Click Import extension file and select CiscoCyberVision-sensor-management-<version>.ext.
The file upload takes a few minutes.

Check the Cisco IC3000 firmware version
To ensure a proper installation of the Cisco IC3000, you must check its firmware version.
It is recommended to use the newest firmware version available. The lowest version used should be 1.2.1 for a classic installation or 1.5.1 for an installation with Active Discovery.
Procedure
|
Step 1 |
To check the version: |
|
Step 2 |
|

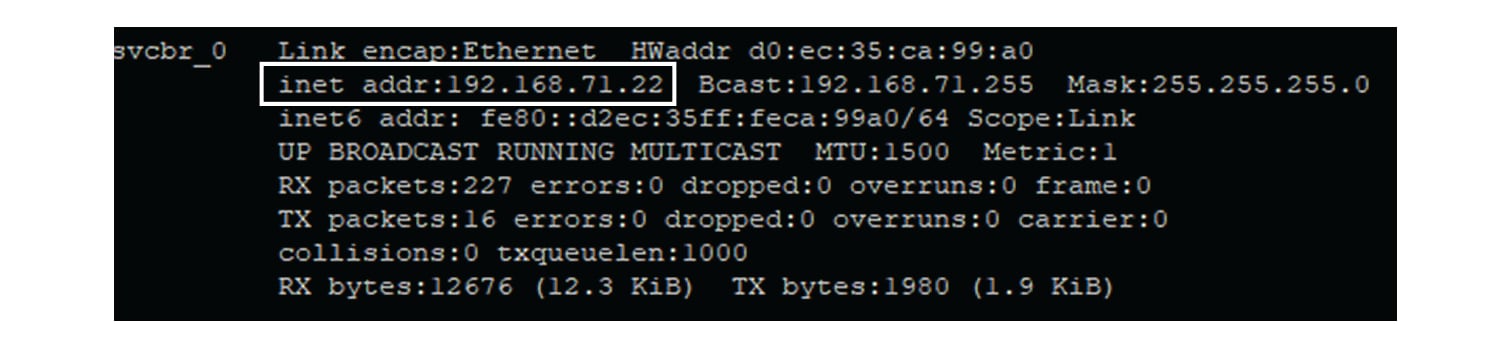
Check the MGMT interface IP address
Check that the IP address set on the MGMT network is the one you've configured on the Cisco Cyber Vision GUI.
To check the MGMT network interface:
Procedure
|
Step 1 |
Use the following command in the Cisco IC3000 shell prompt: |
|
Step 2 |
Search for the reference "svcbr_0" which corresponds to the MGMT interface. The IP address you've set as Host Management on Cisco Cyber Vision GUI should follow the mention "inet addr: <IP ADDRESS>". Example: |
|
Step 3 |
|
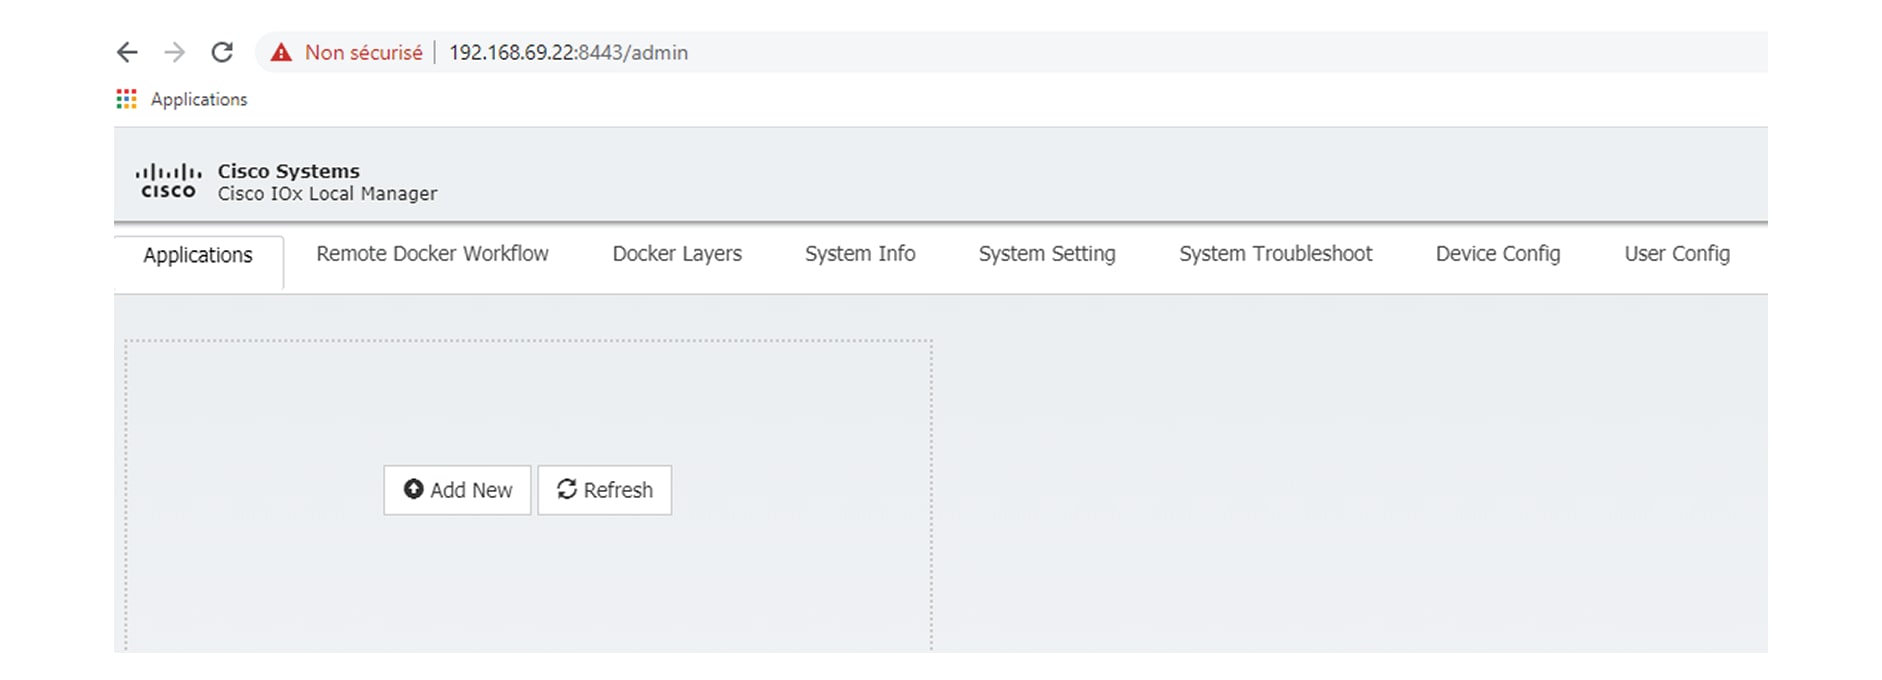
Test connectivity between Cisco IC3000 and IOx Local Manager
To proceed with the installation, you must first test if you have access to the Cisco IC3000's Cisco IOx Local Manager. To do so:
-
Open Chrome.
-
Access Cisco Iox Local Manager using the Cisco IC3000's MGMT IP address and the MGMT port number, which is 8443:
https://Management_Address:8443
ex: https://192.168.71.22:8443
-
If you're able to see the following screen it means that the connectivity between the Cisco IC3000 and IOx Local Manager is on.
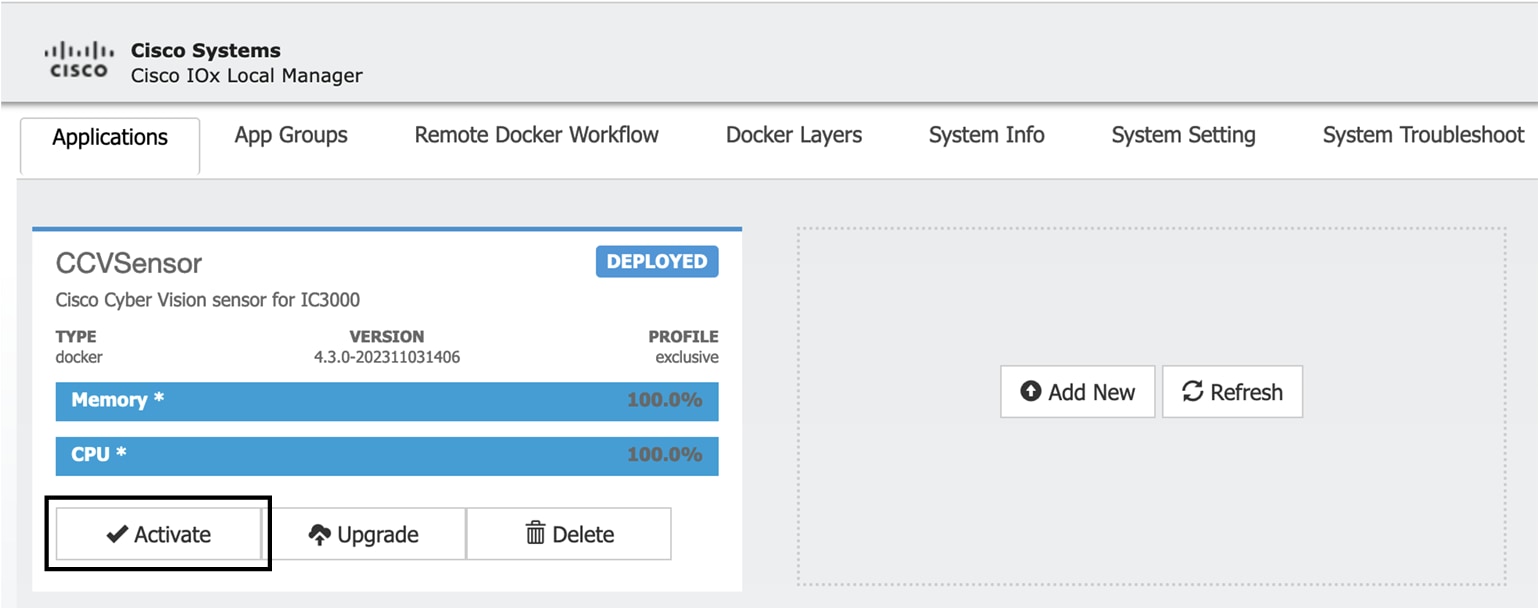
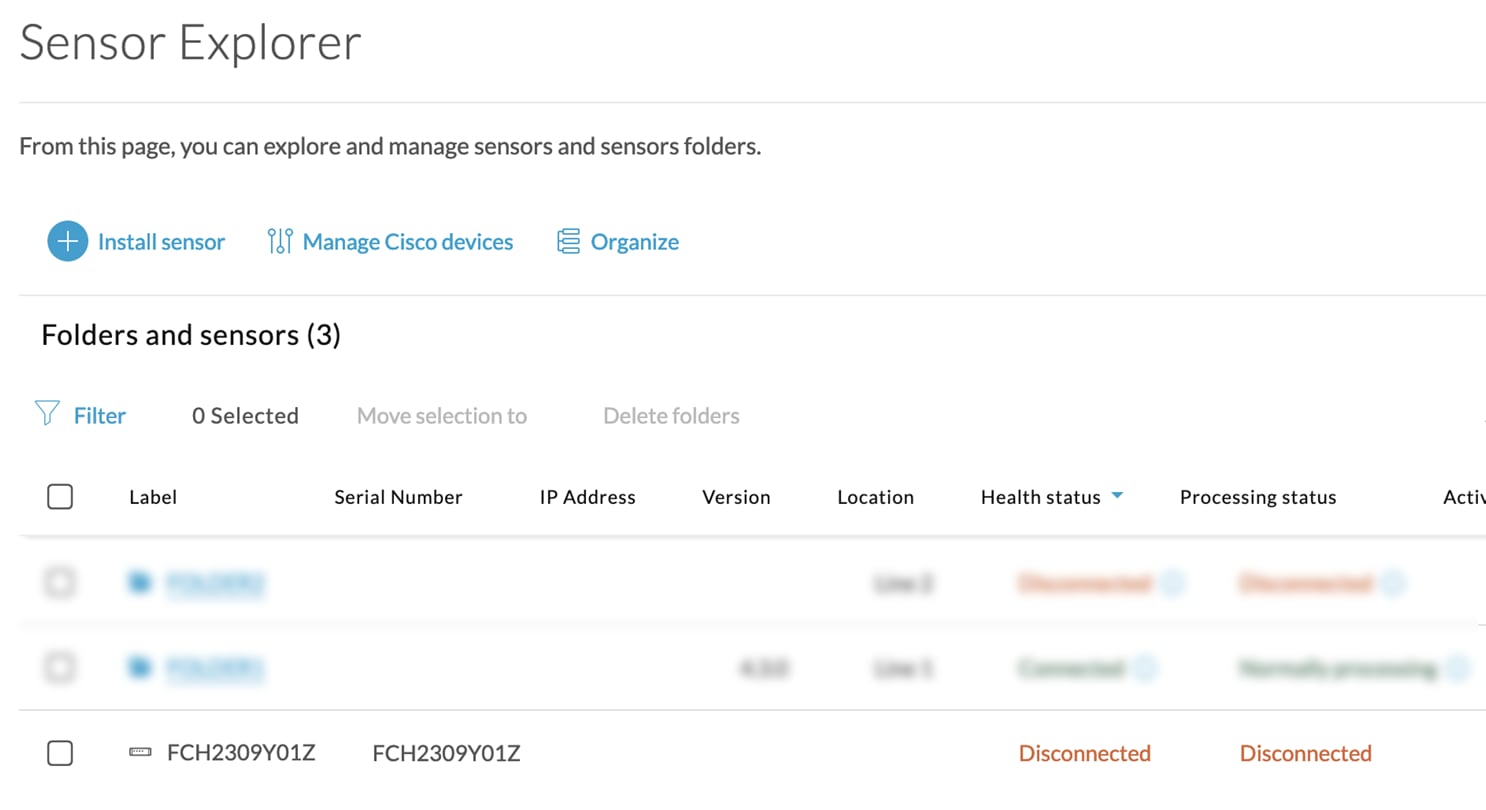
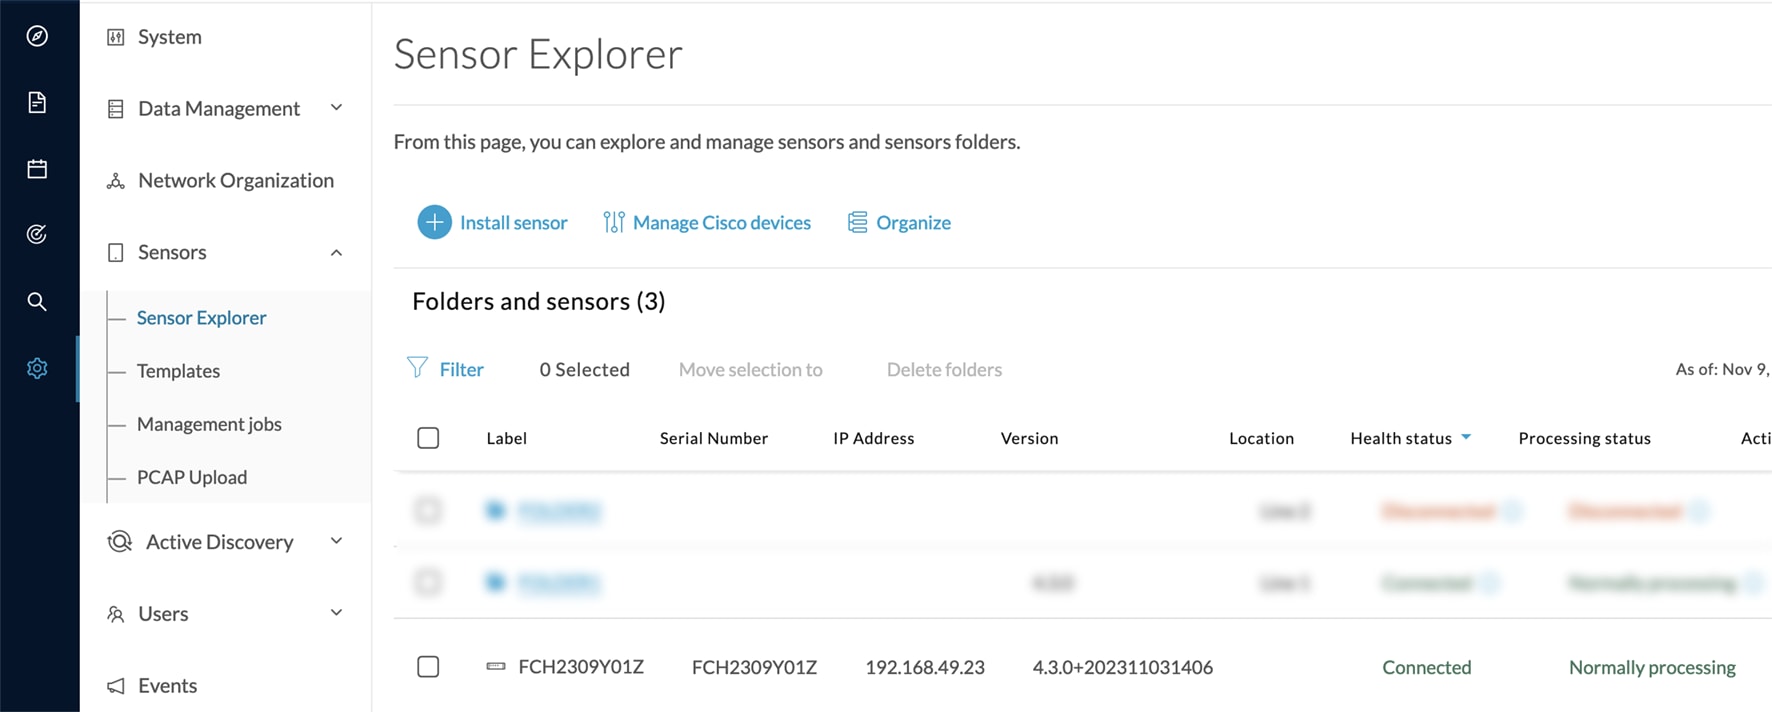
Create a sensor in Cisco Cyber Vision
Procedure
|
Step 1 |
In Cisco Cyber Vision, navigate to Admin > Sensors > Sensor Explorer and click Install sensor, then Install via extension. 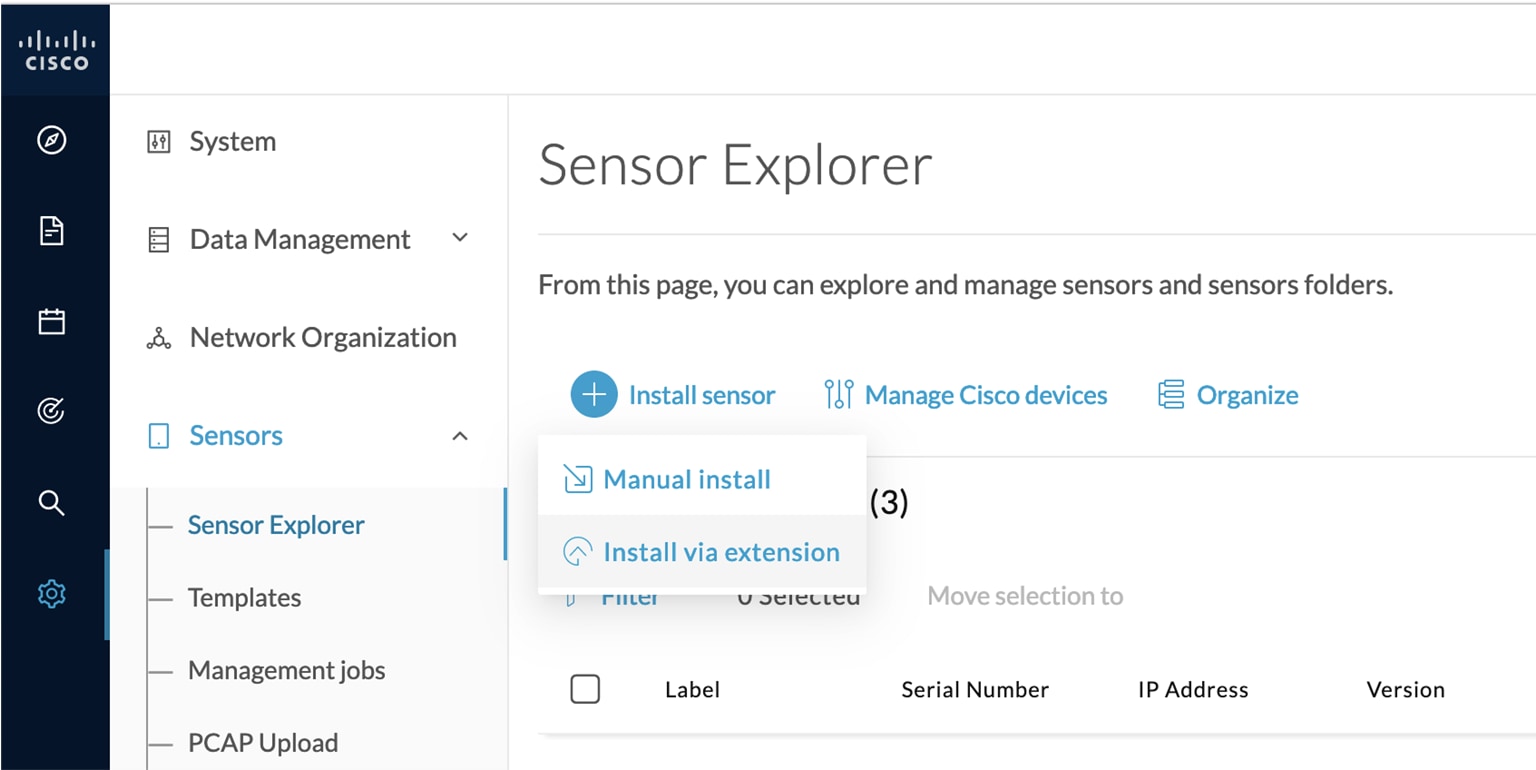 |
|
Step 2 |
Fill in the requested fields so Cisco Cyber Vision can reach the equipment:
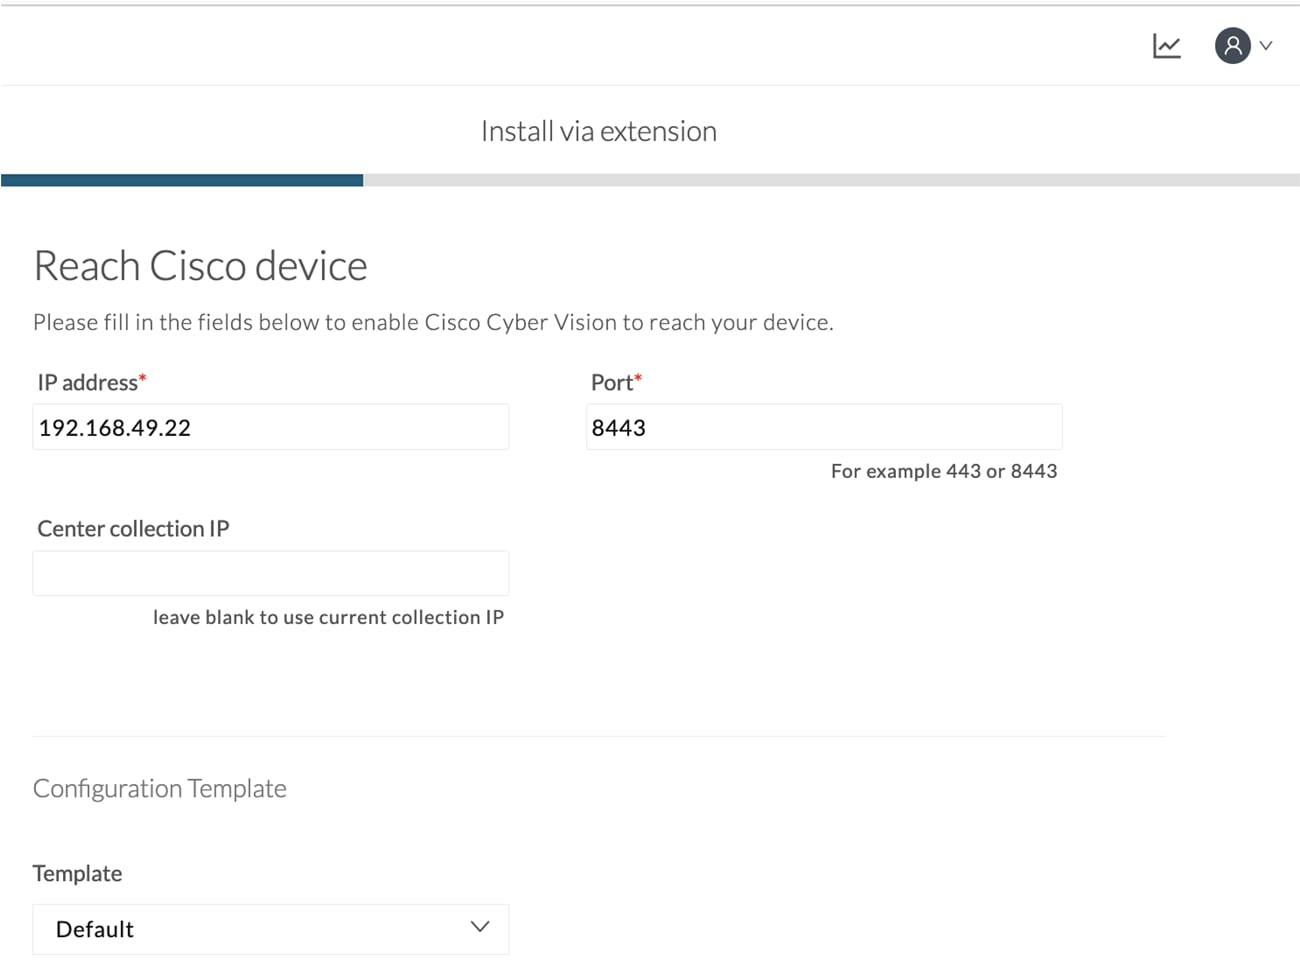 |
|
Step 3 |
Select a configuration template if required. For more information, refer to Configure sensor configuration template. |
|
Step 4 |
Select the credential mode used. For more information, refer to Cisco Cyber Vision GUI Administration Guide available on cisco.com. 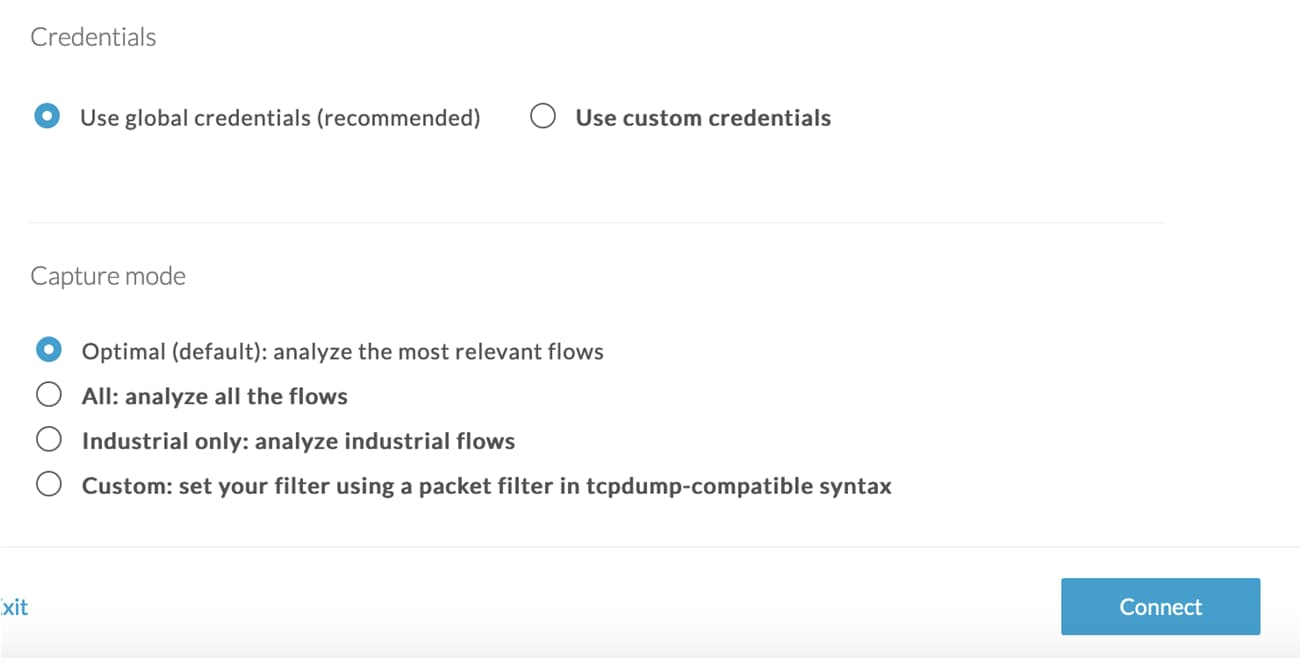 |
|
Step 5 |
Optionally, select a capture mode. |
|
Step 6 |
Click Connect. |
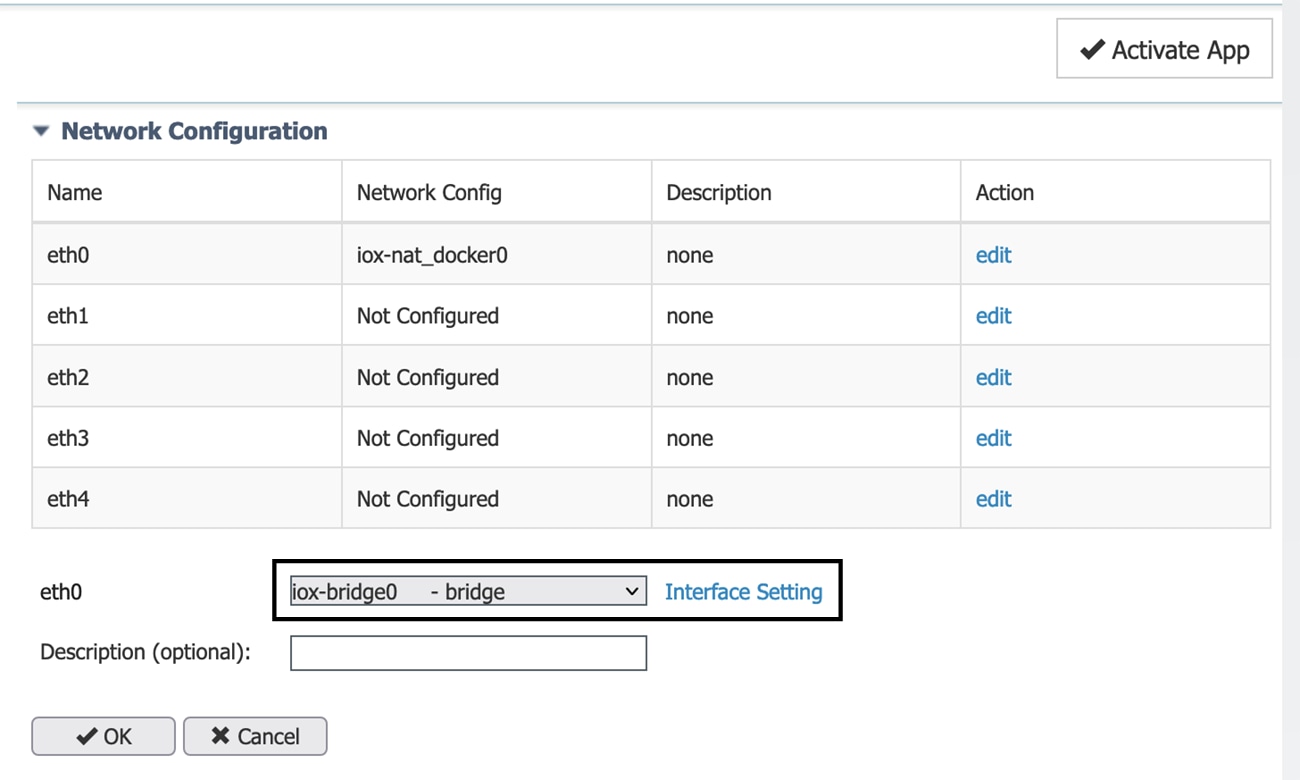
The Center will join the equipment and display the second parameter list. For this step to succeed, the equipment needs to be reachable by the Center on its eth0 connection for a Center with single interface or eth1 for a Center with dual interface.
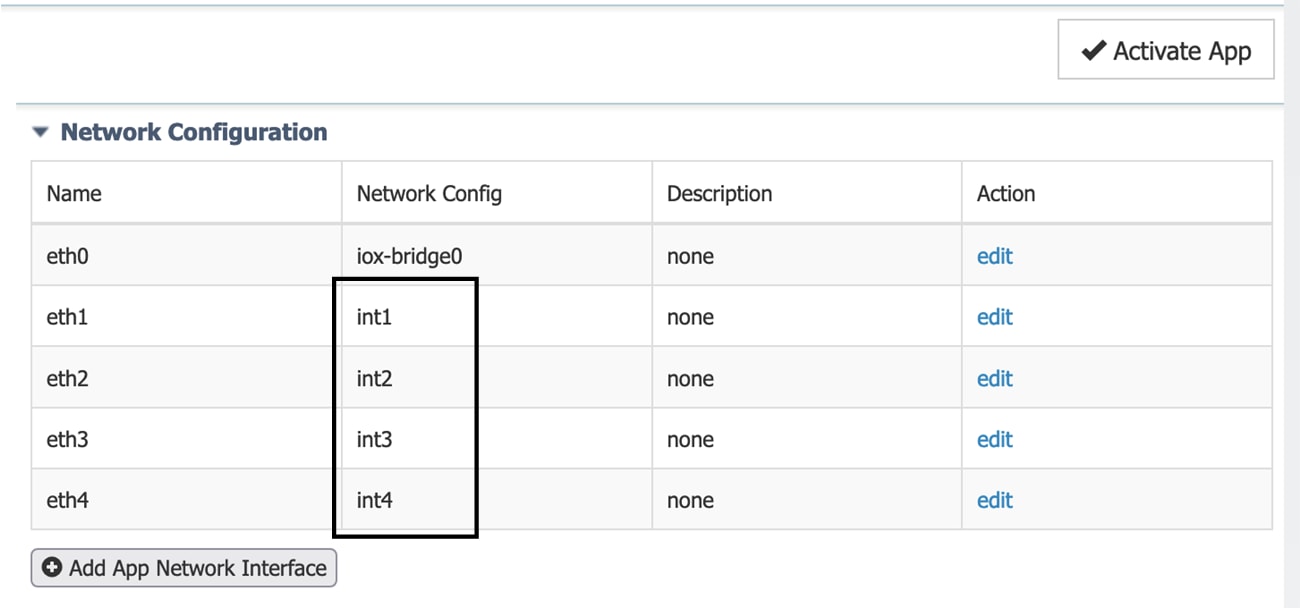
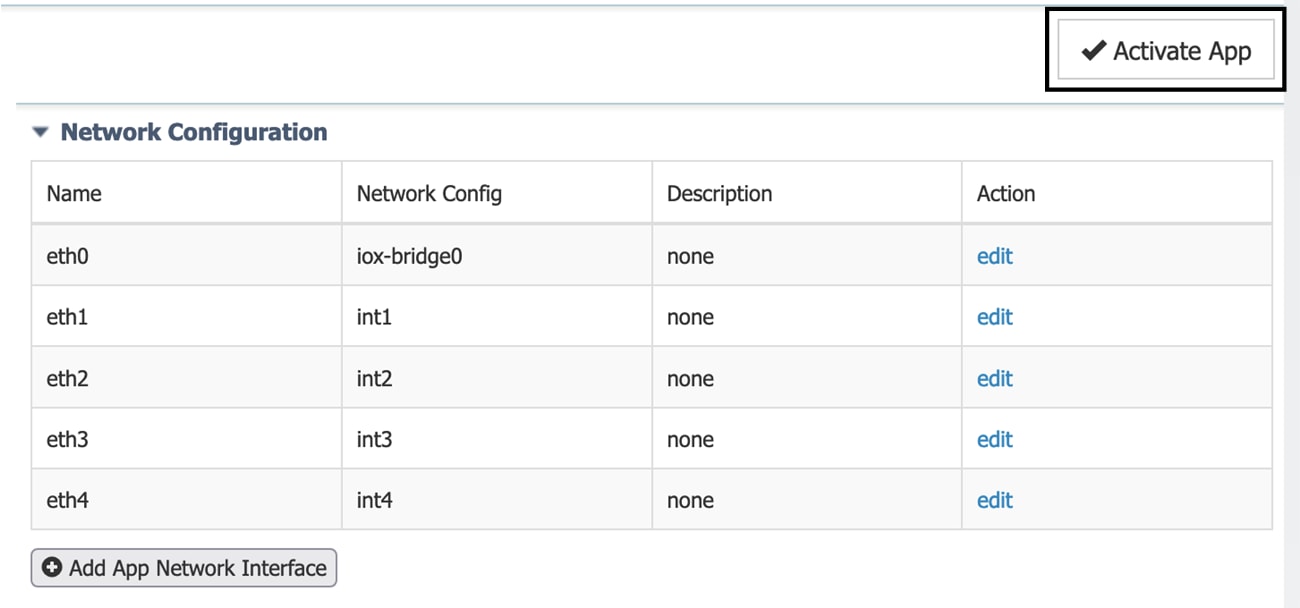
Configure the sensor
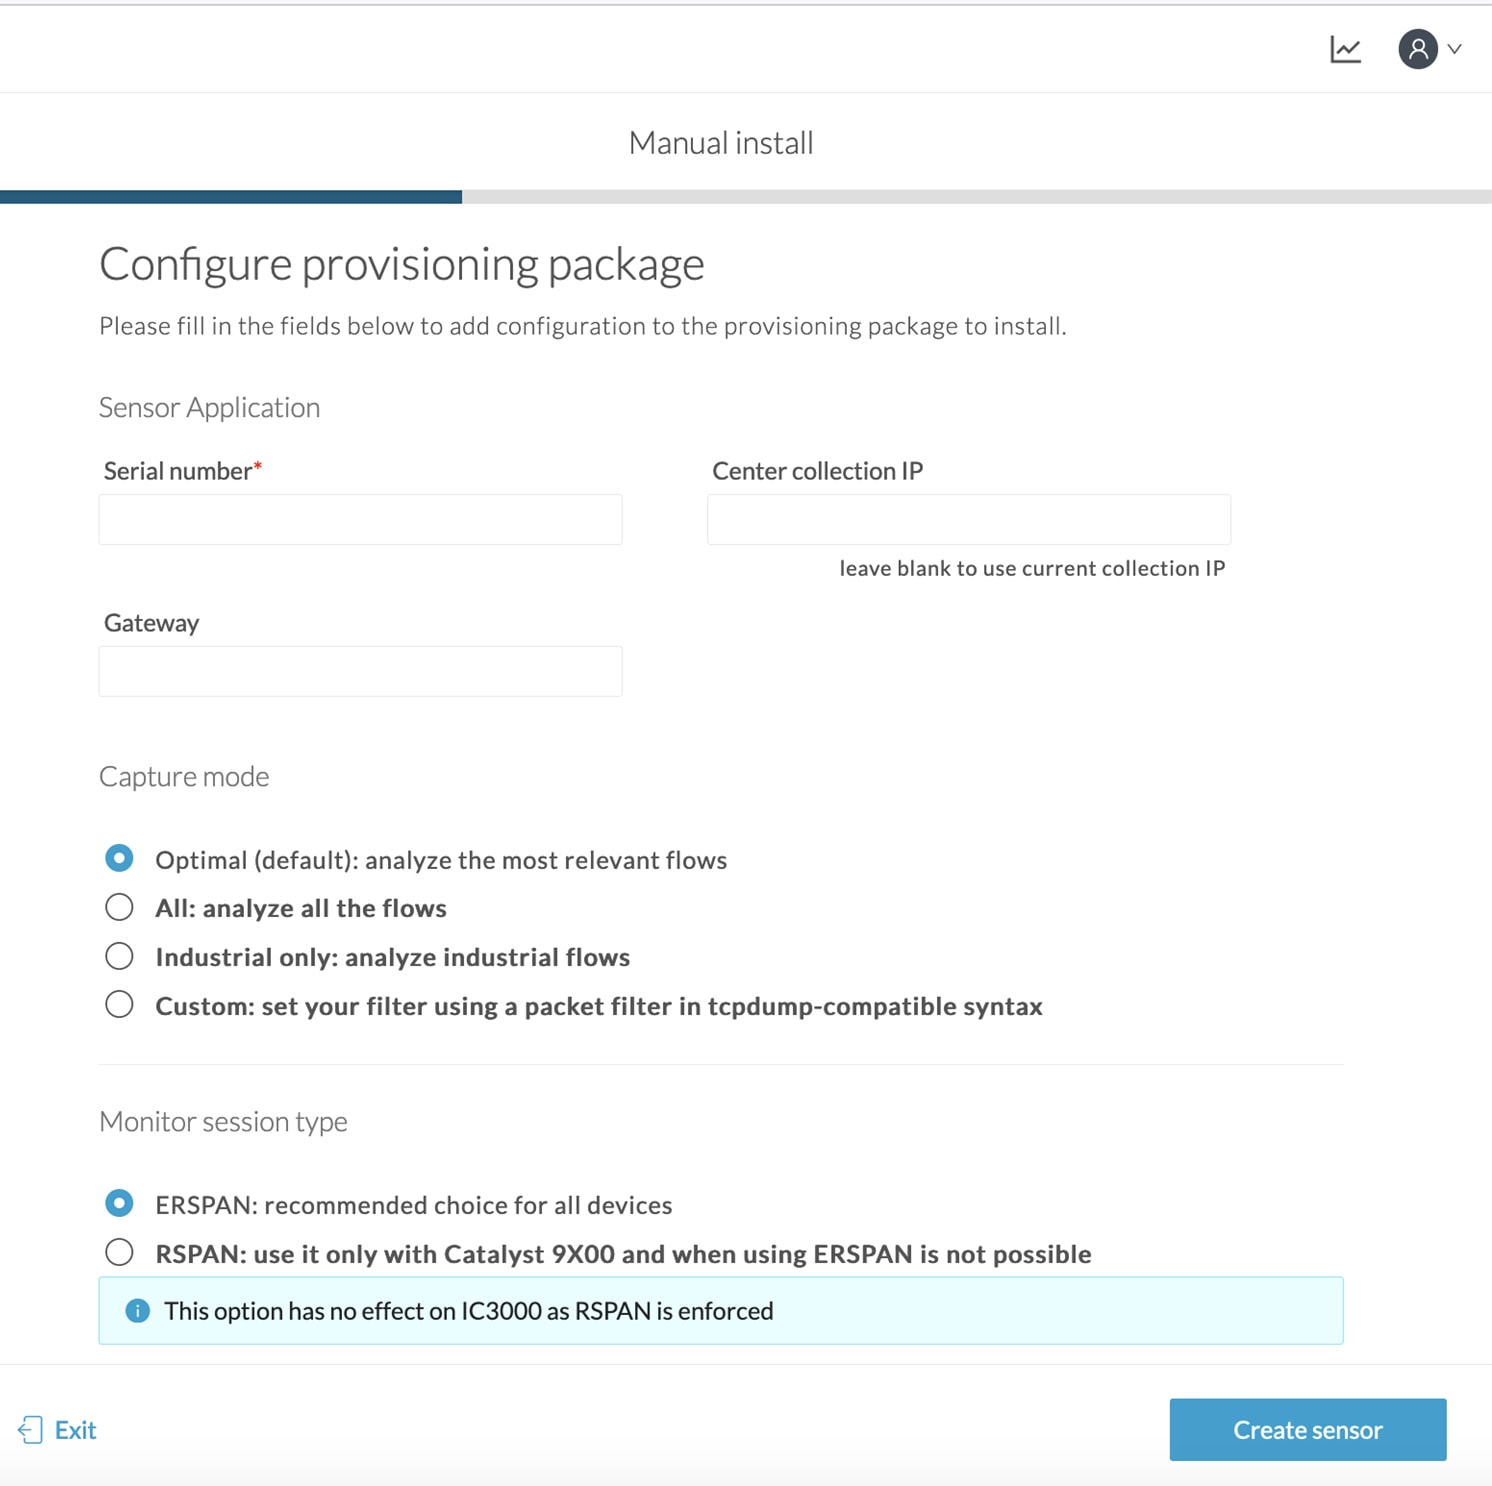
Once the Center can join the equipment, you will have to configure the Cisco Cyber Vision IOx sensor app by setting the Collection interface and, if needed, Active Discovery.
While some parameters are filled automatically, you can still change them if necessary.
-
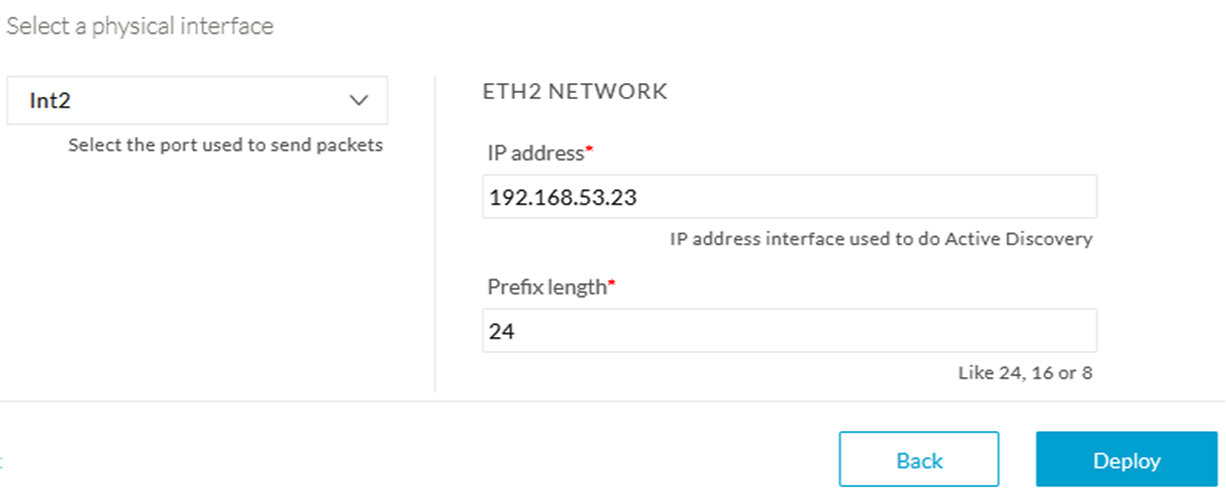
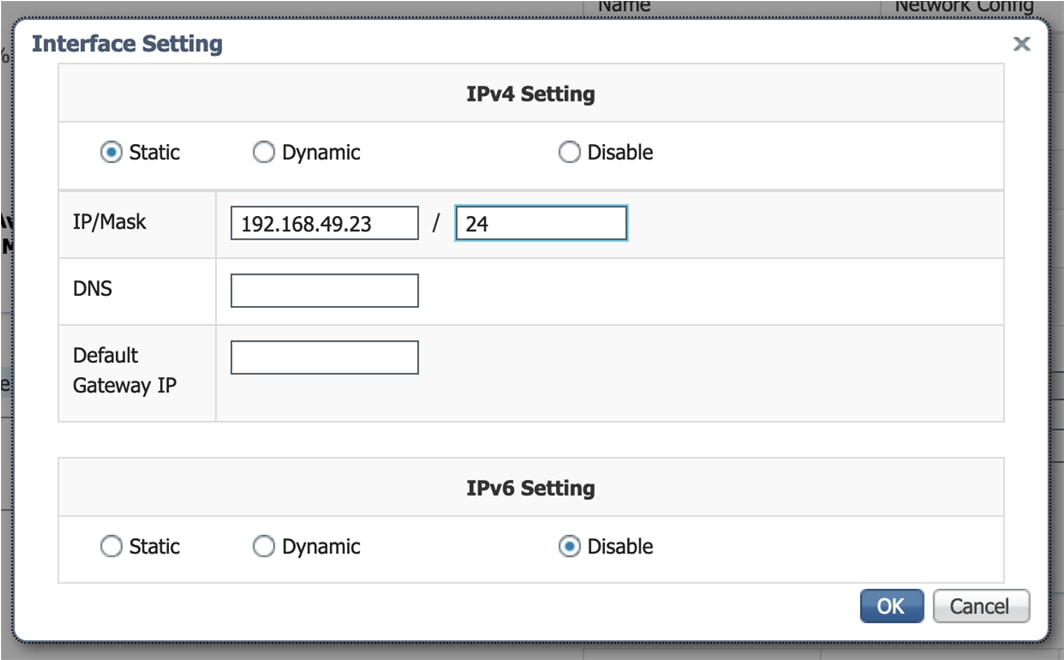
Fill the following parameters for the Collection interface:
-
Collection IP address: IP address of the sensor in the sensor (must be different than the ip address of the device)
-
Collection subnet mask: mask of the Collection IP address
-
Collection gateway: gateway of the Collection IP address (optional)

-
-
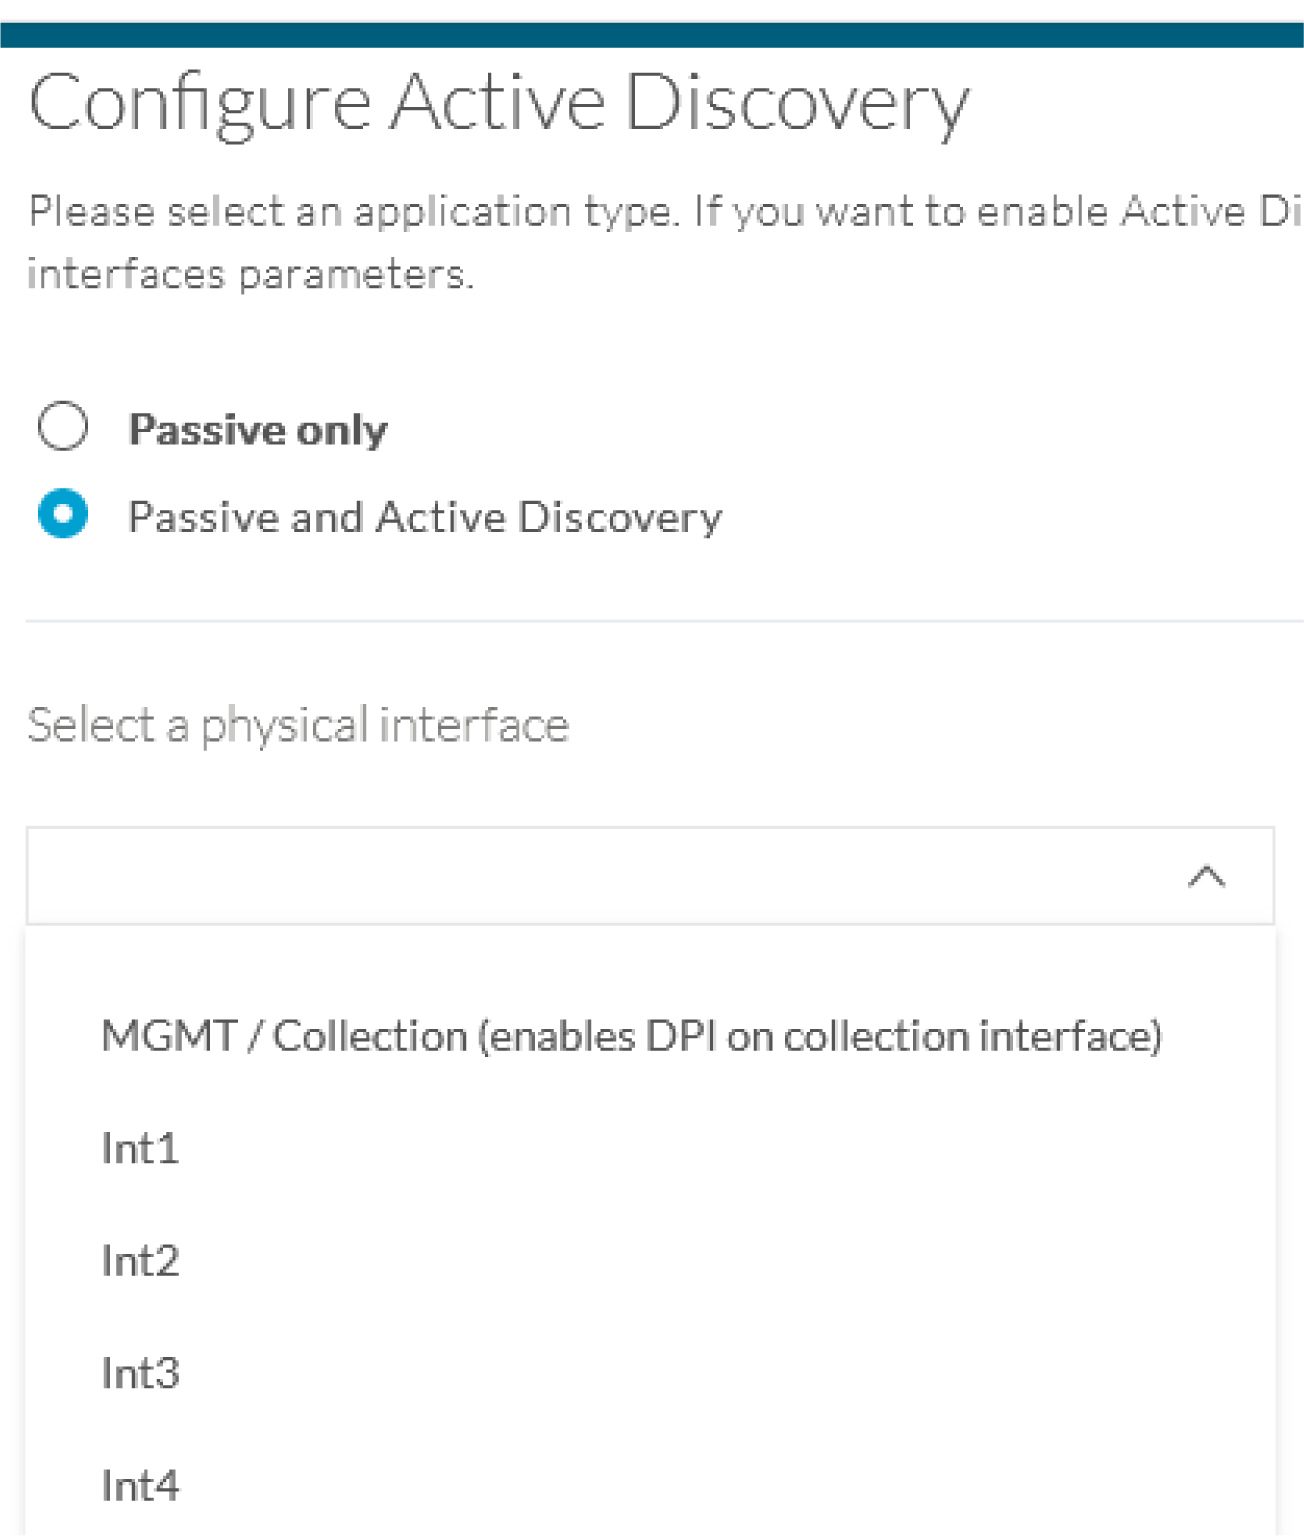
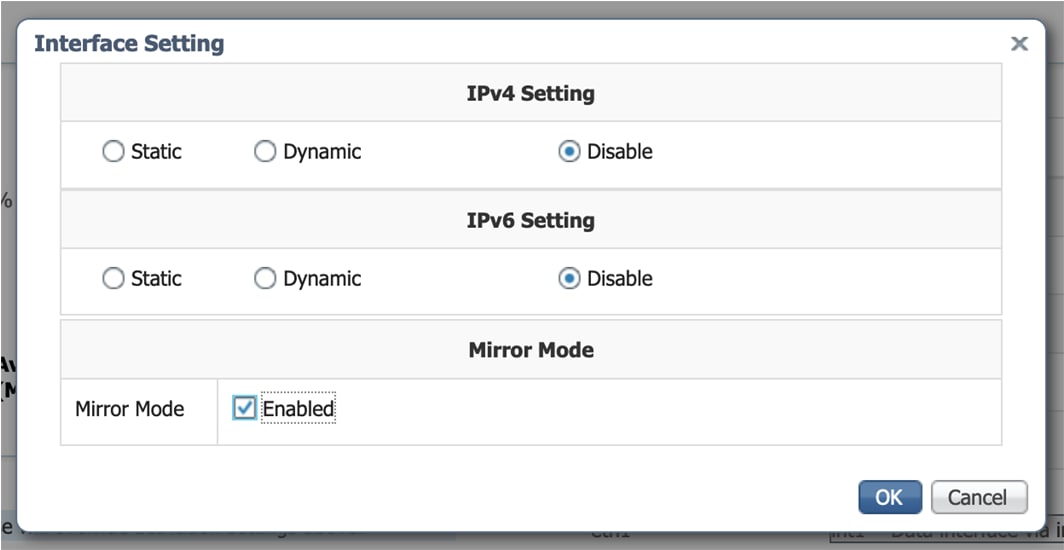
Select the Application type (passive only or passive and Active Discovery).
-
If selecting Passive and Active Discovery, the following fields will appear to set its interface:
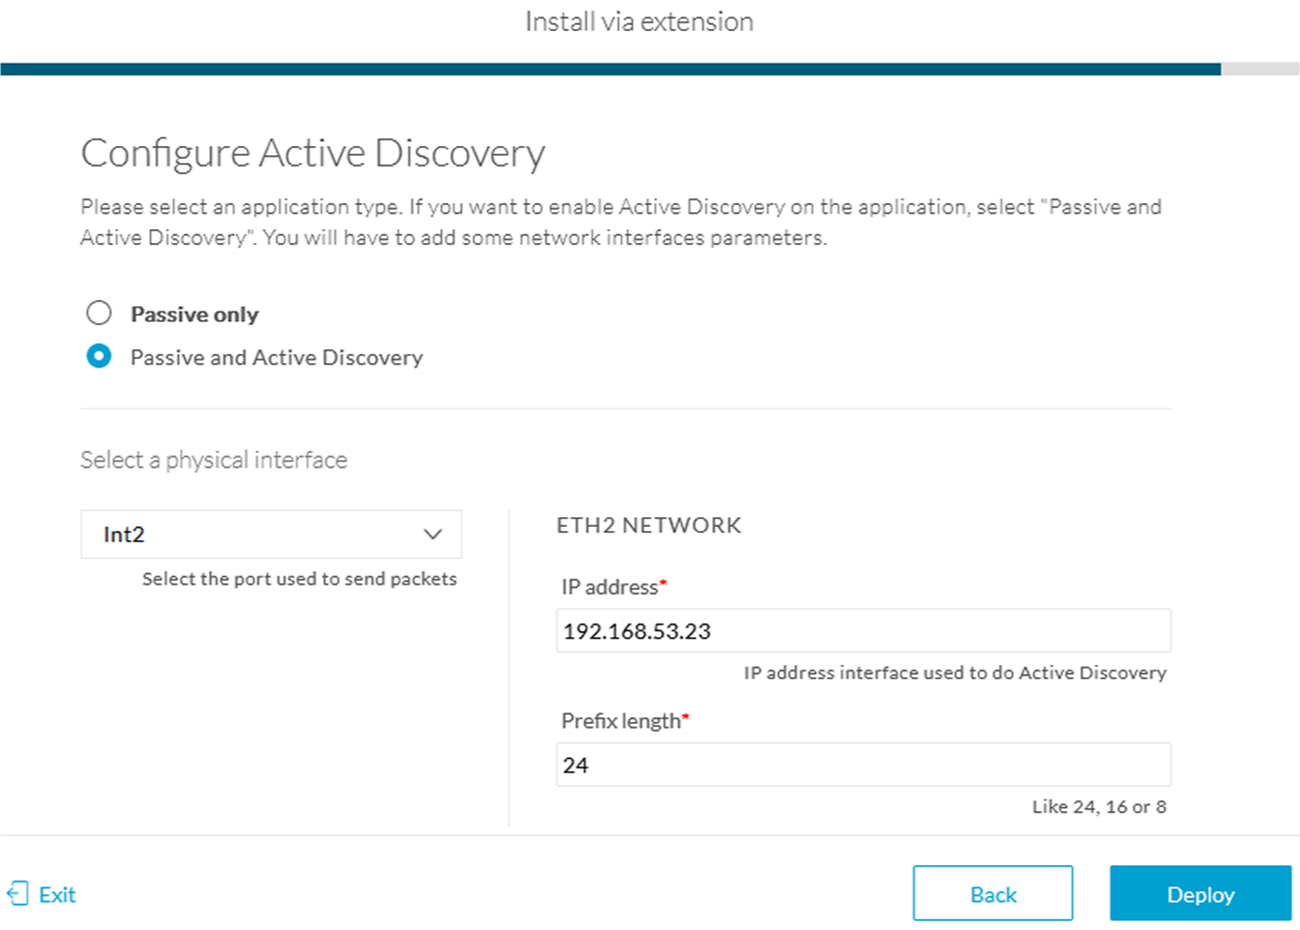
-
Physical interface: port that will be used to send packets.
-
IP address of the interface dedicated to Active Discovery.
-
Prefix lenght: subnet mask of the interface.
-
-
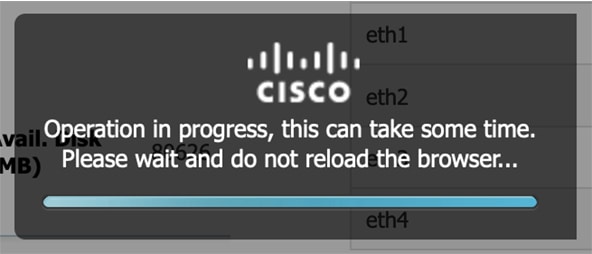
Click the Deploy button.
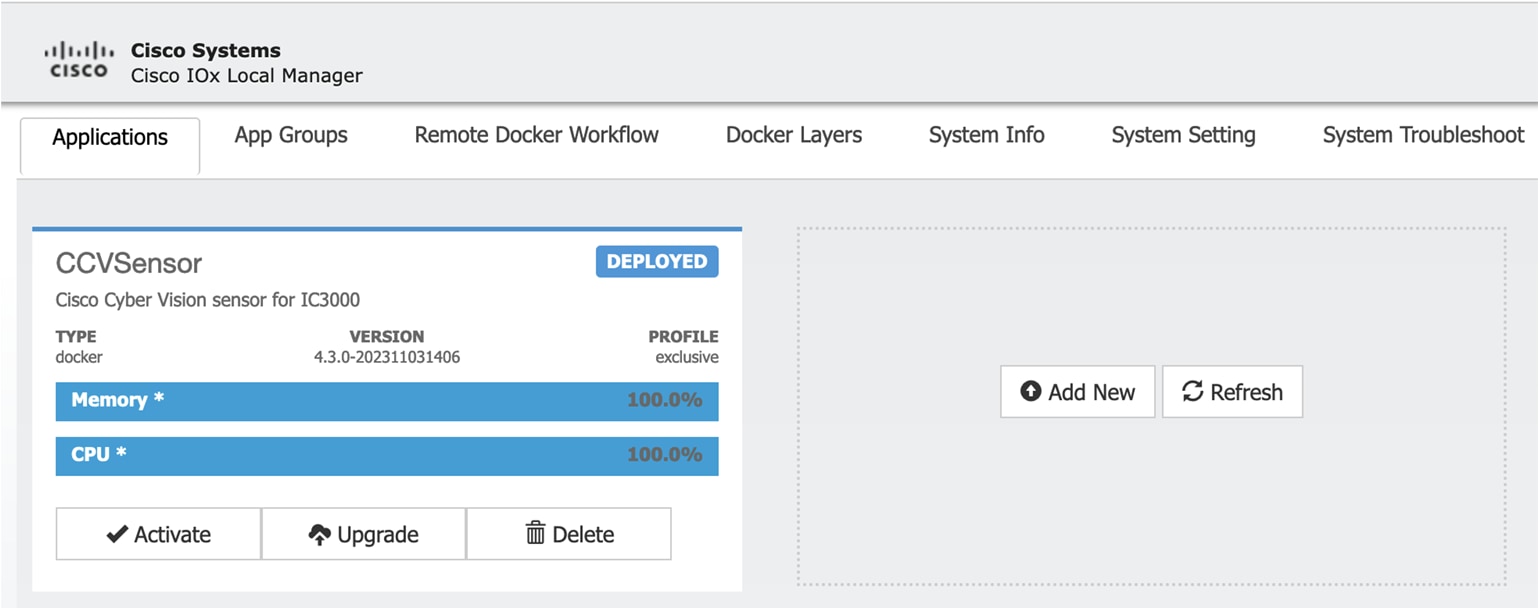
The Center starts deploying the sensor application on the target equipment. This can take a few minutes.
Once the deployment is finished, a new sensor appears in the sensors list.
If Active Discovery has been enabled, the Active Discovery status will switch to Available and the Active Discovery button will be displayed in the right side panel as you click the sensor in the list.
The sensor status will turn to connected.

Note
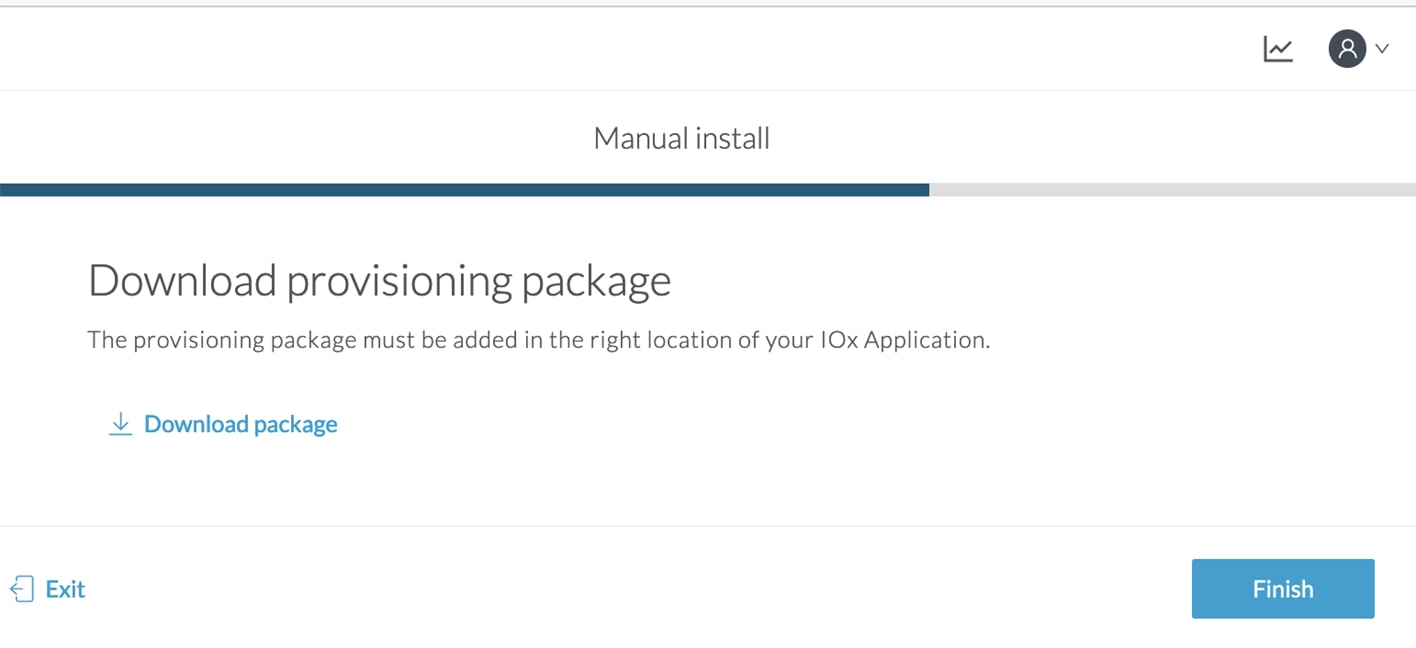
You can change the Active Discovery configuration by clicking the Active Discovery button. However, for changes to be applied, you will have to download a new provisioning package and deploy it on the hardware.


 Feedback