Smart Software Licensing

Introduction

Cisco Smart Licensing is a flexible licensing model that provides you with an easier, faster, and more consistent way to purchase and manage software across the Cisco portfolio and across your organization. And it's secure — you control what users can access. With Smart Licensing you get:

  • Easy Activation: Smart Licensing establishes a pool of software licenses that can be used across the entire organization — no more PAKs (Product Activation Keys).

  • Unified Management: My Cisco Entitlements (MCE) provides a complete view into all of your Cisco products and services in an easy-to-use portal, so you always know what you have and what you are using.

  • License Flexibility: Your software is not node-locked to your hardware, so you can easily use and transfer licenses as needed.

To use Smart Licensing, you must first set up a Smart Account on Cisco Software Central (https://software.cisco.com/). For a more detailed overview about Cisco Licensing, go to https://cisco.com/go/licensingguide.

All Smart Software Licensed products, upon configuration and activation with a single token, can self-register, removing the need to go to a website and register product after product with PAKs. Instead of using PAKs or license files, Smart Software Licensing establishes a pool of software licenses or entitlements that can be used across your entire company in a flexible and automated manner. Pooling is particularly helpful with RMAs because it eliminates the need to re-host licenses. You may self manage license deployment throughout your company easily and quickly in the Cisco Smart Software Manager.

Through standard product offers, a standard license platform, and flexible contracts you have a simplified, more productive experience with Cisco software.

Smart Licensing Deployment Modes

Security is a concern for many customers. The options below are listed in an order from easiest to use to most secure.

  • The first option is to transfer usage over the Internet to the Cloud server directly from the devices to the cloud via HTTPs.

  • The second option is to transfer files directly over the Internet to the Cloud server through an HTTPs proxy, either Smart Call Home Transport Gateway or off the shelf HTTPs proxy such as Apache.

  • The third option uses a customer internal collection device called the “Cisco Smart Software Satellite.” The Satellite periodically transmits the information into the cloud using periodic network synchronization. In this instance the only customer system or database transferring information to the cloud is the Satellite. The customer can control what is included in the collector database, which lends itself to higher security.

  • The fourth option is to use the Satellite, but to transfer the collected files using manual synchronization at least once a month. In this model the system is not directly connected to the Cloud and an air gap exists between the customers network and the Cisco Cloud.


Smart Account Creation

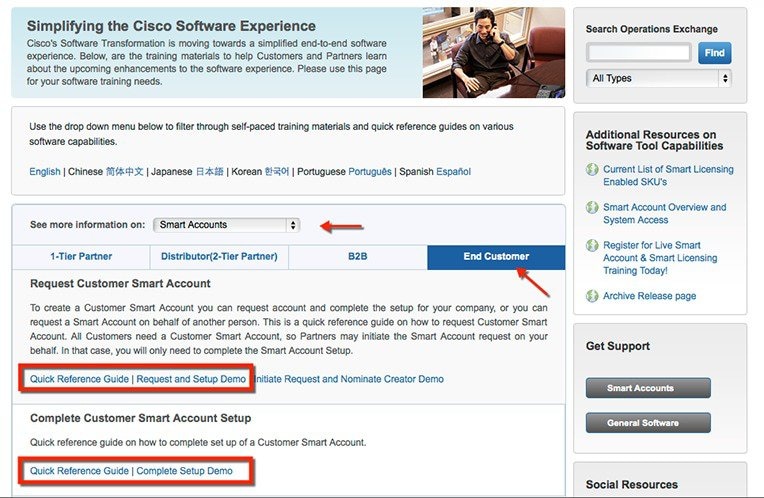
A Customer Smart Account provides the repository for Smart enabled products and enables Users to manage Cisco Licenses. Once they are deposited, Users can activate licenses, monitor license usage and track Cisco purchases. Your Smart Account can be managed by the Customer directly or a Channel Partner or authorized party. All Customers will need to create a Customer Smart Account to fully utilize the license management features of their smart enabled products. The creation of your Customer Smart Account is a one-time setup activity using the link Training Resources for Customers, Partners, Distributors, B2B

After the Customer Smart Account Request has been submitted and the Account Domain Identifier has been approved (if edited), the Creator will receive an email notification informing them that they will need to complete the Customer Smart Account setup in Cisco Software Central (CSC).

Cisco Smart Software Manager

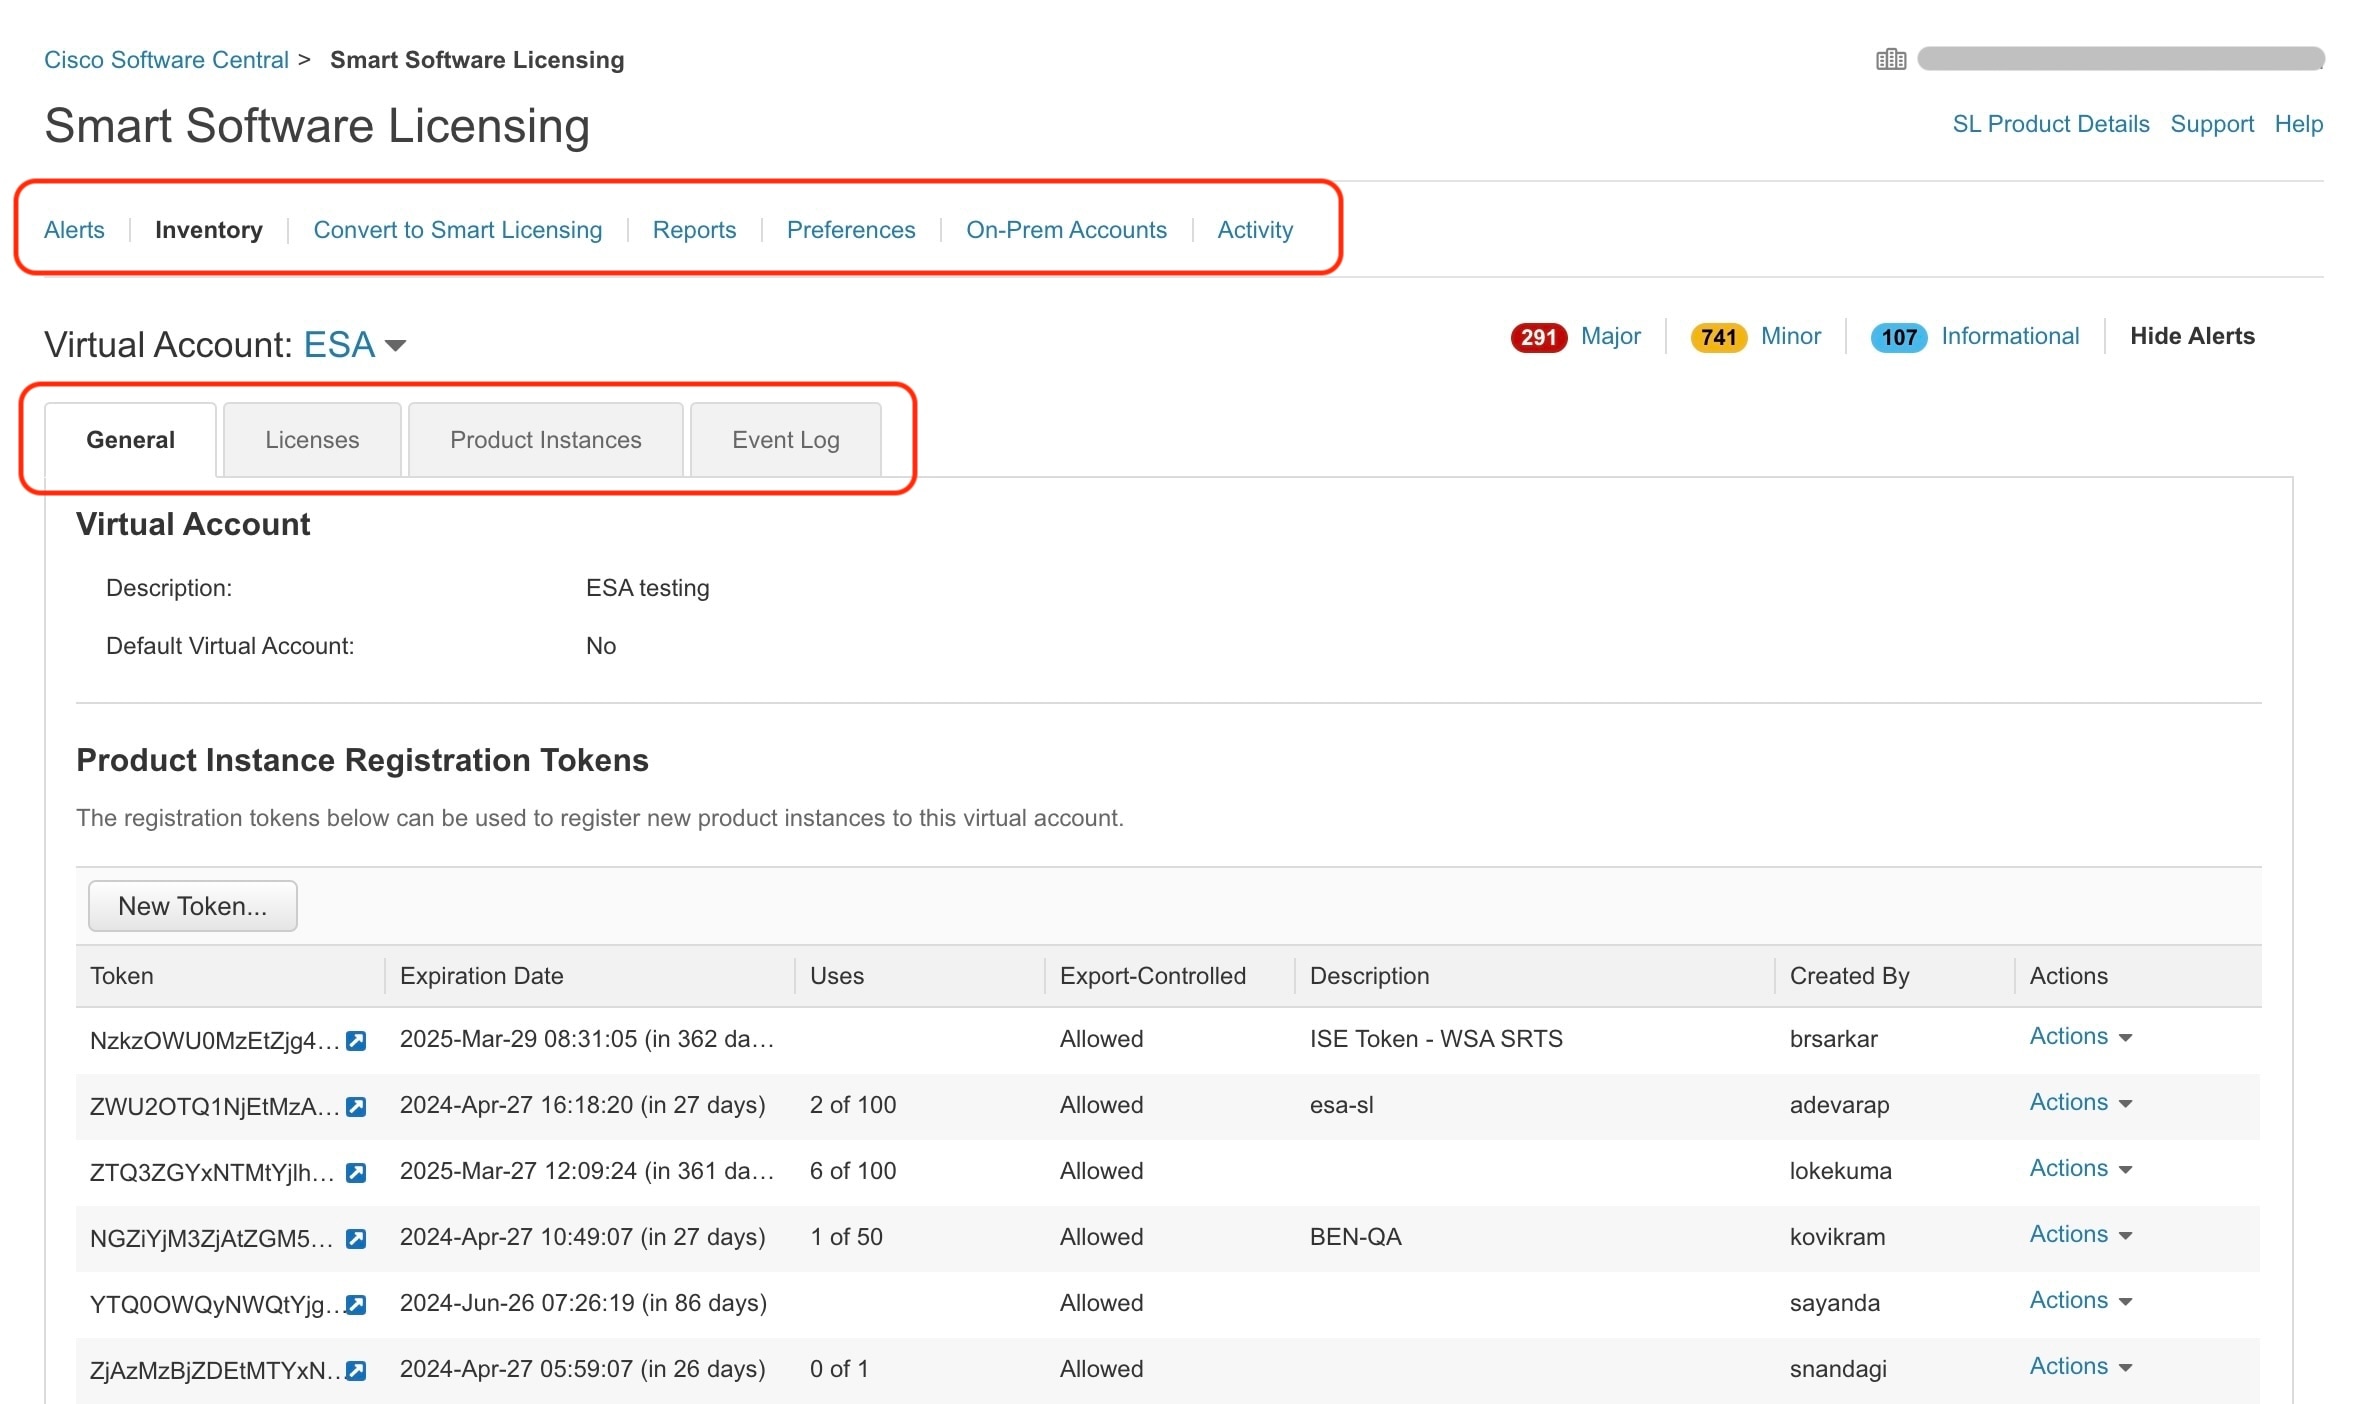
Cisco Smart Software Manager (CSSM) is a portal that enables you to manage all your Cisco software licenses from a centralized location. CSSM helps you manage current requirements and review usage trends to plan for future license requirements. You can access the CSSM Web UI at https://software.cisco.com. Under the License tab, click the Smart Software Licensing link.

See the section to know about the different ways in which you can connect to CSSM. In CSSM you can:

  • Create, manage, or view virtual accounts.

  • Create and manage Product Instance Registration Tokens.

  • Transfer licenses between virtual accounts or view licenses.

  • Transfer, remove, or view product instances.

  • Run reports against your virtual accounts.

  • Modify your email notification settings.

  • View overall account information.

Cisco Smart Software Manager enables you to manage all of your Cisco Smart software licenses from one centralized website. With Cisco Smart Software Manager, you organize and view your licenses in groups called virtual accounts. You use Cisco Smart Software Manager to transfer the licenses between virtual accounts as needed.

CSSM can be accessed from the Cisco Software Central homepage at software.cisco.com under the Smart Licensing section.

Cisco Smart Software Manager is divided into two main sections: a Navigation pane on the top and the main Work pane.

You can use the Navigation pane to do the following tasks:

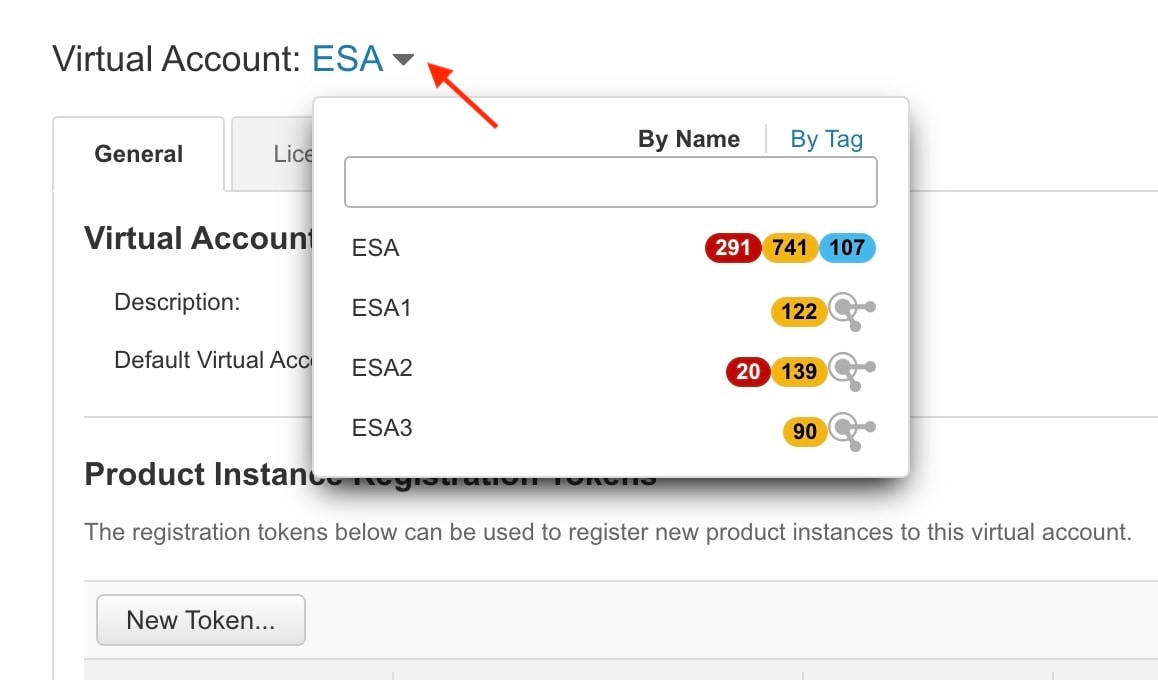
  • Choose virtual accounts from the list of all virtual accounts that are accessible by the user.

  • Run reports against your virtual accounts.

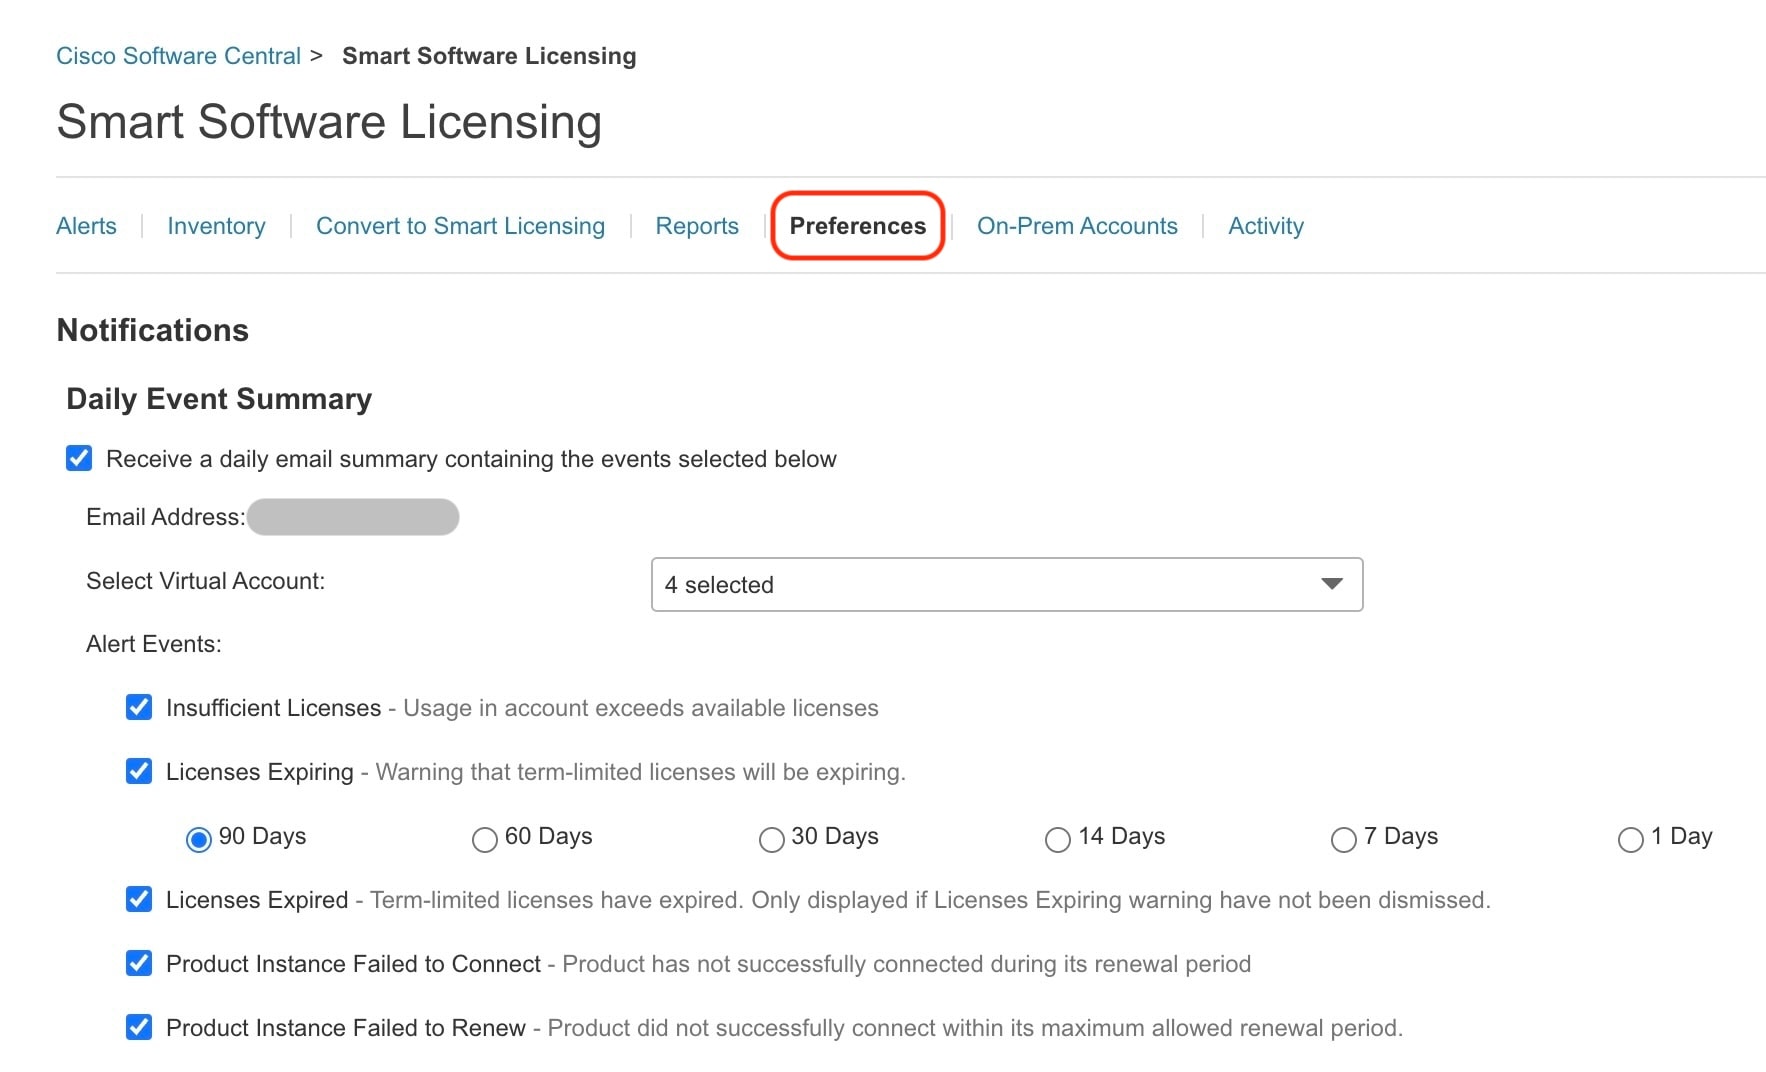
  • Modify your email notification settings.

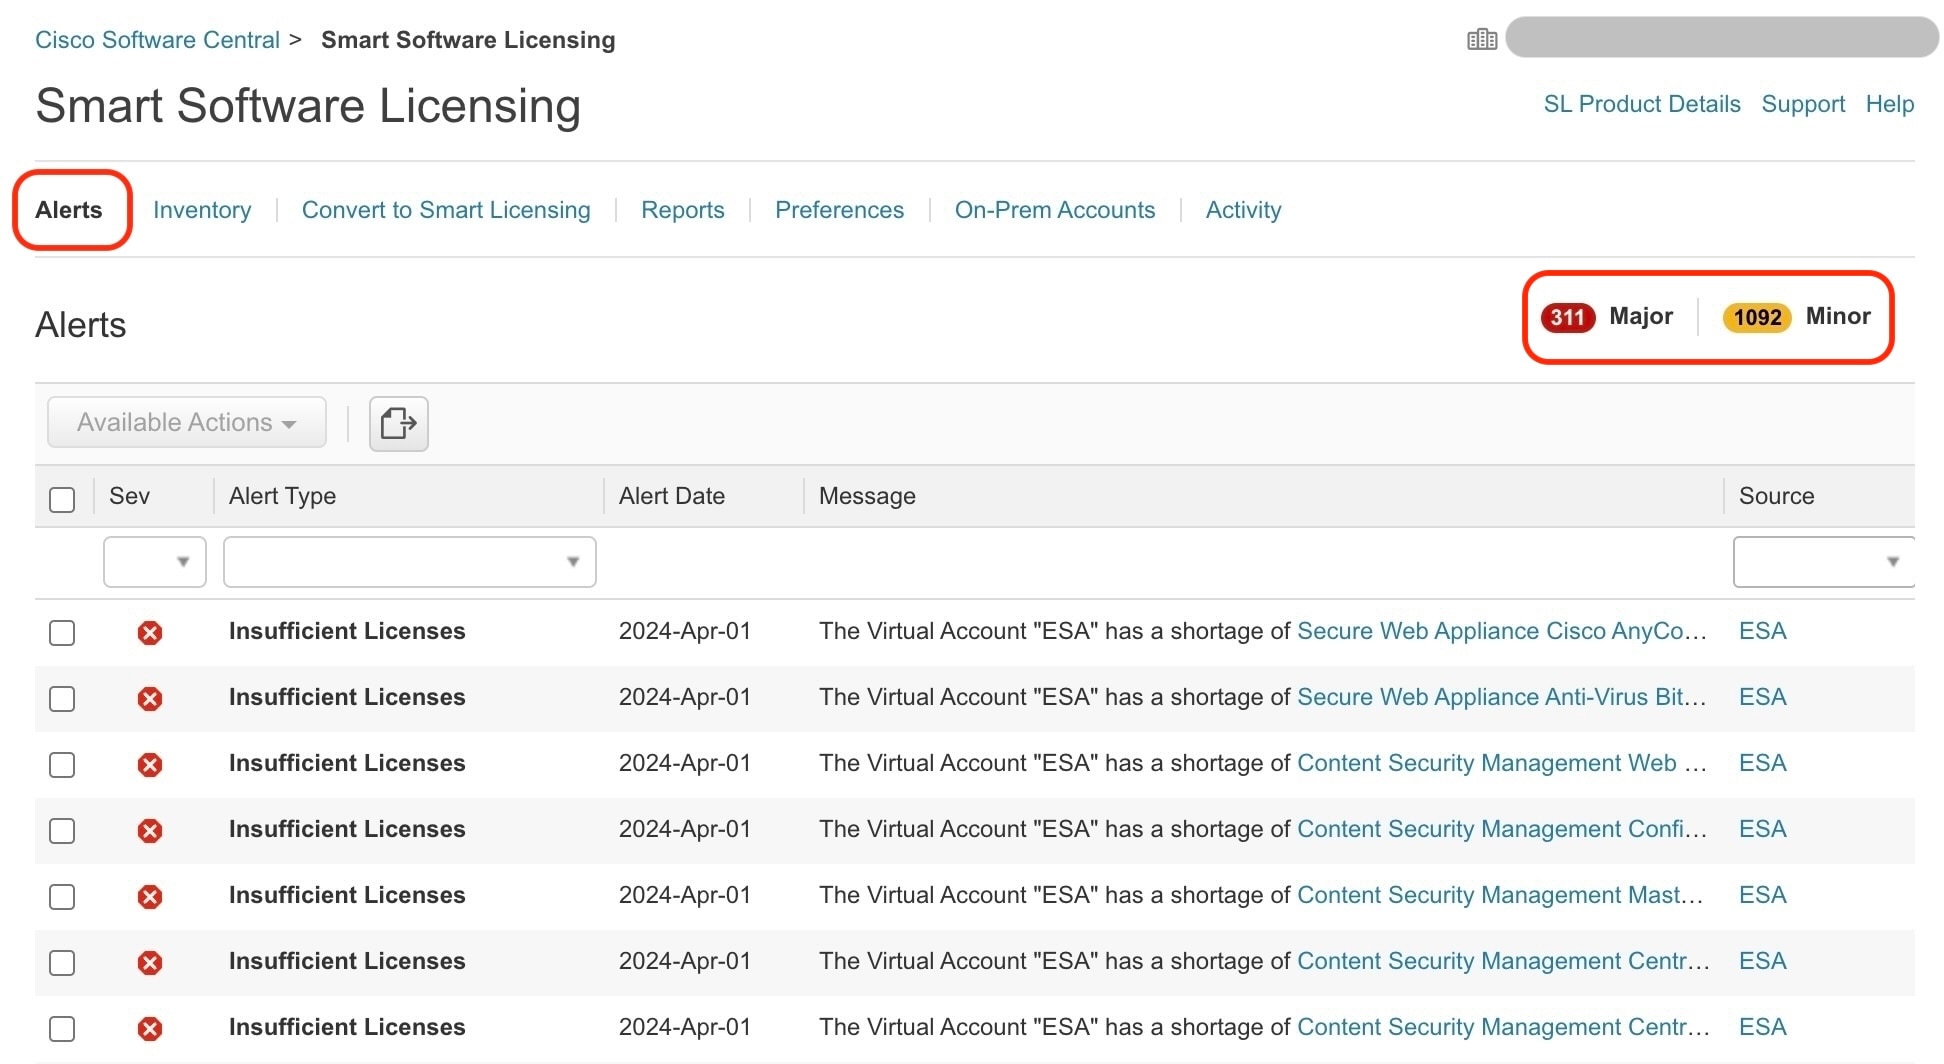
  • Manage Major and Minor Alerts.

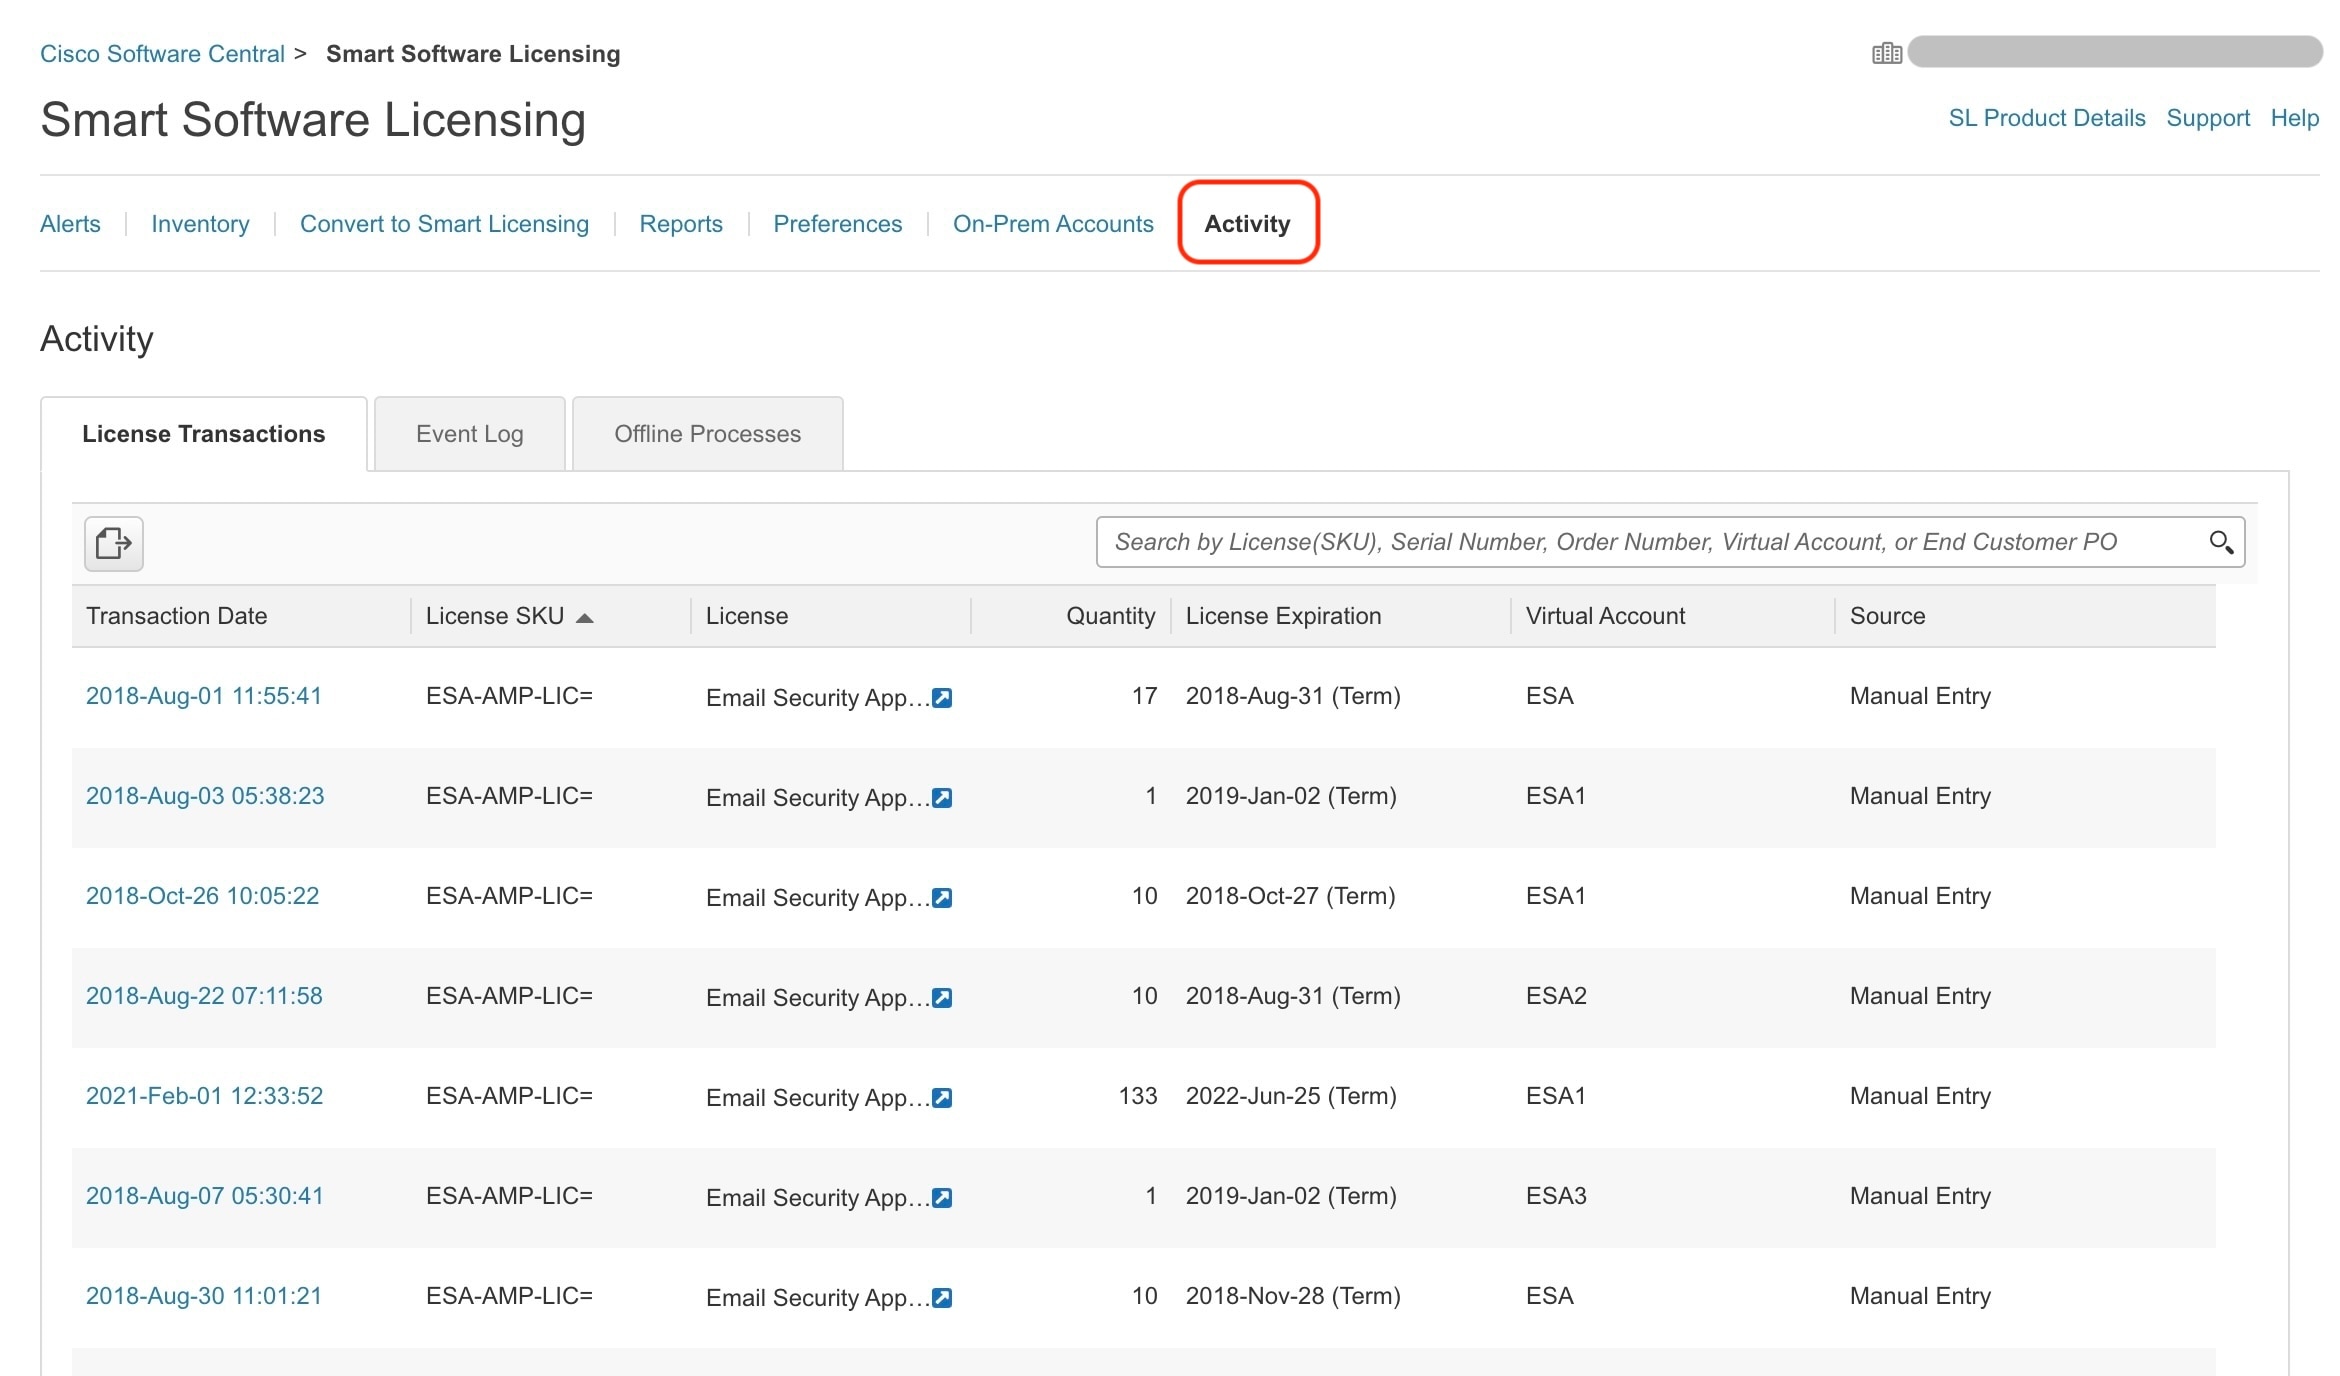
  • View overall account activity, license transactions and event log.


The latest stable version of the following web browsers are supported for Cisco Smart Software Manager:

  • Google Chrome

  • Mozilla Firefox

  • Safari

  • Microsoft Edge


Note


To access the web-based UI, your browser must support and be enabled to accept JavaScript and cookies, and it must be able to render HTML pages containing Cascading Style Sheets (CSS).


Smart Licensing for Different Users

Smart Software Licensing enables you to manage and monitor email gateway licenses seamlessly. To activate Smart Software licensing, you must register your email gateway with Cisco Smart Software Manager (CSSM) which is the centralized database that maintains the licensing details about all the Cisco products that you purchase and use. With Smart Licensing, you can register with a single token rather than registering them individually on the website using Product Authorization Keys (PAKs).

Once you register the email gateway, you can track your email gateway licenses and monitor license usage through the CSSM portal. The Smart Agent installed on the email gateway connects the appliance with CSSM and passes the license usage information to the CSSM to track the consumption.


Note


If the Smart Account Name in the Smart Licensing account contains unsupported Unicode characters, the email gateway is unable to fetch the Cisco Talos certificate from the Cisco Talos server. You can use the following supported characters: - a-z A-Z 0-9 _ , . @ : & '" / ; # ? ö ü Ã ¸ () for the Smart Account Name.

License Reservation

You can reserve licenses for features enabled in your email gateway without connecting to the Cisco Smart Software Manager (CSSM) portal. This is mainly beneficial for covered users that deploy the email gateway in a highly secured network environment with no communication to the Internet or external devices.

The feature licenses can be reserved in any one of the following modes:

  • Specific License Reservation (SLR) – use this mode to reserve licenses for individual features (for example, ‘Mail Handling’) for a given time-period.

  • Permanent License Reservation (PLR) – use this mode to reserve licenses for all features permanently.

For more information on how to reserve the licenses in your email gateway, see Reserving Feature Licenses.

Device Led Conversion

After you register your email gateway with smart licensing, all existing, valid classical licenses are automatically converted to smart licenses using the Device Led Conversion (DLC) process. These converted licenses are updated in the virtual account of the CSSM portal.


Note


The DLC process is initiated if the email gateway contains valid feature licenses.

Note


After the DLC process is complete, you will not be able to convert the smart licenses to classic licenses. Contact Cisco TAC for assistance.

Note


The DLC process takes approximately an hour to complete.

You can view the status of the DLC process – ‘success’ or ‘failed’ in any one of the following ways:

  • Device Led Conversion status field under the 'Smart Software Licensing Status' section in the System Administration > Smart Software Licensing page of the web interface.

  • Conversion Status entry in the license_smart > status sub command in the CLI.


Note


When the DLC process fails, the system sends a system alert that details the reason for the failure. You need to fix the issue and then use the license_smart > conversion_start sub command in the CLI to manually convert the classical licenses to smart licenses.

Note


The DLC process is applicable only for classic licenses and not for the SLR or PLR modes of license reservation.


Before you begin

  • Make sure that your email gateway has internet connectivity.

  • Contact Cisco sales team to create a smart account in Cisco Smart Software Manager portal or install a Cisco Smart Software Manager Satellite on your network.

    See Cisco Smart Software Manager to know more about Cisco Smart Software Manager covered user account creation or installing a Cisco Smart Software Manager Satellite.

    Note


    A covered user is the total number of internet-connected employees, subcontractors, and other authorized individuals covered by your email gateway deployment (on-premises or cloud, whichever is applicable.)

    For covered users who do not want to directly send the license usage information to the internet, the Smart Software Manager Satellite can be installed on the premises, and it provides a subset of CSSM functionality. Once you download and deploy the satellite application, you can manage licenses locally and securely without sending data to CSSM using the internet. The CSSM Satellite periodically transmits the information to the cloud.


    Note


    If you want to use Smart Software Manager Satellite, use Smart Software Manager Satellite Enhanced Edition 6.1.0.


  • The existing covered users of classical licenses (traditional) should migrate their classical licenses to smart licenses.

    See https://video.cisco.com/detail/video/6330894176112.

  • The system clock of the email gateway must be in sync with that of the CSSM. Any deviation in the system clock of the email gateway with that of the CSSM, will result in failure of smart licensing operations.


Note


If you have internet connectivity and want to connect to the CSSM through a proxy, you must use the same proxy that is configured for the email gateway using Security Services -> Service updates.


Note


Once Smart Software Licensing is enabled, you cannot revert back to classic licensing. The only way to do so is by completely reverting or resetting the Email Gateway or Email and Web Manager. If you have any questions, contact Cisco TAC.


Note


When you configure the proxy on the Security Services > Service Updates page, make sure the username you enter does not contain a domain or realm. For example, in the Username field, enter only the username instead of DOMAIN\username.


Note


For virtual covered users, every time you receive a new PAK file (new or renewal), generate the license file and load the file on the email gateway. After loading the file, you must convert the PAK to Smart Licensing. In Smart Licensing mode, the feature keys section in the license file will be ignored while loading the file and only the certificate information will be used.


Note


If you already have a Cisco XDR account, make sure you first register your email gateway with Cisco XDR before you enable the Smart Licensing mode on your email gateway.

You must perform the following procedures to activate Smart Software Licensing for your email gateway:

Migrating from Classic Licensing to Smart Software Licensing - Existing User

If you are migrating from Classic Licensing to Smart Software Licensing, you must perform the following procedures to activate Smart Software Licensing:

Do This

More Informaton

Step 1

Enable Smart Software Licensing

Enabling Smart Software Licensing

Step 2

Register the Secure Email Gateway with Cisco Smart Software Manager

Registering the Email Gateway with Cisco Smart Software Manager

Step 3

Request for licenses (feature keys)

Requesting for Licenses

Note:After you register Secure Email Gateway with Smart Software Licensing, all existing, valid Classic Licenses are automatically converted to Smart Licenses using the Device Led Conversion (DLC) process. For more information, see Device Led Conversion in Smart Licensing for Different Users.

Smart Software Licensing in Air-Gap Mode - New User

If you are using Secure Email Gateway operating in air-gap mode, and if you are activating Smart Software Licensing for the first-time, you must perform the following procedures:

Do This

More Informaton

Step 1

Enable Smart Software Licensing

Enabling Smart Software Licensing

Step 2 (Required only for AsyncOS 15.5 and later)

Obtaining and Using VLN, Certificate, and Key Details to Register Secure Email Gateway in Air-Gap Mode for the first-time

Obtaining and Using VLN, Certificate, and Key Details to Register Secure Email Gateway in Air-Gap Mode

Step 3

Request for licenses (feature keys)

Requesting for Licenses

Smart Software Licensing in Air-Gap Mode - Existing User

If you are using Secure Email Gateway operating in air-gap mode, you must perform the following procedures to activate Smart Software Licensing:

Do This

More Informaton

Step 1

Enable Smart Software Licensing

Enabling Smart Software Licensing

Step 2 (Required only for AsyncOS 15.5 and later)

Register Secure Email Gateway operating in air-gap mode with license reservation

Obtaining and Using VLN, Certificate, and Key Details to Register Secure Email Gateway in Air-Gap Mode

Step 3

Request for licenses (feature keys)

Requesting for Licenses

Obtaining and Using VLN, Certificate, and Key Details to Register Secure Email Gateway in Air-Gap Mode

Perform the following steps to obtain VLN, certificate, and key details and use these details to register your virtual Secure Email Gateway operating in air-gap mode:

Procedure


Step 1

Register a virtual Secure Email Gateway operating outside the air-gap mode. For information on how to register a virtual Secure Email Gateway, see Registering the Email Gateway with Cisco Smart Software Manager.

Step 2

Enter the vlninfo command in the CLI. This command displays the VLN, certificate, and key details. Copy these details and maintain these details to use it later.

Note


The vlninfo command is available in Smart Licensing mode. For more information on the vlninfo command, see CLI Reference Guide for AsyncOS for Cisco Secure Email Gateway.

Step 3

Register your virtual Secure Email Gateway operating in air-gap mode with your license reservation. For more information on how to register a virtual Secure Email Gateway with your license reservation, see Reserving Feature Licenses.

Step 4

Enter updateconfig -> VLNID subcommand in the CLI.

Step 5

Paste the copied VLN (in step 2) when you are prompted to enter the VLN.

Note


The updateconfig -> VLNID subcommand is available only in License Reservation mode. For more information on how to use updateconfig -> VLNID subcommand, see CLI Reference Guide for AsyncOS for Cisco Secure Email Gateway.

Note


Using the VLNID subcommand, you can add or update the VLNID. The update option is available to modify the VLN if you enter an incorrect VLN.

Step 6

Enter CLIENTCERTIFICATE command in the CLI.

Step 7

Paste the copied certificate and key details (in step 2) when you are prompted to enter these details.


Token Creation

Token is required to register the product. Registration tokens are stored in the Product Instance Registration Token Table that is associated with your smart account. Once the product is registered, the registration token is no longer necessary and can be revoked and removed from the table. Registration tokens can be valid from 1 to 365 days.

Procedure


Step 1

In the General tab of virtual account, click New Token.


Step 2

In the Create Registration Token dialog box, enter a description and the number of days that you want the token to be valid for. Select the checkbox for export-controlled functionality and accept the terms and responsibilities.

Step 3

Click Create Token to create token.

Step 4

Once the token is created click Copy to copy the newly created token.


Enabling Smart Software Licensing

Procedure


Step 1

Choose System Administration > Smart Software Licensing.

Step 2

Click Enable Smart Software Licensing.

To know about Smart Software Licensing, click on the Learn More about Smart Software Licensing link.

Step 3

Click OK after reading the information about Smart Software Licensing.

Step 4

Commit your changes.


What to do next

After you enable Smart Software Licensing, all the features in the Classic Licensing mode will be automatically available in the Smart Licensing mode. If you are an existing covered user in Classic Licensing mode, you have 90-days evaluation period to use the Smart Software Licensing feature without registering your email gateway with the CSSM.

You will get notifications on regular intervals (90th, 60th, 30th, 15th, 5th, and last day) prior to the expiry and also upon expiry of the evaluation period. You can register your email gateway with the CSSM during or after the evaluation period.


Note


New virtual email gateway covered users with no active licenses in Classic Licensing mode will not have the evaluation period even if they enable the Smart Software Licensing feature. Only the existing virtual email gateway covered users with active licenses in Classic Licensing mode will have evaluation period. If new virtual email gateway covered users want to evaluate the smart licensing feature, contact Cisco Sales team to add the evaluation license to the smart account. The evaluation licenses are used for evaluation purpose after registration.


Note


After you enable the Smart Licensing feature on your email gateway, you will not be able to roll back from Smart Licensing to Classic Licensing mode.


Registering the Email Gateway with Cisco Smart Software Manager

You must enable the Smart Software Licensing feature under System Administration menu in order to register your email gateway with the Cisco Smart Software Manager.

Procedure


Step 1

Go to System Administration > Smart Software Licensing page in your email gateway.

Step 2

Select the Smart License Registration option.

Step 3

Click Confirm.

Step 4

Click Edit, if you want to change the Transport Settings. The available options are:

  • Direct: Connects the email gateway directly to the Cisco Smart Software Manager through HTTPs. This option is selected by default.

  • Transport Gateway: Connects the email gateway to the Cisco Smart Software Manager through a Transport Gateway or Smart Software Manager Satellite. When you choose this option, you must enter the URL of the Transport Gateway or the Smart Software Manager Satellite and click OK. This option supports HTTP and HTTPS. In FIPS mode, Transport Gateway supports only HTTPS.

    Access the Cisco Smart Software Manager portal

    (https://software.cisco.com/ using your login credentials. Navigate to the Virtual Account page of the portal and access the General tab to generate a new token. Copy the Product Instance Registration Token for your email gateway.

    See Token Creation to know about Product Instance Registration Token creation.

Step 5

Switch back to your email gateway and paste the Product Instance Registration Token.

Step 6

Click Register.

Step 7

On the Smart Software Licensing page, you can check the Reregister this product instance if it is already registered check box to reregister your email gateway. See Reregistering the Email Gateway with Smart Cisco Software Manager.


What to do next

The product registration process takes a few minutes and you can view the registration status on the Smart Software Licensing page.


Note


After you have enabled smart software licensing and registered your email gateway with the Cisco Smart Software Manager, the Cisco Cloud Services portal is automatically enabled and registered on your email gateway.

Requesting for Licenses

Once you complete the registration process successfully, you must request for licenses for the email gateway's features as required.


Note


In License Reservation mode (air-gap mode), you must request for licenses before the license token is applied to the email gateway.


Procedure


Step 1

Choose System Administration > Licenses.

Step 2

Click Edit Settings.

Step 3

Check the checkboxes under the License Request/Release column corresponding to the licenses you want to request for.

Step 4

Click Submit.

Note


By default the licenses for Mail Handling and Cisco Secure Email Gateway Bounce Verification are available. You cannot activate, deactivate, or release these licenses.

There is no evaluation period or out of compliance for Mail Handling and Cisco Secure Email Gateway Bounce Verification licenses. This is not applicable for virtual email gateways.


What to do next

When the licenses are overused or expired, they will go into out of compliance (OOC) mode and 30-days grace period is provided to each license. You will get notifications on regular intervals (30th, 15th, 5th, and last day) prior to the expiry and also upon the expiry of the OOC grace period.

After the expiry of the OOC grace period, you cannot use the licenses and the features will be unavailable. To access the features again, you must update the licenses on the CSSM portal and renew the authorization.

Deregistering the Email Gateway from Smart Cisco Software Manager

Procedure


Step 1

Choose System Administration > Smart Software Licensing.

Step 2

From the Action drop-down list, choose Deregister and click Go.

Step 3

Click Submit.


Reregistering the Email Gateway with Smart Cisco Software Manager

Procedure


Step 1

Choose System Administration > Smart Software Licensing.

Step 2

From the Action drop-down list, choose Reregister and click Go.


What to do next

See Registering the Email Gateway with Cisco Smart Software Manager to know about registration process.

You can reregister the email gateway after you reset the email gateway configurations during unavoidable scenarios.

Changing Transport Settings

You can change the transport settings only before registering the email gateway with CSSM.


Note


You can change the transport settings only when the smart licensing feature is enabled.If you have already registered your email gateway, you must deregister the email gateway to change the transport settings. After changing the transport settings, you must register the email gateway again.


See Registering the Email Gateway with Cisco Smart Software Manager to know how to change the transport settings.

Renewing Authorization and Certificate

After you register your email gateway with the Smart Cisco Software Manager, you can renew the certificate.


Note


You can renew authorization only after the successful registration of the email gateway.


Procedure


Step 1

Choose System Administration > Smart Software Licensing.

Step 2

From the Action drop-down list, choose the appropriate option:

  • Renew Authorization Now

  • Renew Certificates Now

Step 3

Click Go.


Reserving Feature Licenses

Enabling License Reservation

Before you begin

Make sure you have already enabled the Smart Licensing mode in your email gateway.


Note


You can also enable the feature licenses using the license_smart > enable_reservation sub command in the CLI. For more information, see the ‘Smart Software Licensing’ section in ‘The Commands: Reference Examples’ chapter of the CLI Reference Guide.


Procedure


Step 1

Go to System Administration > Smart Software Licensing page in your email gateway.

Step 2

Select the Specific/Permanent License Reservation option.

Step 3

Click Confirm.


The license reservation (SLR or PLR) is enabled in your email gateway.

What to do next

Registering License Reservation

Before you begin

Make sure you have already enabled the required license reservation (SLR or PLR) in your email gateway.


Note


You can also register the feature licenses using the license_smart > request_code and license_smart > install_authorization_code sub commands in the CLI. For more information, see the ‘Smart Software Licensing’ section in ‘The Commands: Reference Examples’ chapter of the CLI Reference Guide.


Procedure


Step 1

Go to System Administration > Smart Software Licensing page in your email gateway.

Step 2

Click Register.

Step 3

Click Copy Code to copy the request code.

Note

 
You need to use the request code in the CSSM portal to generate an authorization code.

Note

 
A system alert is sent every 24 hours to indicate that you need to install an authorization code.

Step 4

Click Next.

Note

 
The request code is canceled when you click the Cancel button. You cannot install the authorization code (generated in the CSSM portal) in the email gateway. Contact Cisco TAC to assist you in removing the reserved license after the request code is canceled in the email gateway.

Step 5

Go to the CSSM portal to generate an authorization code to reserve licenses for specific or all features.

Note

 
For more information on how to generate an authorization code, go to the Inventory: License Tab > Reserve Licenses section of the Help documentation at Smart Software Licensing Online Help (cisco.com).

Step 6

Paste the authorization code obtained from the CSSM portal in your email gateway in any one of the following ways:

  • Select the Copy and Paste authorizationc code option and paste the authorization code in the text box under the ‘Copy and Paste authorization code’ option.

  • Select the Upload authorization code from the system option and click Choose File to upload the authorization code.

Step 7

Click Install Authorization Code.

Note

 
After you install the authorization code, you receive a system alert that indicates Smart Agent successfully installed the license reservation.

The required license reservation (SLR or PLR) is registered in your email gateway. In SLR, only the reserved license is moved to the ‘Reserved in Compliance’ state. For PLR, all the licenses in the email gateway are moved to the 'Reserved in Compliance’ state.

Note


The ‘Reserved In Compliance:’ state indicates that the email gateway is authorized to use the license.

What to do next

Updating License Reservation

You can reserve license for a new feature or modify the existing license reservation for a feature.


Note


You can only update the Specific License reservations and not the Permanent License reservations.

Note


You can also update the license reservation using the license_smart > reauthorize sub command in the CLI. For more information, see the ‘Smart Software Licensing’ section in ‘The Commands: Reference Examples’ chapter of the CLI Reference Guide.

Procedure


Step 1

Go to the CSSM portal to generate an authorization code to update the already reserved licenses.

Note

 
For more information on how to generate an authorization code, go to the Inventory: Product Instances Tab > Update Reserved Licenses section of the Help documentation at Smart Software Licensing Online Help (cisco.com).

Step 2

Copy the authorization code obtained from the CSSM portal.

Step 3

Go to System Administration > Smart Software Licensing page in your email gateway.

Step 4

Select Reauthorize from the 'Action' drop-down list and click GO.

Step 5

Paste the authorization code obtained from the CSSM portal in your email gateway in any one of the following ways:

  • Select the Copy and Paste authorization code option and paste the authorization code in the text box under the ‘Copy and Paste authorization code’ option.

  • Select the Upload authorization code from the system option and click Choose File to upload the authorization code.

Step 6

Click Re-authorize.

Step 7

Click Copy Code to copy the confirmation code.

Note

 
You need to use the confirmation code in the CSSM portal to update the license reservations.

Step 8

Click OK.

Step 9

Add the confirmation code obtained from the email gateway in the CSSM portal.

Note

 
For more information on how to add the confirmation code, go to the Inventory: Product Instances Tab > Update Reserved Licenses section of the Help documentation at Smart Software Licensing Online Help (cisco.com).

The license reservations are updated. The reserved license is moved to the 'Reserved in Compliance' state. The licenses that are not reserved are moved to the "Not Authorized" state.

Note


The ‘Not Authorized’ state indicates that the email gateway has not reserved any feature licenses.

What to do next

Removing License Reservation

You can remove the specific or permanent license reservation for the features enabled in your email gateway.


Note


You can also remove the license reservation using the license_smart > return_reservation sub command in the CLI. For more information, see the ‘Smart Software Licensing’ section in ‘The Commands: Reference Examples’ chapter of the CLI Reference Guide.

Procedure


Step 1

Go to System Administration > Smart Software Licensing page in your email gateway.

Step 2

Select Return code from the 'Action' drop-down list and click GO.

Step 3

Click Copy Code to copy the return code.

Note

 
You need to use the return code in the CSSM portal to remove the license reservations.

Note

 
An alert is sent to the user to indicate that Smart Agent successfully generated the return code for the product.

Step 4

Click OK.

Step 5

Add the return code obtained from the email gateway in the CSSM portal.

Note

 
For more information on how to add the return code, go to the Inventory: Product Instances Tab > Removing a Product Instance section of the Help documentation at Smart Software Licensing Online Help (cisco.com).

The licenses reserved in your email gateway are removed and moved to the evaluation period.

Note


If you have already installed the authorization code and enabled license reservation, the device is automatically moved to the 'registered' state with a valid license.

Disabling License Reservation

You can disable the license reservation in your email gateway.


Note


You can also disable the license reservation using the license_smart > disable_reservation sub command in the CLI. For more information, see the ‘Smart Software Licensing’ section in ‘The Commands: Reference Examples’ chapter of the CLI Reference Guide.

Procedure


Step 1

Go to System Administration > Smart Software Licensing page in your email gateway.

Step 2

Click Change Type under the ‘Registration Mode’ field.

Step 3

Click Submit in the ‘Change registration mode’ dialog box.

Note

 
  • After you generate a request code and you disable the license reservation, the generated request code is canceled automatically.

  • After you install the authorization code and disable the license reservation, the reserved license is maintained in the email gateway.

  • If an authorization code is installed and the Smart Agent is in the Authorized state, it moves back to the ‘Unidentified’ (enabled) state.


The license reservation is disabled on your email gateway.

Alerts

You will receive notifications on the following scenarios:

  • Smart Software Licensing successfully enabled

  • Smart Software Licensing enabling failed

  • Beginning of the evaluation period

  • Expiry of evaluation period (on regular intervals during evaluation period and upon expiry)

  • Successfully registered

  • Registration failed

  • Successfully authorized

  • Authorization failed

  • Successfully deregistered

  • Deregistration failed

  • Successfully renewed Id certificate

  • Renewal of Id certificate failed

  • Expiry of authorization

  • Expiry of Id certificate

  • Expiry of out of compliance grace period (on regular intervals during out of compliance grace period and upon expiry)

  • First instance of the expiry of a feature

  • [Applicable for SLR and PLR only]: Authorization code is installed after generation of request code.

  • [Applicable for SLR and PLR only]: Authorization code is installed successfully.

  • [Applicable for SLR and PLR only]: Return code is generated successfully.

  • [Applicable for SLR only]: Reservation of specific feature license is expired.

  • [Applicable for SLR only]: Frequency of alerts sent before expiry of specific feature license reserved.

Updating Smart Agent

To update the Smart Agent version installed on your email gateway, perform the following steps:

Procedure


Step 1

Choose System Administration > Smart Software Licensing.

Step 2

In the Smart Agent Update Status section, click Update Now and follow the process.

Note


If you try to save any configuration changes using the CLI command saveconfig or through the web interface using System Administration > Configuration Summary, then Smart Licensing related configuration will not be saved.


Smart Licensing in Cluster Mode

In a clustered configuration, you can enable smart software licensing and register all the machines simultaneously with the Cisco Smart Software Manager.

Procedure:

  1. Switch from the cluster mode to the machine mode in the logged-in email gateway.

  2. Go to System Administration > Smart Software Licensing page.

  3. Click Enable.

  4. Check the Enable Smart Software Licensing on all machines in the cluster check box.

  5. Click OK.

  6. Check the Register Smart Software Licensing across machines in cluster check box.

  7. Click Register.


Note


You can use the license_smart command in the CLI to enable smart software licensing and register all the machines simultaneously with the Cisco Smart Software Manager.

Note


The cluster management of smart licensing feature happens only in the machine mode. In smart licensing cluster mode, you can log into any of the appliances and configure smart licensing feature. You can log into an email gateway and access other email gateways one by one in the cluster and configure the smart licensing feature without logging off from the first email gateway.


Note


In a clustered configuration, you can also enable smart software licensing and register all the machines individually with the Cisco Smart Software Manager. In smart licensing cluster mode, you can log into any of the email gateways and configure smart licensing feature. You can log into an email gateway and access other email gateways one by one in the cluster and configure the smart licensing feature without logging off from the first email gateway.

For more information, see Centralized Management Using Clusters chapter in the User Guide for AsyncOS for Cisco Secure Email Gateway.

Enabling License Reservation in Cluster Mode

You can enable the license reservation for all machines in the cluster.


Note


You can also enable the license reservation for all machines in the cluster using the license_smart > enable_reservation sub command in the CLI. For more information, see the ‘Smart Software Licensing’ section in ‘The Commands: Reference Examples’ chapter of the CLI Reference Guide.

Procedure


Step 1

Switch from the cluster mode to the machine mode in the logged-in email gateway.

Step 2

Go to System Administration > Smart Software Licensing page in your logged-in email gateway.

Step 3

Select the Specific/Permanent License Reservation option.

Step 4

Select the Enable license reservation for all machines in the cluster check box.

Step 5

Click Confirm.

The license reservation is enabled for all machines in the cluster.

Step 6

Refer to the procedure in Registering License Reservation to reserve the feature licenses for the logged-in email gateway.

Step 7

[Optional] Repeat step 6 for all other machines in the cluster.


What to do next

  • [Applicable for SLR only]: You can update the license reservation for all the machines in the cluster, if required. For more information, see Updating License Reservation.

Disabling License Reservation in Cluster Mode

You can disable the license reservation for all machines in the cluster.


Note


You can also disable the license reservation for all machines in the cluster using the license_smart > disable_reservation sub command in the CLI. For more information, see the ‘Smart Software Licensing’ section in ‘The Commands: Reference Examples’ chapter of the CLI Reference Guide.

Procedure


Step 1

Go to System Administration > Smart Software Licensing page in your logged-in email gateway.

Step 2

Select the Disable license reservation for all machines in the cluster check box.

Step 3

Click Change Type under the ‘Registration Mode’ field.

Step 4

Click Submit in the ‘Change registration mode’ dialog box.


The license reservation is disabled for all machines in the cluster.

References

Product

Location

Cisco Smart Software Manager

https://software.cisco.com/

Cisco Smart Software Licensing

https://www.cisco.com/c/en_my/products/software/smart-accounts/software-licensing.html

Cisco Software Licensing Guide

https://www.cisco.com/c/en/us/buy/licensing/licensing-guide.html

Cisco Smart Licensing Support FAQs

https://www.cisco.com/c/en/us/support/licensing/licensing-support.html

Cisco Smart Accounts

http://www.cisco.com/c/en/us/buy/smart-accounts.html

User Guide for AsyncOS for Cisco Secure Email Gateway

https://www.cisco.com/c/en/us/support/security/email-security-appliance/products-user-guide-list.html

CLI Reference Guide for AsyncOS for Cisco Secure Email Gateway

https://www.cisco.com/c/en/us/support/security/email-security-appliance/products-command-reference-list.html

Cisco Privacy and Security Compliance

http://www.cisco.com/web/about/doing_business/legal/privacy_compliance/index.html

Cisco Transport Gateway User Guide

http://www.cisco.com/c/dam/en/us/td/docs/switches/lan/smart_call_home/user_guides/SCH_Ch4.pdf