End-to-End Procedure
|
Workspace |
Steps |
|
|---|---|---|
|
|
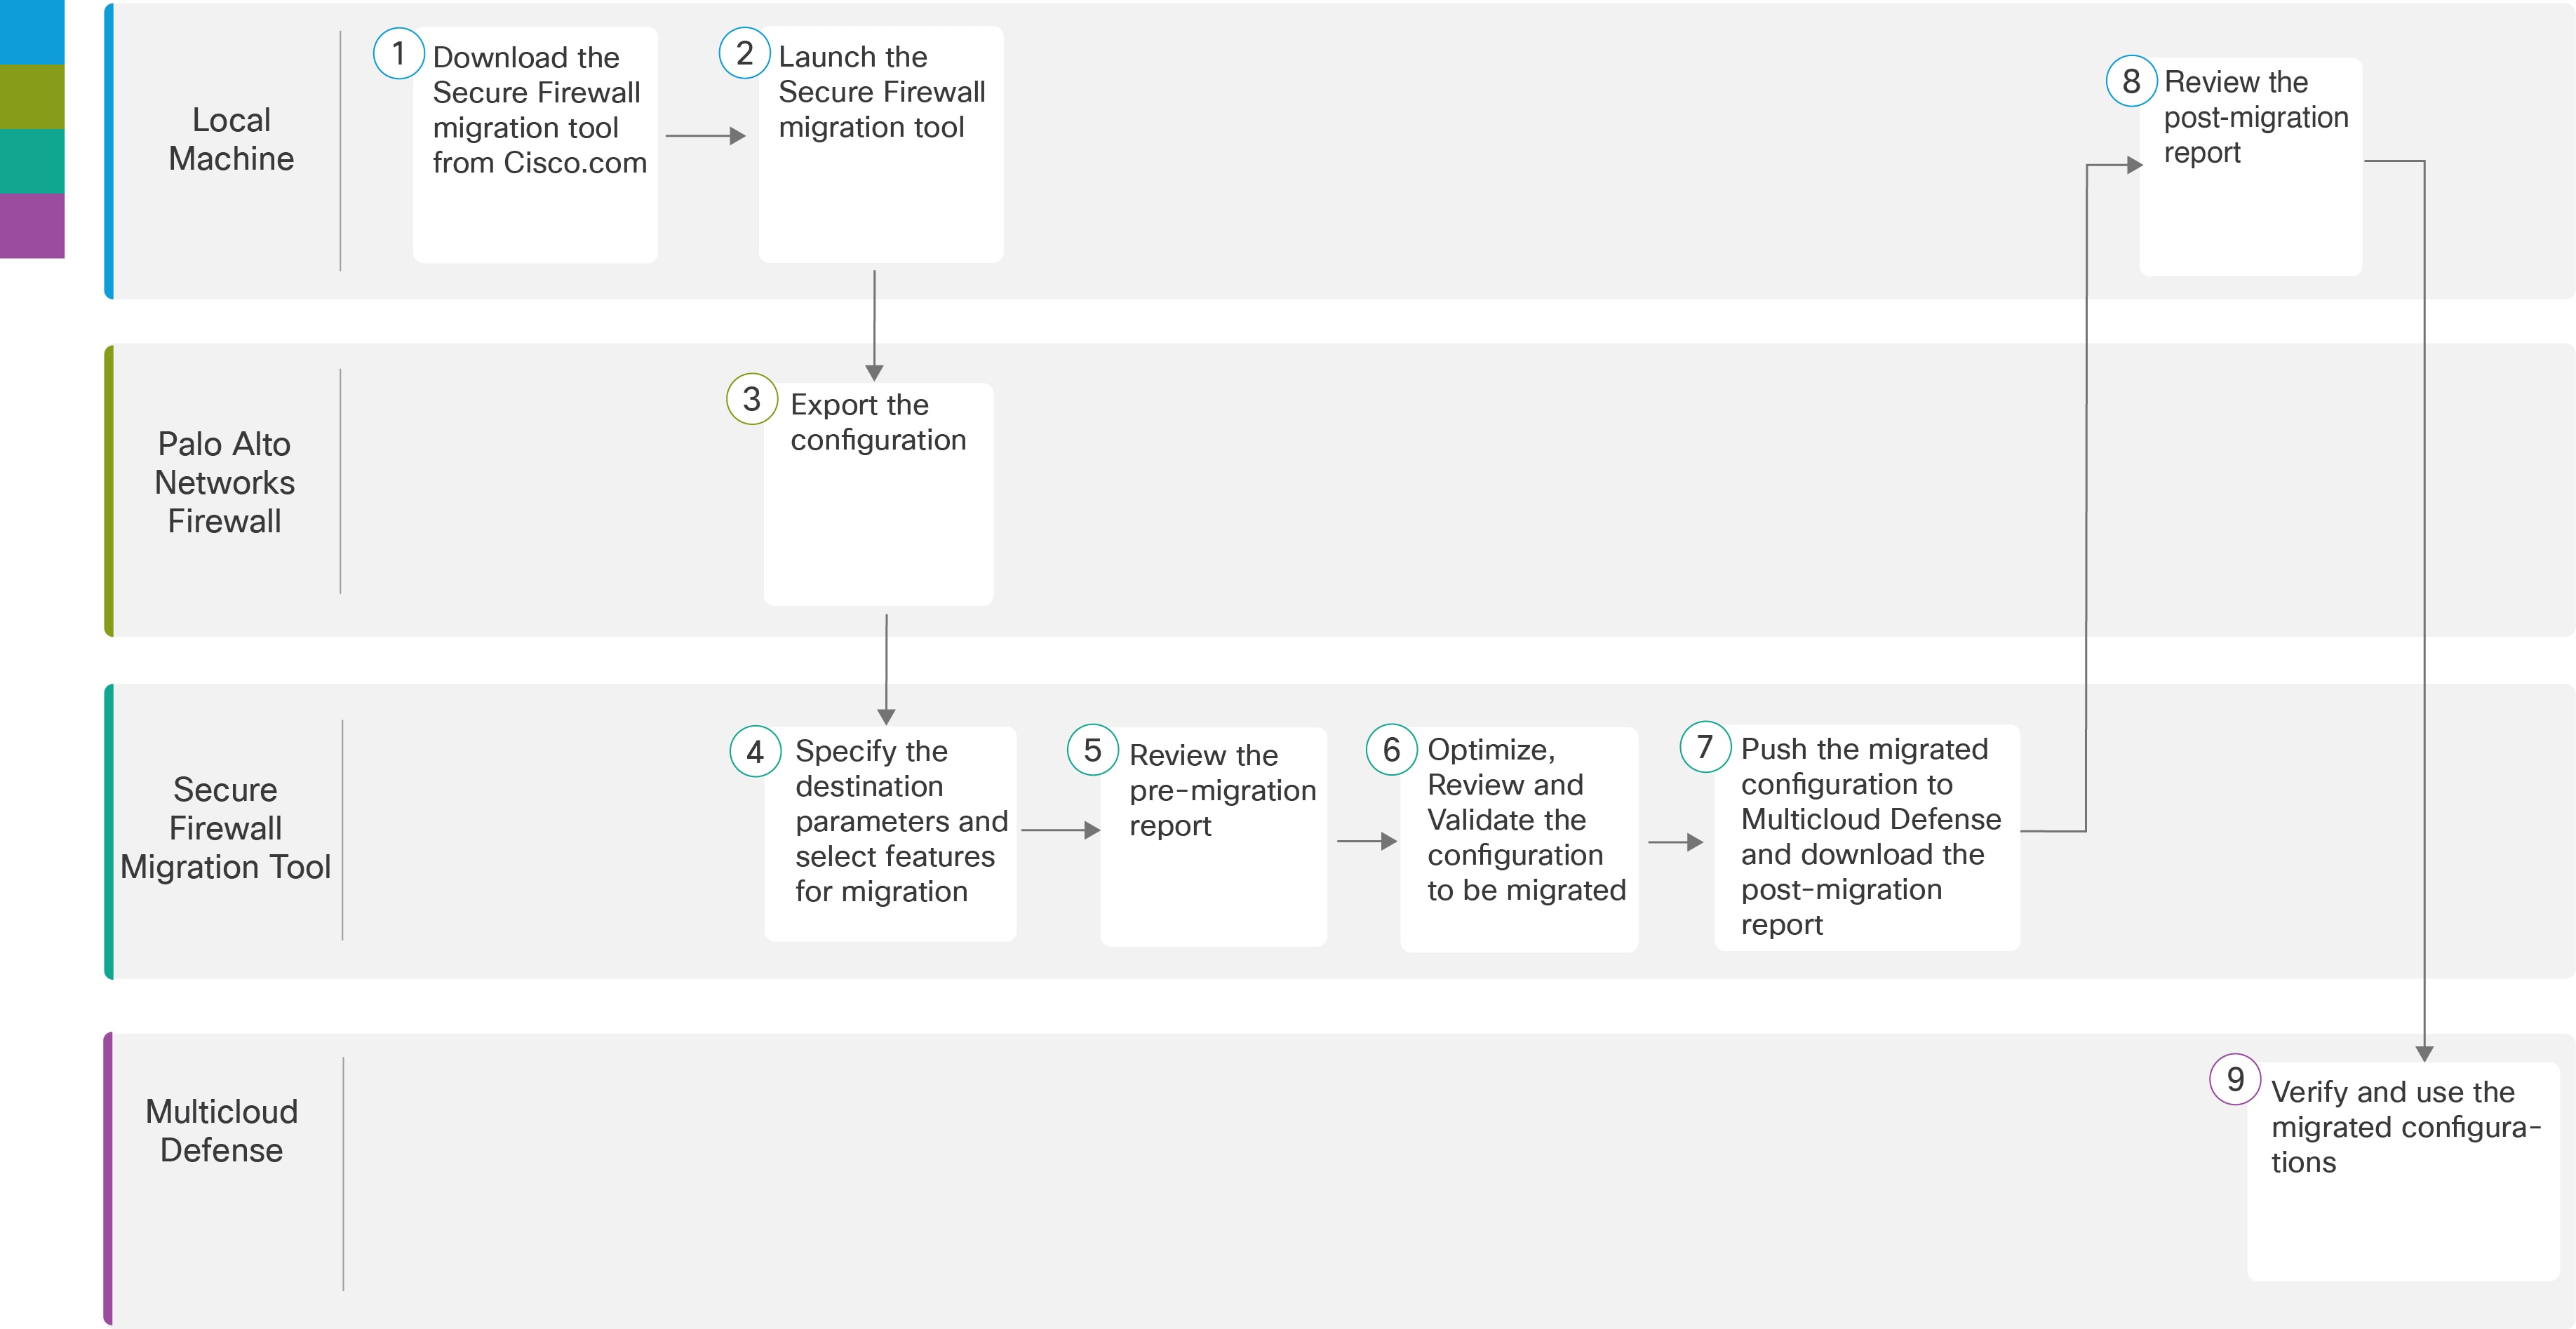
Local machine |
Download the latest version of Secure Firewall migration tool from Cisco.com. For detailed steps, see Download the Secure Firewall migration tool from Cisco.com. |
|
|
Local Machine |
In the local machine, initiate the Secure Firewall Migration tool by double-clicking on the application file that you downloaded from Cisco.com. |
|
|
Palo Alto Networks Firewall |
Export the Configuration File: To export the configuration from Palo Alto Networks Firewall, see Export the Configuration from Palo Alto Networks Firewall. |
|
|
Secure Firewall Migration Tool |
During this step, you can specify the destination parameters for Multicloud Defense. For detailed steps, see Specify Destination Parameters for Multicloud Defense. |
|
|
Secure Firewall migration tool |
Navigate to where you downloaded the pre migration report and review the report. For detailed steps, see Review the Pre-Migration Report. |
|
|
Secure Firewall Migration Tool |
Optimize and review the configuration carefully and validate that it is correct. For detailed steps, see Optimize, Review, and Validate the Configuration to be Migrated. |
|
|
Secure Firewall Migration Tool |
This step in the migration process sends the migrated configuration to Multicloud Defense and allows you to download the post-migration report. For detailed steps, see Push the Configuration to Multicloud Defense. |
|
|
Local Machine |
Navigate to where you downloaded the post migration report and review the report. For detailed steps, see Review the Post-Migration Report and Complete the Migration. |
|
|
Multicloud Defense |
Verify the migrated configurations and use them as required in configuring gateways. |


 Feedback