Using DMM-DSM for Digital Signage

Tip ![]() Features in DMM-DSM are available to you if you purchased and installed the required license. For information about licensing, see "Using DMM-Admin to Install Licenses."
Features in DMM-DSM are available to you if you purchased and installed the required license. For information about licensing, see "Using DMM-Admin to Install Licenses."
The simple, flexible, and centralized management and publishing features in DMM-DSM help you to deliver compelling digital media to your networked, on-premise DMP displays for many possible purposes, including:
•![]() Marketing — Describe products and services directly to your in-store customers.
Marketing — Describe products and services directly to your in-store customers.
•![]() Customer experience — Deliver entertainment and information to reduce perceived wait times.
Customer experience — Deliver entertainment and information to reduce perceived wait times.
•![]() Messaging — Broadcast executive and internal communications in real time.
Messaging — Broadcast executive and internal communications in real time.
•![]() Training — Deliver cost-effective, flexible training.
Training — Deliver cost-effective, flexible training.
•![]() Information — Deliver real-time schedules, news, and way-faring information where people need it.
Information — Deliver real-time schedules, news, and way-faring information where people need it.
•![]() Advertising — Sell advertising time and space to third parties.
Advertising — Sell advertising time and space to third parties.
•![]() Branding — Communicate about your brand consistently.
Branding — Communicate about your brand consistently.
This chapter describes DMM-DSM features and options in these sections:
•![]() Creating and Categorizing Digital Signage Content
Creating and Categorizing Digital Signage Content
•![]() Using Digital Signage Applications
Using Digital Signage Applications
•![]() Delivering Saved Commands and Content Files to Your DMPs
Delivering Saved Commands and Content Files to Your DMPs
•![]() Common Scenarios for Using DMM-DSM
Common Scenarios for Using DMM-DSM
•![]() Understanding and Using DMP Status Report Charts
Understanding and Using DMP Status Report Charts
Managing and Grouping DMPs
You can organize your DMPs in groups and manage them collectively instead of managing only one DMP at a time. We recommend that you create DMP groups to organize your DMPs according to characteristics that they have in common, such as where or how you will use them, but you can group your DMPs according to whatever logic works best for you. For example, the logical basis for your DMP groups might be geographic (by state, province, or metropolitan area) or corporate (by product team, sales region, time zone, primary spoken language, or type of facility), as in this illustration:


Timesaver ![]() DMM-DSM includes a feature to autoregister your DMPs, so that you do not have to register each DMP manually. Autoregistration finds every DMP in the subnets that you specify, configures those DMPs to know and trust the IP address for your DMM appliance, restarts the DMPs, and registers them in DMM-DSM for centralized management. To learn how to use autoregistration, see the "{Add New | Edit} DMP Group" row in Table 3-1.
DMM-DSM includes a feature to autoregister your DMPs, so that you do not have to register each DMP manually. Autoregistration finds every DMP in the subnets that you specify, configures those DMPs to know and trust the IP address for your DMM appliance, restarts the DMPs, and registers them in DMM-DSM for centralized management. To learn how to use autoregistration, see the "{Add New | Edit} DMP Group" row in Table 3-1.
Step 1 ![]() Select Digital Signage Module from the untitled list at the top far-right of any page.
Select Digital Signage Module from the untitled list at the top far-right of any page.
Step 2 ![]() Select Site Manager > DMP Manager.
Select Site Manager > DMP Manager.
Step 3 ![]() Select the options or enter the values that meet your requirements.
Select the options or enter the values that meet your requirements.
When you make selections anywhere on the DMP Manager page, it is updated automatically to show the options and features that are relevant to your selection. If you do not understand your options, see Table 3-1.
Step 4 ![]() (Optional) To configure a DMP to recognize the authority of your DMM appliance if it does not already recognize that authority, do the following:
(Optional) To configure a DMP to recognize the authority of your DMM appliance if it does not already recognize that authority, do the following:
a. ![]() Open another browser but do not close the browser that you have been using to work in DMM-DSM.
Open another browser but do not close the browser that you have been using to work in DMM-DSM.
b. ![]() To log in to DMPDM on the DMP, point your new browser to the DMP IP address and enter its administrator username and password at the login prompt.
To log in to DMPDM on the DMP, point your new browser to the DMP IP address and enter its administrator username and password at the login prompt.
c. ![]() In the Settings area, click DMM, then enter the required values:
In the Settings area, click DMM, then enter the required values:
•![]() DMM Host — The IP address of your DMM appliance.
DMM Host — The IP address of your DMM appliance.
•![]() Timeout (Seconds) — The maximum number of seconds that your DMP should wait for a response from your DMM appliance.
Timeout (Seconds) — The maximum number of seconds that your DMP should wait for a response from your DMM appliance.
d. ![]() To confirm your DMPDM entries and to implement them until you change them or until you restart the DMP, click Apply.
To confirm your DMPDM entries and to implement them until you change them or until you restart the DMP, click Apply.
e. ![]() To make your configuration changes permanent even after you reboot your DMP, click Save Configuration, then (after you see the Save Configuration page) click Save.
To make your configuration changes permanent even after you reboot your DMP, click Save Configuration, then (after you see the Save Configuration page) click Save.
f. ![]() Close the browser that you used to work in DMPDM and return to the browser where you have been working in DMM-DSM.
Close the browser that you used to work in DMPDM and return to the browser where you have been working in DMM-DSM.
Step 5 ![]() Click Reboot DMP, then (after you see the Reboot DMM page) click Reboot.
Click Reboot DMP, then (after you see the Reboot DMM page) click Reboot.

Note ![]() Important considerations apply to your digital signage network if any of your DMPs uses an HTTP proxy server. It is unusual and not scalable to manage many DMPs that share one HTTP proxy server. We recommend that you do not use proxies.
Important considerations apply to your digital signage network if any of your DMPs uses an HTTP proxy server. It is unusual and not scalable to manage many DMPs that share one HTTP proxy server. We recommend that you do not use proxies.
•![]() We recommend that you use Web Cache Communication Protocol (WCCP) to reroute HTTP requests transparently, instead of using a proxy server. To learn how to use WCCP if you do not already know how, see Cisco.com.
We recommend that you use Web Cache Communication Protocol (WCCP) to reroute HTTP requests transparently, instead of using a proxy server. To learn how to use WCCP if you do not already know how, see Cisco.com.
•![]() To configure one DMP to use one proxy server, use DMPDM, not DMM-DSM. See the "Adjusting Basic Network Settings" topic in User Guide for Cisco Digital Media Player Device Manager 1.0 on Cisco.com.
To configure one DMP to use one proxy server, use DMPDM, not DMM-DSM. See the "Adjusting Basic Network Settings" topic in User Guide for Cisco Digital Media Player Device Manager 1.0 on Cisco.com.
•![]() To configure many DMPs to share one proxy server, even though we recommend that you do not, Click System Tasks in the list of all applications under the Applications tab, then click
To configure many DMPs to share one proxy server, even though we recommend that you do not, Click System Tasks in the list of all applications under the Applications tab, then click ![]() ("Add New Application"). Enter a name and description, then select Set from the Request Type list and use this syntax in the Request text box:
("Add New Application"). Enter a name and description, then select Set from the Request Type list and use this syntax in the Request text box: init.BROWSER_PROXY=<on | off>&init.BROWSER_PROXY_IP=<proxy_server_IP_address>&init.BROWSER_PROXY_PORT=<proxy_server_logical_port>.
For example, if the proxy server uses 192.168.12.12 as its IP address and delivers proxy services through port 5678, the Request string would look like this: init.BROWSER_PROXY=on&init.BROWSER_PROXY_IP=192.168.12.12&init.BROWSER_PROXY_PORT=5678&mib.save=1&mng.reboot=1.
To remove that example proxy, you would select Set from the Request type list, then enter this Request string: init.BROWSER_PROXY_IP=&init.BROWSER_PROXY_PORT=&init.BROWSER_PROXY=off
&mib.save=1&mng.reboot=1.
|
|
|
|---|---|
DMP Groups |
A hierarchical tree (an object selector) of DMP groups, subgroups, and DMPs. From the object selector, you can add or remove group assignments for registered DMPs, create new groups, edit existing groups, and make selections for which DMPs the DMP List pane should describe. One group can contain another and the choices that you make for centralized management propagate from parent (DMP group), to child (DMP subgroup or DMP), to grandchild (DMP). There is no maximum number of levels that you can add to the hierarchy, but a simpler organization is more scalable than an unreasonably complex one would be. We recommend that you do not assign any DMP to the root level in the hierarchy, due to the complexity of management, but you can if you choose to. • • • • • • |
DMP List |
A list of all DMPs contained in (or under) the level that you clicked in the DMP Groups object selector. To see a list of every registered DMP, click the group that represents the root level of your digital signage network. • • • • • 1. 2. 3. 4.
• 1. 2. 3. 4.
• – – – – – |
{Add New | Edit} DMP Group |
You can create or edit a DMP group. You must specify the group name and description. In addition, you can populate the group automatically with all the DMPs in any CIDR address range that you specify.1 
Caution Options are as follows: • • • • • •
Note Autodiscovery operations follow this sequence: 1. 2. Note 3. 4. 5. |
{Add New | Edit} DMP |
Note Make selections and enter required values to add one DMP manually: • • • • |
1 You can schedule multiple DMP discovery operations to run simultaneously if they all search the same one subnet. If the DMP discovery operations that you configure do not all search the same one subnet, you should not schedule them to run simultaneously. If you do, only the first such operation will run and DMM-DSM will not show any error message to explain why the other discovery operations failed to find any DMPs. If you must run DMP discovery tasks that search different subnets, schedule a 35-minute interval between the start time for one discovery and the start time for the next discovery. (In a very large network that contains thousands of DMPs, the required interval might be longer than 35 minutes.) |
(Optional) To configure your DMPs to recognize the authority of your DMM appliance, do the following for each centrally managed DMP in your digital signage network:
a. ![]() To log in to the embedded device management software, point your browser to the DMP IP address.
To log in to the embedded device management software, point your browser to the DMP IP address.
b. ![]() At the login prompt, enter the username and the password that you configured for the DMP.
At the login prompt, enter the username and the password that you configured for the DMP.
c. ![]() In the Settings area, click DMM, then enter the required values:
In the Settings area, click DMM, then enter the required values:
· DMM Host — The IP address of your DMM server appliance.
· Timeout (Seconds) — The maximum number of seconds that your DMP should wait for a response from your DMM appliance.
d. ![]() To confirm your entries and to implement them until you change them or until you restart the DMP, click Apply.
To confirm your entries and to implement them until you change them or until you restart the DMP, click Apply.
e. ![]() To make your configuration changes permanent even after you reboot your DMP, click Save Configuration, then (after you see the Save Configuration page) click Save.
To make your configuration changes permanent even after you reboot your DMP, click Save Configuration, then (after you see the Save Configuration page) click Save.
Click Reboot DMP, then (after you see the Reboot DMM page) click Reboot.
Creating and Categorizing Digital Signage Content
You can organize your content offerings in categories for simplified management. We recommend that you create categories for sets of characteristics that your media files have in common — such as their filetype, intended audience, or genre.
Step 1 ![]() Select Digital Signage Module from the untitled list at the top far-right of any page.
Select Digital Signage Module from the untitled list at the top far-right of any page.
Step 2 ![]() Select Content Manager > Media Library.
Select Content Manager > Media Library.
Using Digital Signage Applications
Topics in this section tell you how to use features under the Applications tab:
•![]() Creating and Organizing Digital Signage Playlists
Creating and Organizing Digital Signage Playlists
•![]() Working with Flash Applications
Working with Flash Applications
•![]() Using Other DMM-DSM Applications
Using Other DMM-DSM Applications
Creating and Organizing Digital Signage Playlists
You can create and organize playlists to deliver MPEG files to your DMPs (as one part of a zoning application) and you can edit a playlist after you create it. A playlist contains MPEG files from one or more content categories and shows the MPEG files in sequence on your DMP displays.
Tip ![]() Your screen resolution settings might obscure part of the DMM-DSM user interface for managing playlists and you might notice that horizontal and vertical scrolling are required even when your browser is maximized. We recommend in this case that you use the settings for a higher screen resolution. If you prefer not to change your screen resolution settings, you can press F11 in your browser at any time to use your browser in full-screen mode. To exit full-screen mode, press F11 again.
Your screen resolution settings might obscure part of the DMM-DSM user interface for managing playlists and you might notice that horizontal and vertical scrolling are required even when your browser is maximized. We recommend in this case that you use the settings for a higher screen resolution. If you prefer not to change your screen resolution settings, you can press F11 in your browser at any time to use your browser in full-screen mode. To exit full-screen mode, press F11 again.
Before You Begin
•![]() You must add MPEG files to your media library before you can organize them in a playlist and deliver that playlist to your DMPs as part of a zoning application. See the "{Add New | Edit} Content" row in Table 3-2.
You must add MPEG files to your media library before you can organize them in a playlist and deliver that playlist to your DMPs as part of a zoning application. See the "{Add New | Edit} Content" row in Table 3-2.
•![]() You must add a DMP to DMM-DSM before you can deploy any playlists to it, and you must organize your DMPs into groups before you can deploy any playlist to multiple DMPs simultaneously. The DMP Groups list does not show any DMPs until you add at least one. See Managing and Grouping DMPs.
You must add a DMP to DMM-DSM before you can deploy any playlists to it, and you must organize your DMPs into groups before you can deploy any playlist to multiple DMPs simultaneously. The DMP Groups list does not show any DMPs until you add at least one. See Managing and Grouping DMPs.
•![]() You must add an external publishing server to DMM-DSM before you can deploy any playlists to it. The DMP Groups list does not show any external publishing servers until you add at least one. See Configuring DMM-DSM to Use External Publishing Servers.
You must add an external publishing server to DMM-DSM before you can deploy any playlists to it. The DMP Groups list does not show any external publishing servers until you add at least one. See Configuring DMM-DSM to Use External Publishing Servers.
Step 1 ![]() Select Digital Signage Module from the untitled list at the top far-right of any page.
Select Digital Signage Module from the untitled list at the top far-right of any page.
Step 2 ![]() Select Applications > Full Applications List > Playlists, then do one of the following:
Select Applications > Full Applications List > Playlists, then do one of the following:
•![]() To create a new playlist, click
To create a new playlist, click ![]() .
.
•![]() To edit a playlist that you created previously, click its name to highlight it in the table, then click
To edit a playlist that you created previously, click its name to highlight it in the table, then click ![]() .
.
The right pane is refreshed. Depending on the icon that you clicked, the pane is named either "Create New Playlist" or "Change Playlist."
Step 3 ![]() Enter the values or select the options that meet your requirements and add, remove, or rearrange MPEG files in the playlist. If you do not understand the options, see Table 3-3.
Enter the values or select the options that meet your requirements and add, remove, or rearrange MPEG files in the playlist. If you do not understand the options, see Table 3-3.
Step 4 ![]() To save the playlist that you configured, click Submit.
To save the playlist that you configured, click Submit.
Step 5 ![]() (Optional) Deploy the playlist to one or more DMPs or to one or more external publishing servers:
(Optional) Deploy the playlist to one or more DMPs or to one or more external publishing servers:
a. ![]() Create a zoning application and assign this playlist to the video zone. See Working with Screen Zones.
Create a zoning application and assign this playlist to the video zone. See Working with Screen Zones.
b. ![]() Click the Publisher tab.
Click the Publisher tab.
c. ![]() Decide whether to deploy the playlist immediately or at a later time, then do one of the following. (Alternatively, see the detailed procedures in Delivering Commands or Content Files Immediately, and Scheduling Future Deliveries of Commands or Content Files.)
Decide whether to deploy the playlist immediately or at a later time, then do one of the following. (Alternatively, see the detailed procedures in Delivering Commands or Content Files Immediately, and Scheduling Future Deliveries of Commands or Content Files.)
|
|
|
|
|---|---|---|
Step 1 |
Click Scheduler. |
Click Immediate. |
Step 2 |
From the Applications list, select a zoning application that contains the playlist. |
In the DMP Groups object selector, click the name of a DMP group to see its member DMPs in the DMP List table. Note |
Step 3 |
From the DMP Groups list, select the DMP group that should show the playlist. Alternatively, you can select an external publishing server from the DMP Groups list. Note |
In the DMP List table, select the check box for each DMP that should show MPEG files from the playlist. |
Step 4 |
From the How Often list, select an option to control the interval between showings. |
From the Actions list, select the name of the zoning application that contains the playlist. |
Step 5 |
Click Select Target Date, then select the calendar date for the first showing. |
Click Go. |
Step 6 |
In the From area, click |
|
Step 7 |
In the To area, click |
|
Step 8 |
Click Save, then click Publish. |
|
|
|
|
|---|---|
Name |
A unique and human-readable name for the MPEG playlist. The name is unique in the sense that you have not used it as the name for any other application that you created in DMM-DSM. |
Description |
A brief description of the MPEG playlist and its purpose. |
Play |
Select whether the MPEG playlist should play repeatedly from start to finish: • • |
Content Categories |
An object selector that lists all the content categories in your media library. From the object selector, click the one category that the Available Content table should describe. To learn more about content categories, see Creating and Categorizing Digital Signage Content. • • • |
Available Content |
Describes every available MPEG file in the content category that you clicked. Click any other content category to see different MPEG files in the Available Content table. One table row describes one MPEG file. An MPEG file is considered available if it is not already included in the playlist that you are creating or editing. You can move files from the Available Content table to the Selected Content table. To select a file, click it. The elements and options are: • • • • • • • • • • |
Selected Content |
Describes every MPEG file in the playlist that you are creating or editing. The elements and options are: • • • • • • • • • • Note |
Working with Flash Applications
You can show a full-screen Adobe (Macromedia) Flash 6 content file on the DMP displays in a DMP group that you specify or throughout your entire digital signage network. Alternatively, you can show a Flash 6 file at full-screen on just one DMP display. The filename extension must be SWF.
Before You Begin
You must add the Flash content file to your media library before you can deliver it to your DMPs. See the "{Add New | Edit} Content" row in Table 3-2.
Step 1 ![]() Select Digital Signage Module from the untitled list at the top far-right of any page.
Select Digital Signage Module from the untitled list at the top far-right of any page.
Step 2 ![]() Select Applications > Flash, then do one of the following in the left pane:
Select Applications > Flash, then do one of the following in the left pane:
•![]() To create a new Flash application, click
To create a new Flash application, click ![]() .
.
•![]() To edit a Flash application that you created previously, click its name.
To edit a Flash application that you created previously, click its name.
•![]() To delete a Flash application, click its name, click
To delete a Flash application, click its name, click ![]() , then click Submit to confirm the deletion.
, then click Submit to confirm the deletion.
The right pane is refreshed. Depending on the icon that you clicked, the pane is named either "Add New Full Screen Flash Application" or "Change Full Screen Flash Application."
Step 3 ![]() Enter a name and a description for the application.
Enter a name and a description for the application.
Step 4 ![]() Select a content category in the object selector.
Select a content category in the object selector.
Step 5 ![]() To select or change the SWF (Flash 6) file that this Flash application uses, click anywhere in the corresponding row to select one SWF file.
To select or change the SWF (Flash 6) file that this Flash application uses, click anywhere in the corresponding row to select one SWF file.
Step 6 ![]() Click Submit.
Click Submit.
|
|
|
|---|---|
Name |
A unique and human-readable name for the Flash application. The name is unique in the sense that you have not used it as the name for any other application that you created in DMM-DSM. |
Description |
A brief description of the Flash application and its purpose. |
Content Categories |
An object selector that lists all the content categories in your media library. From the object selector, click the one category that the Available Content table should describe. To learn more about content categories, see Creating and Categorizing Digital Signage Content. • • • |
Available Content |
Describes every available content item in the content category that you clicked. Click any other content category to see different content items in the Available Content table. One table row describes one file. To select a file, click anywhere in the corresponding row. • • • • • • • • • |
Working with Screen Zones
You can show several types of content simultaneously on a DMP display after you divide its screen virtually into distinct areas called screen zones. The predesigned zoning template that you select in a zoning application determines whether there are two, three, or four zones, and you can also select the actual media files and messages to show in each zone.
After you create or edit a screen zone application, you can publish it to your DMPs, each of which restarts automatically.
Before You Begin
•![]() You must already have created and saved the content files that you will show. See Creating and Categorizing Digital Signage Content.
You must already have created and saved the content files that you will show. See Creating and Categorizing Digital Signage Content.
•![]() You must already have created at least one playlist, so that you can make a selection for the video zone. See Creating and Organizing Digital Signage Playlists.
You must already have created at least one playlist, so that you can make a selection for the video zone. See Creating and Organizing Digital Signage Playlists.
•![]() Confirm that none of the individual content files that you will show has a filesize any larger than 1.9 GB. If any file has a larger filesize, the screen zone that should show the file shows nothing and your DMP device logs describe many errors.
Confirm that none of the individual content files that you will show has a filesize any larger than 1.9 GB. If any file has a larger filesize, the screen zone that should show the file shows nothing and your DMP device logs describe many errors.
•![]() You must already have created the DMP group whose member DMPs should show the content. See Managing and Grouping DMPs.
You must already have created the DMP group whose member DMPs should show the content. See Managing and Grouping DMPs.
Step 1 ![]() Select Digital Signage Module from the untitled list at the top far-right of any page.
Select Digital Signage Module from the untitled list at the top far-right of any page.
Step 2 ![]() Select Applications > Zoning, then select the options that meet your requirements. If you do not understand your options, see Table 3-5.
Select Applications > Zoning, then select the options that meet your requirements. If you do not understand your options, see Table 3-5.
Because content files from a zoning application serve as the basis for stage-one failover on DMPs — see the "Understanding Content Substitution (Failover)" topic in User Guide for Cisco Digital Media Player Device Manager 1.0 on Cisco.com — we recommend that the combined size of all content files should not exceed 900 MB for a zoning application. If the combined filesize is more than 900 MB, only stage-two failover is available.
Step 3 ![]() Click Submit.
Click Submit.
Step 4 ![]() (Optional) Publish the zoning application. See Delivering Saved Commands and Content Files to Your DMPs.
(Optional) Publish the zoning application. See Delivering Saved Commands and Content Files to Your DMPs.
Note![]() •
•![]() After you publish a zoning application, DMM-DSM automatically creates a Go to URL application. The name by default for the Go to URL application is failover — <name_of_zoning_application>. If your DMPs should use content files from the zoning application as their files to show during stage-one failover, you must publish the corresponding Go to URL application.
After you publish a zoning application, DMM-DSM automatically creates a Go to URL application. The name by default for the Go to URL application is failover — <name_of_zoning_application>. If your DMPs should use content files from the zoning application as their files to show during stage-one failover, you must publish the corresponding Go to URL application.
•![]() After you delete a zoning application, you must also delete its corresponding Go to URL application.
After you delete a zoning application, you must also delete its corresponding Go to URL application.
|
|
|
|---|---|
Name |
A unique and human-readable name for this zoning application. You must enter a name. The name is unique in the sense that you have not used it as the name for any other application that you created in DMM-DSM. |
Description |
A brief description of this zoning application and its purpose. The description is optional. |
Background Color |
The hexidecimal number (hex triplet) that describes the background color. Enter a number manually or click Pick to open a color picker. In the color picker, you can select a color for which DMM-DSM automatically enters the correct hexidecimal number. |
Text Color |
The hexidecimal number (hex triplet) that describes the text color. Enter a number manually or click Pick to open a color picker. In the color picker, you can select a color for which DMM-DSM automatically enters the correct hexidecimal number. The color that you use should be one that results in clear and legible text against the background color that you specified; if there is not enough difference between the two colors, your audience might not see information clearly when you use this zoning application to show text on a DMP display. |
Template Type |
Defines virtual subdivisions (zones) of the screen on a DMP display. Each zone shows one content item at a time. DMPs show zones simultaneously and the actual number of zones is determined by the template that you select. The templates are:

Logo-Video Subdivides the screen into two zones.

Logo-Video-Flash Subdivides the screen into three zones.

Logo-Video-Flash-Ticker Subdivides the screen into four zones.
Click a zone in the zoning map to see options for the type of zone that you clicked. If you click: • • • • |
Content Categories |
An object selector that lists all the content categories in your media library. From the object selector, click the one category that the Available Content table should describe. • • • |
Available Content |
A table in which you can click any row to select one content item in the specified content category. The table sorts content item information into these columns: • • • • Before you add any MPEG file, confirm that its filesize is not more than 1.9 GB, which is the maximum size for any file that you include in a zoning application. For purposes of stage-one failover, the combined size of all files cannot exceed 900 MB. To understand failover, see the "Understanding Content Substitution (Failover)" topic in User Guide for Cisco Digital Media Player Device Manager 1.0 on Cisco.com. • • • • |
Using Other DMM-DSM Applications
Many applications and options are available to you in DMM-DSM. Your expectations and goals for your digital signage network determine which applications and options are relevant to you at any particular time or for any particular purpose.
Step 1 ![]() Select Digital Signage Module from the untitled list at the top far-right of any page.
Select Digital Signage Module from the untitled list at the top far-right of any page.
Step 2 ![]() Select Applications > Full Applications List, then click an application name in the Application Types list, as follows:
Select Applications > Full Applications List, then click an application name in the Application Types list, as follows:
If you do not understand the options for an application, see Table 3-6.
Step 3 ![]() (Optional) If you previously defined or configured options for the relevant application and you saved your selections, click any row in the Applications table to select one of the operations that you defined; the row that you click should be one that you want to edit, deliver to DMPs, or delete.
(Optional) If you previously defined or configured options for the relevant application and you saved your selections, click any row in the Applications table to select one of the operations that you defined; the row that you click should be one that you want to edit, deliver to DMPs, or delete.
Step 4 ![]() Do one of the following:
Do one of the following:
•![]() To define or configure options for a new operation, click
To define or configure options for a new operation, click ![]() ("Add New Application").
("Add New Application").
•![]() To edit the options that you previously defined or configured for the operation that you selected in Step 3, click
To edit the options that you previously defined or configured for the operation that you selected in Step 3, click ![]() ("Edit Application").
("Edit Application").
•![]() To delete the operation that you selected in Step 3, click
To delete the operation that you selected in Step 3, click ![]() ("Delete Application").
("Delete Application").
Step 5 ![]() If you clicked
If you clicked ![]() ("Add New Application") or
("Add New Application") or ![]() ("Edit Application"), the page is refreshed and you can select options or enter values that define or redefine the behavior for this operation.
("Edit Application"), the page is refreshed and you can select options or enter values that define or redefine the behavior for this operation.
Step 6 ![]() To save your selections, click Submit. Otherwise, click Cancel to discard your selections.
To save your selections, click Submit. Otherwise, click Cancel to discard your selections.
Step 7 ![]() To deliver to your DMPs the commands that you saved in Step 6, see Delivering Saved Commands and Content Files to Your DMPs.
To deliver to your DMPs the commands that you saved in Step 6, see Delivering Saved Commands and Content Files to Your DMPs.
|
|
|
|---|---|
DMP Discovery |
Discover the DMPs in a network range that you specify and add those DMPs to DMM-DSM for centralized management. The elements and options are: • • • To learn about other autodiscovery options for the DMPs in your digital signage network, see the "{Add New | Edit} DMP" row in Table 3-1. Note |
DMP Video/Audio Settings |
Adjust the audio and video signals that DMPs send to their attached DMP displays. The elements and options are: • • • • • • • |
Go to URL |
Load content from a web server into the embedded DMP browser. The elements and options are: • • • |
Flash |
Load a SWF (Flash 6) file into the embedded DMP browser and change the DMP startup URL so that the Flash application loads quickly after a DMP restarts or recovers from problems with its network connection. The elements and options are: • • • – – – • – – – – – – – – |
Multicasts |
Causes DMPs to receive and show the multicast video stream from a server that you specify and changes the DMP startup URL so that the multicast application loads quickly after a DMP restarts or recovers from problems with its network connection. The elements and options are: • • • Note • • |
Playlists |
Describes the sequence of MPEG files that a zoning application should play in its video zone and changes the DMP startup URL so that the playlist application loads quickly after a DMP restarts or recovers from problems with its network connection. See Creating and Organizing Digital Signage Playlists. |
Publishing |
Caution Deliver to particular DMPs the commands and settings from applications that you select or configure under the Applications tab. See Delivering Saved Commands and Content Files to Your DMPs. The elements and options are: • • • • – – – • – – – – – |
Startup URL |
Causes DMPs to load and show content that you specify, immediately after every restart. The elements and options are: • • • – – – – Note • • |
System Tasks |
Predefined system commands that you can send to a DMP. When you create or edit a system task, these are the elements: • • • • These system tasks tell you about a DMP: • • • These system tasks show or hide content on a DMP display: • • • These system tasks help you to limit administrative access to a DMP: • • These system tasks help you to administer a DMP:
Caution • • • • • |
Upgrade DMP |
Caution Send a content item (of the "DMP FS Image" content type) from your media library to a DMP and send commands to install the new firmware image. The elements and options are: • • • – – – • – – – – – – – – |
Zoning |
Divide a DMP display virtually into areas called screen zones, play particular content types simultaneously in each of those zones, change the DMP startup URL so that the zoning application loads quickly after a DMP restarts or recovers from problems with its network connection, and restart each targeted DMP automatically. See Working with Screen Zones. |
Supported Fonts
The browser that is preinstalled on DMPs supports some bitmap fonts and some TrueType fonts. The browser will substitute an installed font for any unsupported font.
Note ![]() Other typographic representations that you might show on a DMP display, such as the opening titles for a theatrical film, do not require that any font be installed. Similarly, when a font is embedded within a Flash file that you show, the Flash file will load correctly even if the corresponding font is not installed on your DMP.
Other typographic representations that you might show on a DMP display, such as the opening titles for a theatrical film, do not require that any font be installed. Similarly, when a font is embedded within a Flash file that you show, the Flash file will load correctly even if the corresponding font is not installed on your DMP.
Supported X11 Bitmap Fonts
These X11 bitmap fonts are preinstalled as part of this release:
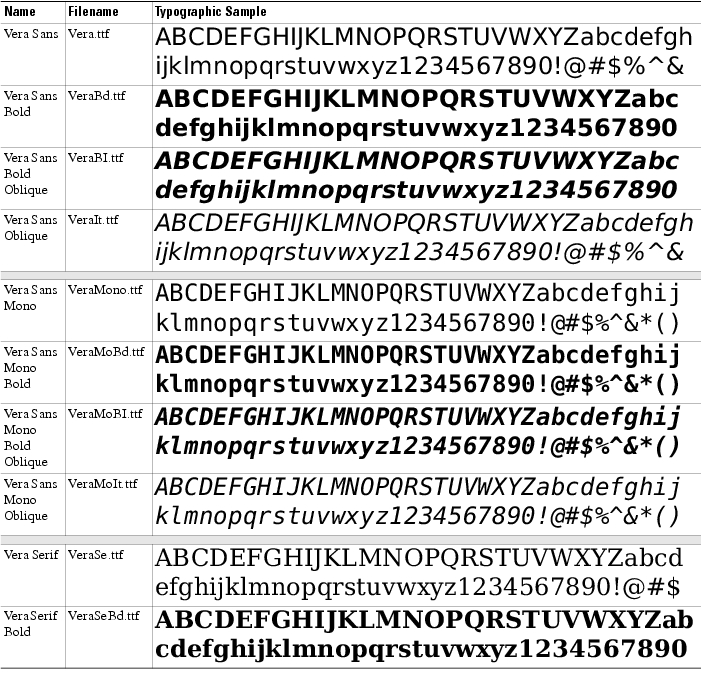
Supported TrueType Fonts
These TrueType fonts are preinstalled as part of this release:
Delivering Saved Commands and Content Files to Your DMPs
Tip ![]() Network congestion or other performance problems at a DMP deployment site might cause the content that you deliver to pause, stop, or play at unacceptably low speeds. To work around this problem, troubleshoot network performance at the deployment site and consider upgrading its network or applying policies to shape and prioritize its traffic.
Network congestion or other performance problems at a DMP deployment site might cause the content that you deliver to pause, stop, or play at unacceptably low speeds. To work around this problem, troubleshoot network performance at the deployment site and consider upgrading its network or applying policies to shape and prioritize its traffic.
Topics in this section tell you how to publish (deliver to your DMPs) the content files and commands that you saved elsewhere in DMM-DSM.
•![]() Delivering Commands or Content Files Immediately
Delivering Commands or Content Files Immediately
•![]() Scheduling Future Deliveries of Commands or Content Files
Scheduling Future Deliveries of Commands or Content Files
•![]() Preempting a Recurring Delivery for a One-time Event
Preempting a Recurring Delivery for a One-time Event
Delivering Commands or Content Files Immediately
You can deliver commands or content files immediately to one DMP or to multiple DMPs that all use the same one DMP group as their parent.
Note![]() •
•![]() In this release, we do not support immediate publishing to external (FTP) servers.
In this release, we do not support immediate publishing to external (FTP) servers.
•![]() We recommend that you avoid using immediate publishing with ACNS, due to the amount of time required to distribute content throughout your network and to its edge. If you do so despite this recommendation, DMM-DSM always uses the default ACNS channel. You cannot select any other channel.
We recommend that you avoid using immediate publishing with ACNS, due to the amount of time required to distribute content throughout your network and to its edge. If you do so despite this recommendation, DMM-DSM always uses the default ACNS channel. You cannot select any other channel.
Before You Begin
•![]() You must already have created and saved the commands or the content files that you will deliver. See Creating and Categorizing Digital Signage Content.
You must already have created and saved the commands or the content files that you will deliver. See Creating and Categorizing Digital Signage Content.
•![]() You must already have created the DMP group whose member DMPs should receive the delivery. See Managing and Grouping DMPs.
You must already have created the DMP group whose member DMPs should receive the delivery. See Managing and Grouping DMPs.
Step 1 ![]() Select Digital Signage Module from the untitled list at the top far-right of any page.
Select Digital Signage Module from the untitled list at the top far-right of any page.
Step 2 ![]() Select Publisher > Immediate.
Select Publisher > Immediate.
Step 3 ![]() In the DMP Groups object selector, click the name of a DMP group to see its member DMPs in the DMP List table.
In the DMP Groups object selector, click the name of a DMP group to see its member DMPs in the DMP List table.
Step 4 ![]() In the DMP List table, select the check box for each DMP that should receive the delivery.
In the DMP List table, select the check box for each DMP that should receive the delivery.
Step 5 ![]() Select from the Actions list the name of the saved application that you want to deliver.
Select from the Actions list the name of the saved application that you want to deliver.
Options in the Actions list are sorted into categories, based on their purpose. For example, the Playlists category contains every playlist that you have defined, while the Zoning category contains every zoning application that you have created. The Actions list contains a particular category only if you have created what the category should describe; for example, if you have not defined any playlists, the Actions list does not show the Playlists category.
Step 6 ![]() Click Go.
Click Go.
Scheduling Future Deliveries of Commands or Content Files
You can schedule future one-time or repeated delivery of commands or content files to:
•![]() One registered DMP.
One registered DMP.
•![]() Multiple registered DMPs that all use the same one DMP group as their parent.
Multiple registered DMPs that all use the same one DMP group as their parent.
•![]() All of your registered external (FTP) publishing servers; DMM-DSM treats all of your registered external servers identically.
All of your registered external (FTP) publishing servers; DMM-DSM treats all of your registered external servers identically.
In addition, you can view two types of summary for any scheduled delivery. See:
•![]() Understanding Tooltips in the Scheduler Timeline
Understanding Tooltips in the Scheduler Timeline
•![]() Understanding Popup Windows in the Scheduler Timeline
Understanding Popup Windows in the Scheduler Timeline
When you publish to DMPs, the only supported application type is zoning applications, which you can publish only one at a time. If you want a particular zoning application to play during stage-one failover on a DMP, the combined filesize of all its files must not be any more than 900 MB.
Note ![]() It is important that you understand all of the possible limitations and effects of publishing to an FTP server, as well as the exact circumstances that lead to these effects. Files are sometimes unplayable or deleted automatically, subdirectories are sometimes created automatically, and values that you enter in DMM-DSM are sometimes changed automatically. Also, DMM-DSM can publish only some application types to FTP servers.
It is important that you understand all of the possible limitations and effects of publishing to an FTP server, as well as the exact circumstances that lead to these effects. Files are sometimes unplayable or deleted automatically, subdirectories are sometimes created automatically, and values that you enter in DMM-DSM are sometimes changed automatically. Also, DMM-DSM can publish only some application types to FTP servers.
•![]() Video files do not play at all if you publish a playlist (or publish a zoning application that uses a playlist) to an FTP server when the playlist uses MPEG files that are:
Video files do not play at all if you publish a playlist (or publish a zoning application that uses a playlist) to an FTP server when the playlist uses MPEG files that are:
–![]() Served from Microsoft Internet Information Server (IIS). On Windows, we support only Apache.
Served from Microsoft Internet Information Server (IIS). On Windows, we support only Apache.
–![]() Requested through Microsoft Proxy Server.
Requested through Microsoft Proxy Server.
–![]() Requested through Microsoft Internet Security and Acceleration Server.
Requested through Microsoft Internet Security and Acceleration Server.
•![]() When your media library in DMM is the source for a file that you publish as part of a playlist, and when you select an FTP server as the target to receive that file, DMM-DSM transfers copies of the relevant file to all of the FTP servers that you have registered. After the transfer is completed, DMM-DSM deletes the original file from its media library, then changes the relevant playlist application so that it uses a URL instead of a local path. The URL that DMM-DSM enters automatically is specific to whichever FTP server you registered first.
When your media library in DMM is the source for a file that you publish as part of a playlist, and when you select an FTP server as the target to receive that file, DMM-DSM transfers copies of the relevant file to all of the FTP servers that you have registered. After the transfer is completed, DMM-DSM deletes the original file from its media library, then changes the relevant playlist application so that it uses a URL instead of a local path. The URL that DMM-DSM enters automatically is specific to whichever FTP server you registered first.
•![]() When an HTTP URL is the source for a published file, and when the pathname on the source server contains subdirectories that do not exist on the target FTP server, DMM-DSM automatically creates the required subdirectories on the FTP server.
When an HTTP URL is the source for a published file, and when the pathname on the source server contains subdirectories that do not exist on the target FTP server, DMM-DSM automatically creates the required subdirectories on the FTP server.
•![]() When you publish to an FTP server, the supported application types are these only:
When you publish to an FTP server, the supported application types are these only:
–![]() Playlists — See Creating and Organizing Digital Signage Playlists.
Playlists — See Creating and Organizing Digital Signage Playlists.
–![]() Flash — See Working with Flash Applications.
Flash — See Working with Flash Applications.
–![]() Zoning — See Working with Screen Zones.
Zoning — See Working with Screen Zones.
–![]() Multicast — See the "Multicasts" row in Table 3-6.
Multicast — See the "Multicasts" row in Table 3-6.
You can schedule a delivery to occur at any time and recur any number of times, and you can schedule any number of deliveries. DMM-DSM can make multiple deliveries simultaneously and — assuming that a DMP has a fast network connection and you send deliveries to it that are not mutually exclusive — a DMP can receive multiple deliveries simultaneously.
Before You Begin
•![]() You must already have created and saved the commands or the content files that you will deliver. See Creating and Categorizing Digital Signage Content.
You must already have created and saved the commands or the content files that you will deliver. See Creating and Categorizing Digital Signage Content.
•![]() You must already have created the DMP group that should receive a delivery. See Managing and Grouping DMPs.
You must already have created the DMP group that should receive a delivery. See Managing and Grouping DMPs.
Step 1 ![]() Select Digital Signage Module from the untitled list at the top far-right of any page.
Select Digital Signage Module from the untitled list at the top far-right of any page.
Step 2 ![]() Select Publisher > Scheduler.
Select Publisher > Scheduler.
Step 3 ![]() Click Select Target Date, then click the calendar date for the first delivery.
Click Select Target Date, then click the calendar date for the first delivery.
Step 4 ![]() Do one of the following:
Do one of the following:
•![]() If you are scheduling a new delivery, select from the DMP Groups list the DMPs or the external (FTP) publishing servers that should receive the delivery.
If you are scheduling a new delivery, select from the DMP Groups list the DMPs or the external (FTP) publishing servers that should receive the delivery.
•![]() If you are editing a scheduled delivery, find that task in the timeline row that names the recipient DMP group. You might have to scroll horizontally through the timeline to see earlier or later times. When you find the task, click it to select it.
If you are editing a scheduled delivery, find that task in the timeline row that names the recipient DMP group. You might have to scroll horizontally through the timeline to see earlier or later times. When you find the task, click it to select it.
Step 5 ![]() Set or edit the timing for delivery:
Set or edit the timing for delivery:
a. ![]() From the How Often list, select the interval between deliveries.
From the How Often list, select the interval between deliveries.
b. ![]() In the From area, click
In the From area, click ![]() , then select the hour and minute to start the delivery.
, then select the hour and minute to start the delivery.
c. ![]() In the To area, click
In the To area, click ![]() , then select the calendar date, hour, and minute to stop the delivery.
, then select the calendar date, hour, and minute to stop the delivery.
The times that you configure for deliveries are relative to the time zone where you deployed your DMM appliance, not to the time zone where you deployed any DMP. You set the time zone value when you used AAI to set up your DMM appliance and you can change the time zone value if it is wrong. To learn how to set or reset the time zone, see the "Administering a DMM Appliance" chapter in Appliance Administration Guide for Cisco Digital Media System 4.0 on Cisco.com.
Step 6 ![]() Select the Applications list option that names what you want to deliver.
Select the Applications list option that names what you want to deliver.
Options in the Applications list are sorted into categories, based on their purpose. For example, the Playlists category contains every playlist that you have defined, while the Zoning category contains every zoning application that you have created. The Applications list contains a particular category only if you have created what the category should describe; for example, if you have not defined any playlists, the Applications list does not show the Playlists category.
Step 7 ![]() Do one of the following:
Do one of the following:
•![]() If you are scheduling a new delivery, click Add Task.
If you are scheduling a new delivery, click Add Task.
•![]() If you are editing a scheduled delivery, click Update Task.
If you are editing a scheduled delivery, click Update Task.
•![]() If you are deleting a scheduled delivery, click Remove Task.
If you are deleting a scheduled delivery, click Remove Task.
Step 8 ![]() To save your selections, click Save.
To save your selections, click Save.
If you do not save your selections for a delivery that you add or update, DMM-DSM discards your selections immediately after you refresh your browser or load any other page in it.
Step 9 ![]() (Optional) To make copies of a delivery, so that it recurs as many times as you want and at any interval that you specify, click Multiply Task.
(Optional) To make copies of a delivery, so that it recurs as many times as you want and at any interval that you specify, click Multiply Task.
a. ![]() At the first prompt, enter the hours and minutes between copied instances of the delivery. Use the format for military time (24 hours that increment from 0100 to 2400) and the format HH:MM.
At the first prompt, enter the hours and minutes between copied instances of the delivery. Use the format for military time (24 hours that increment from 0100 to 2400) and the format HH:MM.
b. ![]() At the second prompt, enter the number of copies to make.
At the second prompt, enter the number of copies to make.
Step 10 ![]() (Optional) To transmit the delivery according to the schedule that you defined — and synchronize it if you use ACNS — click Publish.
(Optional) To transmit the delivery according to the schedule that you defined — and synchronize it if you use ACNS — click Publish.
Understanding Tooltips in the Scheduler Timeline
Whenever your pointer hovers over a scheduled delivery in the timeline, DMM-DSM displays a tooltip. Information in the tooltip describes the current status of the corresponding delivery and summarizes its most important attributes. Information in the tooltip is organized as follows:
•![]() Status — One of the following:
Status — One of the following:
–![]() New — You made selections to define a new delivery. However, because you have not yet clicked Save, DMM-DSM will discard your selections if you refresh your browser or load any other page in it.
New — You made selections to define a new delivery. However, because you have not yet clicked Save, DMM-DSM will discard your selections if you refresh your browser or load any other page in it.
–![]() Saved — You made selections to define a new delivery and you clicked Save. DMM-DSM created a permanent record for the delivery, but has not scheduled it yet to run.
Saved — You made selections to define a new delivery and you clicked Save. DMM-DSM created a permanent record for the delivery, but has not scheduled it yet to run.
–![]() Published — You made selections to define a delivery, you saved your selections, and DMM-DSM has scheduled the delivery to run at the times that you specified.
Published — You made selections to define a delivery, you saved your selections, and DMM-DSM has scheduled the delivery to run at the times that you specified.
–![]() Scheduled — The delivery is occurring now.
Scheduled — The delivery is occurring now.
–![]() Finished — The delivery occurred at the scheduled time and is now stopped.
Finished — The delivery occurred at the scheduled time and is now stopped.
•![]() App — The selection that you made from the Applications list.
App — The selection that you made from the Applications list.
•![]() Group — The selection that you made from the DMP Groups list.
Group — The selection that you made from the DMP Groups list.
•![]() From — The date and time when the delivery is (or was) scheduled to start.
From — The date and time when the delivery is (or was) scheduled to start.
•![]() To — The date and time when the delivery is (or was) scheduled to stop.
To — The date and time when the delivery is (or was) scheduled to stop.
•![]() How Often — The number of times that the delivery is scheduled to recur.
How Often — The number of times that the delivery is scheduled to recur.
•![]() Start Cmd Result (Total/OK/Failed) — N/N/N, where:
Start Cmd Result (Total/OK/Failed) — N/N/N, where:
–![]() The first N is a color-coded (black) numeral that counts the total number of times that DMM-DSM tried to deliver the command to start the designated application.
The first N is a color-coded (black) numeral that counts the total number of times that DMM-DSM tried to deliver the command to start the designated application.
–![]() The second N is a color-coded (green) numeral that counts the number of times that DMM-DSM succeeded in delivering the command to start the designated application.
The second N is a color-coded (green) numeral that counts the number of times that DMM-DSM succeeded in delivering the command to start the designated application.
–![]() The third N is a color-coded (red) numeral that counts the number of times that DMM-DSM failed to deliver the command to start the designated application.
The third N is a color-coded (red) numeral that counts the number of times that DMM-DSM failed to deliver the command to start the designated application.
•![]() Stop Cmd Result (Total/OK/Failed) — N/N/N, where:
Stop Cmd Result (Total/OK/Failed) — N/N/N, where:
–![]() The first N is a color-coded (black) numeral that counts the total number of times that DMM-DSM tried to deliver the command to stop the designated application.
The first N is a color-coded (black) numeral that counts the total number of times that DMM-DSM tried to deliver the command to stop the designated application.
–![]() The second N is a color-coded (green) numeral that counts the number of times that DMM-DSM succeeded in delivering the command to stop the designated application.
The second N is a color-coded (green) numeral that counts the number of times that DMM-DSM succeeded in delivering the command to stop the designated application.
–![]() The third N is a color-coded (red) numeral that counts the number of times that DMM-DSM failed to deliver the command to stop the designated application.
The third N is a color-coded (red) numeral that counts the number of times that DMM-DSM failed to deliver the command to stop the designated application.
Understanding Popup Windows in the Scheduler Timeline
Whenever you double-click a scheduled delivery in the timeline, DMM-DSM opens a popup window. Information in the popup describes the current status of the corresponding delivery and summarizes its most important attributes. Information in the popup is organized as follows:
•![]() Application Name — The selection that you made from the Applications list.
Application Name — The selection that you made from the Applications list.
•![]() Application Type — One of the following (see Using Other DMM-DSM Applications):
Application Type — One of the following (see Using Other DMM-DSM Applications):
–![]() DMP Discovery
DMP Discovery
–![]() DMP Video/Audio Settings
DMP Video/Audio Settings
–![]() Go to URL
Go to URL
–![]() Flash
Flash
–![]() Multicasts
Multicasts
–![]() Playlists
Playlists
–![]() Publishing
Publishing
–![]() Startup URL
Startup URL
–![]() System Tasks
System Tasks
–![]() Upgrade DMP
Upgrade DMP
–![]() Zoning
Zoning
•![]() From — The date and time when the delivery is (or was) scheduled to start.
From — The date and time when the delivery is (or was) scheduled to start.
•![]() To — The date and time when the delivery is (or was) scheduled to stop.
To — The date and time when the delivery is (or was) scheduled to stop.
•![]() How Often — The number of times that the delivery is scheduled to recur.
How Often — The number of times that the delivery is scheduled to recur.
•![]() Status — One of the following:
Status — One of the following:
–![]() New — You made selections to define a new delivery. However, because you have not yet clicked Save, DMM-DSM will discard your selections if you refresh your browser or load any other page in it.
New — You made selections to define a new delivery. However, because you have not yet clicked Save, DMM-DSM will discard your selections if you refresh your browser or load any other page in it.
–![]() Saved — You made selections to define a new delivery and you clicked Save. DMM-DSM created a permanent record for the delivery, but has not scheduled it yet to run.
Saved — You made selections to define a new delivery and you clicked Save. DMM-DSM created a permanent record for the delivery, but has not scheduled it yet to run.
–![]() Published — You made selections to define a delivery, you saved your selections, and DMM-DSM has scheduled the delivery to run at the times that you specified.
Published — You made selections to define a delivery, you saved your selections, and DMM-DSM has scheduled the delivery to run at the times that you specified.
–![]() Scheduled — The delivery is occurring now.
Scheduled — The delivery is occurring now.
–![]() Finished — The delivery occurred at the scheduled time and is now stopped.
Finished — The delivery occurred at the scheduled time and is now stopped.
•![]() Group — The selection that you made from the DMP Groups list.
Group — The selection that you made from the DMP Groups list.
•![]() Start Command Summary (Total/OK/Failed) — N/N/N, where:
Start Command Summary (Total/OK/Failed) — N/N/N, where:
–![]() The first N is a color-coded (white) numeral that counts the total number of times that DMM-DSM tried to deliver the command to start the designated application.
The first N is a color-coded (white) numeral that counts the total number of times that DMM-DSM tried to deliver the command to start the designated application.
–![]() The second N is a color-coded (green) numeral that counts the number of times that DMM-DSM succeeded in delivering the command to start the designated application.
The second N is a color-coded (green) numeral that counts the number of times that DMM-DSM succeeded in delivering the command to start the designated application.
–![]() The third N is a color-coded (red) numeral that counts the number of times that DMM-DSM failed to deliver the command to start the designated application.
The third N is a color-coded (red) numeral that counts the number of times that DMM-DSM failed to deliver the command to start the designated application.
•![]() Stop Command Summary (Total/OK/Failed) — N/N/N, where:
Stop Command Summary (Total/OK/Failed) — N/N/N, where:
–![]() The first N is a color-coded (white) numeral that counts the total number of times that DMM-DSM tried to deliver the command to stop the designated application.
The first N is a color-coded (white) numeral that counts the total number of times that DMM-DSM tried to deliver the command to stop the designated application.
–![]() The second N is a color-coded (green) numeral that counts the number of times that DMM-DSM succeeded in delivering the command to stop the designated application.
The second N is a color-coded (green) numeral that counts the number of times that DMM-DSM succeeded in delivering the command to stop the designated application.
–![]() The third N is a color-coded (red) numeral that counts the number of times that DMM-DSM failed to deliver the command to stop the designated application.
The third N is a color-coded (red) numeral that counts the number of times that DMM-DSM failed to deliver the command to stop the designated application.
In addition, a status bar at the bottom of the popup window counts the number of errors associated with the described delivery.
Preempting a Recurring Delivery for a One-time Event
In some cases, you might want to show a playlist or a zoning application one time, or for a limited time, that overlaps with a recurring delivery. For example, you might schedule a playlist to run from 9:00 a.m. to 6:00 p.m. every weekday in the month of March, but want to show a different playlist on the second Tuesday in March. The problem in this scenario is that your DMP cannot prioritize contradictory events that are scheduled to start simultaneously. However, there are three possible ways that you might schedule a preemption. In this scenario, you can do any of the following:
•![]() Schedule a recurring event for the first uninterrupted span of dates, schedule the one-time event, then schedule a copy of the first recurring event for the second uninterrupted span of dates.
Schedule a recurring event for the first uninterrupted span of dates, schedule the one-time event, then schedule a copy of the first recurring event for the second uninterrupted span of dates.
•![]() Create two DMP groups. In this scenario, call them Group_A and Group_B. For Group_A, schedule an event that recurs throughout the entire span of dates. For Group_B, schedule the one-time event. When the one-time event should begin, move your DMPs from Group_A to Group_B . When the one-time event should end, move your DMPs back to Group A.
Create two DMP groups. In this scenario, call them Group_A and Group_B. For Group_A, schedule an event that recurs throughout the entire span of dates. For Group_B, schedule the one-time event. When the one-time event should begin, move your DMPs from Group_A to Group_B . When the one-time event should end, move your DMPs back to Group A.
•![]() Schedule the recurring event to run every weekday, as you would expect, from 9:00 a.m. to 6:00 p.m. Schedule the one-time event to start at 9:05 a.m, so that it interrupts the recurring event instead of conflicting with its start time, and schedule it to stop at 6:00 p.m. The recurring task will begin again, as expected, the next day.
Schedule the recurring event to run every weekday, as you would expect, from 9:00 a.m. to 6:00 p.m. Schedule the one-time event to start at 9:05 a.m, so that it interrupts the recurring event instead of conflicting with its start time, and schedule it to stop at 6:00 p.m. The recurring task will begin again, as expected, the next day.
Using Administrative Options
This section contains these topics:
•![]() Configuring DMM-DSM User Accounts
Configuring DMM-DSM User Accounts
•![]() Configuring DMM-DSM to Use a Servlet Server
Configuring DMM-DSM to Use a Servlet Server
•![]() Configuring DMM-DSM to Send Notification Settings
Configuring DMM-DSM to Send Notification Settings
•![]() Configuring DMM-DSM to Use ACNS
Configuring DMM-DSM to Use ACNS
•![]() Configuring DMM-DSM to Use External Publishing Servers
Configuring DMM-DSM to Use External Publishing Servers
•![]() Viewing the DMM-DSM `About Box'
Viewing the DMM-DSM `About Box'
Configuring DMM-DSM User Accounts
You can configure user accounts for DMM-DSM.
Before You Begin
To see and use the Settings tab, you must be logged in an administrator.
Step 1 ![]() Select Digital Signage Module from the untitled list at the top far-right of any page.
Select Digital Signage Module from the untitled list at the top far-right of any page.
Step 2 ![]() Select Settings > User Accounts, then select the options that meet your requirements. If you do not understand your options, see Table 3-7.
Select Settings > User Accounts, then select the options that meet your requirements. If you do not understand your options, see Table 3-7.
Step 3 ![]() Click Submit.
Click Submit.
Limiting User Permissions
You can restrict the permissions that you grant to particular user accounts in DMM-DSM. For example, you might grant a user the permission to use only the applications that you choose or to deliver content to only the DMPs that you choose.
Before You Begin
To see and use the Settings tab, you must be logged in an administrator.
Step 1 ![]() Select Digital Signage Module from the untitled list at the top far-right of any page.
Select Digital Signage Module from the untitled list at the top far-right of any page.
Step 2 ![]() Select Settings > User Accounts.
Select Settings > User Accounts.
Step 3 ![]() In the Users list, click a username to highlight it. DMM-DSM automatically shows the Change User pane for the corresponding user account, where you can edit the permissions that apply to the user.
In the Users list, click a username to highlight it. DMM-DSM automatically shows the Change User pane for the corresponding user account, where you can edit the permissions that apply to the user.
Step 4 ![]() Make selections to limit any or all of the permissions that you will grant to the user. If you do not understand your options, see Table 3-7.
Make selections to limit any or all of the permissions that you will grant to the user. If you do not understand your options, see Table 3-7.
By limiting permissions in specific ways, you can assign highly specialized combinations of access to any DMM-DSM user. This table describes some of the types of limited permissions that you might want to assign and tells you how to assign them:
Step 5 ![]() Click Submit.
Click Submit.
Configuring DMM-DSM to Use a Servlet Server
You can configure DMM-DSM to use a servlet server.
Before You Begin
To see and use the Settings tab, you must be logged in an administrator.
Step 1 ![]() Select Digital Signage Module from the untitled list at the top far-right of any page.
Select Digital Signage Module from the untitled list at the top far-right of any page.
Step 2 ![]() Select Settings > Network Settings.
Select Settings > Network Settings.
Step 3 ![]() In the Servlet Server Address field, enter the routable IP address or resolvable DNS hostname.
In the Servlet Server Address field, enter the routable IP address or resolvable DNS hostname.
Step 4 ![]() Click Save.
Click Save.
Configuring DMM-DSM to Send Notification Settings
You can configure DMM-DSM to notify you or other interested parties automatically whenever important events affect your digital signage network.
Before You Begin
To see and use the Settings tab, you must be logged in an administrator.
Step 1 ![]() Select Digital Signage Module from the untitled list at the top far-right of any page.
Select Digital Signage Module from the untitled list at the top far-right of any page.
Step 2 ![]() Select Settings > E-Mail Notification Settings, then select the options that meet your requirements. If you do not understand your options, see Table 3-8.
Select Settings > E-Mail Notification Settings, then select the options that meet your requirements. If you do not understand your options, see Table 3-8.
|
|
|
|---|---|
SMTP Mail Server Configuration |
Enter the required values for DMM-DSM to use an SMTP server. You must enter these values or you cannot send notification messages. • • • |
Administrator |
E-mail Address — Enter the administrator email address. |
Notification Events |
Make selections and enter required values to configure notification settings, then click Save. • – – – – • • • • • |
Configuring DMM-DSM to Use ACNS
You can configure DMM-DSM to use ACNS.
Before You Begin
To see and use the Settings tab, you must be logged in an administrator.
Step 1 ![]() Select Digital Signage Module from the untitled list at the top far-right of any page.
Select Digital Signage Module from the untitled list at the top far-right of any page.
Step 2 ![]() Select Settings > ACNS Settings, then select the options that meet your requirements. If you do not understand your options, see Table 3-9.
Select Settings > ACNS Settings, then select the options that meet your requirements. If you do not understand your options, see Table 3-9.
Step 3 ![]() Click Save.
Click Save.
Configuring DMM-DSM to Use External Publishing Servers
You can configure DMM-DSM to use external publishing servers. The only supported server type is FTP in this release.
Before You Begin
To see and use the Settings tab, you must be logged in an administrator.
Step 1 ![]() Select Digital Signage Module from the untitled list at the top far-right of any page.
Select Digital Signage Module from the untitled list at the top far-right of any page.
Step 2 ![]() Select Settings > External Publishing Servers, then select the options that meet your requirements. If you do not understand your options, see Table 3-10.
Select Settings > External Publishing Servers, then select the options that meet your requirements. If you do not understand your options, see Table 3-10.
Step 3 ![]() Click Save.
Click Save.
Viewing the DMM-DSM `About Box'
To view version information about DMM-DSM, select Digital Signage Module from the untitled list at the top far-right of any page, then select Help > About.
Working with Downloads
You can use the Downloads page.
Step 1 ![]() Select Digital Signage Module from the untitled list at the top far-right of any page.
Select Digital Signage Module from the untitled list at the top far-right of any page.
Step 2 ![]() Select Help > Downloads, then click a button to download the software that the corresponding row describes (or run a test that tells you if you must download software).
Select Help > Downloads, then click a button to download the software that the corresponding row describes (or run a test that tells you if you must download software).
Common Scenarios for Using DMM-DSM
This section describes common scenarios for using DMM-DSM.
Uploading Files to a DMP for Local Storage and Immediate Deployment
You can create a zoning application that shows video files from a playlist, then publish the playlist and its media files to the local Secure Digital (SD) flash memory card in a DMP for playback on its attached DMP display.
Note![]() •
•![]() The total amount of available file space for local storage is 1 GB.
The total amount of available file space for local storage is 1 GB.
•![]() A zoning application cannot play any file with a filesize greater than 1.9 GB.
A zoning application cannot play any file with a filesize greater than 1.9 GB.
•![]() For purposes of stage-one failover, the combined size of all files cannot exceed 900 MB. To understand failover, see the "Understanding Content Substitution (Failover)" topic in User Guide for Cisco Digital Media Player Device Manager 1.0 on Cisco.com.
For purposes of stage-one failover, the combined size of all files cannot exceed 900 MB. To understand failover, see the "Understanding Content Substitution (Failover)" topic in User Guide for Cisco Digital Media Player Device Manager 1.0 on Cisco.com.
Step 1 ![]() Select Digital Signage Module from the untitled list at the top far-right of any page.
Select Digital Signage Module from the untitled list at the top far-right of any page.
Step 2 ![]() To create a playlist of videos that you can show in the video zone of a zoning application, select Applications > Playlist, then do the following:
To create a playlist of videos that you can show in the video zone of a zoning application, select Applications > Playlist, then do the following:
a. ![]() Click Add New Playlist (
Click Add New Playlist (![]() ), then enter a unique name for the new playlist in the Name field; for example, you might enter the name LocalPlaylist.
), then enter a unique name for the new playlist in the Name field; for example, you might enter the name LocalPlaylist.
You must enter a name. The name is unique in the sense that you have not used it as the name for any other application that you created in DMM-DSM.
b. ![]() From the Content Categories object selector, select the category for video files that meet your requirements.
From the Content Categories object selector, select the category for video files that meet your requirements.
c. ![]() In the Available Content table, click a row to highlight a video, then click Select Applications (
In the Available Content table, click a row to highlight a video, then click Select Applications (![]() ) to move the highlighted video to the Selected Content table, so that it will be part of the playlist. To add videos to the playlist, repeat this step as many times as necessary.
) to move the highlighted video to the Selected Content table, so that it will be part of the playlist. To add videos to the playlist, repeat this step as many times as necessary.
d. ![]() (Optional) Highlight a video in the playlist, then do either or both of the following:
(Optional) Highlight a video in the playlist, then do either or both of the following:
•![]() To reposition the video in the playlist, click Move Selected Item Up (
To reposition the video in the playlist, click Move Selected Item Up (![]() ) or Move Selected Item Down (
) or Move Selected Item Down (![]() ).
).
•![]() To move the video from the Selected Applications table to the Available Applications table, click Delete Selected Item (
To move the video from the Selected Applications table to the Available Applications table, click Delete Selected Item (![]() ).
).
e. ![]() To save the playlist, click Submit.
To save the playlist, click Submit.
Step 3 ![]() To create a zoning application that contains the playlist, select Applications > Zoning, then do the following:
To create a zoning application that contains the playlist, select Applications > Zoning, then do the following:
a. ![]() Click Add Zoning Application (
Click Add Zoning Application (![]() ), then enter a name for the new zoning application in the Name field; for example, you might enter the name LocalZones.
), then enter a name for the new zoning application in the Name field; for example, you might enter the name LocalZones.
You must enter a name. The name is unique in the sense that you have not used it as the name for any other application that you created in DMM-DSM.
b. ![]() From the Template Type list, select the zoning template to use.
From the Template Type list, select the zoning template to use.
Each zone type (logo, video, Flash, and ticker) supports particular types of content files and your selection determines whether you must populate two, three, or four zones. To understand the zoning templates, see the "Template Type" row in Table 3-5.
c. ![]() In the thumbnail representation of the zoning template that you selected, click a zone to highlight it, so that you can make selections for what to show in that zone.
In the thumbnail representation of the zoning template that you selected, click a zone to highlight it, so that you can make selections for what to show in that zone.
d. ![]() Select appropriate content for the highlighted zone. To understand the requirements, see the "Template Type" row in Table 3-5.
Select appropriate content for the highlighted zone. To understand the requirements, see the "Template Type" row in Table 3-5.
e. ![]() To save the zoning application, click Submit.
To save the zoning application, click Submit.
Step 4 ![]() To create a publishing application that can deliver the zoning application anywhere in your digital signage network, select Applications > Full Applications List > Publishing, then do the following:
To create a publishing application that can deliver the zoning application anywhere in your digital signage network, select Applications > Full Applications List > Publishing, then do the following:
a. ![]() Click Add New Application (
Click Add New Application (![]() ), then enter a name for the new publishing application in the Name field; for example, you might enter the name LocalPublishing.
), then enter a name for the new publishing application in the Name field; for example, you might enter the name LocalPublishing.
You must enter a name. The name is unique in the sense that you have not used it as the name for any other application that you created in DMM-DSM.
b. ![]() In the Applications list, click Zoning.
In the Applications list, click Zoning.
c. ![]() In the Available Content table, click a row to highlight the zoning application, then click Select Applications (
In the Available Content table, click a row to highlight the zoning application, then click Select Applications (![]() ) to move the highlighted zoning application to the Selected Content table, so that it will be part of the publishing application.
) to move the highlighted zoning application to the Selected Content table, so that it will be part of the publishing application.
d. ![]() To save the publishing application, click Submit.
To save the publishing application, click Submit.
Step 5 ![]() To deploy the publishing application to a DMP or DMP group, select Publisher > Immediate, then do the following:
To deploy the publishing application to a DMP or DMP group, select Publisher > Immediate, then do the following:
a. ![]() From the DMP Groups object selector, select the DMP or DMP group that should receive the deployment.
From the DMP Groups object selector, select the DMP or DMP group that should receive the deployment.
b. ![]() From the Actions list, select the name of the publishing application that you created, then click Go.
From the Actions list, select the name of the publishing application that you created, then click Go.
DMM-DSM deploys the files and commands immediately to the DMPs that you selected, and the targeted DMPs restart automatically. After they restart, your DMPs show the newly received content on their attached DMP displays.
Understanding and Using DMP Status Report Charts
This section contains these topics:
•![]() Viewing the DMP Access Status Summary
Viewing the DMP Access Status Summary
•![]() Viewing Available and Used Disk Space
Viewing Available and Used Disk Space
Viewing the DMP Access Status Summary
You can view a color-coded chart that illustrates in real time how many of the DMPs you registered in DMM-DSM are reachable for centralized management.
•![]() The color green represents registered DMPs that are reachable.
The color green represents registered DMPs that are reachable.
•![]() The color red represents registered DMPs that are unreachable.
The color red represents registered DMPs that are unreachable.
Step 1 ![]() Select Digital Signage Module from the untitled list at the top far-right of any page.
Select Digital Signage Module from the untitled list at the top far-right of any page.
Step 2 ![]() Select Site Manager > Site Report.
Select Site Manager > Site Report.
Tip ![]() The interval between polling cycles is 2 minutes, so any newly added DMP might report temporarily that it is unavailable; if this happens to you, wait a few minutes, then check again.
The interval between polling cycles is 2 minutes, so any newly added DMP might report temporarily that it is unavailable; if this happens to you, wait a few minutes, then check again.
If you notice that any of your DMPs are unreachable, see Troubleshooting Guide for Cisco Digital Media Player 4300G.
Viewing Available and Used Disk Space
You can view a color-coded chart that illustrates the percentages of free disk space and used disk space.
•![]() The color green represents available space in gigabytes.
The color green represents available space in gigabytes.
•![]() The color blue represents used space in gigabytes.
The color blue represents used space in gigabytes.
Step 1 ![]() Select Digital Signage Module from the untitled list at the top far-right of any page.
Select Digital Signage Module from the untitled list at the top far-right of any page.
Step 2 ![]() Select Content Manager > Disk Space.
Select Content Manager > Disk Space.
 Feedback