Office 365 Interdomain Federation Overview
The IM and Presence Service supports business to business interdomain federation with an Office 365 deploymnet. With this integration, Office 365 hosts a Skype for Business server, which handles instant messaging and presence for the Office 365 users.
 Note |
With this integration, Office 365 hosts a Skype for Business server within the cloud. You can also federate with:
For these Skype for Buisness federations, see Interdomain Federation with Skype for Business. |
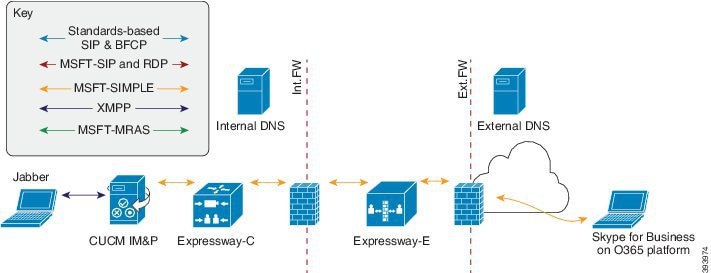
Office 365 Federation Example
The following image illustrates Business to Business federation with an Office 365-hosted Skype for Business server. Communication between the IM and Presence Service and Office 365 must cross a company firewall and go to the cloud. You must deploy Expressway-C in the internal network and Expressway-E in the DMZ of the company firewall in order to guard traffic that enters and leaves the enterprise network.
 Feedback