Your Phone

Cisco Webex Room Phone

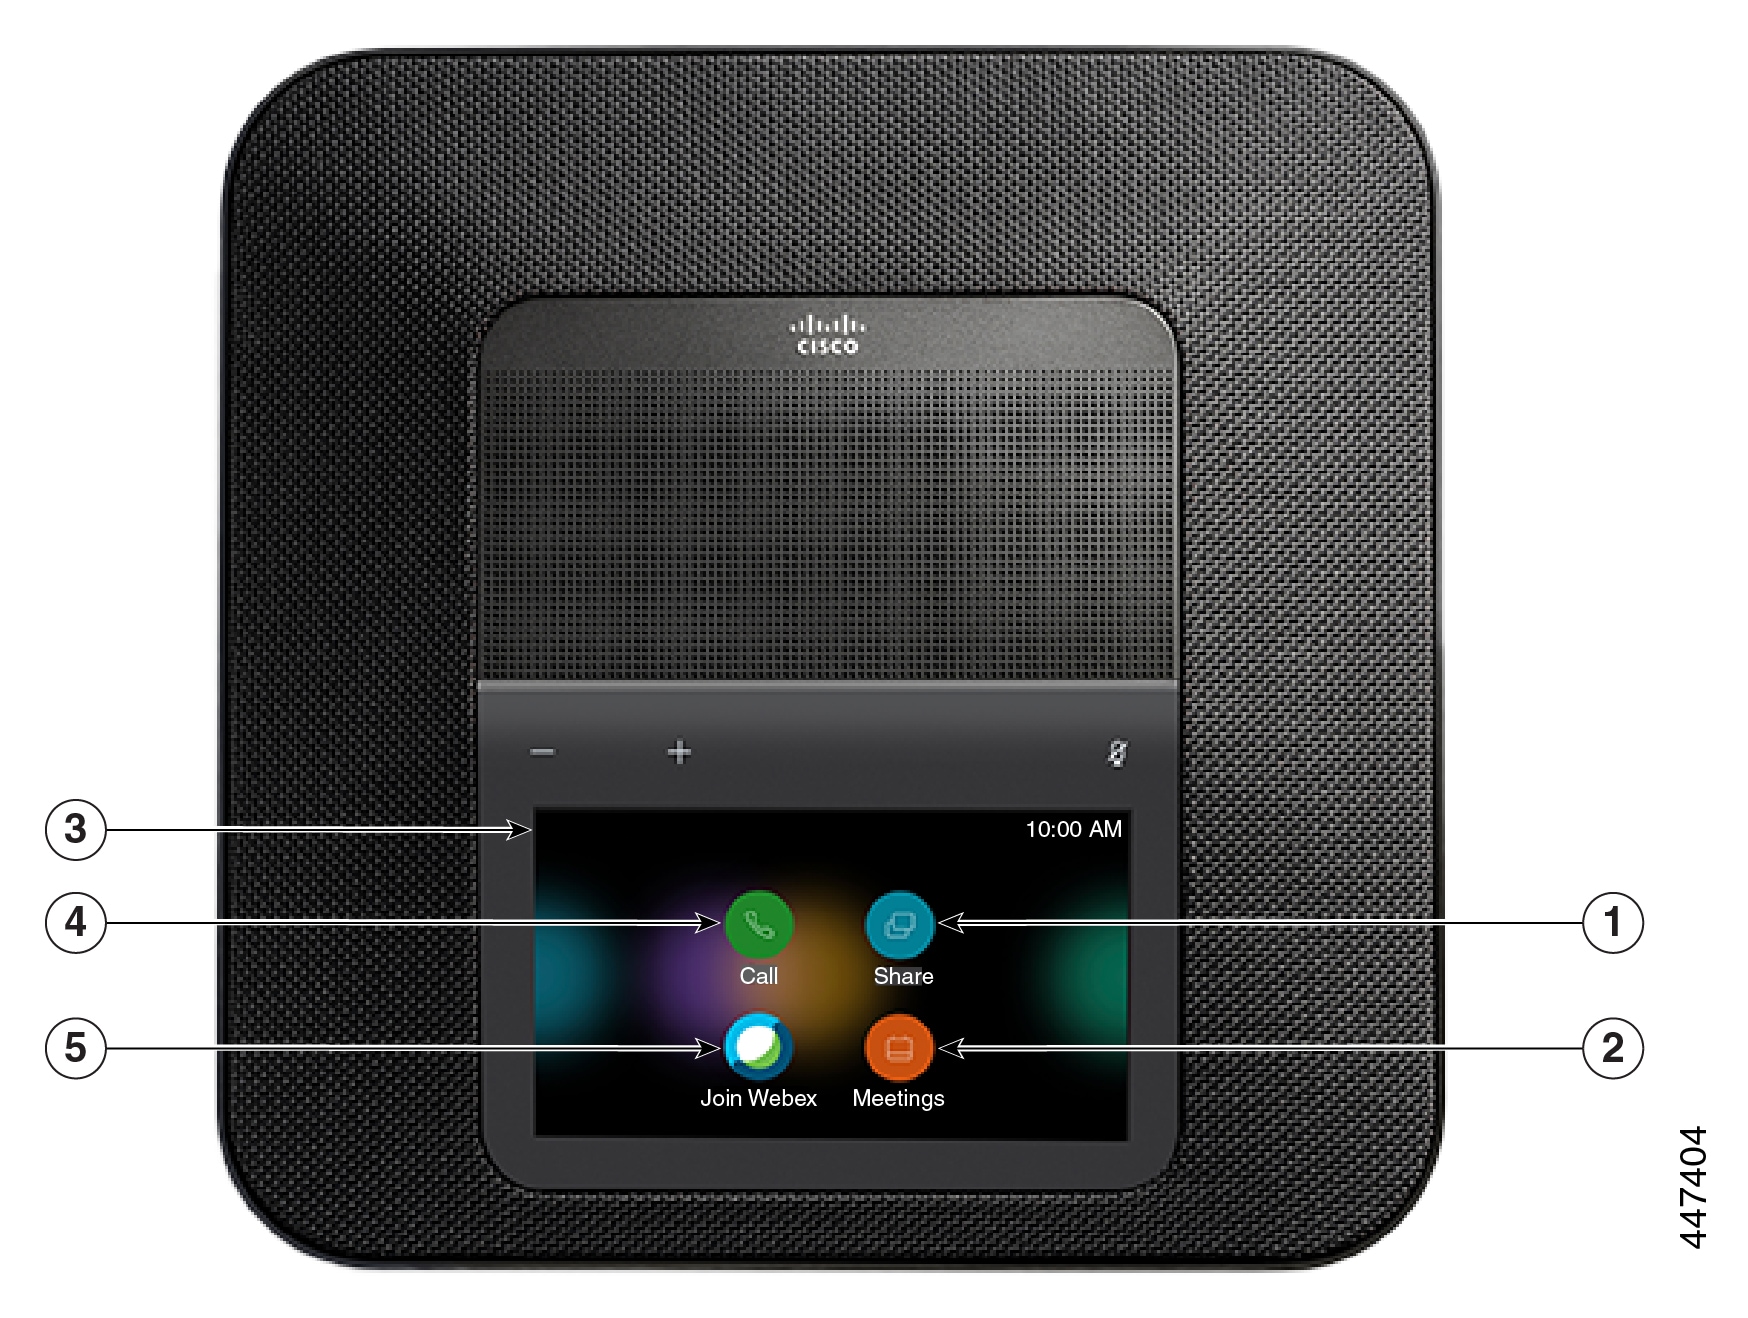
The Cisco Webex Room Phone provides a collaborate work experience for huddle spaces and meeting rooms. You can use the phone to make calls, to share information, and to collaborate during meetings. Connect a screen display, and you can collaborate with everyone in the room.

The device has two states—Wake and Half-wake. When the device is idle for two minutes, it enters into the Half-wake state.

You wake the device when you touch the LCD screen, or receive a call or meeting notification.

The phone has one line that handles up to 2 calls. It uses four built-in microphones with 360-degree coverage so people hear you clearly from up to 10 feet (3 m) away.

If you use the Cisco Webex Room Phone in a large room, then consider the two wired expansion microphones. These microphones accessories expand your coverage to 20 x 34 feet (6.1 m x 10 m) and up to 22 people. For best results, place the microphones between 3 feet (0.91 m) and 7 feet (2.1 m) away from the phone.


Note

We recommend that you connect the phone to a HDMI display screen so you get the full benefits of the device. Only use the included HDMI cables when you connect to an HDMI screen or a laptop. Don't use any other cables or adapters.


Figure 1. Cisco Webex Room Phone
Top view of Cisco Webex Conference Phone with home screen

Buttons and Hardware

The Cisco Webex Room Phone has several buttons and hardware features that allow you access to the phone features.

Use the following figures to identify the phone buttons and hardware items.

Figure 2. Cisco Webex Room Phone Top View
Callouts: Number 1 points to the LED bar. Number 2 points to the wired microphone ports. Number 3 points to the mute key. Number 4 points to the volume key. Number 5 points to the home screen.
Figure 3. Cisco Webex Room Phone Rear View
Callouts: Number 6 points to the computer HDMI port. Number 7 points to the LAN port. Number 8 points to the display screen HDMI port.

The following table describes the hardware features on the Cisco Webex Room Phone.

Table 1. Cisco Webex Room Phone Buttons and Hardware

Hardware Feature

Purpose

1. LED bar

Indicates call states:

  • Green, solid—Active call

  • Green, flashing—Incoming call

  • Green, pulsing—Held call

  • Red, solid—Muted call

2. Expansion microphone port

The wired expansion microphone cable plugs into the port.

3. Mute

A microphone with a slash through it

Toggles the microphone on or off. When you mute the microphone, the LED bar lights red.

If you mute your phone, then the wired expansion microphones also mute.

4. Volume

volume icon with a minus symbol on the left side and a plus sign on the right

Adjusts the speakerphone volume and silence an incoming call.

5. Home screen

Displays the Call Green call icon, Share Blue Share icon, Meetings Orange Meetings icon, and Join Webex Blue Webex Meetings icon icons. You only see the configured features.

6. HDMI-in port

Connects your phone to your computer.

7. LAN port

Connects your phone to your network.

8. HDMI-out port

Connects your phone to your external HDMI screen.

Home Screen Icons

The Cisco Webex Room Phone home screen allows you easy access to your features.

Features availability is based on how your phone connects to the network. If you don't see an icon on your home screen, then the feature isn't available to you.

Use the following figures to identify the home screen icons.

Figure 4. Cisco Webex Room Phone Home Screen
Callouts: Number 1 points to the Share icon. Number 2 points to the Meetings icon. Number 3 points to the top-left corner of the phone screen. Number 4 points to the Call icon. Number 5 points to the Join Webex icon.

The following table describes the home screen features.

Table 2. Cisco Webex Room Phone Home Screen Icons

Icon

Purpose

1. ShareBlue Share icon

Tap Share to share information on an HDMI display screen. Choose from one of the following options:

  • Share through your Webex app—Share content from your Cisco Webex app to your screen display.

  • Guest Share—Share information without a Webex app or Webex account.

  • Cable Share—Share information with an HDMI cable.

2. Meetings Orange Meetings icon

Tap Meetings to view a list of scheduled Webex meetings or to join a meeting from your calendar.

3. Top-left corner of the phone screen.

Tap the top-left corner of the phone screen to adjust the screen brightness, or to access the phone settings menu.

Your phone status also displays here. A red dot Red dot icon indicates that the phone isn't working and it requires an administrator’s attention.

4. Call Green call icon

Tap Call to place a call, view a list of recent calls.

5. Join Webex Blue Webex Meetings icon

Tap Join Webex to join a Webex meeting.

Connect to a Display Screen with an HDMI Cable

To complete the installation of your phone, connect the Cisco Webex Room Phone to a display screen and get the full benefits of the device.

Before you begin

Locate the screen HDMI cable that came with your device. The cables are color coded for easy identification and the screen cable has a red tab on the end.

Procedure


Step 1

Connect the HDMI cable to the Screen port on your phone. This port is on the back of the phone and it has a screen icon.

Step 2

Connect the HDMI cable to the HDMI port on your display screen.

Step 3

Share your content.

  • Tap Share in call to share in a call.

  • Tap Share to share outside a call.

Step 4

Stop your share.

  • Tap Stop share.

  • Accept a call.

  • Start a Webex meeting.

  • Unplug the cable.


Install the Wired Expansion Microphones

The phone supports an optional kit with two wired expansion microphones. You can extend the microphones up to 7 feet (2.13m) from the phone. For best results, place the microphones between 3 feet (0.91 m) and 7 feet (2.1 m) away from the phone.

Procedure


Step 1

Plug the end of the microphone cable into the port on the side of the phone.

Step 2

Extend the microphone cable to the desired position.

The following figure shows installation of a wired expansion microphone.
Figure 5. Wired Expansion Microphone Installation
Wired Expansion Microphone Installation

Pair the Cisco Webex Room Phone to a Cisco Webex App

To get the most out of your Cisco Webex Room Phone, use it with the Cisco Webex Teams or Meetings app. Once you connect, you can collaborate with your coworkers by sharing ideas and having meetings.

For more information, see "Webex Teams App Automatically Connects with Room and Desk Devices" (https://help.webex.com/en-us/nliifbo/Webex-Teams-App-Automatically-Connects-with-Room-and-Desk-Devices) or "Use the Cisco Webex Meetings Desktop App" (https://help.webex.com/en-us/nqx2ohdb/Use-the-Cisco-Webex-Meetings-Desktop-App).

Postpone a Phone Upgrade

Your phone upgrades to new firmware as new features become available. This upgrade happens when the phone is idle so it doesn't interrupt a call.

When it is time for your phone to upgrade, you see an upgrade notification on your phone, and a 30-second timer begins. If you do nothing, then the upgrade proceeds. But if you are busy, then you can postpone the upgrade for 6 hours.

You cannot postpone critical upgrades.

Procedure


Tap Postpone to delay the upgrade.


Feature Support

This document describes all the features that the device supports. However, not all features may be supported with your current configuration. For information on supported features, contact your administrator.

Additional Help and Information

If you have questions about the functions available on your phone, contact your administrator.

The Cisco website (https://www.cisco.com) contains more information about the phones and call control systems.

Cisco One-Year Limited Hardware Warranty Terms

Special terms apply to your hardware warranty and services that you can use during the warranty period.

Your formal Warranty Statement, including the warranties and license agreements applicable to Cisco software, is available on Cisco.com at this URL: https://www.cisco.com/go/hwwarranty.