Outbound Option

Capabilities

Features

Outbound Option enables call centers to manage outbound calls. With Outbound Option, you can configure a contact center to automatically dial customer contacts from imported lists and direct a call to an available agent. This application transfers a call to an agent only if a live contact is reached.

A summary of major features in Outbound Option follows:

Automated dialing

The dialer automatically dials contact numbers, screens for busy signals, no answers, and answering machines, and transfers calls to agents. The dialer transfers a call to an available agent only when it reaches a live contact.

Campaigns

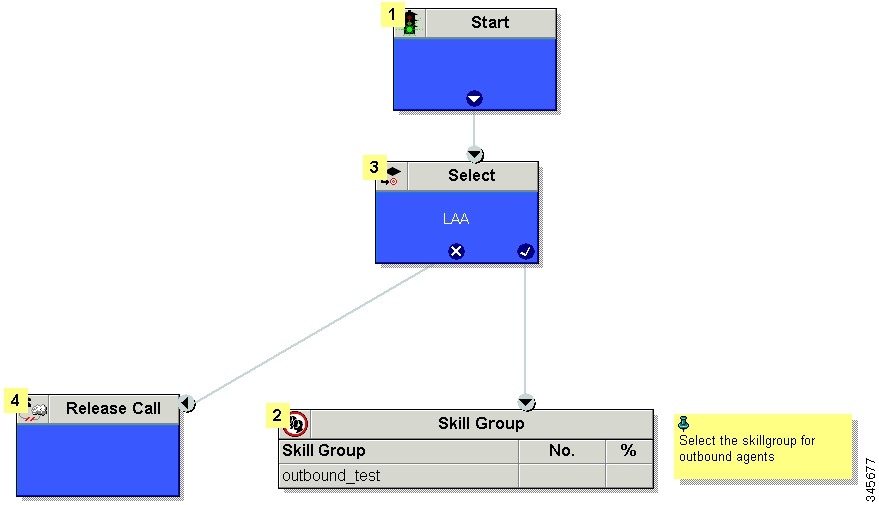
Users create calling campaigns using a set of tabs in a graphical user interface (GUI). A campaign is a set of numbers that will be automatically dialed and a set of agents who will talk to contacted customers.

More specifically, a campaign consists of imported contact lists and agent skill groups.

Imported contact lists and Do Not Call lists

You can import lists of customers you want to call and lists of customers who you do not want to call. You can configure Outbound Option to import both types of lists either by continuously polling or at scheduled intervals. You can also specify whether imported lists will replace existing lists or be appended to them.

Agent skill groups

You assign agents to campaigns by using skill groups. A skill group defines a set of agents with specific capabilities, such as language skills, product knowledge, or training that is associated with a campaign. Agents might belong to multiple skill groups and thus be part of multiple campaigns.

Campaign management

Outbound Option uses a dialing list that is associated with a campaign and directs dialers to place calls to customers. The dialer then directs contacted customers to agents.

Choice of dialing modes

Outbound Option supports the following dialing modes:

  • Preview mode lets the agent preview the contact information on the desktop and decide whether the SIP dialer should dial a contact.

  • Direct Preview mode is similar to Preview mode; however, the dialer places the calls from the agent's phone. This mode prevents abandoned calls and false positive detection of answering machines.

  • Progressive mode dials a configured number of calls per available agent.

  • Predictive mode adjusts the number of calls dialed per agent based on the current abandon rate.

Callbacks
If a customer requests a callback for a later date and time, the agent can enter the request in the system, and the dialer schedules the call appropriately. The following callback types are supported:
  • Personal callbacks specify that the customer receive a callback from the same agent who made the initial contact.

  • Regular callbacks are handled by any available agent.

Call analysis

The Call Progress Analysis (CPA) feature uses a combination of call signaling and media stream analysis to identify different types of calls, such as faxes and modems, answering machines, and operator intercepts.

Sequential dialing

The sequential dialing feature allows up to ten phone numbers per customer record.

Abandoned and retry calls

You can configure campaigns to retry abandoned calls.

Campaign prefix digits for dialed numbers

You can configure a prefix for customer number, which can be used to identify specific campaigns.

Activity reports

Outbound Option reporting features include agent, campaign, dialer, and skill groups report templates.

Two-Way Replication

If you choose to enable Outbound Option, you can also enable Outbound Option High Availability. Outbound Option High Availability supports two-way replication between the Outbound Option database on Logger Side A and the Outbound Option database on Logger Side B.

Outbound API

Outbound API allows you to use REST APIs to create, modify, and delete Outbound Option campaigns.

Outbound API provides a streamlined mechanism for creating campaigns with a single preconfigured query rule and import rule.

Administrative scripts are not required for Outbound Option campaigns created with the Outbound API. If an administrative script is provided, the information in the script overrides the information defined in the API.

Outbound API consists of the following APIs:

  • Outbound Campaign API: Use this API to define new Outbound Option campaigns, and to view, edit, or delete existing campaigns. You can also use this API to disable all campaigns at once (emergency stop).

  • Do Not Call API: Use this API to set the Do Not Call (DNC) import rule configuration for Outbound Option. This prevents the Dialer from dialing the numbers on the DNC list.

  • Import API: Use this API to import customer contact information for an Outbound Option campaign.

  • Time Zone API: Use this API to list all available time zones and to get information for a specified time zone. You also use this API with the Outbound Campaign API to set the default time zone for an Outbound Option campaign.

  • Campaign Status API: Use this API to get the real-time status of running Outbound Option campaigns.

  • Personal Callback (PCB) API: Use this API to configure your Outbound Option campaign to handle personal callbacks. You can create personal callback records individually or in bulk. You can also use this API to update or delete personal callback records.

For more information about Outbound API, see the Cisco Packaged Contact Center Enterprise Developer Reference Guide at https://developer.cisco.com/site/packaged-contact-center/documentation/.

Dialing Modes

Outbound Option supports various dialing modes, described in the following sections.


Note


All dialing modes reserve an agent at the beginning of every Outbound Option call cycle by sending a reservation call to the agent.
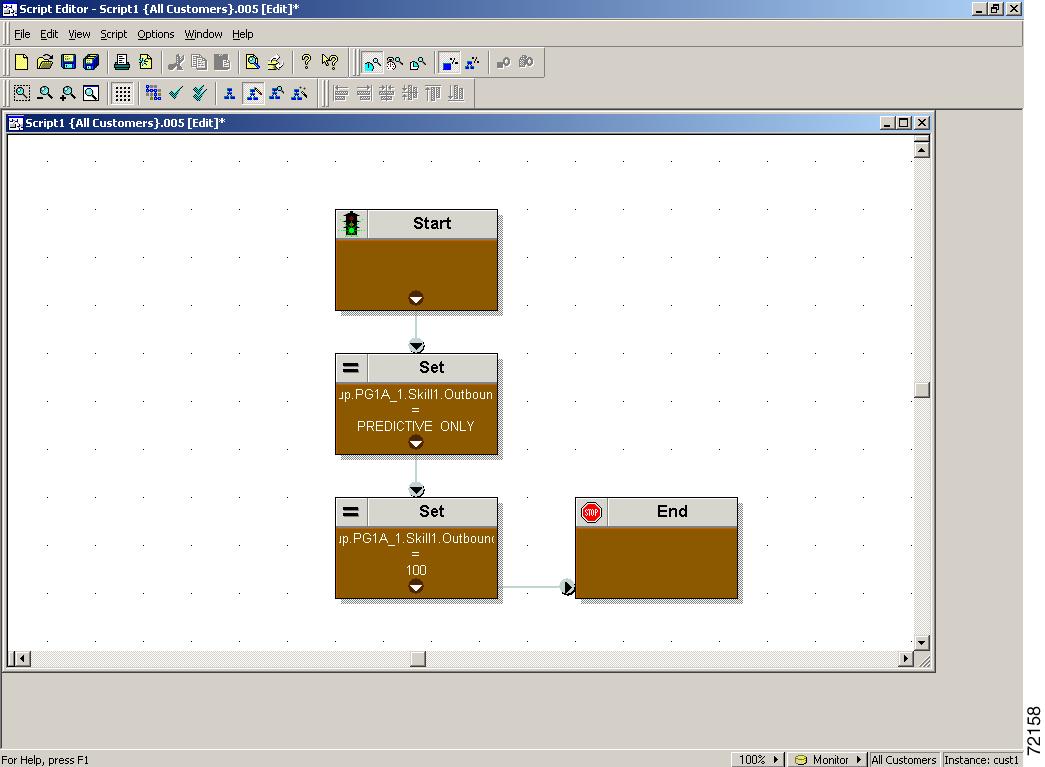

Predictive Dialing

In predictive dialing, the dialer determines the number of customers to dial per agent based on the number of lines available per agent and the configured maximum abandon rate. The agent must take the call if that agent is logged in to a campaign skill group.

A Predictive Dialer is designed to increase the resource utilization in a call center. It is designed to dial several customers per agent. After reaching a live contact, the Predictive Dialer transfers the customer to a live agent along with a screen pop to the agent’s desktop. The Predictive Dialer determines the number of lines to dial per available agent based on the target abandoned percentage.

Outbound Option predictive dialing works by keeping outbound dialing at a level where the abandon rate is below the maximum allowed abandon rate. Each campaign is configured with a maximum allowed abandon rate. In Predictive mode, the dialer continuously increments the number of lines it dials per agent until the abandon rate approaches the configured maximum abandon rate. The dialer lowers the lines per agent until the abandon rate goes below the configured maximum. In this way, the dialer stays just below the configured maximum abandon rate. Under ideal circumstances, the dialer internally targets an abandon rate of 85% of the configured maximum abandon rate. Due to the random nature of outbound dialing, the actual attainable abandon rate at any point in time may vary for your dialer.

Preview Dialing

Preview dialing reserves an agent before initiating an outbound call and presents the agent with a popup window. The agent can then Accept or Reject the call with the following results:

  • Accept: The customer is dialed and transferred to the agent.

  • Reject: The agent is released. The system then delivers another call to the agent, either another Preview outbound call, or a new inbound call.

  • Rejects-Close: The agent is released and the record is closed so it is not called again. The system then delivers another call to the agent, either another Preview outbound call or a new inbound call.

Direct Preview Dialing

The Direct Preview mode is similar to the Preview mode, except that the dialer automatically places the call from the agent's phone after the agent accepts. Because the call is initiated from the agent's phone, the agent hears the ringing, and there is no delay when the customer answers. However, in this mode, the agent must deal with answering machines and other results that the Dialer Call Progress Analysis (CPA) handles for other campaign dialing modes.


Note


  • A zip tone is a tone that announces incoming calls. There is no zip tone in Direct Preview mode.

  • If you select personal callback as the callback option for a Direct Preview mode campaign, a personal callback is dialed in Preview mode. The personal callback is processed like a call in the Preview mode.


Progressive Dialing

Progressive Dialing is similar to predictive dialing (see Predictive Dialing). The only difference is that in Progressive Dialing mode, Outbound Option does not calculate the number of lines to dial per agent, but allows users to configure a fixed number of lines that will always be dialed per available agent.


Note


In the Outbound dialer log, the Progressive dialing mode is also logged as Predictive.


Initial Setup and Maintenance

This section is intended for system administrators who install and configure Packaged CCE. It describes the one-time tasks required to set up Outbound Option. It also discusses occasional upgrade and maintenance tasks. It contains the following topics:

Outbound SIP Dialer Call Flows

Call Flow Diagram for Packaged CCE

This figure illustrates a transfer to agent call flow for a SIP dialer Outbound Option campaign.

Figure 1. SIP Dialer Agent Campaign Call Flow


The call flow works as follows:
  1. You schedule the import and the campaign starts. Records are delivered to the dialer.

  2. The dialer looks for an available agent through the media routing interface.

  3. The media routing peripheral gateway (MR PG) forwards the request to the router.

  4. The routing script identifies an agent and responds to the MR PG.

  5. The MR peripheral interface manager (PIM) notifies the dialer that the agent is reserved.

  6. The dialer signals the gateway to call the customer.

  7. The gateway calls the customer and notifies the dialer of the attempted call.

  8. Call Progress Analysis (CPA) is done at the gateway. When voice is detected, the gateway notifies the dialer.

  9. The dialer directs the voice gateway to transfer the call to the reserved agent by the agent extension.

  10. The gateway directs the call to the agent through Unified Communications Manager (using dial peer configuration to locate the Unified Communications Manager). Media are set up between the gateway and the agent's phone.

Unattended VRU Call Flow Diagram for Packaged CCE

This figure illustrates a transfer-to-VRU call flow for a SIP dialer Outbound Option campaign.

Figure 2. SIP Dialer Unattended IVR Campaign Call Flow


The call flow works as follows:
  1. An unattended VRU campaign starts and schedules an import. Records are delivered to the dialer.

  2. The dialer sends a SIP INVITE to the voice gateway to call a customer.

  3. The gateway calls the customer.

  4. Call Progress Analysis (CPA) detects an answering machine (AMD) and notifies the dialer.

  5. The dialer sends a VRU route request to the MR PG.

  6. The MR PG forwards the route request to the router which invokes the routing script.

  7. The router sends the route response with the network VRU label to the MR PG.

  8. The MR PG forwards the route response to the dialer.

  9. The dialer sends a SIP REFER request for the label to the voice gateway.

  10. The voice gateway transfers the call to Unified CVP.

Unified CVP then takes control of the call.

Unified CCE Configuration for Outbound Option

This section provides procedures for configuring Unified CCE for Outbound Option.

Configure the Dialer Component

You deploy the Dialer as a single redundant pair for each Agent PG with agents who handle Outbound Option calls.

Procedure

Step 1

Make sure that all Packaged CCE services are running.

Step 2

In the Unified CCE Configuration Manager, expand Outbound Option Option and double-click Dialer to display the Outbound Option Option Dialer configuration window.

Step 3

Click Retrieve.

Step 4

Click Add to add a new dialer.

Step 5

Enter the required information on the Dialer General Tab. See the Configuration Manager Online Help for details of these fields.

Step 6

Click Save.

Step 7

Select the Port Map Selection tab to display the port map configuration. See the Configuration Manager Online Help for details of configuring these mappings.

Step 8

Click Add

Step 9

Configure a set of ports and their associated extensions.

A Dialer can support 3000 ports. The allowed Telephony Port range is from 0 to 2999.

Step 10

Click OK. The port mappings appear on the Port Map Selection tab.

Step 11

Click Save to save all the configuration information.


Configure System Options

Procedure

Step 1

In Unified CCE Administration, choose Organization > Campaigns to open the Campaigns page.

Step 2

Define the dialing time range to use for all your Outbound Option campaigns.


For more information on campaign configuration, refer the Manage Campaigns section in the Cisco Packaged Contact Center Enterprise Administration and Configuration Guide at https://www.cisco.com/c/en/us/support/customer-collaboration/packaged-contact-center-enterprise/products-maintenance-guides-list.html.

Enable Expanded Call Context Variables

Perform the following steps to enable the expanded call context variables.

Procedure

Step 1

In Unified CCE Administration, click Overview > Call Settings > Route Settings > Expanded Call Variables.

Step 2

Enable all BAxxxx variables (BAAccountNumber, BABuddyName, BACampaign, BADialedListID, BAResponse, BAStatus, and BATimezone).


What to do next

By default, the solution includes the predefined BAxxxx ECC variables in the "Default" ECC payload. You can also create a custom ECC payload for your Outbound Option call flows. Always remember that you cannot use an ECC variable unless it exists in one of the ECC payloads that you use for a call flow.

Packet Capture for Troubleshooting

For the SIP Dialer to capture data, ensure that the dialer on the Unified CCE PG machine uses the active interface from the Ethernet Interface list. You can determine the active interface with a network protocol analyzer tool such as Wireshark, which you can download from www.wireshark.org. The interface with network packets is the active interface.

You can change the SIP Dialer packet capture parameters to use the active interface from the Windows Registry Editor. Change the interface name option (-i) in the CaptureOptions key to the number of the active interface. For example, to use the third interface, set the value for -i to -i 3.

Capture files are in the HKEY_LOCAL_MACHINE\SOFTWARE\Cisco Systems, Inc.\ICM\<customer instance>\Dialer registry key location.

Unified Communications Manager and Gateway Configuration

In the next phase of Outbound Option installation, you set up Unified Communications Manager and its related gateway.

The following table lists the steps that comprise Unified CM setup.

Table 1. Unified CM Configuration Steps for Deployments with SIP Dialer

Step Number

Procedure

1

Disable Ringback During Transfer to Agent for SIP

2

Configuration of Voice Gateways

3

Configure SIP Trunks

Disable Ringback During Transfer to Agent for SIP

The voice gateway generates a ringback tone to the customer. To prevent the gateway from generating a ringback, apply a SIP normalization script to the Unified Communications Manager SIP trunk.

Apply this SIP normalization script only to the SIP trunk that handles the inbound call from the voice gateway for agent transfer.

Procedure

Step 1

Navigate to https://<IP_address>:8443 where <IP_address> identifies the Unified Communications Manager server.

Step 2

Sign in to Unified Communications Manager.

Step 3

To create a SIP trunk security profile in Unified Communications Manager, select Communications Manager GUI > System > Security > SIP Trunk Security Profile > [Add New].

The default port is 5060.
Figure 3. SIP Security Profile

Step 4

Click Save.

Step 5

Create a new SIP trunk and add the new SIP Trunk Security Profile.

Figure 4. Create a New SIP Trunk

Step 6

Click Save.

Step 7

Click Reset.

Step 8

In Communications Manager GUI > Devices > Device Settings > SIP Normalization Scripts > [Create New], enter the following SIP normalization script into the content field. All other values remain set to default.

M = {}
function M.outbound_180_INVITE(msg) 
msg:setResponseCode(183, "Session in Progress") 
end
return M
Figure 5. Add Normalization Script

Step 9

Click Save.

Step 10

Associate the new normalization script with the SIP trunk.

Figure 6. Associate Script with Trunk

Step 11

Click Save.

Step 12

Click Reset.


Configuration of Voice Gateways

Telecom carriers sometimes send an ISDN alerting message without a progress indicator. This situation causes the voice gateway to send a SIP 180 Ringing message, instead of a SIP 183 Session In Progress message, to the SIP dialer. The SIP dialer can process provisional messages such as 180, 181, 182, and 183 with or without Session Description Protocol (SDP). When the SIP dialer receives these provisional messages without SDP, the dialer does not perform Call Progress Analysis (CPA) and the Record CPA feature is disabled.

To enable the SIP dialer to perform CPA, add the following configuration to the POTS dial-peer of the voice gateway: "progress_ind alert enable 8". This code sends a SIP 183 message to the SIP dialer.

Telecom carriers sometimes send an ISDN alerting message without a progress indicator. This situation causes the voice gateway to send a SIP 180 Ringing message, instead of a SIP 183 Session In Progress message, to the SIP dialer. The SIP dialer can process provisional messages such as 180, 181, 182, and 183 with or without Session Description Protocol (SDP). The SIP Dialer processes the CPA information along with the SDP information because the SDP information is part of these provisional messages. But if the dialer receives these provisional messages without SDP, the dialer does not perform Call Progress Analysis (CPA) and the Record CPA feature is disabled. If the next provisional message changes the SDP information, the dialer processes the SDP information.

Enable 100rel for Outbound Option. Otherwise, Outbound calls from the SIP Dialer fail. The following two sections provide examples of voice gateway configuration from the command line.

Configure Rel1xx Supported for Dial-Peer for the SIP Dialer

The following example shows how to enable rel1xx on a voice dial-peer for the SIP dialer. It uses 8989 for the tag of the voice dial-peer.

GW(config)#config t
GW(config-dial-peer)#dial-peer voice 8989 voip
GW(config-dial-peer)#voice-class sip rel1xx supported 100rel
GW(config-dial-peer)#exit
GW(config)#exit
GW#wr

This short procedure results in the following dial-peer configuration. (Only the bolded line is relevant to this discussion.)

dial-peer voice 8989 voip
incoming called-number 978T
voice-class sip rel1xx supported "100rel"
dtmf-relay rtp-nte h245-signal h245-alphanumeric
codec g711ulaw
Configure Outgoing Dial-Peer for a Dialing Customer

The following example shows how to configure an outgoing dial-peer for a dialing customer.

GW(config)#config t
GW(config-dial-peer)#dial-peer voice 97810 voip
GW(config-dial-peer)#destination-pattern 97810[1-9]
GW(config-dial-peer)#port 1/0:23
GW(config-dial-peer)#forward-digits all
GW(config-dial-peer)#exit
GW(config)#exit
GW#wr

This short procedure results in the following dial-peer configuration for a dialing customer.

dial-peer voice 97810 pots
destination-pattern 97810[1-9]
port 1/0:23
forward-digits all
Configure Rel1xx Disable for Unified CVP Voice Dial-Peer

The following example shows how to disable rel1xx for a Unified CVP voice dial-peer. It uses 8989 for the tag of the voice dial-peer.

GW(config)#config t
GW(config-dial-peer)#dial-peer voice 8989 voip
GW(config-dial-peer)#voice-class sip rel1xx disable
GW(config-dial-peer)#exit
GW(config)#exit
GW#wr

This short procedure results in the following dial-peer configuration. (Only the bolded line is relevant to this discussion.)

dial-peer voice 8989 voip
description CVP SIP ringtone dial-peer
service ringtone
incoming called-number 9191T
voice-class sip rel1xx disable
dtmf-relay rtp-nte h245-signal h245-alphanumeric
codec g711ulaw
no vad
Configure an Outgoing Dial-Peer for Transferring Call to Agent

The following example shows the outgoing dial-peer configuration for transferring calls to agents.

dial-peer voice 11000 voip
 destination-pattern 11T
 session protocol sipv2
 session target ipv4:10.10.10.31(this is Call Manager's IP address)
 voice-class codec 1
 voice-class sip rel1xx supported "100rel"
 dtmf-relay rtp-nte h245-signal h245-alphanumeric
 no vad

Note


In a SIP Dialer with Unified CVP VRU deployment, dialer-related call flows do not invoke call-survivability scripts that are enabled on an incoming POTS dial-peer in the Ingress gateway. However, enabling a call-survivability script on an Inbound POTS dial-peer does not negatively affect dialer-related call flows.


Configure Transcoding Profile for Cisco Unified Border Element

The following example shows the transcoding profile for Cisco UBE.


Note


Transcoding impacts port density.


dspfarm profile 4 transcode universal
     codec g729r8
     codec g711ulaw
     codec g711alaw
     codec g729ar8
     codec g729abr8
     maximum sessions 250
     associate application CUBE
     !

Configure Cisco Unified Border Element

While configuring Cisco UBE, ensure that you:

  • Configure the three dial-peers in the Cisco UBE.

    The dial-peers are used for:

    • Incoming calls from the dialer.

    • Outgoing calls to the terminating network from the Cisco UBE.

    • Calls to be routed to the Cisco Unified Communications Manager.

  • Issue the following commands globally to configure the Cisco UBE:

    • no supplementary-service sip refer

    • supplementary-service media-renegotiate


Note


Virtual CUBE does not support CPA. Use a dedicated physical gateway if your solution needs CPA.


Configure SIP Trunks

Unified CM is connected to the voice gateway by SIP Trunks, which you configure on Unified CM. Set up route patterns for the Dialer which are appropriate for your dial pattern.

See the System Configuration Guide for Cisco Unified Communications Manager at https://www.cisco.com/c/en/us/support/unified-communications/unified-communications-manager-callmanager/products-installation-and-configuration-guides-list.html for instructions on how to configure SIP trunks. For information about logging in to Ingress or VXML gateways, refer to the sections on configuring gateways for Courtesy Callback in the Configuration Guide for Cisco Unified Customer Voice Portal at https://www.cisco.com/c/en/us/support/customer-collaboration/unified-customer-voice-portal/products-installation-and-configuration-guides-list.html.

Procedure

Configure a SIP trunk on Unified CM from Unified CM to the voice gateway. Specify the IP address of the voice gateway in the Destination field.


Configure E1 R2 Signaling

The Outbound Option Dialer may be configured with systems using the E1 R2 signaling protocol. E1 R2 signaling is a channel associated signaling (CAS) international standard that is used with E1 networks in Europe, Latin America, Australia, and Asia. For more information, see E1 R2 Signaling Theory

The high-level procedure for configuring an E1 R2 controller for use with the Outbound dialer is summarized below. For full configuration details, see E1 R2 Signaling Configuration and Troubleshooting.

Procedure

Step 1

Set up an E1 controller connected to the private automatic branch exchange (PBX) or switch. Ensure that the framing and linecoding of the E1 are properly set for your environment.

Step 2

For E1 framing, choose either CRC or non-CRC.

Step 3

For E1 linecoding, choose either HDB3 or AMI.

Step 4

For the E1 clock source, choose either internal or line. Keep in mind that different PBX's may have different requirements for their clock source.

Step 5

Configure line signaling.

Step 6

Configure interregister signaling.

Step 7

Customize the configuration with the cas-custom command.


Example E1 R2 Settings
controller E1 0/0/0
  framing NO-CRC4
  ds0-group 1 timeslots 1-15,17-31 type r2-digital r2-compelled ani
  cas-custom 1
  country telmex
  category 2
  answer-signal group-b 1
  caller-digits 4
  dnis-digits min 4 max 13
  dnis-complete
  timer interdigit incoming 1000
  groupa-callerid-end

Outbound Option Software Installation Steps

This section discusses the tasks that are associated with installing Outbound Option and related components. Before proceeding, navigate to the Side A Unified CCE AW-HDS-DDS and stop all ICM services there. Then perform the steps in the following sections.

Outbound Option Database

Outbound Option uses a dedicated SQL database on the Logger. The installation includes creating this database. The installer collects some business-related data to properly create the database.

If you enable Outbound Option High Availability, ensure that the Logger virtual machine datastore is large enough to accommodate both the Logger database and the Outbound Option database on Logger Side A and Logger Side B.

Consider these guidelines when determining minimum drive size:

  • For a 4000 (or smaller) Agent Reference Design solution, add an extra 500 GB of disk space for the Outbound Option database.

  • For a 12000 Agent Reference Design solution, add an extra 1 TB of disk space for the Outbound Option database.


Note


When using Outbound Option High Availability on a Packaged CCE system, the maximum number of records that can be imported without adding any extra disk space to the Rogger VM is one million.


Outbound Option for High Availability: Preliminary Two-Way Replication Requirements

If you plan to set up Outbound Option for High Availability two-way replication, there are several preliminary requirements.

Create an Outbound Option Database on Logger Side A and Side B

If you have enabled Outbound Option on Logger Side A in a previous release, you must:

  • Stop all Logger services on Logger Side A.

  • Perform a full database backup for the Outbound Option database on Logger Side A and restore it to Logger Side B. Use SQL Server Management Studio (SSMS) to complete this task.

If you have not enabled Outbound Option in a previous release, you must create an Outbound Option database on Logger Side A and Logger Side B. Use the ICMDBA utility to complete this task.


Note


If the database replication fails and it is resolved, the Outbound Option HA must be enabled again. In such a case, you must again synchronize the databases on the Active and Standby sides. Perform a full database backup for the Outbound Option database on Active side and restore it to the Standby side.


Define Logger Public Interface Hostname on Logger Side A and Logger Side B

As you configure Outbound Option for High Availability, you must define the Logger Public Interface Hostname on both sides of the Logger. IP addresses are not allowed.

Make Campaign Manager and Dialer Registry Setting Customizations on Both Side A and Side B

If you customize any Campaign Manager and Dialer registry settings on one side, you must make the same updates for the registry settings on the other side.

Stop the Logger Service Before Enabling or Disabling Outbound Option High Availability

Before you enable or disable Outbound Option High Availability, stop the Logger service on the applicable side or sides.

Create Outbound Option Database

Before you use Outbound Option, estimate the size for the Outbound Option database.

Procedure

Step 1

Collect the following information:

  • The size, in bytes, of each customer record in the import file. If the size is less than 128 bytes, use 128. (RecordSize)

  • The number of records that are imported. (RecordCount)

  • Do the records from new imports replace or append to records that are already in the database?

Step 2

Estimate the contact table size as follows:

  • If imports overwrite existing records: Do not change record count.

  • If imports append to existing records: RecordCount = total number of rows kept in a customer table at a time.

  • contact-table-size = RecordSize * RecordCount * 1.18

Step 3

Estimate the dialing list table size as follows:

  • If imports overwrite existing records: RecordCount = number of rows imported * 1.5. (50% more rows are inserted into the dialing list than are imported.)

  • If imports append existing records: RecordCount = total number of rows kept in customer table at a time * 1.5

  • dialing-list-table-size = rows in dialing list * 128 bytes * 4.63

Step 4

Calculate the database size using this formula:

(Number of rows in all DL tables * (size of one row + size of index) ) + 
(Number of rows in personal call back table * (size of one row + size of index) ) +  
(Number of rows in Contact List table * (size of one row + size of index))

Step 5

Start ICMDBA by entering ICMDBA in the Microsoft Windows Run dialog box or command window.

Step 6

Select the Logger. Then, select Database > Create.

Step 7

In the Create Database window, specify the Outbound Option database type.

Step 8

Click Add. The Add Device window appears.

Use this window to create a new data device and log device for the Outbound Option database. Specify the disk drive letter and size in megabytes for each new device.

Step 9

Click OK to create the device.

Step 10

Click Create, and then click Start.

Step 11

Click Close.


If necessary, you can later edit the device to change storage size, or remove a device, using the Database > Expand option.


Caution


You cannot make manual changes to the contents of the Outbound Option database. Do not use triggers in the Outbound Option database. Do not add or modify triggers for the dialing lists or personal callback list. The Dialer_Detail table in the logger or HDS contains the information that custom applications require. Extract that information from the historical database server (HDS) to a separate server where the custom application can process the data without impacting the HDS.

Note


If you have used the ICMDBA tool to create an Outbound Option database on Side B of Unified CCE Rogger and you later uninstall Packaged CCE, you can manually delete the database after the uninstallation by using SQL Server Management Studio (SSMS).


Note


When you use the Append option to import records to the Outbound Contact Table, the size of the Blended Agent (BA) database keeps increasing and it occupies all the available space in the disk. Hence, you must manually purge the Outbound Contact Table to create more space on the disk.


What to do next

You must enable autogrowth on the Outbound Option database. For details, refer to the section about verifying database configuration in the Outbound Option Guide for Unified Contact Center Enterprise at https://www.cisco.com/c/en/us/support/customer-collaboration/unified-contact-center-enterprise/products-user-guide-list.html.

Configure the Logger for Outbound Option

Use this procedure to configure the Logger for Outbound Option.

You can (optionally) configure the Logger to enable Outbound Option and Outbound Option High Availability. Outbound Option High Availability facilitates two-way replication between the Outbound Option database on Logger Side A and the Outbound Option database on Logger Side B. Use the ICMDBA tool to create an outbound database on Side A and Side B; then set up the replication by using Web Setup.

Perform the following procedure on both the Side A and Side B Loggers to configure Outbound Option or Outbound Option High Availability. Both Logger machines must be up and operational.


Important


Before you configure the Logger for Outbound Option High Availability:

  • Confirm that an Outbound Option database exists on Logger Side A and Logger Side B.


Procedure

Step 1

Open the Web Setup tool.

Step 2

Choose Component Management > Loggers.

Step 3

Choose the Logger that you want to configure, and click Edit.

Step 4

Click Next twice.

Step 5

On the Additional Options page, click the Enable Outbound Option check box.

Step 6

Click the Enable High Availability check box to enable Outbound Option High Availability on the Logger. Checking this check box enables High Availability two-way replication between the Outbound Option database on Logger Side A and the Outbound Option database on Logger Side B. Two-way replication requires that you check this check box on the Additional Options page for both Logger Side A and Side B. If you disable two-way replication on one side, you must also disable it on the other side.

You must enable Outbound Option in order to enable Outbound Option High Availability. Similarly, if you have enabled High Availability, you must disable High Availability (uncheck the Enable High Availability check box) before you can disable Outbound Option (uncheck the Enable Outbound Option check box).

Step 7

If you enable High Availability, enter a valid public server hostname address for Logger Side A and Logger Side B. Entering a server IP address instead of a server name is not allowed.

Step 8

If you enable High Availability, enter the Active Directory Account Name that the opposite side Logger runs under or a security group that includes that account.

Note


While using Outbound Option High Availability, if you want to change the Logger Public Interface or Active Directory Account Name, you must disable Outbound Option High Availability using logger setup. Only after disabling Outbound Option HA, change the Logger Public Interfaces or Active Directory Account Name, then re-enable Outbound Option High Availability to update the new Logger Public Interface or Active Directory Account Name.

Step 9

Select the Syslog box to enable the Syslog event feed process (cw2kfeed.exe).

Note

 
The event feed is processed and sent to the Syslog collector only if the Syslog collector is configured. For more information about the Syslog event feed process, see the Serviceability Guide for Cisco Unified ICM/Contact Center Enterprise at https://www.cisco.com/c/en/us/support/customer-collaboration/unified-contact-center-enterprise/products-installation-and-configuration-guides-list.html.

Step 10

Click Next.

Step 11

Review the Summary page, and click Finish.


Additional Two-Way Outbound Option Database Replication Consideration

Keep in mind the following consideration when setting up two-way replication.

Import to Active Side

Importing a local file succeeds only if you import it to the active side. To avoid having to identify which side is active, you can use any of the following methods:

  • Create a Microsoft Windows file share that is accessible to both sides with the same mapping; for example, //<machine_name>/drive/file, viewable from both sides.

  • Use Microsoft Windows Distributed File System (DFS). With DFS, you can set up a local drive that DFS updates for you. DFS also makes sure that operations are replicated. For more information, see your Microsoft documentation.

  • For campaigns created by using the Outbound API, you can use the Import API to import contacts without identifying the active side. For more information, see the Cisco Packaged Contact Center Enterprise Developer Reference at https://developer.cisco.com/site/packaged-contact-center/documentation/.

Add MR PIM for Outbound

Procedure

Step 1

Access the Unified CCE PG on Side A.

Step 2

From Cisco Unified CCE Tools, select Peripheral Gateway Setup.

Step 3

In the Instance Components panel of the Components Setup screen, select the PG2A Instance component for Side A. (Select PG2B for Side B.) Then click Edit.

Step 4

In the Peripheral Gateways Properties screen, click Media Routing. Then click Next.

Step 5

Click Yes at the prompt to stop the service.

Step 6

From the Peripheral Gateway Component Properties screen, click Add and select PIM2.

Note


Select PIM2 and peripheralID 5003 even if you are not using PIM1 for another machine.

Step 7

Configure with the client type of Media Routing as follows:

  1. Check Enabled.

  2. Enter MR2 or a name of your choice for the Peripheral name.

  3. Enter 5003 for the Peripheral ID.

  4. Enter Unified CCE PG Side A IP (Side B IP for PG2B) for the Application Hostname(1).

  5. Retain the default value for the Application Connection port (1).

  6. Enter Unified CCE PG Side B IP (Side A IP for PG2B) for the Application Hostname(2).

  7. Retain the default value for the Application Connection port (2).

  8. Enter 5 for the Heartbeat interval (sec).

  9. Enter 10 for the Reconnect interval (sec).

  10. Check the Enable Secured Connection option.

    This establishes a secured connectionbetween MR PIM and Application Server.

    Ensure that you provide the correct information in the Application Hostname (1) and Application Connection Port (1) fields.

  11. Click OK.

Step 8

Accept defaults and click Next until the Setup Complete screen opens.

Step 9

At the Setup Complete screen, check Yes to start the service. Then click Finish.

Step 10

Click Exit Setup.

Step 11

Repeat from Step 1 for the Unified CCE PG on Side B.


Install Dialer Component on the PG Virtual Machine

Procedure

Step 1

Stop all Packaged CCE Services.

Step 2

On both the Side A and Side B PGs, run Peripheral Gateway Setup. Select Start > All Programs > Cisco Unified CCE Tools > Peripheral Gateway Setup.

Step 3

In the Cisco Unified ICM/Contact Center Enterprise & Hosted Components Setup dialog, select an instance from the left column under Instances.

Step 4

Click Add in the Instance Components section.

The ICM Component Selection dialog opens.

Step 5

Click Outbound Option Dialer.

The Outbound Option Dialer Properties dialog opens.

Step 6

Check Production mode and Auto start at system startup. These options set the Dialer Service startup type to Automatic, so the dialer starts automatically when the machine starts up.

The SIP (Session Initiation Protocol) Dialer Type is automatically selected.

Step 7

Click Next.

Step 8

Supply the following information on this page:

  • In the SIP Dialer Name field, enter the name of the SIP dialer. For example, Dialer_for_Premium_Calling_List. There’s a 32-character limit. The name entered here must match the name that is configured in Configuration Manager.

  • For SIP Server Type, select Cisco voice gateway .

  • In the SIP Server field, enter the hostname or IP address of the Cisco voice gateway.

    Note


    The SIP Server hostnames are restricted to a maximum of 16 characters.

  • In the SIP Server Port field, enter the port number of the SIP Server port. Default is 5060.

Click Next.

Step 9

On the Outbound Option Dialer Properties dialog, specify the following information:

  • Campaign Manager server—The hostname or IP address of the Outbound Option server (the hostname or IP address of Unified CCE Rogger Side A) in Packaged CCE.

  • Campaign Manager server A—If the Campaign Manager is set up as duplex, enter the hostname or IP address of the machine where the Side A Campaign Manager is located. If the Campaign Manager is set up as simplex, enter the same hostname or IP address in this field and the Campaign Manager server B field. You must supply a value in this field.

  • Campaign Manager server B—If the Campaign Manager is set up as duplex, enter the hostname or IP address of the machine where the Side B Campaign Manager is located. If the Campaign Manager is set up as simplex, enter the same hostname or IP address in this field and the Campaign Manager server A field. You must supply a value in this field.

    In simplex mode, make sure not to provide same port number in server Side B and Side A. For more information about port ranges, see the Port Utilization Guide.

  • Enable Secured Connection— Allows you to establish secured connection between the following:

    • CTI server and dialer

    • MR PIM and dialer

    Check the Enable Secured Connection check box to enable secured connection.

    Note


    Before you enable secured connection between the components, ensure to complete the security certificate management process.

    For more information, see the Security Guide for Cisco Unified ICM/Contact Center Enterprise at https://www.cisco.com/c/en/us/support/customer-collaboration/unified-contact-center-enterprise/products-installation-and-configuration-guides-list.html.

  • CTI server A—The hostname or IP address of Unified CCE PG Side A.

  • CTI server port A—The port number that the dialer uses to create an interface with CTI server-Side A. The default is 42027.

  • CTI server B—The hostname or IP address of Unified CCE PG Side B.

  • CTI server port B—The port number that the dialer uses to create an interface with CTI server-Side B. The default is 43027.

  • Heart beat—The interval between dialer checks for the connection to the CTI server, in milliseconds. The default value is 500.

  • Media routing port—The port number that the dialer uses to create an interface with the Media Routing PIM on the Media Routing PG. The default is 38001. Make sure the Media routing port matches that of the MR PG configuration.

Step 10

Click Next. A Summary screen appears.

Step 11

Click Next to begin the dialer installation.


Optional - Edit Dialer Registry Value for Auto-Answer

If you enable auto answer in the CallManager with a zip tone, you must disable auto answer in the Dialer or Dialers, if there are more than one. A zip tone is a tone sent to the agent's phone to signal that a customer is about to be connected.

To disable auto answer in the Dialer, after the Dialer process runs for the first time, change the value of the following registry key to 0:

HKEY_LOCAL_MACHINE\SOFTWARE\Cisco Systems, Inc.\ICM\<instance_name> \Dialer\AutoAnswerCall

Auto Answer Configuration on Agent Phones

The dialer component is preconfigured during installation to auto answer Outbound Option related calls to the Outbound Option agent. However, this default configuration does not provide a zip tone to the agent (which notifies of incoming calls), so agents must monitor the agent application for incoming customer calls.

To enable zip tone, enable auto-answer on the agent’s phone configuration in Unified CM. This solution adds about a second onto the transfer time. This solution is identical to the solution that is used for Unified CCE.

For Mobile Agents using the nailed connection, the Unified CM auto answer setting does not provide a zip tone, but contact center enterprise does provide an option for playing a notification tone to the agent using the agent desk settings.

Enabling auto answer in the agent desk settings or in the dialer component in conjunction with the Unified CM can be problematic. Therefore, disable the auto answer option in the dialer component, and enable it either in the agent desk settings or in Unified CM.

Verify connections

The Diagnostic Framework Portico provides details about the health of the installation even before any campaign configuration is initiated or before any call is placed. The interface contains the following details about the dialer status.

Procedure


Step 1

Navigate to the Outbound Option Dialer component in the Diagnostic Framework Portico.

The Node Name is Dialer. The Process name is BADialer.

Step 2

Verify that the Campaign Manager (CM) has a status of Active (A).

Step 3

Verify that the CTI Server (CTI) has a status of Active (A).

Step 4

Verify that the number of Configured Ports equals the number of Ready Ports.

Step 5

Verify that the MR has a status of Active (A).


Maintenance Considerations

This section contains information about maintaining the Outbound Option application.

SIP Dialer Voice Gateway Over-capacity Errors

If your network monitoring tool receives an alarm in the SIP dialer about being over capacity, you can ignore the alarm unless it becomes an ongoing issue. This section describes the source of the alarm and remedial actions associated.

If the Voice Gateway in a SIP dialer implementation is over capacity, the SIP Dialer receives the following message: SIP 503 messages if the SIP Dialer is deployed with Voice Gateway only

If the percentage of SIP 503 messages reaches 1% of all messages, the SIP dialer raises an alarm.

Use one of the following measures to attempt to remedy the problem if Voice Gateway capacity becomes an ongoing issue:

  • Check the Voice Gateway configuration. If there are errors, fix them and reset Port Throttle to its original value. Port Throttle (the calls-per-second rate at which the dialer dials outbound calls) is set on the Dialer General tab in the Configuration Manager.

  • Check the sizing information. Adjust the value of Port Throttle according to the documented guidelines.

  • Enable the auto-throttle mechanism by setting the Dialer registry setting EnableThrottleDown to 1.

    To set EnableThrottleDown, open the Registry Editor (regedit.exe) on the PG machine and navigate to HKEY_LOCAL_MACHINE\SOFTWARE\Cisco Systems, Inc.\ICM\<customerinstance>\Dialer.

The SIP dialer performs an automatic throttle down when the percentage of SIP 503 messages reaches 2% of all messages, if the auto-throttle mechanism is enabled. This throttle down means that the SIP dialer decreases the configured value of Port Throttle by approximately 10%.

If one throttle down does not correct the problem, the SIP dialer performs more throttle downs until either the problem is corrected or the value of Port Throttle is throttled down to 50% of the originally configured value.

For each automatic throttle down, alarm and trace messages clearly provide detailed information about the adjusted port throttle value, configured port throttle value, and time duration.

Even after the problem is corrected, the dialer does not automatically throttle back to the configured value. To increase the throttle back to the configured value, run the updateportthrottle /portthrottle <configured value> command using the process monitoring tool Procmon.

Update the North American Numbering Plan Data

The Regional Prefix Update Tool (RPUT) is used to update the Packaged CCE database to the latest North American Local Exchange NPA NXX Database (NALENND).

You can use this tool only if Packaged CCE is using the North American Numbering Plan.

The RPUT is composed of the following two files (installed in the ICM\bin directory on the Unified CCE AW-HDS-DDS server):

  • region_prefix_data.txt (or the <DatafileName>)

    Contains the data this tool uses to update the region prefix table in the Packaged CCE database. Note that you should change paths to the ICM\bin directory.

  • regionfix.exe

    This executable reads the region_prefix_data.txt data file and updates the region prefix table.

The RPUT is run from the command line as described in the following procedure.

Procedure

Step 1

Open a command prompt (Select Start > Run, and enter cmd, then click OK).

Step 2

Change the path to ICM\bin.

Step 3

Enter the following at the prompt: regionfix.exe <DatafileName> (where <DatafileName> is the name of the data file).

The Regional Prefix Update Tool then shows the version of the input data file and asks if you want to proceed. If you proceed, the tool connects to the Packaged CCE database. The number of records that are to be updated, deleted, and inserted appear. These records are put into three different files:

  • region_prefix_update.txt (which includes preserved Custom Region Prefixes)

  • region_prefix_new.txt

  • region_prefix_delete.txt

Step 4

You can either delete or retain the entries present in the region_prefix_delete.txt file while performing the insertions and updates. To retain the entries, type No when the tool prompts you to delete the entries. Type Yes to delete the entries.

Step 5

Check the contents of the files before proceeding.

Step 6

Answer Yes to proceed with the update.

When the update is complete, the tool displays the following message:

Your region prefix table has been successfully updated.


Administration and Usage

Campaign configuration

Campaign Task List

The following table lists the steps that are required to create both an agent and IVR campaign, and the location of the instructions for the task.

Table 3. Steps for Creating a Campaign

Step Number

Task

Where Discussed

1

Create one or more skill groups for the campaign.

Configure Skill Group

2

Configure the call type using the Packaged CCE Call Type gadget.

Create a Call Type

3

Create a dialed number on the MR client using the Packaged CCE Dialed Number gadget. This dialed number is for agent reservation.

Configure Dialed Numbers

4

Create DN for Abandon to IVR on the MR PG for the SIP dialer.

Configure Dialed Numbers

5

Create DN for AMD to IVR on the MR PG for the SIP dialer.

Configure Dialed Numbers

6

Configure a campaign using the Outbound Option Campaign tool.

Create a Campaign

7

Configure a routing script using the Script Editor.

Set Up Routing Scripts

8

Configure an administrative script using the Script Editor.

Set Up Administrative Scripts

9

Voice gateway configuration.

Voice Gateway and Unified CVP Configuration for a VRU Campaign

Configure Skill Group

Add at least one skill group. For an agent campaign, add at least one agent to the skill group. Log the agent in to the skill group, and make the agent ready for the agent campaign. You do not need to add an agent for a VRU campaign skill group. For information about configuring skill groups, see the Cisco Packaged Contact Center Enterprise Administration and Configuration Guide at https://www.cisco.com/c/en/us/support/customer-collaboration/packaged-contact-center-enterprise/products-maintenance-guides-list.html.

Create a Call Type

The dialed numbers and routing scripts that you will create will reference call types, so you should create them as needed. For information about creating call types, see the Cisco Packaged Contact Center Enterprise Administration and Configuration Guide at https://www.cisco.com/c/en/us/support/customer-collaboration/packaged-contact-center-enterprise/products-maintenance-guides-list.html. For example, you can create one call type for an agent campaign and another for a VRU campaign. You need to associate the call types with the dialed numbers you created earlier.

Create a Campaign

The Campaign feature in the Packaged CCE webadmin is used to add, delete, and modify Outbound Option campaigns.

Before you create a campaign, first configure the following information:

  • At least one skill group

  • The following dialed numbers with Routing Type set to Outbound Voice:

    • One for accessing the agent reservation script (not required for transfer to VRU campaigns).

    • One for transferring the call to the VRU for abandon treatment when no agents are available. This number must be different from the previous number.

    • One for transferring the call to the VRU for answering machine detection (AMD) or transfer to VRU campaign treatment. This number can be the same as the previous number, but different from the first number.

For more information, refer the Manage Campaign section in the Cisco Packaged Contact Center Enterprise Administration and Configuration Guide at https://www.cisco.com/c/en/us/support/customer-collaboration/packaged-contact-center-enterprise/products-maintenance-guides-list.html.

Notes on Editing a Campaign in Progress

You can edit most campaign configuration settings while a campaign is running. The changes take effect with new calls after the setting has been changed. However, do not edit the following settings while a campaign is in progress:

  • Do not modify the Maximum Attemptsvalue. Modifying this value while a campaign is in progress can cause a long delay in record retrieval and longer agent idle times.

  • Do not delete a skill group while a campaign is in progress.

(Optional) Configure Personal Callbacks

PersonalizedCallback is an optional feature in Outbound Option. Personal Callback enables an agent to schedule a callback to a customer for a specific date and time. A personal callback connects the agent who originally spoke to the customer back to the customer at the customer-requested time.

When you create campaigns, you enable the callback feature individually for each campaign.

For more information, refer the Manage Campaign section in the Cisco Packaged Contact Center Enterprise Administration and Configuration Guide at https://www.cisco.com/c/en/us/support/customer-collaboration/packaged-contact-center-enterprise/products-maintenance-guides-list.html.

Voice Gateway and Unified CVP Configuration for a VRU Campaign

For a VRU campaign, you need to configure a dial-peer in the voice gateway. This dial peer is used to instruct the voice gateway to transfer the call to Unified CVP. It must match the Network VRU label that is configured on the MR routing client with type 10 Unified CVP network VRU.

In base configuration, this label is preconfigured with default value 66611110000. Follow the steps in this example.

Procedure


Step 1

Add a dial-peer to match the network VRU label in the outbound routing client.

Example:

dial-peer voice 6661111 voip
description ******To CVP1*****
destination-pattern 6661111T
session protocol sipv2
session target ipv4:10.10.10.10
voice-class codec 1
voice-class sip rel1xx supported "100rel"
dtmf-relay rtp-nte h245-signal h245-alphanumeric
no vad

Note


The call can be transferred to only one Unified CVP; in the above example, the call is transferred to CVP1.

Step 2

Configure a dial-peer for the VRU leg. This is the same dial-peer as the inbound call flow whose call is transferred to Unified CVP.

Example:

dial-peer voice 777111 voip
description Used for VRU leg
service bootstrap
incoming called-number 7771111T
voice-class sip rel1xx disable
dtmf-relay rtp-nte h245-signal h245-alphanumeric
codec g711ulaw
no vad

Step 3

A Routingpattern needs to be configured on Unified CCE Administration so that Unified CVP can route the call to the VXML gateway after it receives the run script request from the router. This dialed pattern is the same one as the inbound call flow that transfers a call to VRU. If the base configuration has not been changed, the pattern is 777111*.

Note


It is possible that the procedures in Steps 2 and 3 may have been done already during installation. For more information, see the Cisco Packaged Contact Center Enterprise Administration and Configuration Guide at https://www.cisco.com/c/en/us/support/customer-collaboration/packaged-contact-center-enterprise/products-maintenance-guides-list.html


Outbound Option Scripting

Outbound Option uses Packaged CCE scripting configured on the Administrative Workstation to manage campaigns.

There are two types of scripts:

  • Administrative Scripts

  • Agent Reservation Routing Scripts

Administrative Scripts for Outbound Option

Outbound Option administrative scripts enable, disable, or throttle campaign skill groups for outbound campaigns. The scripts can also automatically close out a skill group for a specific campaign. The administrative scripts can use time or any other conditional factor that the script can access to close a skill group. You can perform this scripting at the skill group level to provide more flexibility for managing larger campaigns with multiple skill groups.

Enable a campaign skill group by setting the campaign mode to one of the available modes: Preview, Direct Preview, Progressive, or Predictive. Schedule an administrative script to run at regular intervals. Disable the campaign skill group in the administrative script by creating a script node to change the campaign mode to inbound for that skill group.

An administrative script controls a campaign skill group. You can only map a campaign skill group to one campaign at a time. Multiple administrative scripts controlling the same skill group can result in conflicting campaign mode requests.


Note


Both the Outbound API and administrative scripts can set the dialing mode for a campaign. The value set by the administrative script takes precedence over the value set by the API.


You can also use administrative scripts to control the percentage of agents that a campaign skill group can use. A script can also set whether to use a skill group for other campaigns or inbound calls.


Note


To allow the outbound control and percent configured values from Campaign Skill group (set by either the Configuration Manager Campaign Skill Group tab or the Campaign API) to apply without restarting the router. If you use an administrative script to set the outbound control and percent variables in operation and if you want to employ these configured value on the Campaign Skillgroup, set the outbound control and percent variable to -1 in the administrative script accordingly.


Set Up Administrative Scripts

Use the Script Editor application to create an administrative script for each skill group to set the OutboundControl variable and the skill group reservation percentage. The Outbound Option Dialer uses the value of this variable to determine which mode each skill group uses.


Note


  • If the OutboundControl variable is not set, the skill group defaults to inbound. See chapter 1, "Outbound Business Concepts" for detailed information about Outbound Option outbound dialing modes.

  • Make sure that the routing client for the translation route labels is Unified CM, which makes the outgoing call.


Perform the following steps to create the administrative script:

Procedure

Step 1

Open the Script Editor application.

Step 2

Select File > New > Administrative Script.

Step 3

Create an administrative script.

One script can be used to control all Outbound Option skill groups or multiple scripts can control multiple Outbound Option skill groups. For example, if you want to control skill groups at different times of the day, you need multiple administrative scripts; however, if you are going to initialize the groups all in the same way, you need only one script (with additional Set nodes).

Step 4

Set up the script with the following nodes (required): Start, Set Variable, and End.

The following diagram displays a simple administrative script where both the OutboundControl variable and the outbound percentage are set for a skill group. A script in a production call center is typically more complex, perhaps changing these variables according to time of day or service level.

Figure 7. Sample Administrative Script


Note

 
The Transfer to VRU feature requires an IF node in the administrative script to disable it if the VRU is not available. Also, to ensure timely responses to VRU outages, set the administrative script to run every minute.

Step 5

Set the OutboundControl variable. Setting this variable enables contact center managers to control the agent mode.

Right-click on the work space and select NEW > Object > Set Variable to open the Set Properties window.
  • For Object Type, select a skill group.

  • For variable, select OutboundControl.

Set this variable to one of the values listed in the following table.

Table 4. OutboundControl Variable Values

Value String

Description

INBOUND

Agents take inbound calls only. Outbound dialing is disabled for the skill group.

PREDICTIVE_ONLY

Agents in the skill group are dedicated for outbound Predictive calls only.

PREVIEW_ONLY

Agents in the skill group are dedicated for outbound Preview calls only.

PROGRESSIVE_ONLY

Agents in the skill group are dedicated for outbound Progressive calls only.

PREVIEW_DIRECT_ONLY

Agents only place outbound calls and hear ringtones, such as phone ringing or busy signal.

Note


If the administrative script is changed and the SET variable is removed, the value of the OutboundControl variable is the same as it was the last time the script was run. However, if the Central Controller is restarted, the value resets to INBOUND.

Step 6

Right-click on the work space and select NEW > Object > Set Variable to open the Set Properties window.

  • For Object Type, select a skill group.

  • For variable, select OutboundControl.

Step 7

Set the OutboundPercent variable in the same administrative script; for example, select the OutboundPercent variable in the Set Properties window and enter the agent percentage in the Value field. This variable controls the percentage of agents, which are logged in to a particular skill group, used for outbound dialing. For example, if 100 agents are logged in to a skill group, and the OutboundPercent variable is set to 50%, 50 agents are allocated for outbound dialing for this campaign skill group. This setup allows the rest of the agents to be used for inbound or other active campaigns. The default is 100%.

Note


This variable does not allocate specific agents for outbound dialing, just a total percentage. The default is 100%.

Step 8

Schedule the script.

  1. Select Script > Administrative Manager. An Administrative Manager dialog box appears.

  2. Click Add.

  3. On the Script tab, select the administrative script.

  4. On the Period tab, specify the run frequency of the script. (For example, every minute of every day.)

  5. (Optional) Enter a description on the Description tab.

  6. Click OK to close the Add Administrative Schedule dialog box.

  7. Click OK to close the Administrative Manager.


Sample Administrative Script: ServiceLevelControl
The following figure demonstrates how to control skill group modes based on "Service Level," which maximizes the resource utilization in a call center and maintains an acceptable service level at the same time.
Figure 8. ServiceLevelControl Script


This script divides the day into two parts:

  • Peak Traffic Period (8:00 a.m. to 12:00 p.m.): During this period, the OutboundControl variable is set to INBOUND only, because more agents are required to handle inbound calls.

  • Other Periods: During all other time periods, the OutboundControl variable is set according to the service level in the past half hour. If the skill group service level in the past half-hour period is over 85%, the OutboundControl variable gets set to PREDICTIVE_ONLY, which maximizes the efficiency of outbound campaigns. If during any half-hour period the skill group service level drops below 85%, the OutboundControl variable is switched to PREVIEW_BLENDED, so that the agents in the skill group can accept inbound calls to improve the service level. When the agents are not in an inbound call, Outbound Option presents the agents with a Preview outbound call, maximizing the resource utilization for the call center at the same time.

Add the IF Node

To add the IF node, follow these steps:

Procedure

Step 1

Select ObjectType as Skillgroup.

Step 2

Select the skill group that was created for outbound as the Object.

Step 3

Select ServiceLevelHalf as the variable.


Routing Scripts for Outbound Option

Two types of routing scripts are described later in this document. One is for Agent Campaign and one is for VRU Campaign.

Set Up Routing Scripts

Use the Script Editor application to create a reservation script that uses the dialed number for the Outbound Routing Type and routes through one of the following methods:

  • Using a Select node to the previously configured skill group.

  • Using Dynamic Route Target by ID in the Skill Group node.

Before beginning this procedure, you must create and configure a skill group. For information about creating skill groups, see the Cisco Packaged Contact Center Enterprise Administration and Configuration Guide at https://www.cisco.com/en/US/products/ps12586/tsd_products_support_series_home.html.

The following sections contain diagrams displaying sample routing scripts.

Script for Agent Campaign Without Personal Callback

The following steps and accompanying diagrams provide an example of how to create a script for an agent campaign without personal callback.

Procedure

Step 1

Using the Dialed Number tool, associate the Outbound Voice dialed numbers with the configured call type.

Step 2

Using the Call Type Manager in Script Editor, associate the MR dialed numbers with the configured call type and newly created reservation script.

Figure 9. Sample Script for Agent Campaign Without Personal Callback (Using Select Node)


Figure 10. Sample Script for Agent Campaign Without Personal Callback (Using Dynamic Route Target by ID)


Script for Agent Campaign with Personal Callback

The following steps and accompanying diagram provide an example of how to create a script for an agent campaign with personal callback.

Include the following nodes:
  • Add a queue-to-agent node.
  • Add a Queue to Skill Group Node after the Queue to Agent Node. Use a skill group that handles outbound calls.

  • End the script in a release call node for a successful case; otherwise end the script with the END node.

Procedure

Step 1

Using the Dialed Number tool, associate the Outbound Voice dialed numbers and Personal Callback dialed numbers with the configured call type.

Step 2

Using the Script Editor Call Type Manager, associate the call type with the newly created reservation script.

Figure 11. Sample Script for Agent Campaign with Personal Callback


Configure Queue to Agent Node

Procedure

Step 1

In Script Editor, double-click the Queue to Agent node.

Step 2

In the Agent Expression column, enter Call.PreferredAgentID.

Step 3

Confirm that the Peripheral column is left blank.

Step 4

Click OK to save the Queue to Agent node.

Step 5

Save and then schedule the script. When scheduling the script, use the call type that is configured for personal callback.

For more information about script scheduling, see the Cisco Packaged Contact Center Enterprise Administration and Configuration Guide at https://www.cisco.com/en/US/products/ps12586/tsd_products_support_series_home.html.

Script for VRU Campaign

The following steps and accompanying diagram provide an example of how to create a script for a VRU campaign.

Procedure

Step 1

Using the Dialed Number tool, associate the Outbound Voice dialed numbers with the configured call type.

Step 2

Using the Script Editor Call Type Manager, associate the call type with the newly created reservation script.

Figure 12. Sample Script for VRU Campaign


SIP Dialer Recording Parameters Configuration

When recording is enabled in a campaign, the number of recording files that result can be large. The following table lists registry settings that you can adjust to regulate the number of recording sessions and the maximum recording file size.

Registry Setting

Default Setting

Description

MaxAllRecordFiles

500,000,000

The maximum recording file size (in bytes) of all recording files.

MaxMediaTerminationSessions

200

The maximum number of media termination sessions if recording is enabled in the Campaign configuration.

MaxPurgeRecordFiles

100,000,000

The maximum recording file size (in bytes) when the total recording file size, MaxAllRecordFiles, is reached.

MaxRecordingSessions

100

The maximum number of recording sessions if recording is enabled in the Campaign configuration.

Recording files are in the HKEY_LOCAL_MACHINE\SOFTWARE\Cisco Systems, Inc.\ICM\<customer instance>\Dialer directory.


Note


Only the G.711 codec is supported for recording. To record outbound calls, configure the G.711 on the voice gateway.

Verification of Dialed Number

Outbound Option places agents in the Reserved state before using them for an outbound call. The dialer uses the dialed number to route to an agent. The following procedure describes how to verify that this mechanism works properly.

Verify DN Configuration

When an Outbound Option Dialer is installed in a Unified CCE environment, the dialer uses the dialed number to make routing requests through the Media Routing (MR) Peripheral Gateway. The following verification steps assume that you have completed all the applicable configuration and reservation script generation.

Procedure

Step 1

Log in an agent to a skill group participating in an outbound campaign, and make the agent available. (Note the dialed number, which was configured in the Skill Group Selection tab in the Campaign component.) If a different dialed number is used for predictive and preview calls, make sure to verify both dialed numbers.

Step 2

Run the Script Editor application and select the Call Tracer utility from the Script > Call Tracer menu. Select the routing client that is associated with the MR PG and select the Dialed Number.

Step 3

Press Send Call to simulate a route request and note the results. If a label was returned for the agent who was logged in above, the reservation script is working properly and the dialer can reserve agents through this script.


Verify Campaign Configuration

As a final step to verify that you configured your Outbound Option campaign correctly, create a small campaign of one or two entries that dial work phones or your mobile phone.

Campaign Management

Single Campaign Versus Multiple Campaigns

You might choose to run multiple campaigns because of different calling policies (for example, time rules) or to run different outbound modes simultaneously.

From the perspective of dialer port allocation, running fewer campaigns with a larger agent pool is more efficient. Dialer ports are allocated based on the number of agents assigned and the current number of lines per agent to dial. The more campaigns you have that are active, the more the ports are distributed across the campaigns, which affects overall efficiency.

Results from Individual Customers

After running a campaign, you can generate a list of customers who were reached, not reached, or have invalid phone numbers.

Interpret Information from Dialer_Detail Table

The Dialer_Detail table is a single table that contains the customer call results for all campaigns. When you view the Dialer_Detail table, note that each attempted Outbound Option call is recorded as an entry in the table. Each entry lists the number called and which numbers are invalid.

For more information, see the appendix on the Dialer Detail Table.

Management of Campaign Manager Database Tables

The Campaign Manager tables, Dialing_List and Personal_Callback_List can grow to be large. If the database size grows too large, Campaign Manager performance can significantly slow down. To limit the size of the Outbound Option database, a stored procedure is run daily at midnight to purge records that are no longer needed.

By default, records are removed from the Personal_Callback_List table when the record's CallStatus is either C, M, or D, and the CallbackDateTime for the record is more than five days old. In the Dialing_List table, records are removed by default when CallStatusZone1 has a value of either C, M, or D, and ImportRuleDate is more than five days old.

You can change the status and age of the records to be removed by modifying the Campaign Manager registry values on the Logger machine. The registry settings are located in HKEY_LOCAL_MACHINE\SOFTWARE\Cisco Systems, Inc.\ICM\<instance name>\LoggerA\BlendedAgent\CurrentVersion in the Outbound Option registry.

  • To specify the records to remove from the Personal_Callback_List table, set PersonalCallbackCallStatusToPurge and PersonalCallbackDaysToPurgeOldRecords.


    Note


    PersonalCallbackCallStatusToPurge is not added by default. To change the call status of the records to remove, create this registry setting manually.


  • To specify the records to remove from the Dialing_List table, set DialingListCallStatusToPurge and DialingListDaysToPurgeOldRecords.


    Note


    DialingListCallStatusToPurge is not added by default. To change the call status of the records to remove, create this registry setting manually.


To specify the age of the records to be removed, set PersonalCallbackDaysToPurgeOldRecords or DialingListDaysToPurgeOldRecords to specify the number of days to keep the record before it is removed. For the Personal Callback list, this value is the number of days after the personal callback is scheduled (CallbackDateTime). For the Dialing List, this value is the number of days after the record is imported (ImportRuleDate). The default is 5. The valid range is 1 to 30. If the value is not set or set to 0, the automated purge is disabled.

To set the call status of the records to be removed, set PersonalCallbackCallStatusToPurge or DialingListCallStatusToPurge to a string containing the call status types to apply when purging personal callback or dialing list records. For example, if the string contains “C,M,F,L,I,” all records with these call statuses, that are also older than the number of days specified by PersonalCallbackDaysToPurgeOldRecords or DialingListDaysToPurgeOldRecords, are removed from the database.

You can specify the following call status values:

Value

Description

U

Unknown

F

Fax

I

Invalid Number

O

Operator

L

Not Allocated

X

Agent Not Available

C

Closed

M

Max Calls

D

Dialed

Management of Predictive Campaigns

The following sections provide guidelines to follow when working with predictive campaigns.

Initial Values for Lines per Agent

Determining the initial value for the number of lines per agent is not as simple as inverting the hit rate. If a campaign has a 20% hit rate, you cannot assume that five lines per agent is the applicable initial value for the campaign if you are targeting a 3% abandon rate. The opportunity for abandoned calls increases geometrically as the lines per agent increases; therefore, set the initial value conservatively in the campaign configuration.

If the reports show that the abandon rate is below target and does not come back in line very quickly, modify the initial value in the campaign configuration to immediately correct the lines per agent being dialed.

End-of-Day Calculation for Abandon Rate

It is not unusual for a campaign to be over the abandon rate target for any given 30 minute period. The dialer examines the end-of-day rate when managing the abandon rate. If the overall abandon rate is over target for the day, the system targets a lower abandon rate for remaining calls until the average abandon rate falls into line. This end-of-day calculation cannot work until after the campaign has been running for one hour. Small sample sizes due to short campaigns or campaigns with fewer agents might not give the dialer enough time to recover from an initial value that is too high.

Similarly, if the campaign is significantly under the target abandon rate, it might begin dialing more frequently with an abandon rate over target for a while to compensate in the abandon rate.

Transfer of Answering Machine Detection Calls to Agents

When enabling the Transfer AMD (Answering Machine Detection) to agent option for an agent campaign or enabling the Transfer AMD to IVR option for an IVR campaign, consider the increase in calls to the target resources (agents or IVR) when determining the initial value. If the expectation is that the AMD rate and the live voice rate are over 50%, perhaps start out with an initial value of 1.1 or even one line per agent to stay under a 3% abandon rate.

Management of Agent Idle Time

One of the key reporting metrics for administrators managing campaigns is the amount of time agents spend idle between calls.

There are many possible reasons for longer idle times, such as a combination of one or more of the following:

  • A dialing list with a low hit rate. The solution is to create an improved list.

  • A small agent pool results in fewer calls, resulting in slower adjustments. One solution is to add more agents to the pool.

  • Shorter average handle times means agents become available more frequently. A shorter handle time means that the agent idle time percentage will climb.

  • Not enough dialer ports deployed or too many agents. Deploy more ports or use fewer agents.

  • A large number of retry attempts at the beginning of a day when running with append imports resulting in lower hit rates. Prioritize pending over retries.

  • Modifying the maximum number of attempts up or down in an active campaign. This activity can interrupt the Campaign Manager’s processing of dialer requests for records, as mentioned earlier in this chapter. One solution is to perform the activity during off hours.

  • Running out of records to dial. Import new records.

Sources of Higher Idle Times in Reports

The following Outbound Option reports provide information regarding sources of higher idle times:

  • Campaign Consolidated Reports: These reports provide a very useful overview of a campaign by combining campaign and agent skill group statistics into a single report. They provide average idle time, campaign hit rate, the number of agents working on the campaign, as well as their Average Handle Time per call. Low hit rates and low average handle times result in more work for the dialer to keep those agents busy.

  • Dialer Capacity Reports: These reports show how busy the dialers are and how much time was spent at full capacity when the dialer was out of ports. They also provide the average reservation call time as well as the average time each dialer port spent contacting customers.

Dialer Saturation

If both Dialers have relatively low idle times and high all ports busy times, then it is likely the Dialers have been oversubscribed. The combination of number of agents, Dialing List hit rate, and average handle time are likely more than the deployed number of ports the Dialer can handle.

To solve this problem, perform one of the following actions:

  • Reduce the number of agents working on the campaign.

  • Add more Dialer ports to the solution.

Few Available Records

Call Summary Count reports show how many records in the aggregate campaign dialing lists have been closed and how many are still available to dial.

Reports

This section provides an overview of the Outbound Option reports available in the Cisco Unified Intelligence Center.

For detailed report template descriptions, see the Cisco Packaged Contact Center Enterprise Reporting User Guide at https://www.cisco.com/c/en/us/support/customer-collaboration/packaged-contact-center-enterprise/products-maintenance-guides-list.html.

For directions on importing report templates into Cisco Unified Intelligence Center and configuring Cisco Unified Intelligence Center data sources for Packaged CCE, see the Cisco Packaged Contact Center Enterprise Installation and Upgrade Guide at https://www.cisco.com/c/en/us/support/customer-collaboration/packaged-contact-center-enterprise/products-installation-guides-list.html.

Outbound Option Reports

This section describes the Outbound Option reports, created using the Unified Intelligence Center.

Additionally, sample custom report templates are available from the Cisco Developer Network (https://developer.cisco.com/web/ccr/documentation.)


Note


Call Type reporting can be used on Outbound Option reservation calls and transfer to VRU calls. Call Type reporting is not applicable for outbound customer calls because a routing script is not used.
Outbound Historical Reports Bundle

The Outbound Options Historical reports receive data from the historical data source. Reports are populated with interval data that has a default refresh rate of 15 minutes.

Half-hour/Daily: Provides statistics for each half-hour period. Many of the half-hour reports are also available in a daily report format.

The Outbound Historical bundle contains the following reports:

Report Description

Attempts per Campaign Daily

Shows the status (summary and percentage) of each campaign for the selected time period and the breakdown of attempts (in percentage) of each campaign for the selected time period.

Campaign Consolidated Daily

Shows the daily activity and performance of the selected campaigns and their skill groups for the selected time period and provides analysis of the actual customer calls (outbound calls which reached live voice, inbound calls, or calls transferred to the campaign's skill group) for the selected campaigns and their skill groups for the selected time period.

Campaign Consolidated Half Hour

Shows the list of Consolidated Calls and Agent Statistics per Campaign by Half Hour and Breakdown of completed calls.

Campaign Half Hour Summary

Shows the status for all campaigns for the selected time period, the status (summary and percentage) of each campaign for the selected time period and the breakdown of attempts (in percentage) of each campaign for the selected time period.

Dialer Call Result Summary Half Hour

Dialer Capacity Daily

Dialer Capacity Half Hour

Shows the status of each dialer for the selected time period.

Import Rule

Shows the status of imported records for the selected time period.

Query Rule Within Campaign Daily

Shows the breakdown of attempts (in percentage) of each campaign for the selected time period and the status (summary and percentage) of each campaign for the selected time period.
Outbound Realtime Reports Bundle

The Outbound Option Real Time reports display current information about a system entity; for example, the number of tasks an agent is currently working on or the number of agents currently logged in to a skill group. By default, the reports automatically query the Admin Workstation database on the distributor every 15 seconds. The data is written to the database by the Router almost every 10 seconds.

The Outbound Real Time Reports Bundle contains the following reports:

Report Description

Call Summary Count per Campaign Real Time

Shows status of all campaign records, and the currently valid campaign dialing times.

Dialer Real Time

Shows the status of each dialer, including the number of contacts dialed today and the result of each attempt.

Import Status Real Time

Shows the status of Outbound Option import records.

Agent Reports

In addition to the reports contained in the Outbound Reports bundles, other Agent reports also provide information about Outbound activities:

Report Outbound Option Fields

Agent Queue Real-Time

Agent Real-Time

Agent Skill Group Real-Time

Agent Team Real-Time

The Direction field indicates the direction of the call that the agent is currently working on including Other Out/Outbound Direct Preview, Outbound Reserve, Outbound Preview, or Outbound Predictive/Progressive.

The Destination field indicates the type of outbound task on which the agent is currently working.

Agent Team State Counts

The Active Out field shows the number of agents currently working on outbound tasks.

Agent State Real Time Graph

For agents handling Outbound Option calls, the Hold state indicates that the agent has been reserved for a call. The Outbound Dialer puts the agent on hold while connecting the call.

Interpreting agent data for Outbound Option tasks, requires understanding how Outbound Option reserves agents, reports calls that are connected to agents, and handles calls that are dropped by customers before the calls are connected.

The Outbound Option Dialer assigns and connects calls differently than regular contact center enterprise routing. Report data for agents handling Outbound Option calls therefore differs from data for agents handling typical voice calls and multichannel tasks.

When the Outbound Dialer calls a customer, it reserves the agent to handle the call. The Dialer places a reservation call to the agent and changes the agent's state to Hold. This reservation call is reported as a Direct In call to the agent.

For typical calls, the agent is placed into Reserved state when the contact center reserves the agent to handle a call. For Outbound Option calls, reports show the agent in Hold state when reserved for a call and the time that agent spends reserved is reported as Hold Time.

When the customer answers the call, the Outbound Option Dialer transfers the call to an agent. The call is now reported as a Transfer In call to the agent. When the customer call is transferred to the agent, the Dialer drops the reservation call and classifies it as Abandon on Hold.

The abandoned call wait time, set in the Campaign Configuration screen, determines how calls are reported if the caller ends the call. Calls are counted in the Customer Abandon field in both Real Time and Historical campaign query templates only if the customer ends the call before the abandoned call wait time is reached.

For agent reporting per campaign, Outbound Option provides reports that accurately represent the Outbound Option agent activity for a contact center, including information grouped by skill group.

The following list describes the data that are presented in the agent reports.

  • A real-time table that shows Outbound Option agent activity that is related to Outbound Option calls.

  • A historical table that shows agent daily performance for Outbound Option predictive calls, by skill group.

  • A historical table that shows agent daily performance for Outbound Option preview calls, by skill group.

  • A historical table that shows agent daily performance for Outbound Option reservation calls, by skill group.

Campaign and Dialer Reports

Outbound Option provides a campaign report template that describes the effectiveness of a campaign and the dialer. This list can be used for Agent and VRU campaigns.

Observe the following guidelines when using the campaign reports:

  • Campaign Real Time reports describe how many records are left in the campaign dialing list.

  • Both Campaign and Dialer Half Hour reports provide the call result counts.


Note


Campaign Real Time reports capture call results since the last Campaign Manager restart only. If the Campaign Manager restarts, data collected before the restart is lost.

Note


When the active Campaign Manager fails over, partial campaign interval reports are generated for the relevant interval based on the data that was available after failover. Some of the campaign statistics collected prior to failover will be missing.

The campaign interval tables used in Reporting are impacted due to this scenario.


The following list describes the data that is presented in the campaign reports.

  • A summary of call results for query rules within a campaign since the beginning of the day.

  • A summary of call results for a campaign since the beginning of the day. It includes a summary of all query rules within the campaign.

  • A view of what is configured for valid campaign calling times for zone1 and zone2 for selected campaigns. The times are relative to the customer’s time zone.

  • A view of what is configured for valid campaign calling times for zone1 and zone2 for selected campaign query rules. The zone times are relative to the customer’s time zone. The query rule start and stop times are relative to the Central Controller time.

  • How many records for selected query rules have been dialed to completion, and how many records remain.

  • How many records for selected campaigns have been dialed to completion, and how many records remain.

  • A summary of call results for selected campaign query rules for selected half-hour intervals.

  • A summary of call results for all query rules for selected campaigns for selected half-hour intervals.

  • A historical table by half-hour/daily report that shows the status (summary and percentage) of each campaign for the selected time period.

  • A historical table by breakdown of attempts (in percentage) of each campaign for the selected time period.

  • A historical table by half-hour/daily report that shows the status (summary and percentage) per query rule of each campaign for the selected time period.

  • A historical table by breakdown of attempts (in percentage) per query rule of each campaign for the selected time period.

  • A summary half-hour/daily report that shows activity and performance of the selected campaigns and their skill group for the selected time period, including abandon rate, hit rate, and agent idle times.

  • A historical table by breakdown of actual customer calls (outbound calls which reached live voice, inbound calls, or calls transferred to the campaign skill group) for the selected campaigns and their skill groups for the selected time period.

Dialer Reports

The Outbound Option Dialer reports provide information about the dialer. These reports include information about performance andresource usage. The templates also enable you to determine whether you need more dialer ports to support more outbound calls.

The following list describes the data presented in the Outbound Option Dialer reports:

  • A real-time table that shows contact, busy, voice, answering machine, and special information tone (SIT) detection for each dialer. A SIT consists of three rising tones indicating a call has failed.

  • An historical table that records contact, busy, voice, answering machine, and SIT Tone detection for each dialer by half-hour intervals.

  • Displays information about the amount of time the dialer was idle or had all ports busy.

  • Displays Dialer status on a port-by-port basis used for troubleshooting. If this report does not display any records, then the data feed is disabled by default. It is only enabled for troubleshooting purposes.

Skill Group Reports

For skill group reporting per campaign, Outbound Option provides reports that represent the skill group activity for a contact center.

The following list describes the data presented in the skill group reports:

  • A real-time table that shows all skill groups and their associated Outbound Option status.

  • A historical table that records Outbound Option counts for the agent states signed on, handle, talk, and hold by half-hour intervals.