Unified Communications Manager 10.0(1) 向け Cisco Unified Communications Manager Assistant ユーザ ガイド
偏向のない言語
この製品のマニュアルセットは、偏向のない言語を使用するように配慮されています。このマニュアルセットでの偏向のない言語とは、年齢、障害、性別、人種的アイデンティティ、民族的アイデンティティ、性的指向、社会経済的地位、およびインターセクショナリティに基づく差別を意味しない言語として定義されています。製品ソフトウェアのユーザーインターフェイスにハードコードされている言語、RFP のドキュメントに基づいて使用されている言語、または参照されているサードパーティ製品で使用されている言語によりドキュメントに例外が存在する場合があります。シスコのインクルーシブランゲージに対する取り組みの詳細は、こちらをご覧ください。
翻訳について
このドキュメントは、米国シスコ発行ドキュメントの参考和訳です。リンク情報につきましては、日本語版掲載時点で、英語版にアップデートがあり、リンク先のページが移動/変更されている場合がありますことをご了承ください。あくまでも参考和訳となりますので、正式な内容については米国サイトのドキュメントを参照ください。
- Updated:
- 2017年6月22日
章のタイトル: アシスタント向け:電話機での Manager Assistant の使用
目次
- アシスタント向け:電話機での Manager Assistant の使用
- アシスタント向け:電話機での Manager Assistant の使用
- アシスタント向け:電話機での Manager Assistant へのログイン
- Cisco Desktop Collaboration Experience Phone での Manager Assistant へのログイン
- マネージャのステータスの確認
- コールの処理および他の操作の実行
- 電話機での Manager Assistant を使用したコールへの応答
- マネージャ設定の設定
- Cisco Desktop Collaboration Experience Phone での [マネージャの設定] 画面の表示
- Cisco Desktop Collaboration Experience Phone でのマネージャの設定の設定
- アシスタント設定の設定
- 固有呼び出し音機能のカスタマイズ
アシスタント向け:電話機での Manager Assistant の使用
この章では、Cisco Unified IP Phone(「Assistant Phone」と呼ばれることもあります)上で Manager Assistant 機能に直接アクセスする方法について説明します。
電話機上のボタンとソフトキーを使用して、Assistant Console で実行可能なほとんどのタスクを実行できます。 また、Assistant Console の使用中に電話機を使用して、同時にいくつかのタスクを実行できます。 さらに、固有呼び出し音を除き、電話機に用意されている機能は Assistant Console にも用意されています。
電話機で Manager Assistant を使用する場合、アシスタントがサポートするマネージャの人数を 5 人以下にすることを強くお勧めします。
また、優先アシスタントの割り当てなど、一部のタスクは電話機上で実行できません。 マネージャは、システム管理者によって設定された Web サイトを使用してこれらのタスクを割り当てます。アシスタントは、Assistant Console を使用してこれらのタスクを割り当てます。
電話機の Manager Assistant 機能は、次の Cisco Unified IP Phone でサポートされます。
- Cisco Unified IP Phone 7945G、7942G、7941G-GE、7941G、および 7940G
- Cisco Unified IP Phone 7965G、7962G、7961G-GE、7961G、および 7960G
- Cisco Unified IP Phone 7975G、7971G-GE、7970G
 (注) |
開始する前に、共有回線モードとプロキシ回線モードのどちらがシステム管理者によって選択されているかを確認する必要があります。 これらのモードの詳細およびその識別方法については、共有回線モードとプロキシ回線モードの概要を参照してください。 |
アシスタント向け:電話機での Manager Assistant へのログイン
電話機上で Manager Assistant にログインするには、次の手順を使用します。
| ステップ 1 | 電話機の [サービス] ボタンを押します。 |
| ステップ 2 | [プライマリIPMA Phoneサービス] を選択します。 |
| ステップ 3 |
ユーザ ID と PIN を入力し、[送信] を押します。 [マネージャステータス] 画面が表示されます。 
|
次の作業
プライマリ IP Manager Assistant(IPMA)サービスがダウンした場合、IP Phone の画面にはその状況が通知されません。 ただし、ソフトキーを使用しようとすると「ホストが見つかりません:例外」メッセージが表示されます。 この場合、[IPサービス] メニューから [セカンダリIPMA Phoneサービス] を手動で選択し、再度ログインする必要があります。
Cisco Desktop Collaboration Experience Phone での Manager Assistant へのログイン
電話機上で Manager Assistant にログインするには、次の手順を使用します。
電話機がアクティブであることを確認します。
| ステップ 1 | 左ペインで、[Assistantをオンにする] を選択します。 [Assistantへのサインイン] 画面が表示されます。 |
| ステップ 2 |
ユーザ ID とパスワードを入力し、[ログイン] を押します。 [マネージャステータス] 画面が表示されます。 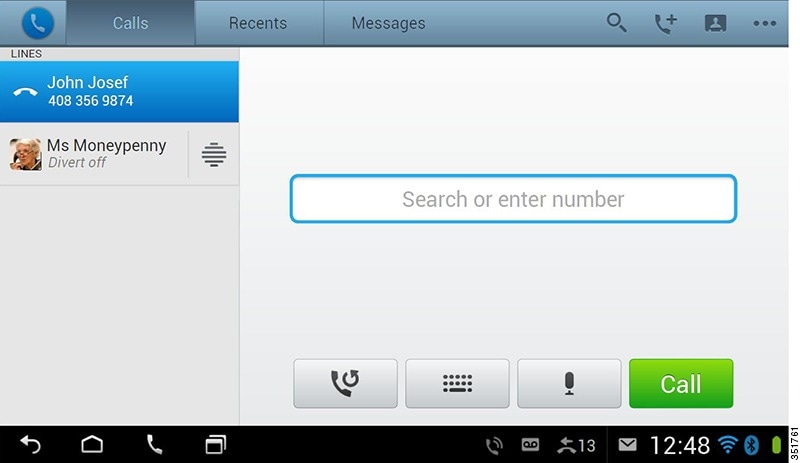 |
マネージャのステータスの確認
[マネージャステータス] 画面には、アシスタントがサポートしているマネージャのリストが表示されます。 このトピックでは、この画面と画面に表示されるソフトキーについて説明します。
アシスタントがサポートしているそれぞれのマネージャについて、次の情報が表示されます。
- マネージャのアシスタントのステータス行:アシスタントがオンラインかオフラインかを示します。
- リストに含まれるマネージャの人数:マネージャの人数をすばやく確認できます。
- マネージャの名前:名前は、新しいコール表示、オンフックからのマネージャ ステータスの変更、またはオンフック状態の電話機に基づいてソートされます。
- コールステータス アイコン:表「[マネージャステータス] 画面のコール ステータス アイコン」に、マネージャ名の左側に表示されるステータス アイコンを示します。
- マネージャのプロキシ回線
マネージャ コール ステータス アイコン |
機能 |
|---|---|
[話し中] |
マネージャの電話機が話中(電話回線が使用中)のときに表示されます。 |
[保留] |
マネージャがコールを保留にしたときに表示されます。 |
[アイドル/オンフック] |
マネージャの電話機がオンフック状態のときに表示されます。 |
[オフフック] |
マネージャの電話機がオフフック状態(ハンドセットが持ち上げられているか、別のオーディオ デバイスが使用されている)のときに表示されます。 |
[鳴らす] |
マネージャの電話機が呼び出し中のときに表示されます。 |
[不明] |
Manager Assistant が状態を判定できないときに表示されます(たとえば、CTI 障害、マネージャがログイン中のとき)。 |
[MWI] |
マネージャ宛てのボイス メッセージがあるときに MWI(メッセージ受信インジケータ)が表示されます。 |
コールの処理および他の操作の実行
次の表では、[マネージャステータス] 画面に表示されるソフトキーについて説明します。 ソフトキーを使用して、さまざまなコール処理タスクを実行できます。
ソフトキー |
機能 |
||
|---|---|---|---|
[選択] |
マネージャのリストで強調表示されたマネージャを選択し、選択されたマネージャの設定を設定するための [マネージャの設定] 画面を表示します。 |
||
[応答] |
対応するマネージャの着信呼に応答します。 |
||
[終了] |
[マネージャステータス] 画面を終了し、[サービス] メニュー ページを表示します。 |
||
[リダイレクト] |
呼び出し中、接続中、または保留中のコールを、対応するマネージャ(デフォルト)またはプリセットされた別の電話番号に即座に転送します。 転送先を電話番号に設定するには、[設定]、[転送先の設定] の順に押し、電話番号を入力します。 |
||
[詳細情報] |
[マネージャステータス] 画面で使用できる残りのソフトキーを表示します。 |
||
[VM転送] |
呼び出し中、接続中、または保留中のコールを、マネージャのボイス メールボックスに送信します。 |
||
[インターコム] |
アシスタントがインターコム回線でマネージャと会話できるようにします。 |
||
[オフライン接続] |
オフラインにします。 マネージャに対して別のアシスタントが設定されていて、そのアシスタントがオンラインになっている場合、そのアシスタントがマネージャのアクティブなアシスタントになります。 電話に応答できる他のアシスタントがいない場合、マネージャ宛てのコールのフィルタ処理または即転送は行われず、マネージャの電話機の呼び出し音が鳴ります。
|
||
[設定] |
各種の設定を行うための [アシスタントの設定] 画面を表示します。 設定できるフィールドについては、"[アシスタントの設定] のフィールド"を参照してください。 |
電話機での Manager Assistant を使用したコールへの応答
[マネージャステータス] ページに表示されたマネージャ宛てのコールに応答できます。
マネージャ設定の設定
[マネージャステータス] 画面のリストでマネージャを選択すると、[マネージャの設定] 画面が表示されます。
次の表では、この画面のフィールドを設定する方法について説明します。
(注) |
Assistant Console でマネージャの設定を変更するときにメニュー項目を押す速度が速すぎると、セキュリティ対策としてそのマネージャがログアウトされ、[アシスタントモニタ] ウィンドウが非表示になります。 マネージャが再度ログインできるようにするには、その特定の [マネージャの設定] Web ページで [保存] 操作を実行する必要があります。 |
ソフトキー |
機能 |
||
|---|---|---|---|
[フィルタ] |
[オン] と [オフ] を切り替えます。 このフィールドの設定を変更するには、フィールドを強調表示し、[選択] を押します。 このフィールドが [オン] に設定されている場合、[フィルタモード] フィールドで設定されたフィルタ ルールが適用されます。
|
||
[フィルタモード] |
[排他] と [包含] を切り替えます。 このフィールドの設定を変更するには、フィールドを強調表示し、[選択] を押します。
使用できるワイルドカード文字として、1 つの数字を表す X と、数字の先頭または末尾の数字の文字列を表す * があります。 |
||
[サイレント] |
マネージャの電話機の呼び出し音をオフにします。 このタスクは、マネージャごとに実行できます。 |
||
[コールの即転送] |
[オン] と [オフ] を切り替えます。 このフィールドの設定を変更するには、フィールドを強調表示し、[選択] を押します。 このフィールドが [オン] に設定されている場合、呼び出し中、接続中、または保留中のコールがマネージャまたはプリセットされた別の電話番号([転送先の設定] フィールドを選択して指定した番号)に送信されます。 |
||
[転送先の設定] |
[コールの即転送] フィールドが [オン] の場合にコールが転送される番号。 デフォルト:ここで別の電話番号を設定しないかぎり、コールは対応するマネージャの電話機に転送されます。 |
||
[アラートトーン] |
[オン] と [オフ] を切り替えます。 このフィールドの設定を変更するには、フィールドを強調表示し、[選択] を押します。 プロキシ回線環境でこのフィールドが [オン] に設定されている場合にマネージャ宛てのコールがあると、マネージャの電話機でオーディオ アラートが生成されます。 |
- Cisco Desktop Collaboration Experience Phone での [マネージャの設定] 画面の表示
- Cisco Desktop Collaboration Experience Phone でのマネージャの設定の設定
Cisco Desktop Collaboration Experience Phone での [マネージャの設定] 画面の表示
| ステップ 1 | [...] ボタンを押します。 |
| ステップ 2 | ドロップダウン メニューから [電話の設定] を選択します。 |
| ステップ 3 |
[マネージャステータス] 画面で、リストからマネージャを選択します。 [マネージャの設定] 画面が表示されます。  |
Cisco Desktop Collaboration Experience Phone でのマネージャの設定の設定
次の表では、[マネージャの設定] 画面のフィールドを設定する方法について説明します。
(注) |
Assistant Console でマネージャの設定を変更するときにメニュー項目を押す速度が速すぎると、セキュリティ対策としてそのマネージャがログアウトされ、[アシスタントモニタ] ウィンドウが非表示になります。 マネージャが再度ログインできるようにするには、その特定の [マネージャの設定] Web ページで [保存] をクリックします。 |
| ソフトキー |
機能 |
||
|---|---|---|---|
| [アシスタントの選択] |
設定を適用するアシスタントを選択します。
|
||
| [アシスタントへの通話の送信] |
[オン] と [オフ] を切り替えます。 |
||
| [フィルタグループの設定] |
フィルタ グループを設定します。
|
||
| [優先コール以外のすべてのコールをアシスタントに送信する] |
[オン] と [オフ] を切り替えます。 |
||
| [拒否された発信者のみを送信する] |
[オン] と [オフ] を切り替えます。 |
アシスタント設定の設定
次の図に、[マネージャステータス] 画面で [設定] ソフトキーを押すと表示される [アシスタントの設定] 画面を示します。 [アシスタントの設定] 画面では、転送先や [マネージャステータス] 画面でのソート順序などの項目を設定できます。
表「[アシスタントの設定] のフィールド」では、画面のフィールドを設定する方法について説明します。表「[アシスタントの設定] のソフトキー」では、画面のソフトキーを使用する方法について説明します。

| フィールド |
機能 |
|---|---|
| [コールプレーンの上書き] |
[有効] と [無効] を切り替えます。 このフィールドの設定を変更するには、フィールドを強調表示し、[選択] を押します。 このフィールドを有効にすると、コールの応答中にリアルタイム更新が送信されます。 コールをマネージャに転送する前にマネージャのステータスが話中であるかまたはアイドルであるかを調べておくと便利です。 このフィールドが有効な場合、コールに応答しているときにマネージャのステータスの変更が表示されます。 |
| [スマートソート] |
[有効] と [無効] を切り替えます。 このフィールドの設定を変更するには、フィールドを強調表示し、[選択] を押します。 このフィールドを有効にすると、[マネージャステータス] 画面が新しいコール イベントに基づいてソートされます。 マネージャのリストのソート順序については、マネージャのステータスの確認を参照してください。 このフィールドが無効な場合、[マネージャステータス] 画面は静的です。 |
| [転送先の設定] |
マネージャに対して [すべて転送] フィールドを [オン] に設定した場合、そのマネージャ宛ての着信呼が転送先に転送されます。転送先は、現在選択されているマネージャ(デフォルト)または電話番号です。 コールを電話番号に転送するには、[転送先の設定] フィールドに電話番号を入力します。電話番号を変更するには、[転送先の設定] フィールドを編集します。 |
| フィールド |
機能 |
||
|---|---|---|---|
| 選択 |
ボタンを押して、画面の 2 つの切り替えフィールド([コールプレーンの上書き] および [スマートソート])の設定を変更します。 [転送先の設定] フィールドを強調表示し、[選択] を押すと、即転送操作の転送先番号を設定するための画面が表示されます。 |
||
| [更新の停止]/[更新の再開] |
デフォルトでは、[マネージャステータス] 画面は、マネージャのステータスが変更されたときまたはマネージャ宛ての新しいコールが着信したときに更新されます。 [更新の停止] ボタンは、この自動更新を無効にします。 このボタンは、たとえば、33 人のマネージャをサポートしているときに 20 人目のマネージャの設定を変更する場合に使用します。 この場合、[マネージャステータス] 画面でマネージャ リストを下にスクロールし、20 番目の名前を強調表示した後、[選択] を押します。 このとき画面の更新が発生すると、スクロール リスト内の位置が変化したり、潜在的に重要なステータスの更新を見失ったりする可能性があります。 したがって、このような状況での更新を回避するには、[更新の停止] ボタンを押します。
|
||
| [終了] |
[アシスタントの設定] 画面を終了し、[マネージャステータス] 画面に戻ります。 |
||
| [ログアウト] |
IPMA サービスからログアウトします。 いったんログアウトした後は、再度サービスにログインする必要があります。 |
固有呼び出し音機能のカスタマイズ
固有呼び出し音機能では、一意の呼び出し音タイプを各電話回線に関連付けることができます。 一意の呼び出し音タイプをマネージャのプロキシ回線に関連付けることにより、自分宛ての着信呼とマネージャ宛ての着信呼を簡単に区別できます。
固有呼び出し音機能を電話機上で直接カスタマイズするには、次の手順を使用します。
目次
- アシスタント向け:電話機での Manager Assistant の使用
- アシスタント向け:電話機での Manager Assistant の使用
- アシスタント向け:電話機での Manager Assistant へのログイン
- Cisco Desktop Collaboration Experience Phone での Manager Assistant へのログイン
- マネージャのステータスの確認
- コールの処理および他の操作の実行
- 電話機での Manager Assistant を使用したコールへの応答
- マネージャ設定の設定
- Cisco Desktop Collaboration Experience Phone での [マネージャの設定] 画面の表示
- Cisco Desktop Collaboration Experience Phone でのマネージャの設定の設定
- アシスタント設定の設定
- 固有呼び出し音機能のカスタマイズ
アシスタント向け:電話機での Manager Assistant の使用
この章では、Cisco Unified IP Phone(「Assistant Phone」と呼ばれることもあります)上で Manager Assistant 機能に直接アクセスする方法について説明します。
電話機上のボタンとソフトキーを使用して、Assistant Console で実行可能なほとんどのタスクを実行できます。 また、Assistant Console の使用中に電話機を使用して、同時にいくつかのタスクを実行できます。 さらに、固有呼び出し音を除き、電話機に用意されている機能は Assistant Console にも用意されています。
電話機で Manager Assistant を使用する場合、アシスタントがサポートするマネージャの人数を 5 人以下にすることを強くお勧めします。
また、優先アシスタントの割り当てなど、一部のタスクは電話機上で実行できません。 マネージャは、システム管理者によって設定された Web サイトを使用してこれらのタスクを割り当てます。アシスタントは、Assistant Console を使用してこれらのタスクを割り当てます。
電話機の Manager Assistant 機能は、次の Cisco Unified IP Phone でサポートされます。
- Cisco Unified IP Phone 7945G、7942G、7941G-GE、7941G、および 7940G
- Cisco Unified IP Phone 7965G、7962G、7961G-GE、7961G、および 7960G
- Cisco Unified IP Phone 7975G、7971G-GE、7970G
(注)
開始する前に、共有回線モードとプロキシ回線モードのどちらがシステム管理者によって選択されているかを確認する必要があります。 これらのモードの詳細およびその識別方法については、共有回線モードとプロキシ回線モードの概要を参照してください。
アシスタント向け:電話機での Manager Assistant へのログイン
手順
ステップ 1 電話機の [サービス] ボタンを押します。 ステップ 2 [プライマリIPMA Phoneサービス] を選択します。 ステップ 3 ユーザ ID と PIN を入力し、[送信] を押します。 [マネージャステータス] 画面が表示されます。
次の作業プライマリ IP Manager Assistant(IPMA)サービスがダウンした場合、IP Phone の画面にはその状況が通知されません。 ただし、ソフトキーを使用しようとすると「ホストが見つかりません:例外」メッセージが表示されます。 この場合、[IPサービス] メニューから [セカンダリIPMA Phoneサービス] を手動で選択し、再度ログインする必要があります。
マネージャのステータスの確認
[マネージャステータス] 画面には、アシスタントがサポートしているマネージャのリストが表示されます。 このトピックでは、この画面と画面に表示されるソフトキーについて説明します。
アシスタントがサポートしているそれぞれのマネージャについて、次の情報が表示されます。
- マネージャのアシスタントのステータス行:アシスタントがオンラインかオフラインかを示します。
- リストに含まれるマネージャの人数:マネージャの人数をすばやく確認できます。
- マネージャの名前:名前は、新しいコール表示、オンフックからのマネージャ ステータスの変更、またはオンフック状態の電話機に基づいてソートされます。
- コールステータス アイコン:表「[マネージャステータス] 画面のコール ステータス アイコン」に、マネージャ名の左側に表示されるステータス アイコンを示します。
- マネージャのプロキシ回線
表 1 "[マネージャステータス] 画面のコール ステータス アイコン" マネージャ コール ステータス アイコン
機能
[話し中]
マネージャの電話機が話中(電話回線が使用中)のときに表示されます。
[保留]
マネージャがコールを保留にしたときに表示されます。
[アイドル/オンフック]
マネージャの電話機がオンフック状態のときに表示されます。
[オフフック]
マネージャの電話機がオフフック状態(ハンドセットが持ち上げられているか、別のオーディオ デバイスが使用されている)のときに表示されます。
[鳴らす]
マネージャの電話機が呼び出し中のときに表示されます。
[不明]
Manager Assistant が状態を判定できないときに表示されます(たとえば、CTI 障害、マネージャがログイン中のとき)。
[MWI]
マネージャ宛てのボイス メッセージがあるときに MWI(メッセージ受信インジケータ)が表示されます。
コールの処理および他の操作の実行
表 2 "アシスタントの電話機に表示されるソフトキー" ソフトキー
機能
[選択]
マネージャのリストで強調表示されたマネージャを選択し、選択されたマネージャの設定を設定するための [マネージャの設定] 画面を表示します。
[応答]
対応するマネージャの着信呼に応答します。
[終了]
[マネージャステータス] 画面を終了し、[サービス] メニュー ページを表示します。
[リダイレクト]
呼び出し中、接続中、または保留中のコールを、対応するマネージャ(デフォルト)またはプリセットされた別の電話番号に即座に転送します。
転送先を電話番号に設定するには、[設定]、[転送先の設定] の順に押し、電話番号を入力します。
[詳細情報]
[マネージャステータス] 画面で使用できる残りのソフトキーを表示します。
[VM転送]
呼び出し中、接続中、または保留中のコールを、マネージャのボイス メールボックスに送信します。
[インターコム]
アシスタントがインターコム回線でマネージャと会話できるようにします。
[オフライン接続]
オフラインにします。 マネージャに対して別のアシスタントが設定されていて、そのアシスタントがオンラインになっている場合、そのアシスタントがマネージャのアクティブなアシスタントになります。
電話に応答できる他のアシスタントがいない場合、マネージャ宛てのコールのフィルタ処理または即転送は行われず、マネージャの電話機の呼び出し音が鳴ります。
(注) プライマリ アシスタントがオフライン状態に移行するかまたはログアウトすると、次に応答可能なアシスタントがプライマリ アシスタントになり、そのアシスタントの電話機にマネージャの電話機とコールのステータスが表示されます。
[設定]
各種の設定を行うための [アシスタントの設定] 画面を表示します。 設定できるフィールドについては、"[アシスタントの設定] のフィールド"を参照してください。
マネージャ設定の設定
[マネージャステータス] 画面のリストでマネージャを選択すると、[マネージャの設定] 画面が表示されます。
次の表では、この画面のフィールドを設定する方法について説明します。
(注)
Assistant Console でマネージャの設定を変更するときにメニュー項目を押す速度が速すぎると、セキュリティ対策としてそのマネージャがログアウトされ、[アシスタントモニタ] ウィンドウが非表示になります。 マネージャが再度ログインできるようにするには、その特定の [マネージャの設定] Web ページで [保存] 操作を実行する必要があります。
表 3 "[マネージャの設定] のフィールド" ソフトキー
機能
[フィルタ]
[オン] と [オフ] を切り替えます。 このフィールドの設定を変更するには、フィールドを強調表示し、[選択] を押します。 このフィールドが [オン] に設定されている場合、[フィルタモード] フィールドで設定されたフィルタ ルールが適用されます。
(注) マネージャのためのフィルタを設定するには、Assistant Console を使用する必要があります。 詳細については、マネージャのためのフィルタ リストの作成を参照してください。
[フィルタモード]
[排他] と [包含] を切り替えます。 このフィールドの設定を変更するには、フィールドを強調表示し、[選択] を押します。
- [排他]:フィルタ リストに含まれる電話番号に一致するコールがアシスタントに送信されます。残りのコールはマネージャに送信されます。
- [包含]:フィルタ リストに含まれる電話番号に一致するコールがマネージャに送信されます。残りのコールはアシスタントに送信されます。
使用できるワイルドカード文字として、1 つの数字を表す X と、数字の先頭または末尾の数字の文字列を表す * があります。
[サイレント]
マネージャの電話機の呼び出し音をオフにします。 このタスクは、マネージャごとに実行できます。
[コールの即転送]
[オン] と [オフ] を切り替えます。 このフィールドの設定を変更するには、フィールドを強調表示し、[選択] を押します。 このフィールドが [オン] に設定されている場合、呼び出し中、接続中、または保留中のコールがマネージャまたはプリセットされた別の電話番号([転送先の設定] フィールドを選択して指定した番号)に送信されます。
[転送先の設定]
[コールの即転送] フィールドが [オン] の場合にコールが転送される番号。
デフォルト:ここで別の電話番号を設定しないかぎり、コールは対応するマネージャの電話機に転送されます。
[アラートトーン]
[オン] と [オフ] を切り替えます。 このフィールドの設定を変更するには、フィールドを強調表示し、[選択] を押します。 プロキシ回線環境でこのフィールドが [オン] に設定されている場合にマネージャ宛てのコールがあると、マネージャの電話機でオーディオ アラートが生成されます。
- Cisco Desktop Collaboration Experience Phone での [マネージャの設定] 画面の表示
- Cisco Desktop Collaboration Experience Phone でのマネージャの設定の設定
Cisco Desktop Collaboration Experience Phone でのマネージャの設定の設定
次の表では、[マネージャの設定] 画面のフィールドを設定する方法について説明します。
(注)
Assistant Console でマネージャの設定を変更するときにメニュー項目を押す速度が速すぎると、セキュリティ対策としてそのマネージャがログアウトされ、[アシスタントモニタ] ウィンドウが非表示になります。 マネージャが再度ログインできるようにするには、その特定の [マネージャの設定] Web ページで [保存] をクリックします。
表 4 "[マネージャの設定] のフィールド" ソフトキー
機能
[アシスタントの選択]
設定を適用するアシスタントを選択します。
(注) マネージャのためのフィルタを設定するには、Assistant Console を使用する必要があります。 詳細については、マネージャのためのフィルタ リストの作成を参照してください。
[アシスタントへの通話の送信]
[オン] と [オフ] を切り替えます。
[フィルタグループの設定]
フィルタ グループを設定します。
(注) マネージャのためのフィルタを設定するには、Assistant Console を使用する必要があります。 詳細については、マネージャのためのフィルタ リストの作成を参照してください。
[優先コール以外のすべてのコールをアシスタントに送信する]
[オン] と [オフ] を切り替えます。
[拒否された発信者のみを送信する]
[オン] と [オフ] を切り替えます。
アシスタント設定の設定
次の図に、[マネージャステータス] 画面で [設定] ソフトキーを押すと表示される [アシスタントの設定] 画面を示します。 [アシスタントの設定] 画面では、転送先や [マネージャステータス] 画面でのソート順序などの項目を設定できます。
表「[アシスタントの設定] のフィールド」では、画面のフィールドを設定する方法について説明します。表「[アシスタントの設定] のソフトキー」では、画面のソフトキーを使用する方法について説明します。
表 5 "[アシスタントの設定] のフィールド" フィールド
機能
[コールプレーンの上書き]
[有効] と [無効] を切り替えます。 このフィールドの設定を変更するには、フィールドを強調表示し、[選択] を押します。 このフィールドを有効にすると、コールの応答中にリアルタイム更新が送信されます。
コールをマネージャに転送する前にマネージャのステータスが話中であるかまたはアイドルであるかを調べておくと便利です。 このフィールドが有効な場合、コールに応答しているときにマネージャのステータスの変更が表示されます。
[スマートソート]
[有効] と [無効] を切り替えます。 このフィールドの設定を変更するには、フィールドを強調表示し、[選択] を押します。 このフィールドを有効にすると、[マネージャステータス] 画面が新しいコール イベントに基づいてソートされます。
マネージャのリストのソート順序については、マネージャのステータスの確認を参照してください。
このフィールドが無効な場合、[マネージャステータス] 画面は静的です。
[転送先の設定]
マネージャに対して [すべて転送] フィールドを [オン] に設定した場合、そのマネージャ宛ての着信呼が転送先に転送されます。転送先は、現在選択されているマネージャ(デフォルト)または電話番号です。
コールを電話番号に転送するには、[転送先の設定] フィールドに電話番号を入力します。電話番号を変更するには、[転送先の設定] フィールドを編集します。
表 6 "[アシスタントの設定] のソフトキー" フィールド
機能
選択
ボタンを押して、画面の 2 つの切り替えフィールド([コールプレーンの上書き] および [スマートソート])の設定を変更します。 [転送先の設定] フィールドを強調表示し、[選択] を押すと、即転送操作の転送先番号を設定するための画面が表示されます。
[更新の停止]/[更新の再開]
デフォルトでは、[マネージャステータス] 画面は、マネージャのステータスが変更されたときまたはマネージャ宛ての新しいコールが着信したときに更新されます。
[更新の停止] ボタンは、この自動更新を無効にします。
このボタンは、たとえば、33 人のマネージャをサポートしているときに 20 人目のマネージャの設定を変更する場合に使用します。
この場合、[マネージャステータス] 画面でマネージャ リストを下にスクロールし、20 番目の名前を強調表示した後、[選択] を押します。
このとき画面の更新が発生すると、スクロール リスト内の位置が変化したり、潜在的に重要なステータスの更新を見失ったりする可能性があります。 したがって、このような状況での更新を回避するには、[更新の停止] ボタンを押します。
(注) 自動更新を再度有効にするには、[更新の再開] ボタンを押します。
[終了]
[アシスタントの設定] 画面を終了し、[マネージャステータス] 画面に戻ります。
[ログアウト]
IPMA サービスからログアウトします。 いったんログアウトした後は、再度サービスにログインする必要があります。
固有呼び出し音機能のカスタマイズ
手順固有呼び出し音機能では、一意の呼び出し音タイプを各電話回線に関連付けることができます。 一意の呼び出し音タイプをマネージャのプロキシ回線に関連付けることにより、自分宛ての着信呼とマネージャ宛ての着信呼を簡単に区別できます。
固有呼び出し音機能を電話機上で直接カスタマイズするには、次の手順を使用します。
ステップ 1 Cisco Unified IP Phone の [設定] ボタンを押します。 ステップ 2 [ナビゲーション] パッドを使用して [設定] メニューから [呼出音タイプ] を選択します(または電話機のキーパッドの 2 を押します)。 電話機のそれぞれの回線が、選択された呼び出し音タイプとともに電話機の LCD 画面に表示されます。 これらの回線では、最初はデフォルトの呼び出し音タイプが使用されます。
ステップ 3 回線の呼び出し音タイプを変更するには、[ナビゲーション] パッドを使用して回線を選択し、[選択] ソフトキーを押します。
(注) 電話機のどのマネージャ プロキシ回線が特定のマネージャに関連付けられているかを識別するには、Assistant Console の [マイコール] パネルを確認してください。 このパネルには、マネージャ プロキシ回線とマネージャ名が表示されます。 (マネージャのプロキシ回線とは、アシスタントがそのマネージャ宛ての着信呼を受信する回線です)。
ステップ 4 選択した回線に対して使用可能な呼び出し音タイプのリスト内を移動するには、[ナビゲーション] ボタンを使用します。 任意の呼び出し音タイプのサンプルを再生するには、呼び出し音タイプを選択し、[再生] ソフトキーを押します。 ステップ 5 新しい呼び出し音タイプを関連付けるには、[選択] ソフトキーと [OK] ソフトキーを押し、[終了] を押します。
 フィードバック