Install Cisco ISE

Install Cisco ISE Using CIMC

This section lists the high-level installation steps to help you quickly install Cisco ISE:

Before you begin

Procedure


Step 1

If you are installing Cisco ISE on a:

  • Cisco SNS appliance: Install the hardware appliance. Connect to CIMC for server management.

  • Virtual Machine: Ensure that your VM is configured correct. Use the OVA template if you are installing Cisco ISE on VMware VM.

Step 2

Download the Cisco ISE ISO image. To install Cisco ISE on VMware VM, download the OVA template.

  1. Go to http://www.cisco.com/go/ise. You must already have valid Cisco.com login credentials to access this link.

  2. Click Download Software for this Product.

    The Cisco ISE image comes with a 90-day evaluation license already installed, so you can begin testing all Cisco ISE services when the installation and initial configuration is complete.

Step 3

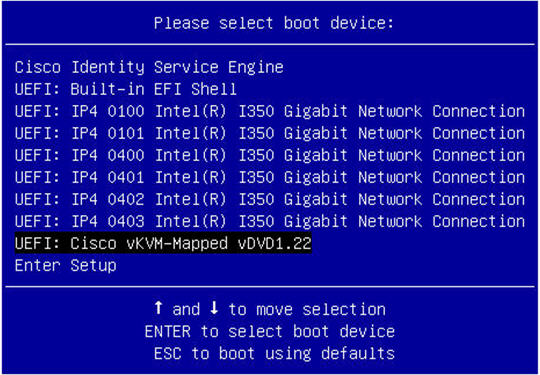
Boot the appliance or the virtual machine.

  • Cisco SNS appliance:
    1. Connect to CIMC and log in using the CIMC credentials.

    2. Launch the KVM console.

    3. Choose Virtual Media > Activate Virtual Devices.

    4. Choose Virtual Media > Map CD/DVD and select the ISE ISO image and click Map Device.

    5. Choose Macros > Static Macros > Ctrl-Alt-Del to boot the appliance with the ISE ISO image.

    6. Press F6 to bring up the boot menu. A screen similar to the following one appears:

      Figure 1. Selection of Boot Device
      Selection of boot device for Cisco ISE installation

      Note


      If the SNS appliances are placed in a remote location (for example, data centers), to which you do not have any physical access and need to perform CIMC install from remote servers, it might take long hours for installation. We recommend that you copy the ISO file on a USB drive and use that in the remote location to speed up the installation process.

  • Virtual Machine:
    1. Map the CD/DVD to an ISO image. A screen similar to the following one appears. The following message and installation menu are displayed.

      Welcome to the Cisco Identity Services Engine Installer
      Cisco ISE Version: 2.4.0.xxx
      
      
      Available boot options:
      
      Cisco ISE Installation (Serial Console)
      Cisco ISE Installation (Keyboard/Monitor)
      System Utilities (Serial Console)
      System Utilities (Keyboard/Monitor)
      

Step 4

At the boot prompt, press 1 and Enter to install Cisco ISE using a serial console.

If you want to use a keyboard and monitor, use the arrow key to select the Cisco ISE Installation (Keyboard/Monitor) option. The following message appears.

**********************************************
Please type 'setup' to configure the appliance
**********************************************

Step 5

At the prompt, type setup to start the Setup program. See Run the Setup Program of Cisco ISE for details about the Setup program parameters.

Step 6

After you enter the network configuration parameters in the Setup mode, the appliance automatically reboots, and returns to the shell prompt mode.

Step 7

Exit from the shell prompt mode. The appliance comes up.

Step 8

Continue with Verifying the Cisco ISE Installation Process .


Run the Setup Program of Cisco ISE

This section describes the setup process to configure the ISE server.

The setup program launches an interactive command-line interface (CLI) that prompts you for the required parameters. An administrator can use the console or a dumb terminal to configure the initial network settings and provide the initial administrator credentials for the ISE server using the setup program. This setup process is a one-time configuration task.


Note


If you are integrating with Active Directory (AD), it is best to use the IP and subnet addresses from a dedicated Site created specifically for ISE. Consult with the staff in your organization responsible for AD and retrieve the relevant IP and subnet addresses for your ISE nodes prior to installation and configuration.


Note


It is not recommended to attempt offline installation of Cisco ISE as this can lead to system instability. When you run the Cisco ISE installation script offline, the following error is shown:

Sync with NTP server failed' Incorrect time could render the system unusable until it is re-installed. Retry? Y/N [Y]:

Choose Yes to continue with the installation. Choose No to retry syncing with the NTP server.

It is recommended to establish network connectivity with both the NTP server and the DNS server while running the installation script.


To run the setup program:

Procedure


Step 1

Turn on the appliance that is designated for the installation.

The setup prompt appears:

Please type ‘setup’ to configure the appliance
localhost login:

Step 2

At the login prompt, enter setup and press Enter.

The console displays a set of parameters. You must enter the parameter values as described in the table that follows.

Table 1. Cisco ISE Setup Program Parameters

Prompt

Description

Example

Hostname

Must not exceed 19 characters. Valid characters include alphanumerical (A–Z, a–z, 0–9), and the hyphen (-). The first character must be a letter.

Note


We recommend that you use lowercase letters to ensure that certificate authentication in Cisco ISE is not impacted by minor differences in certificate-driven verifications. You cannot use "localhost" as hostname for a node.

isebeta1

(eth0) Ethernet interface address

Must be a valid IPv4 address for the Gigabit Ethernet 0 (eth0) interface.

10.12.13.14

Netmask

Must be a valid IPv4netmask.

255.255.255.0

Default gateway

Must be a valid IPv4 address for the default gateway.

DNS domain name

Cannot be an IP address. Valid characters include ASCII characters, any numerals, the hyphen (-), and the period (.).

example.com

Primary name server

Must be a valid IPv4 address for the primary name server.

10.15.20.25

Add/Edit another name server

Must be a valid IPv4 address for the primary name server.

(Optional) Allows you to configure multiple name servers. To do so, enter y to continue.

Primary NTP server

Must be a valid IPv4 address or hostname of a Network Time Protocol (NTP) server.

Note


Ensure that the primary NTP server is reachable.

clock.nist.gov

Add/Edit another NTP server

Must be a valid NTP domain.

(Optional) Allows you to configure multiple NTP servers. To do so, enter y to continue.

System Time Zone

Must be a valid time zone. For example, for Pacific Standard Time (PST), the System Time Zone is PST8PDT (or Coordinated Universal Time (UTC) minus 8 hours).

Note


Ensure that the system time and time zone match with the CIMC or Hypervisor Host OS time and time zone. System performance might be affected if there is any mismatch between the time zones.

You can run the show timezones command from the Cisco ISE CLI for a complete list of supported time zones.

Note


We recommend that you set all the Cisco ISE nodes to the UTC time zone. This time zone setting ensures that the reports, logs, and posture agent log files from the various nodes in your deployment are always synchronized with regard to the time stamps.

UTC (default)

Username

Identifies the administrative username used for CLI access to the Cisco ISE system. If you choose not to use the default (admin), you must create a new username. The username must be three to eight characters in length and comprise of valid alphanumeric characters (A–Z, a–z, or 0–9).

admin (default)

Password

Identifies the administrative password that is used for CLI access to the Cisco ISE system. You must create this password in order to continue because there is no default password. The password must be a minimum of six characters in length and include at least one lowercase letter (a–z), one uppercase letter (A–Z), and one numeral (0–9).

MyIseYPass2

Note


When you create a password for the administrator during installation or after installation in the CLI, do not use the $ character in your password, unless it is the last character of the password. If it is the first or one of the subsequent characters, the password is accepted, but cannot be used to log in to the CLI.

If you inadvertently create such a password, reset your password by logging into the console and using the CLI command, or by getting an ISE CD or ISO file. Instructions for using an ISO file to reset the password are explained in the following document: https://www.cisco.com/c/en/us/support/docs/security/identity-services-engine/200568-ISE-Password-Recovery-Mechanisms.html

After the setup program is run, the system reboots automatically.

Now, you can log in to Cisco ISE using the username and password that was configured during the setup process.


Verifying the Cisco ISE Installation Process

To verify that you have correctly completed the installation process:

Procedure


Step 1

When the system reboots, at the login prompt enter the username you configured during setup, and press Enter.

When you log in through the CLI for the first time after installation, the system prompts you to change the password.

Step 2

Enter a new password.

Step 3

Verify that the application has been installed properly by entering the show application command, and press Enter.

The console displays:
ise/admin# show application
<name>          <Description> 
ise             Cisco Identity Services Engine

Note


The version and date might change for different versions of this release.

Step 4

Check the status of the ISE processes by entering the show application status ise command, and press Enter.

The console displays:
ise/admin# show application status ise

ISE PROCESS NAME                       STATE            PROCESS ID  
--------------------------------------------------------------------
Database Listener                      running          14890       
Database Server                        running          70 PROCESSES
Application Server                     running          19158       
Profiler Database                      running          16293       
ISE Indexing Engine                    running          20773       
AD Connector                           running          22466       
M&T Session Database                   running          16195       
M&T Log Collector                      running          19294       
M&T Log Processor                      running          19207       
Certificate Authority Service          running          22237       
EST Service                            running          29847       
SXP Engine Service                     disabled                     
Docker Daemon                          running          21197       
TC-NAC Service                         disabled        
Wifi Setup Helper Container            not running                  
pxGrid Infrastructure Service          disabled                     
pxGrid Publisher Subscriber Service    disabled                     
pxGrid Connection Manager              disabled                     
pxGrid Controller                      disabled                     
PassiveID WMI Service                  disabled                     
PassiveID Syslog Service               disabled                     
PassiveID API Service                  disabled                     
PassiveID Agent Service                disabled                     
PassiveID Endpoint Service             disabled                     
PassiveID SPAN Service                 disabled                     
DHCP Server (dhcpd)                    disabled                     
DNS Server (named)                     disabled                     

ise/admin#