Update the DNS Server on a Catalyst Center VA Using the AWS Console
To update the DNS server IP address configured on a Catalyst Center VA, use the consent token you obtained from Cisco TAC and follow the steps in this procedure.
Before you begin
Contact Cisco TAC to get a consent token to be able to get full shell access.
Procedure
|
Step 1 |
Log in to the AWS console. |
|
Step 2 |
Choose . |
|
Step 3 |
Choose the instance ID that you want to change and click Connect. The Connect to instance page is displayed with the EC2 Instance Connect tab selected by default.  |
|
Step 4 |
Click the EC2 serial console tab. The Catalyst Center VA instance ID and serial port are displayed. 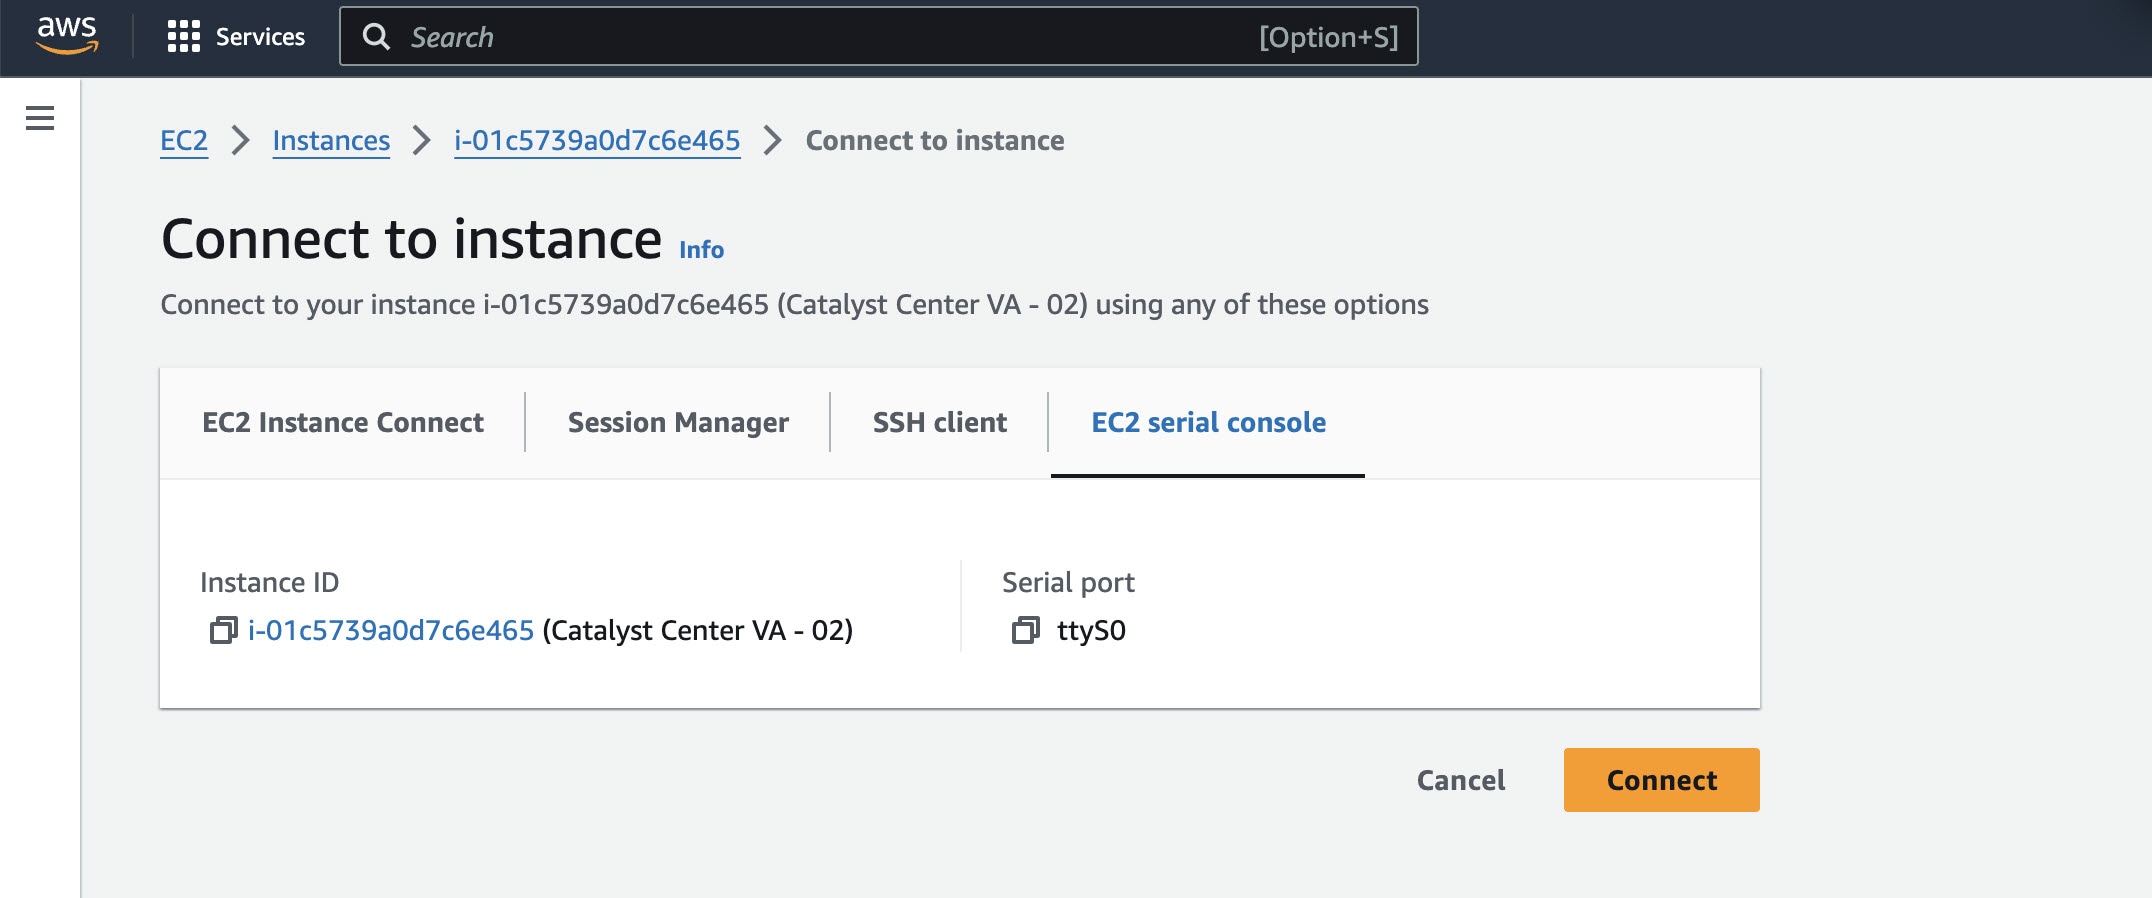 |
|
Step 5 |
Click Connect. The Maglev console is displayed.  |
|
Step 6 |
At the Login prompt, enter maglev as the username. |
|
Step 7 |
At the Password prompt, enter the password that was configured during the initial deployment, regardless of whether you deployed your Catalyst Center VA using Cisco Global Launchpad, AWS CloudFormation, or AWS Marketplace. |
|
Step 8 |
Gain full shell access by using the consent token that you obtained from Cisco TAC: For example: |
|
Step 9 |
Set the terminal to display in color: |
|
Step 10 |
Run the sudo maglev-config update command. The Configuration wizard presents an abbreviated version of the same series of screens shown in, for example, Configure a Secondary Node Using the Maglev Wizard in the Cisco DNA Center Second-Generation Appliance Installation Guide. When the DNS server IP address setting is displayed, change the DNS server IP address to the preferred one. After you finish making changes on each screen, choose next>>, as needed, to proceed through the Configuration wizard. |
|
Step 11 |
At the end of the configuration process, a message appears, stating that the Configuration wizard is now ready to apply your changes. The following options are available:
|
|
Step 12 |
To complete the change, choose proceed>>. The Configuration wizard applies the changes you made. At the end of the configuration process, a CONFIGURATION SUCCEEDED! message appears. |
 Feedback