Managing enterprises

A Security Cloud enterprise is a trust boundary for Cisco products, users, registered domains, identity providers, and other metadata.

Create an enterprise

You can create multiple enterprise, each with their own set of users, products, and other enterprise data.

Procedure


Step 1

In Security Provisioning and Administration, hover over the Enterprise menu at the top of the browser and click Create new enterprise.

A dialog warns you that by creating a new enterprise will you leave the current page.

Step 2

Click Proceed.

Security Provisioning and Administration reloads with the new created enterprise selected. The enterprise is given a default name, which you can rename.


Rename an enterprise

You can rename an enterprise that you've created. Enterprise names are limited to 50 characters.

Procedure


Step 1

Select the enterprise that you want to rename from the Enterprise menu.

Step 2

Click the pencil icon next to the enterprise name at the top of Security Provisioning and Administration page.

Step 3

In the Edit Enterprise Name dialog box, enter the new enterprise name and click Save.


Switch enterprises

All operations you perform in Security Provisioning and Administration, such as creating domains or inviting users, are applied to the currently selected enterprise. The Enterprise menu at the top of Security Provisioning and Administration shows the currently selected enterprise. To switch to another enterprise, follow this procedure.

Procedure


Step 1

Sign in to Security Provisioning and Administration.

Step 2

Hover over the Enterprise menu and select the desired enterprise from the slide-in pane.

Step 3

In the Switch Enterprise dialog box, click Proceed.

Security Provisioning and Administration reloads with the selected enterprise.


Support access to an enterprise

To help the support team diagnose and debug issues more effectively, you can grant the team temporary access to your enterprise. This access is automatically revoked after a specified duration, and can also be disabled anytime after it is no longer needed.

Enable support access

You can grant the support team access to your enterprise for better diagnosis and debugging.

Procedure


Step 1

In the Security Provisioning and Administration window, hover over the Enterprise menu and from the slide-in pane, select the enterprise .

Security Provisioning and Administration reloads with the selected enterprise.

Step 2

Click Support Access in the left navigation pane.

Support Access menu

Step 3

In the Support Access page, click Enable support access.

Step 4

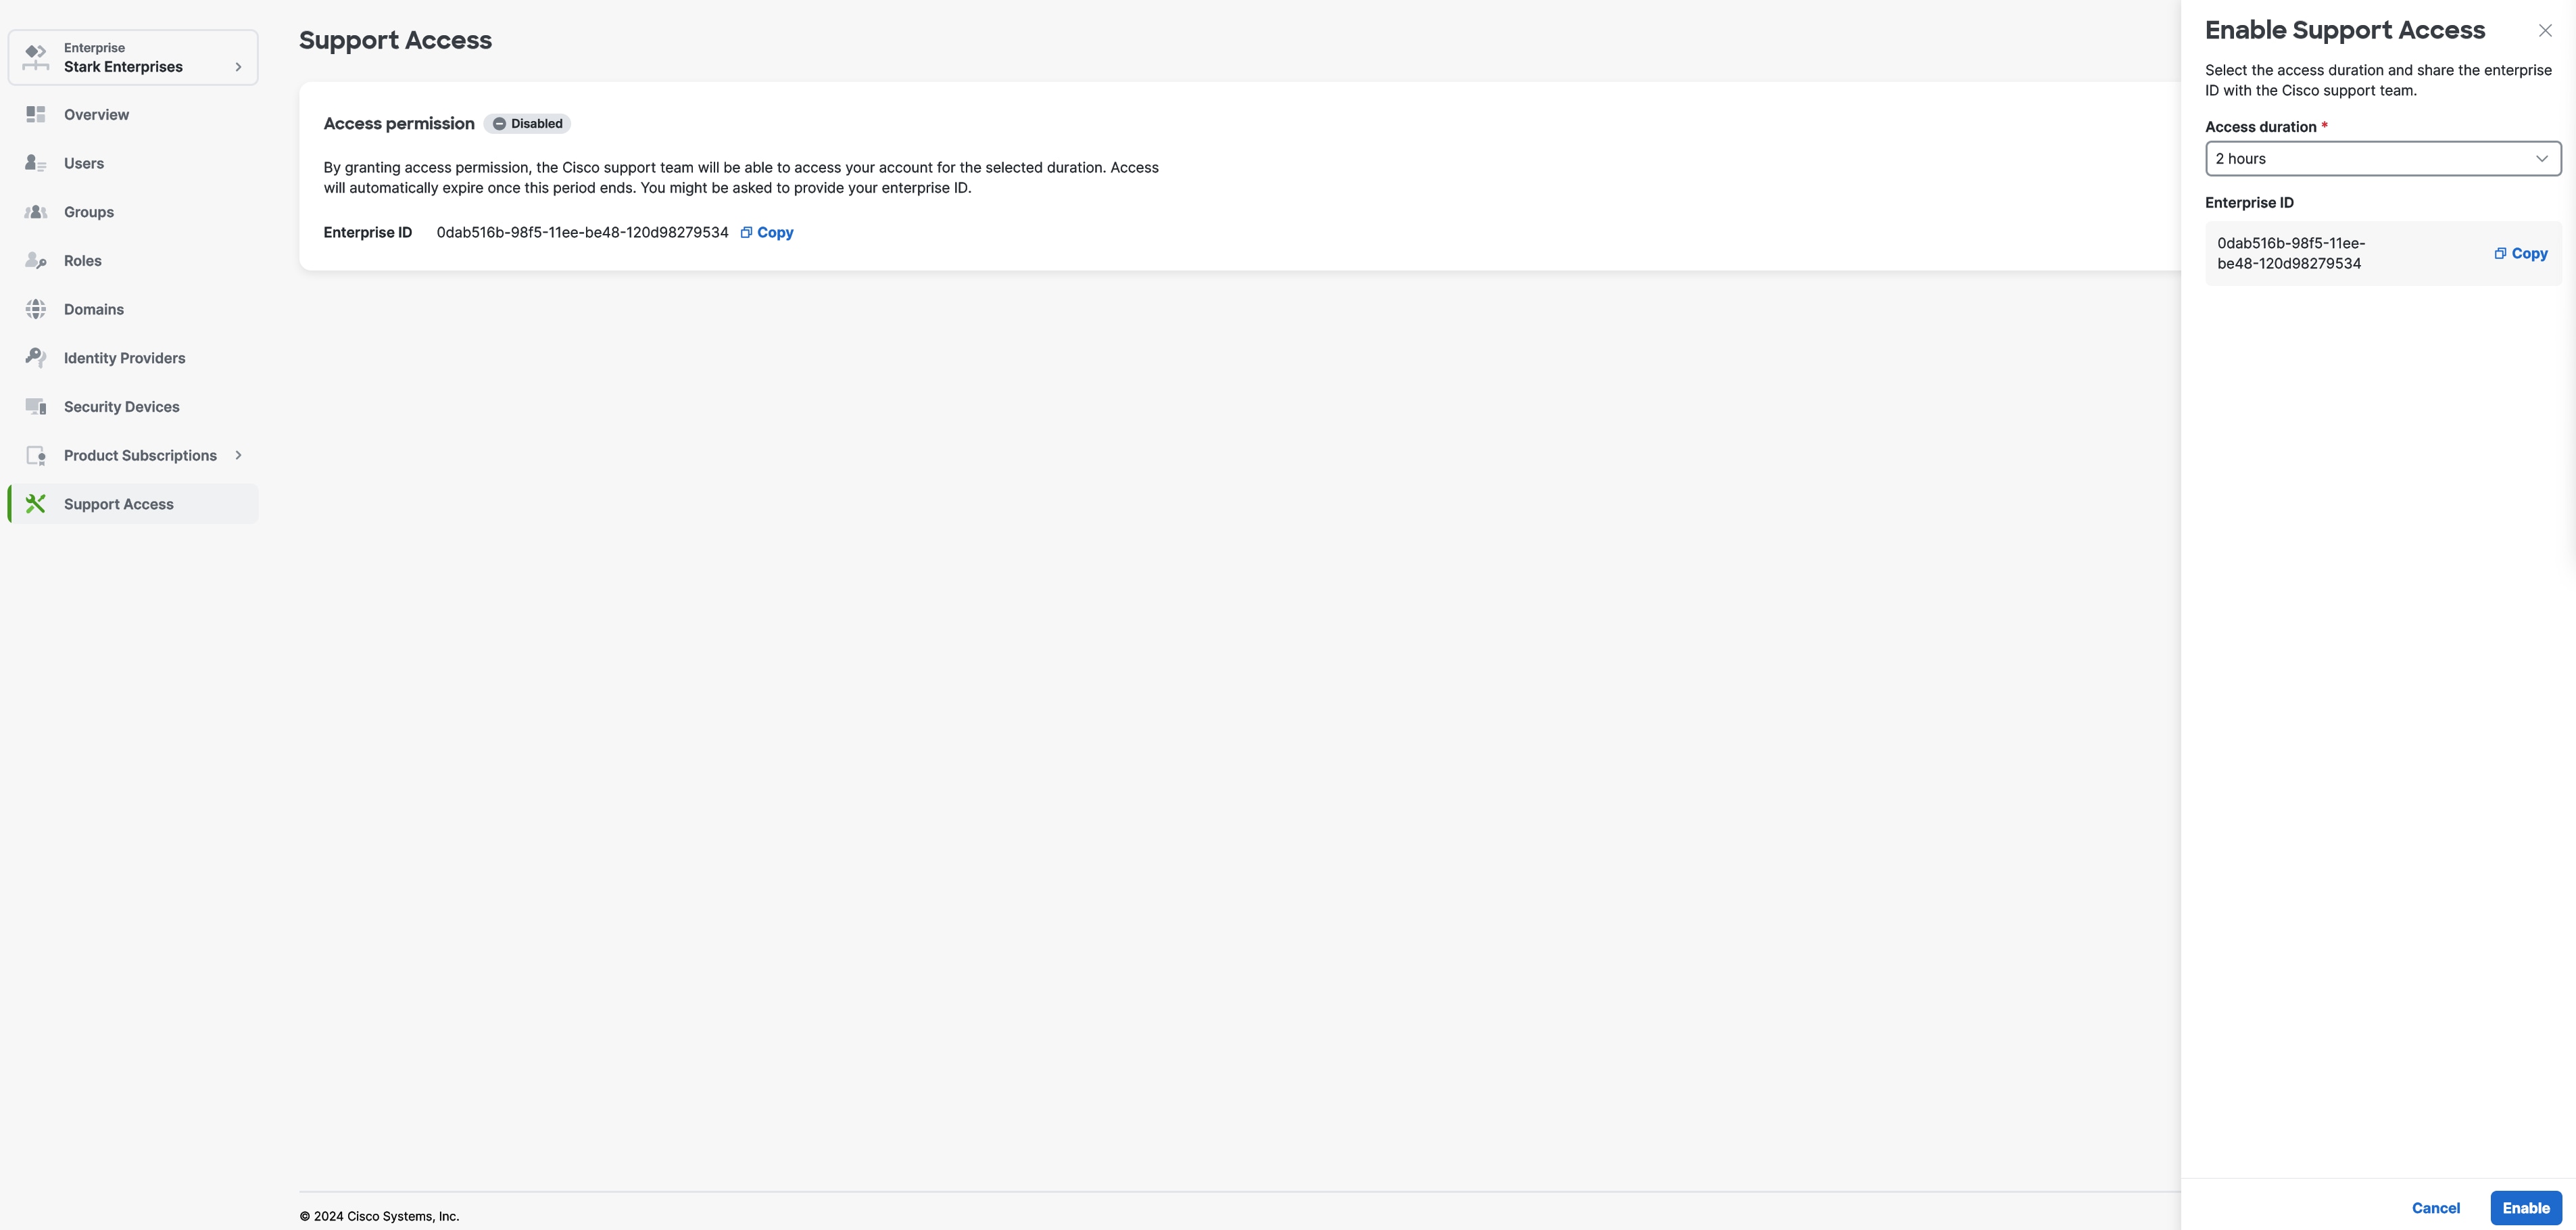
In the Enable Support Access slide-in pane, select the duration from the Access duration drop-down list.

This is the duration for which the Cisco Support team has access to your enterprise account.

Step 5

Under Enterprise ID, click the clipboard icon to copy the number.

  1. Paste the enterprise ID into a safe text tool.

  2. When asked, provide the enterprise ID to the Cisco Support team.

Enable Support Access

Step 6

Click Enable.


Access to your enterprise is enabled and the support team can access your enterprise for the duration that you have configured. At the end of this period, access is automatically revoked.

Disable support access

You can revoke the access that is provided to the support team, when needed. Also, after the access duration expires, the access is automatically revoked.

Procedure


Step 1

In the Security Provisioning and Administration window, click Support Access in the left navigation pane.

Step 2

Click Disable Support Access.

Step 3

In the Disable Support Access dialog window, click Disable access.


External access to your enterprise is disabled.