Maintenance

Upgrade procedures

Upgrade through the Cisco Cyber Vision sensor management extension

Before updating sensors, the Cisco Cyber Vision sensor management extension must be up-to-date.

It is possible to select which sensors to update. The update status will be visible in the Management jobs page.

Update the sensor management extension

The Cisco Cyber Vision sensor management extension must be up-to-date to update IOx sensors.

Procedure

Step 1

Retrieve the sensor management extension file (i.e. CiscoCyberVision-sensor-management-<version>.ext) on cisco.com.

Step 2

In Cisco Cyber Vision, navigate to Admin > Extensions.

Step 3

Click Update to browse the new version of the extension file.


Update the sensors

Procedure

Step 1

In Cisco Cyber Vision, navigate to Admin > Sensors > Sensor Explorer.

Sensors that are not up-to-date have their version displayed in red.

Step 2

Click Install sensor, then Update Cisco devices.

The update Cisco devices window pops up listing all sensors that have been deployed with the sensor management extension.

Step 3

Select the sensors you want to update.

Step 4

Click Update.

The sensors' update status appear in the Management jobs page in batches per sensor type and of maximum ten sensors per batch.

Herebelow the management jobs indicate that the batch of sensors updated successfully.

If the batch update fails, click the red update error icon to see logs.


Upgrade through the IOx Local Manager

The following section explains how to upgrade the sensor through the IOx Local Manager.


Note


In the case of Cisco Cyber Vision upgrade for a Catalyst 9x00 from a release 4.1.2 or lower to a release 4.1.3, the update will fail due to the addition of the RSPAN option. The sensor application must be removed and deployed again.


In the example below, the sensor is upgraded from Cisco Cyber Vision version 3.2.2 to version 3.2.3.

Figure 1. The sensor in version 3.2.2 in the Sensors administration page of Cisco Cyber Vision
  1. Access the IOx Local Manager.

  2. Stop the application.

    The operation takes a few moments.

    The application status switches to STOPPED.

    In Cisco Cyber Vision, the sensor status switches to Disconnected.

  3. In the IOx Local Manager, click the Deactivate button.

    The application status moves to DEPLOYED.

  4. Click Upgrade.

    The pop up Upgrade application appears.

  5. Select the Preserve Application Data option.

  6. Select the new version of the application archive file.

    e.g. CiscoCyberVision-IOx-aarch64-3.2.3.tar

    The operation takes a few moments.

    A message indicating that the sensor has been successfully upgraded is displayed.

  7. Check the number of the new version.

  8. Click Activate.

  9. Check configurations.

    It can happen that network configurations are lost during the upgrade. If they are, refer to Configure the sensor virtual application in the procedure with the Local Manager corresponding to the switch used and do as explained.

  10. Click the Activate App button.

    The application status moves to ACTIVATED.

  11. Click the Start button.

    The application status changes to RUNNING.

    In Cisco Cyber Vision, the sensor is upgraded from version 3.2.2 to 3.2.3 and its status moves to Connected.

Replace SD card

This section explains how to replace a SD card on a Cisco IE3x00.

Procedure


Step 1

Connect to the device CLI and use the following commands to disable IoX:

configure terminal 
no iox 
exit 

Step 2

Replace the SD card.

Step 3

Format the SD card using the following command:

format sdflash: ext4

Step 4

Enable IOx using the following command:

configure terminal
iox

Step 5

Follow the instructions described in the following section to redeploy the sensor.


What to do next

Reconfigure/Redeploy a sensor

Reconfigure/Redeploy a sensor

The Redeploy button is used when you need to replace a sensor model with another one keeping the same network configurations (e.g. replacing a Cisco IE3400 with a Cat 9300), change configurations, or if you need to reconfigure the sensor (e.g. to enable Active Discovery).

To do so:

Procedure


Step 1

On the Sensor Explorer page, click the sensor to reconfigure/redeploy. The sensor right side panel appears.

Step 2

Click Redeploy.

A pop up asking to confirm the redeployment of the sensor appears.

Step 3

Click OK to proceed.

A summary of the sensor configuration is displayed. In this example, we're going to change the Collection VLAN number.

Step 4

Click Start.

Step 5

Enter the credentials to reach the sensor to redeploy and click Connect.

Step 6

Click the blue link to fill the warning fields with the current sensor configuration. We change the Collection VLAN number value to 49.

Step 7

Click Next.

Step 8

You can enable Active Discovery selecting Passive and Active Discovery.

Step 9

Click Deploy.

A message saying that the sensor is being redeployed appears. You can either go the jobs page or go back to the Sensor Explorer page.

Step 10

Click Go to the jobs page.

You are redirected to the Management jobs page to see the redeployment advancement. This can take several minutes.

If you go back to the Sensor Explorer page, you will see that the sensor is in Redeploying status.

Once the redeployment is finished, the sensor will switch status to connected and the Active Discovery to Enabled.


Certificate renewal

The certificates generated by Cisco Cyber Vision have a validity of two years.

Sensor certificates must be renewed manually. The procedure used differs whether the certificate is already expired or not and whether the sensor has been deployed using the sensor management extension.

Sensor certificate renewal

The following procedure applies to:

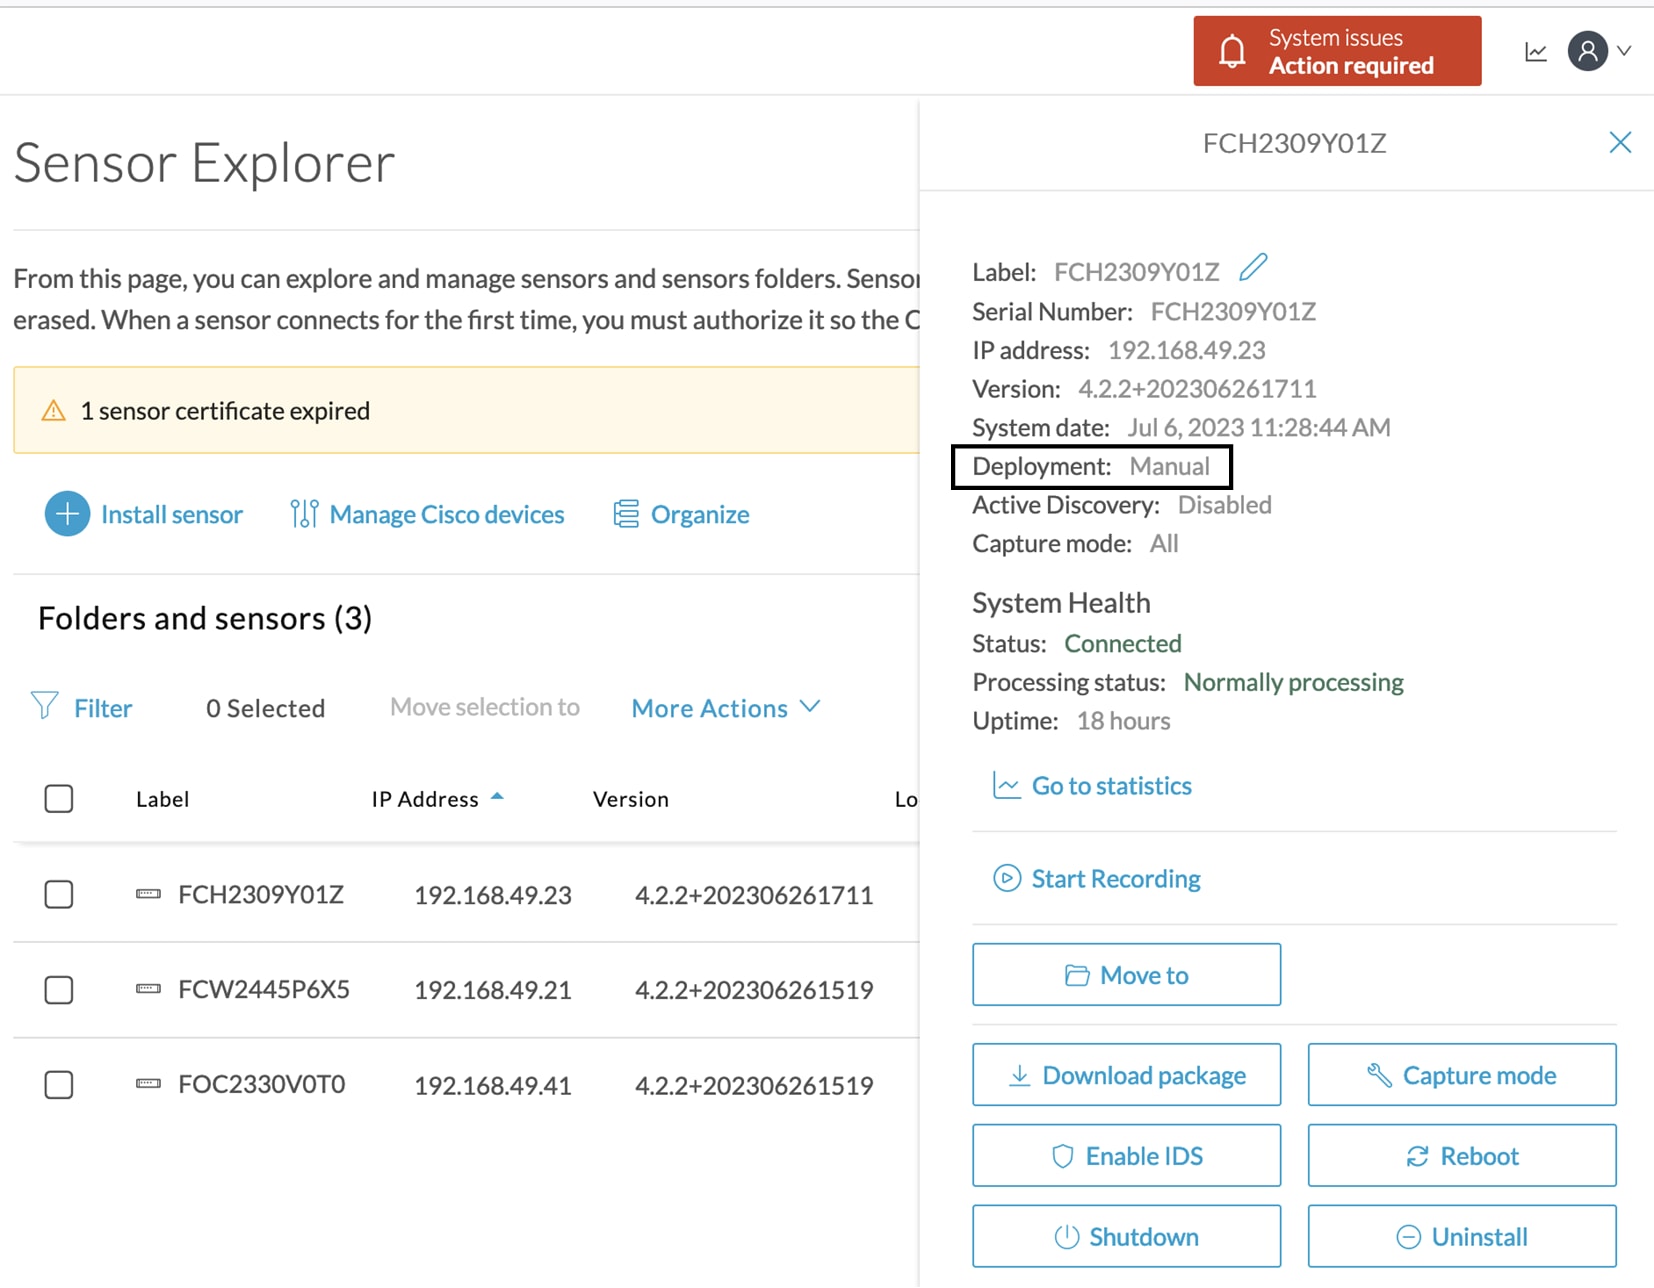
  • Sensors deployed with the sensor management extension, whether the certificate expiration date is exceeded or not (i.e. the deployment method is indicated in the sensor's right side panel).

  • In the case of sensors deployed manually, it only applies if the sensors certificate have not expired yet (i.e. the sensor certificate status is Expire Soon).

If sensors have been deployed manually and the certificate expiration date is exceeded, refer to Sensor certificate renewal through the Local Manager.

Procedure


Step 1

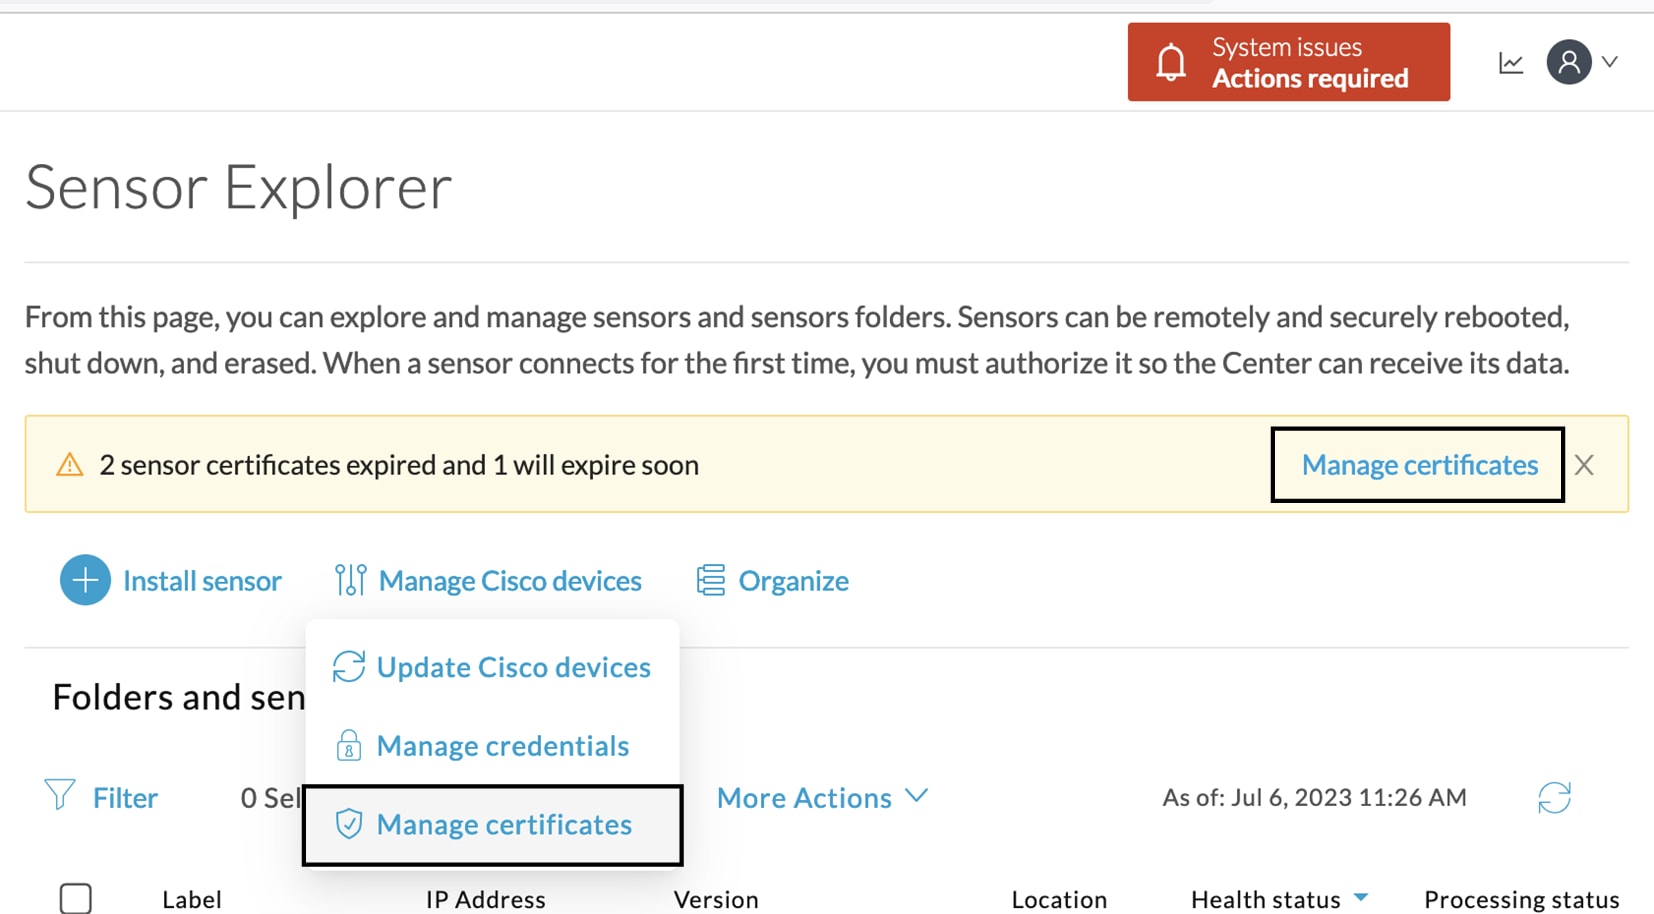
In Cisco Cyber Vision, navigate to Admin > Sensors > Sensor Explorer or click the top banner alert to access the Sensor Explorer page directly.

Another alert is displayed.

Step 2

Click Manage certificates in the alert or Manage Cisco devices > Manage certificates.

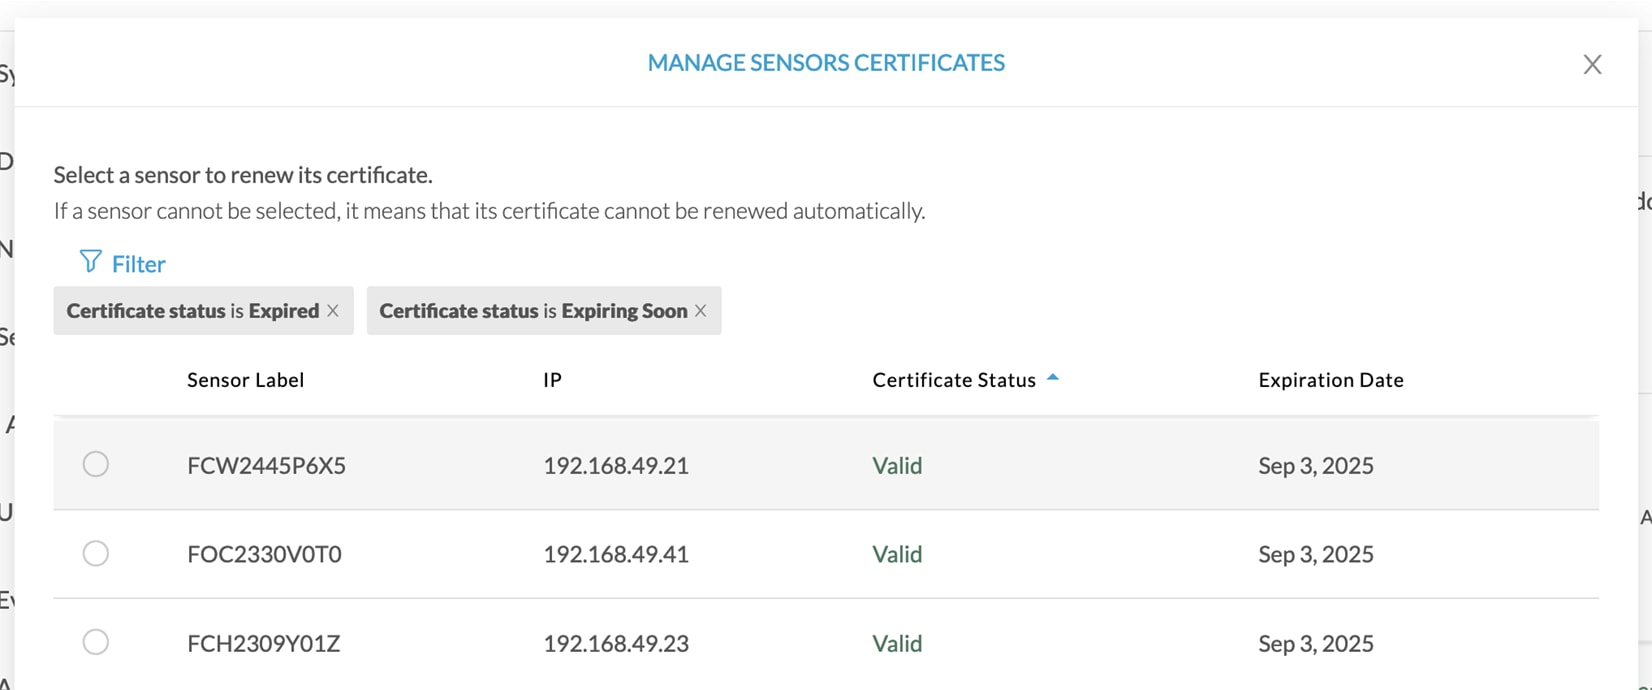
The Manage sensors certificates window opens.

Step 3

Select the sensor with the status Expiring Soon.

Step 4

Click Renew certificate.

The certificate is renewed and automatically sent to the sensor. Its status switches to Valid and the new expiration date appears.


Sensor certificate renewal through the Local Manager

In case of certificate expiration, communication with the sensor is no longer possible if it was deployed manually (i.e. without the sensor management extension). In this case, the certificate is renewed by sending it to the sensor manually. As the certificate is part of the provisioning package, the action consists in generating the provisioning package and sending it to the sensor application through the Local Manager.

Procedure


Step 1

In Cisco Cyber Vision, navigate to Admin > Sensors > Sensor Explorer.

Step 2

Click Manage Certificates.

The Manage sensors certificates window appears.

Step 3

Select the sensor and click Renew Certificate.

A message is displayed.

Step 4

Click Renew certificate again.

The sensor certificate status appears as valid.

Step 5

Close the Manage sensors certificates window.

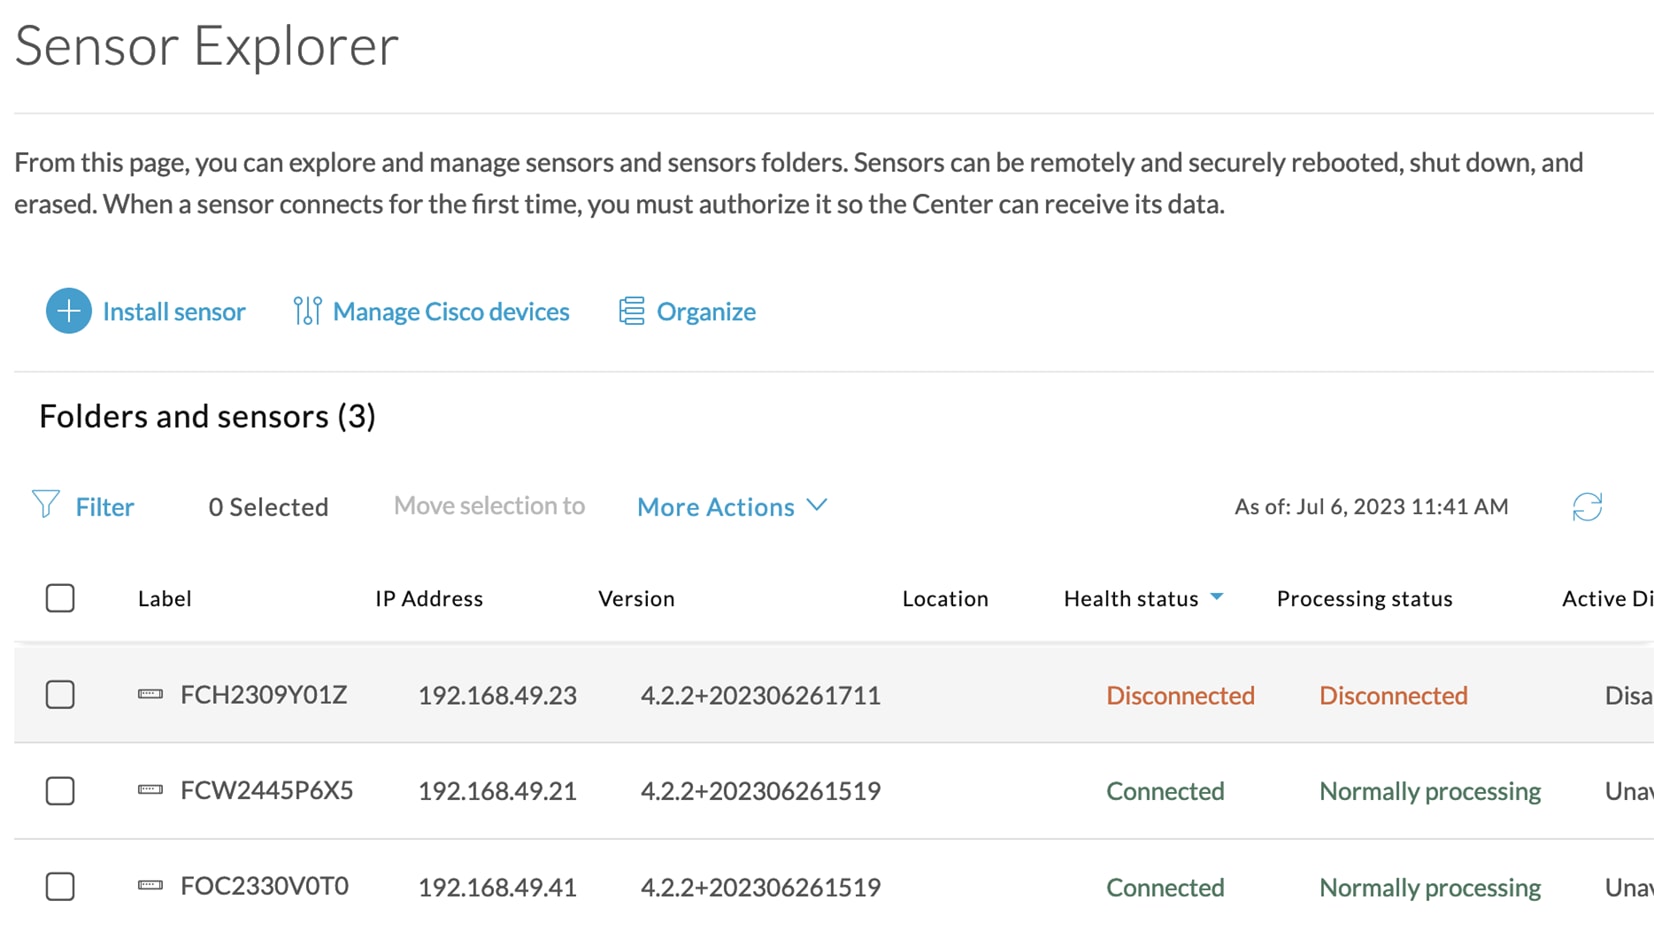
The sensor's health and processing status appear as Disconnected.

Step 6

Click the sensor in the list.

Its right side panel opens.

Step 7

Click the Download package button.

Step 8

Step 9

Import the provisioning package in the Local Manager. To do so, refer to Import the provisioning package.

Step 10

The sensor's health status switches to Connected and its processing status to Normally processing.