Integrating Auth0 with Security Cloud Sign On
This guide explains how to integrate an Auth0 SAML Addon with Security Cloud Sign On.
Before you begin
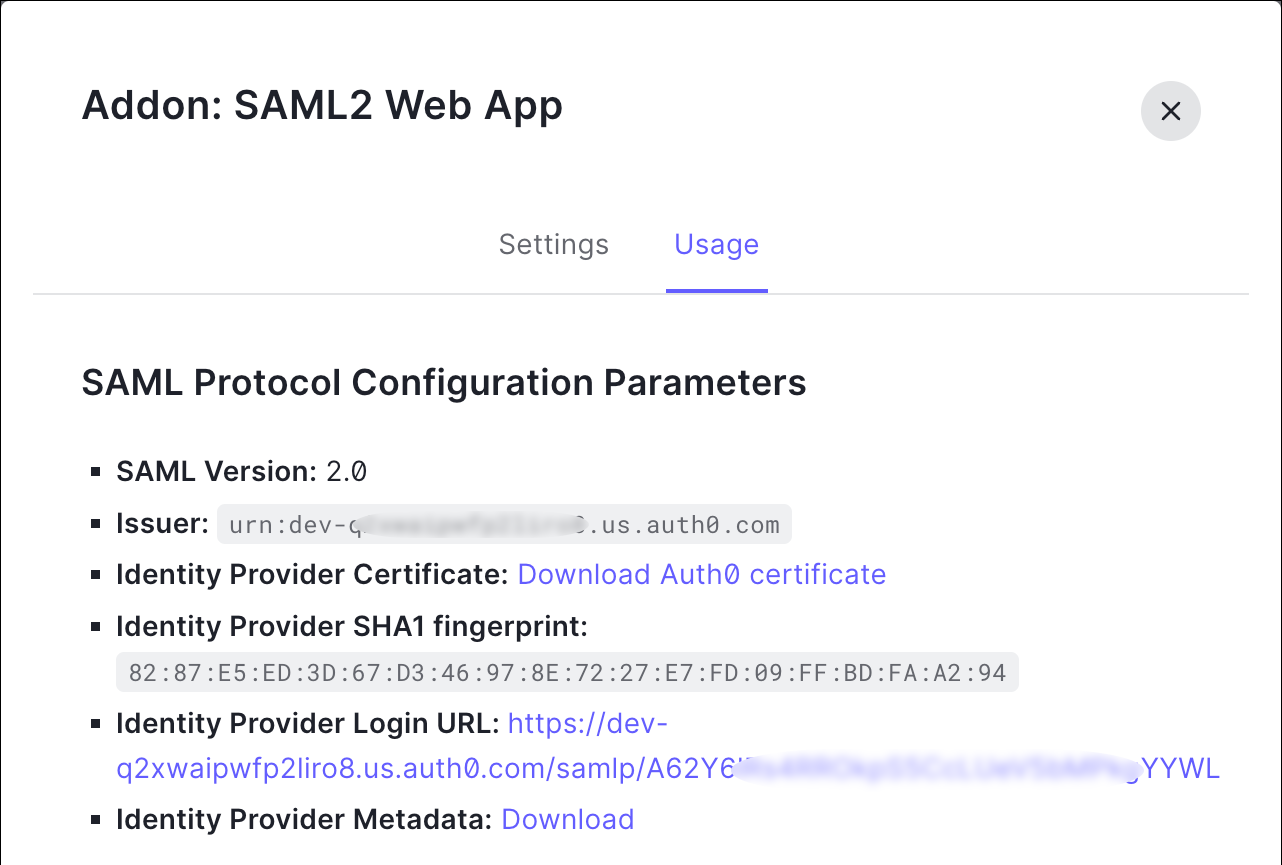
Before you begin, read the Identity provider integration guide to understand the overall process. These instructions supplement that guide with details specific to Auth0 SAML integrations, specifically Step 2: Provide Security Cloud SAML metadata to your identity provider and Step 3: Provide SAML metadata from your IdP to Security Cloud.
Procedure
|
Step 1 |
Sign in to Security Provisioning and Administration with the enterprise that you want to integrate with Auth0.
|
|
Step 2 |
In a new browser tab, sign in to your Auth0 organization as an administrator. Keep the Security Provisioning and Administration browser tab open because you'll return to it shortly.
|
|
Step 3 |
Return to Security Provisioning and Administration and click Next. You should be on Step 3: Provide SAML metadata from your IdP to Security Cloud.
|

What to do next
Next, follow the instructions in Step 4: Test your SAML integration and Step 5: Activate the integration to test and activate your integration.


 Feedback