- Preface
- Chapter 1 - Product Overview
- Chapter 2 - Preparing for Installation
- Chapter 3 - Installing the Client Adapter
- Chapter 4 - Enabling Security Features
- Chapter 5 - Advanced Configuration
- Chapter 6 - Performing Diagnostics
- Chapter 7 - Routine Procedures
- Chapter 8 - Troubleshooting
- Appendix A - Technical Specifications
- Appendix B - Translated Safety Warnings
- Appendix C - Declarations of Conformity and Regulatory Information
- Appendix D - Channels, Power Levels, and Antenna Gains
- Appendix E - Performing a Site Survey
- Glossary
- Index
Cisco Aironet Wireless LAN Client Adapters Installation and Configuration Guide for Windows CE, OL-1375-02
Bias-Free Language
The documentation set for this product strives to use bias-free language. For the purposes of this documentation set, bias-free is defined as language that does not imply discrimination based on age, disability, gender, racial identity, ethnic identity, sexual orientation, socioeconomic status, and intersectionality. Exceptions may be present in the documentation due to language that is hardcoded in the user interfaces of the product software, language used based on RFP documentation, or language that is used by a referenced third-party product. Learn more about how Cisco is using Inclusive Language.
- Updated:
- May 4, 2007
Chapter: Chapter 7 - Routine Procedures
Routine Procedures
This chapter provides procedures for common tasks related to the client adapter.
The following topics are covered in this chapter:
•![]() Inserting and Removing a PC Card
Inserting and Removing a PC Card
•![]() Upgrading the Client Adapter Software
Upgrading the Client Adapter Software
•![]() Restarting the Client Adapter
Restarting the Client Adapter
Inserting and Removing a PC Card
This section provides instructions for inserting a PC card into or removing a PC card from a
Windows CE device.
Inserting a PC Card into a Windows CE Device
Follow the steps below to insert a PC card into a Windows CE device.

Step 1 ![]() Before you begin, examine the PC card. One end has a dual-row, 68-pin PC card connector. The card is keyed so it can be inserted only one way into the PC card slot.
Before you begin, examine the PC card. One end has a dual-row, 68-pin PC card connector. The card is keyed so it can be inserted only one way into the PC card slot.
Step 2 ![]() Hold the PC card with the Cisco logo facing up and insert it into the PC card slot, applying just enough pressure to make sure it is fully seated (see Figure 7-1).
Hold the PC card with the Cisco logo facing up and insert it into the PC card slot, applying just enough pressure to make sure it is fully seated (see Figure 7-1).
Figure 7-1
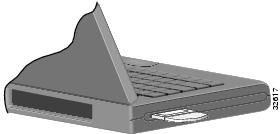
Inserting a PC Card into a Computing Device
Removing a PC Card from a Windows CE Device
Follow the instructions below whenever you need to remove the PC card from your Windows CE device.
To remove a PC card after it is successfully installed and configured, press the Eject button and pull the card out of the PC card slot. When the PC card is reinserted, your connection to the network should be re-established.
Upgrading the Client Adapter Software
This section provides instructions for the following procedures:
•![]() Upgrading the firmware, see below
Upgrading the firmware, see below
•![]() Upgrading the driver and client utilities, see page 5
Upgrading the driver and client utilities, see page 5
Upgrading the Firmware
The client adapter is shipped with the firmware installed in its Flash memory; however, a more recent version of the firmware may be available from Cisco.com. Cisco recommends using the most current version of radio firmware. Follow the instructions in this section to determine the version of your client adapter's firmware and to upgrade it if a more recent version is available from Cisco.com.
Determining the Firmware Version
Follow the steps below to determine if you need to upgrade the client adapter's firmware.
Step 1 ![]() To determine the version of firmware that your client adapter is currently using, double-click the Cisco ACU icon or select Start > Programs > Cisco > Load New Firmware. The current version of your adapter's firmware is shown on the ACU screen and the Select New Firmware screen, provided a client adapter is inserted in your Windows CE device.
To determine the version of firmware that your client adapter is currently using, double-click the Cisco ACU icon or select Start > Programs > Cisco > Load New Firmware. The current version of your adapter's firmware is shown on the ACU screen and the Select New Firmware screen, provided a client adapter is inserted in your Windows CE device.
Step 2 ![]() To determine the latest firmware version available on Cisco.com, follow the steps below:
To determine the latest firmware version available on Cisco.com, follow the steps below:
a. ![]() Use your computer's web browser to access the following URL:
Use your computer's web browser to access the following URL:
http://www.cisco.com/public/sw-center/sw-wireless.shtml
b. ![]() Locate the section for client adapter firmware.
Locate the section for client adapter firmware.
c. ![]() Click the link for your client adapter's series (for example, 350 Series).
Click the link for your client adapter's series (for example, 350 Series).
d. ![]() Look at the available filenames for radio firmware. The numbers that follow the "v" indicate the version number. For example, v42530 indicates a firmware version of 4.25.30.
Look at the available filenames for radio firmware. The numbers that follow the "v" indicate the version number. For example, v42530 indicates a firmware version of 4.25.30.

Note ![]() In order to use LEAP authentication, your client adapter and access point firmware must have matching 802.1X draft standards. That is, if the access point uses draft 8 firmware (prior to 11.06) or has draft 8 selected, the client adapter must use draft 8 firmware (prior to 4.25.x). Similarly, if the access point uses draft 10 firmware (11.06 or later) and has draft 10 selected, the client adapter must use draft 10 firmware (4.25.x or later).
In order to use LEAP authentication, your client adapter and access point firmware must have matching 802.1X draft standards. That is, if the access point uses draft 8 firmware (prior to 11.06) or has draft 8 selected, the client adapter must use draft 8 firmware (prior to 4.25.x). Similarly, if the access point uses draft 10 firmware (11.06 or later) and has draft 10 selected, the client adapter must use draft 10 firmware (4.25.x or later).
Step 3 ![]() If the firmware available from Cisco.com has a higher number than the firmware currently installed in your client adapter, follow the instructions in the "Loading New Firmware" section to upgrade the firmware.
If the firmware available from Cisco.com has a higher number than the firmware currently installed in your client adapter, follow the instructions in the "Loading New Firmware" section to upgrade the firmware.
Loading New Firmware
Follow the instructions below to load new firmware into your client adapter.
Step 1 ![]() Use a serial or USB cable to connect your Windows CE device to a laptop or PC running ActiveSync. A message appears on the Windows CE device indicating that it is connecting to the host. After the Windows CE device is connected, the New Partnership window appears on the laptop or PC. This window asks if you want to set up a partnership.
Use a serial or USB cable to connect your Windows CE device to a laptop or PC running ActiveSync. A message appears on the Windows CE device indicating that it is connecting to the host. After the Windows CE device is connected, the New Partnership window appears on the laptop or PC. This window asks if you want to set up a partnership.
Step 2 ![]() Perform one of the following:
Perform one of the following:
•![]() If you want to establish a partnership that allows you to synchronize files between the laptop or PC and the Windows CE device, select Yes, click Next, and follow the instructions on the screen to specify the files to be synchronized and to finish setting up the partnership.
If you want to establish a partnership that allows you to synchronize files between the laptop or PC and the Windows CE device, select Yes, click Next, and follow the instructions on the screen to specify the files to be synchronized and to finish setting up the partnership.
•![]() If you do not want to synchronize files and want to connect as a "guest," select No and click Next. The screen indicates that you are connected as a guest.
If you do not want to synchronize files and want to connect as a "guest," select No and click Next. The screen indicates that you are connected as a guest.
Step 3 ![]() Use the laptop or PC's web browser to access the following URL:
Use the laptop or PC's web browser to access the following URL:
http://www.cisco.com/public/sw-center/sw-wireless.shtml
Step 4 ![]() Locate the section for client adapter firmware.
Locate the section for client adapter firmware.
Step 5 ![]() Click the link for your client adapter's series (for example, 350 Series).
Click the link for your client adapter's series (for example, 350 Series).
Step 6 ![]() Click the firmware file for your client adapter.
Click the firmware file for your client adapter.
Note ![]() If your wireless network uses LEAP, remember to select a firmware file of the same draft standard as the access points to which your client adapters will be authenticating.
If your wireless network uses LEAP, remember to select a firmware file of the same draft standard as the access points to which your client adapters will be authenticating.
Step 7 ![]() Read and accept the terms and conditions of the Software License Agreement.
Read and accept the terms and conditions of the Software License Agreement.
Step 8 ![]() Select the firmware file to download it.
Select the firmware file to download it.
Step 9 ![]() Save the file to a floppy disk or to the hard drive of your laptop or PC.
Save the file to a floppy disk or to the hard drive of your laptop or PC.
Step 10 ![]() Locate the file using Windows Explorer, double-click it, and extract the image file (*.img) to a folder.
Locate the file using Windows Explorer, double-click it, and extract the image file (*.img) to a folder.
Step 11 ![]() In the ActiveSync window on the laptop or PC, click the Explore button to view the files on the Windows CE device.
In the ActiveSync window on the laptop or PC, click the Explore button to view the files on the Windows CE device.
Step 12 ![]() Drag and drop the firmware image from Windows Explorer to a location in the ActiveSync window.
Drag and drop the firmware image from Windows Explorer to a location in the ActiveSync window.
Note ![]() If your Windows CE device is a PPC running Windows CE 3.0, you must copy the firmware image to the My Documents folder or a folder under My Documents.
If your Windows CE device is a PPC running Windows CE 3.0, you must copy the firmware image to the My Documents folder or a folder under My Documents.
Step 13 ![]() After the file is copied, disconnect the Windows CE device.
After the file is copied, disconnect the Windows CE device.
Step 14 ![]() Make sure the client adapter is installed in your Windows CE device and is operational.
Make sure the client adapter is installed in your Windows CE device and is operational.
Step 15 ![]() On your Windows CE device, select Start > Programs > Cisco > Load New Firmware. The Load New Firmware screen appears (see Figure 7-2).
On your Windows CE device, select Start > Programs > Cisco > Load New Firmware. The Load New Firmware screen appears (see Figure 7-2).
Figure 7-2 Load New Firmware Screen

Step 16 ![]() Click the Select Firmware button.
Click the Select Firmware button.
The Open window appears (see Figure 7-3).
Note ![]() The window shown below is on a Windows CE HPC device. The screen looks slightly different on a Windows CE PPC device.
The window shown below is on a Windows CE HPC device. The screen looks slightly different on a Windows CE PPC device.
Figure 7-3 Open Window

Step 17 ![]() Find the location of the new firmware image in the Open window.
Find the location of the new firmware image in the Open window.
Step 18 ![]() Click the new firmware image file (*.img) so it appears in the Name box at the bottom of the Open window.
Click the new firmware image file (*.img) so it appears in the Name box at the bottom of the Open window.
Step 19 ![]() Click OK. If the selected image is loaded successfully into the client adapter's Flash memory, a "Firmware Upgrade Complete!" message appears on the Load New Firmware screen.
Click OK. If the selected image is loaded successfully into the client adapter's Flash memory, a "Firmware Upgrade Complete!" message appears on the Load New Firmware screen.
Upgrading the Driver and Client Utilities
Follow the instructions in this section to determine the versions of your client adapter's driver and client utilities and to upgrade them if more recent versions are available from Cisco.com.
Note ![]() The driver, client utilities, and online help files are installed together.
The driver, client utilities, and online help files are installed together.
Determining the Driver and Client Utility Versions
Follow the instructions in this section to determine if you need to upgrade the client adapter's driver or client utilities.
Step 1 ![]() To determine the version of the driver that your client adapter is currently using, double-click the Cisco ACU icon or select Start > Programs > Cisco > Aironet Client Utility. The current version of your adapter's driver is shown on the ACU screen, provided the client adapter is installed in the Windows CE device and is operational.
To determine the version of the driver that your client adapter is currently using, double-click the Cisco ACU icon or select Start > Programs > Cisco > Aironet Client Utility. The current version of your adapter's driver is shown on the ACU screen, provided the client adapter is installed in the Windows CE device and is operational.
Step 2 ![]() To determine the version of a client utility that your client adapter is using, open the utility and click the About button at the bottom of the screen. The About screen displays the current version of the utility.
To determine the version of a client utility that your client adapter is using, open the utility and click the About button at the bottom of the screen. The About screen displays the current version of the utility.
Step 3 ![]() To determine the latest driver and client utility versions available on Cisco.com, follow the steps below:
To determine the latest driver and client utility versions available on Cisco.com, follow the steps below:
a. ![]() Use your computer's web browser to access the following URL:
Use your computer's web browser to access the following URL:
http://www.cisco.com/public/sw-center/sw-wireless.shtml
b. ![]() Locate the section for client adapter drivers and utilities.
Locate the section for client adapter drivers and utilities.
c. ![]() Click the link for Windows CE 2.11 or 3.0, depending on which version of Windows CE your device is running.
Click the link for Windows CE 2.11 or 3.0, depending on which version of Windows CE your device is running.
Note ![]() If you are not sure which version of Windows CE your device is running, refer to the "Determining the Windows CE Version" section for instructions.
If you are not sure which version of Windows CE your device is running, refer to the "Determining the Windows CE Version" section for instructions.
d. ![]() Look at the release numbers of the driver and client utilities in the description below the filename. These are the latest available versions on Cisco.com.
Look at the release numbers of the driver and client utilities in the description below the filename. These are the latest available versions on Cisco.com.
Step 4 ![]() If the driver or client utility version available from Cisco.com is greater than the version currently being used by your client adapter, follow the instructions in the "Uninstalling the Current Driver and Client Utilities" section below to remove the current driver and client utilities and the instructions in the "Loading a New Driver and Client Utilities" section to install the new driver and client utilities.
If the driver or client utility version available from Cisco.com is greater than the version currently being used by your client adapter, follow the instructions in the "Uninstalling the Current Driver and Client Utilities" section below to remove the current driver and client utilities and the instructions in the "Loading a New Driver and Client Utilities" section to install the new driver and client utilities.
Uninstalling the Current Driver and Client Utilities
Cisco recommends that you uninstall the existing driver and client utilities for your client adapter before upgrading to more recent versions. This section provides instructions for uninstalling your client adapter's current driver and client utilities. The instructions vary depending on your client adapter's current driver version.
Uninstalling Driver Version 1.4 for Windows CE 2.11
Step 1 ![]() Terminate any Cisco Aironet applications running on the Windows CE device and eject the client adapter.
Terminate any Cisco Aironet applications running on the Windows CE device and eject the client adapter.
Step 2 ![]() Select Start > Programs > Cisco > Cisco Aironet Uninstall. The Cisco Aironet Uninstall screen appears.
Select Start > Programs > Cisco > Cisco Aironet Uninstall. The Cisco Aironet Uninstall screen appears.
Step 3 ![]() Select the Uninstall Cisco Aironet Wireless LAN Adapter checkbox.
Select the Uninstall Cisco Aironet Wireless LAN Adapter checkbox.
Step 4 ![]() Click OK. The utility informs you that the adapter has been uninstalled. The registry entries (but no files) are removed.
Click OK. The utility informs you that the adapter has been uninstalled. The registry entries (but no files) are removed.
Step 5 ![]() Delete the aironet.dll driver file and the following help files from the \Windows directory of the Windows CE device: AuthType.htm, CEM.htm, Cisco Setup.htm, ClieName.htm, DataRate.htm, DHCP.htm, InfrStru.htm, LEAP.htm, LeapLogin.htm, PSMode.htm, SSID.htm, TxPowe.htm, WEP.htm, and WorldMode.htm.
Delete the aironet.dll driver file and the following help files from the \Windows directory of the Windows CE device: AuthType.htm, CEM.htm, Cisco Setup.htm, ClieName.htm, DataRate.htm, DHCP.htm, InfrStru.htm, LEAP.htm, LeapLogin.htm, PSMode.htm, SSID.htm, TxPowe.htm, WEP.htm, and WorldMode.htm.
Step 6 ![]() Delete the following client utility files, which are probably in the \Windows\Programs\Cisco directory on the Windows CE device: Aironet Client Utility.exe, Cisco Aironet Uninstall.exe, Cisco Link Status.exe, Client Encryption Manager.exe, Client Statistics Utility.exe, Load New Firmware.exe, and Site Survey Tool.exe.
Delete the following client utility files, which are probably in the \Windows\Programs\Cisco directory on the Windows CE device: Aironet Client Utility.exe, Cisco Aironet Uninstall.exe, Cisco Link Status.exe, Client Encryption Manager.exe, Client Statistics Utility.exe, Load New Firmware.exe, and Site Survey Tool.exe.
Step 7 ![]() Delete the Cisco directory from \Windows\Programs.
Delete the Cisco directory from \Windows\Programs.
Step 8 ![]() Go to the "Loading a New Driver and Client Utilities" section below for instructions on loading a new driver and client utilities.
Go to the "Loading a New Driver and Client Utilities" section below for instructions on loading a new driver and client utilities.
Uninstalling Driver Version 1.5 or Later for Windows CE 2.11 or 3.0
Step 1 ![]() Eject the client adapter and remove it from the Windows CE device.
Eject the client adapter and remove it from the Windows CE device.
Step 2 ![]() Select Start > Settings > Control Panel > Remove Programs (on an HPC device) or Start > Settings >
Select Start > Settings > Control Panel > Remove Programs (on an HPC device) or Start > Settings >
System tab > Remove Programs (on a PPC device).
Step 3 ![]() Select Cisco Wireless LAN Adapter.
Select Cisco Wireless LAN Adapter.
Step 4 ![]() Click Remove.
Click Remove.
Step 5 ![]() When asked to verify your decision to remove the adapter, click Yes.
When asked to verify your decision to remove the adapter, click Yes.
Step 6 ![]() Click OK. The driver, client utilities, registry entries, and Cisco directory are removed.
Click OK. The driver, client utilities, registry entries, and Cisco directory are removed.
Step 7 ![]() Go to the "Loading a New Driver and Client Utilities" section below for instructions on loading a new driver and client utilities.
Go to the "Loading a New Driver and Client Utilities" section below for instructions on loading a new driver and client utilities.
Loading a New Driver and Client Utilities
Follow the instructions below to install a new driver and client utilities for your client adapter.
Step 1 ![]() Make sure that the client adapter is removed from the Windows CE device.
Make sure that the client adapter is removed from the Windows CE device.
Step 2 ![]() Use a serial or USB cable to connect your Windows CE device to a laptop or PC running ActiveSync. A message appears on the Windows CE device indicating that it is connecting to the host. After the Windows CE device is connected, the New Partnership window appears on the laptop or PC. This window asks if you want to set up a partnership.
Use a serial or USB cable to connect your Windows CE device to a laptop or PC running ActiveSync. A message appears on the Windows CE device indicating that it is connecting to the host. After the Windows CE device is connected, the New Partnership window appears on the laptop or PC. This window asks if you want to set up a partnership.
Step 3 ![]() Perform one of the following:
Perform one of the following:
•![]() If you want to establish a partnership that allows you to synchronize files between the laptop or PC and the Windows CE device, select Yes, click Next, and follow the instructions on the screen to specify the files to be synchronized and to finish setting up the partnership.
If you want to establish a partnership that allows you to synchronize files between the laptop or PC and the Windows CE device, select Yes, click Next, and follow the instructions on the screen to specify the files to be synchronized and to finish setting up the partnership.
•![]() If you do not want to synchronize files and want to connect as a "guest," select No and click Next. The screen indicates that you are connected as a guest.
If you do not want to synchronize files and want to connect as a "guest," select No and click Next. The screen indicates that you are connected as a guest.
Step 4 ![]() Use the laptop or PC's web browser to access the following URL:
Use the laptop or PC's web browser to access the following URL:
http://www.cisco.com/public/sw-center/sw-wireless.shtml
Step 5 ![]() Locate the section for client adapter drivers and utilities.
Locate the section for client adapter drivers and utilities.
Step 6 ![]() Click the link for Windows CE 2.11 or 3.0, depending on which version of Windows CE your device is running.
Click the link for Windows CE 2.11 or 3.0, depending on which version of Windows CE your device is running.
Step 7 ![]() Select the WinCE2.11-PCM-LMC-vx.xx.exe or WinCE3.0-PCM-LMC-vx.xx.exe file.
Select the WinCE2.11-PCM-LMC-vx.xx.exe or WinCE3.0-PCM-LMC-vx.xx.exe file.
Step 8 ![]() Read and accept the terms and conditions of the Software License Agreement.
Read and accept the terms and conditions of the Software License Agreement.
Step 9 ![]() Select the WinCE2.11-PCM-LMC-vx.xx.exe or WinCE3.0-PCM-LMC-vx.xx.exe file to download it.
Select the WinCE2.11-PCM-LMC-vx.xx.exe or WinCE3.0-PCM-LMC-vx.xx.exe file to download it.
Step 10 ![]() Save the file to a floppy disk or to the hard drive of your laptop or PC.
Save the file to a floppy disk or to the hard drive of your laptop or PC.
Step 11 ![]() Use Windows Explorer to locate the saved file.
Use Windows Explorer to locate the saved file.
Step 12 ![]() Double-click the *.exe file for your version of Windows CE (WinCE2.11-PCM-LMC-vx.xx.exe or WinCE3.0-PCM-LMC-vx.xx.exe). The application creates an Install directory under the ActiveSync directory, extracts the .cab files contained in the *.exe file, and copies them to the Install directory.
Double-click the *.exe file for your version of Windows CE (WinCE2.11-PCM-LMC-vx.xx.exe or WinCE3.0-PCM-LMC-vx.xx.exe). The application creates an Install directory under the ActiveSync directory, extracts the .cab files contained in the *.exe file, and copies them to the Install directory.
Step 13 ![]() Click Next to start the Windows CE Application Manager (CeAppMgr). CeAppMgr interrogates the Windows CE device to determine its processor type.
Click Next to start the Windows CE Application Manager (CeAppMgr). CeAppMgr interrogates the Windows CE device to determine its processor type.
Note ![]() If a Windows CE device is not connected to the laptop or PC (as instructed in Step 2), click Exit to quit the setup program and connect a Windows CE device or click Next to continue the installation. If you select Next, a message appears indicating that the software will be downloaded the next time a mobile device is connected. Click OK. The next time a Windows CE device is connected to the laptop or PC via ActiveSync, CeAppMgr starts automatically and you are prompted to install the software. If you select Exit, click OK to shut down CeAppMgr and start again beginning with Step 1.
If a Windows CE device is not connected to the laptop or PC (as instructed in Step 2), click Exit to quit the setup program and connect a Windows CE device or click Next to continue the installation. If you select Next, a message appears indicating that the software will be downloaded the next time a mobile device is connected. Click OK. The next time a Windows CE device is connected to the laptop or PC via ActiveSync, CeAppMgr starts automatically and you are prompted to install the software. If you select Exit, click OK to shut down CeAppMgr and start again beginning with Step 1.
Step 14 ![]() When a dialog box appears asking if you want to install the client adapter using the default application installation directory, click Yes. The default directory is \Windows\Programs\Cisco on HPC devices and \Windows\Start Menu\Programs\Cisco on PPC devices.
When a dialog box appears asking if you want to install the client adapter using the default application installation directory, click Yes. The default directory is \Windows\Programs\Cisco on HPC devices and \Windows\Start Menu\Programs\Cisco on PPC devices.
Note ![]() If you click No on an HPC device, CeAppMgr transfers the *.cab file to the Windows CE device and executes it. This process takes awhile and shows no evidence of activity. Eventually a screen appears on the Windows CE device that asks you where the application files should be installed.
If you click No on an HPC device, CeAppMgr transfers the *.cab file to the Windows CE device and executes it. This process takes awhile and shows no evidence of activity. Eventually a screen appears on the Windows CE device that asks you where the application files should be installed.
A message and a progress bar appear indicating that the client adapter is being installed. CeAppMgr copies the processor-specific *.cab file to the Windows CE device. Then the driver and help files are copied to the \Windows directory, and the client utilities are installed in the \Windows\Programs\Cisco directory on HPC devices or the \Windows\Start Menu\Programs\Cisco directory on PPC devices. Shortcuts to ACU and CEM are automatically added to the desktop on HPC devices.
Step 15 ![]() When the installation process is complete on the laptop or PC, a message appears asking you to check the screen of the Windows CE device to see if any additional steps are required to complete the installation. Click OK to terminate the installation process on the laptop or PC.
When the installation process is complete on the laptop or PC, a message appears asking you to check the screen of the Windows CE device to see if any additional steps are required to complete the installation. Click OK to terminate the installation process on the laptop or PC.
Step 16 ![]() Complete any required steps on the Windows CE device.
Complete any required steps on the Windows CE device.
Step 17 ![]() Disconnect the Windows CE device.
Disconnect the Windows CE device.
Step 18 ![]() Insert the client adapter (with the Cisco logo facing up) into the PC card slot of the Windows CE device. Refer to the "Inserting a PC Card into a Windows CE Device" section for specific instructions on inserting the client adapter.
Insert the client adapter (with the Cisco logo facing up) into the PC card slot of the Windows CE device. Refer to the "Inserting a PC Card into a Windows CE Device" section for specific instructions on inserting the client adapter.
The Windows CE device should configure the client adapter, and the green LED on the adapter should blink. If this does not happen, remove the client adapter, reset the Windows CE device, and reinsert the client adapter.
Step 19 ![]() The Cisco Wireless LAN Adapter Settings dialog box appears. (If the dialog box does not appear, select Start, Settings, Control Panel, Network, the Adapters tab, the Cisco Aironet wireless LAN adapter, and Properties on HPC devices or Start, Settings, the Connections tab, Network, and the Cisco Aironet wireless LAN adapter on PPC devices.)
The Cisco Wireless LAN Adapter Settings dialog box appears. (If the dialog box does not appear, select Start, Settings, Control Panel, Network, the Adapters tab, the Cisco Aironet wireless LAN adapter, and Properties on HPC devices or Start, Settings, the Connections tab, Network, and the Cisco Aironet wireless LAN adapter on PPC devices.)
Perform one of the following:
•![]() If your device is connected to a DHCP server, select Obtain an IP address via DHCP or Use server-assigned IP address and click OK.
If your device is connected to a DHCP server, select Obtain an IP address via DHCP or Use server-assigned IP address and click OK.
•![]() If your device is not connected to a DHCP server, select Specify an IP address or Use specific IP address and follow the steps below:
If your device is not connected to a DHCP server, select Specify an IP address or Use specific IP address and follow the steps below:
a. ![]() Enter the IP address, subnet mask, and default gateway address you want to assign to your device. They can be obtained from your system administrator.
Enter the IP address, subnet mask, and default gateway address you want to assign to your device. They can be obtained from your system administrator.
b. ![]() Select the Name Servers tab and enter the primary and secondary DNS and WINS you want to assign to your device. They can be obtained from your system administrator.
Select the Name Servers tab and enter the primary and secondary DNS and WINS you want to assign to your device. They can be obtained from your system administrator.
c. ![]() Click OK.
Click OK.
Step 20 ![]() Double-click the Cisco ACU icon or select Start > Programs > Cisco > Aironet Client Utility to open ACU. The ACU screen appears (see Figure 7-4).
Double-click the Cisco ACU icon or select Start > Programs > Cisco > Aironet Client Utility to open ACU. The ACU screen appears (see Figure 7-4).
Figure 7-4 ACU Screen

Step 21 ![]() Select SSID under Property. Then enter your RF network's case-sensitive SSID in the Value box.
Select SSID under Property. Then enter your RF network's case-sensitive SSID in the Value box.
Step 22 ![]() Select Client Name under Property. Then enter your Windows CE device's unique client name in the Value box.
Select Client Name under Property. Then enter your Windows CE device's unique client name in the Value box.
Step 23 ![]() Select Data Rates under Property. Make sure that Auto is selected in the list of options in the Value box.
Select Data Rates under Property. Make sure that Auto is selected in the list of options in the Value box.
Step 24 ![]() Click OK. The driver and client utility installation is complete. If the installation was successful, the client adapter's green LED blinks.
Click OK. The driver and client utility installation is complete. If the installation was successful, the client adapter's green LED blinks.
Step 25 ![]() Go to Chapter 4 for instructions on setting the client adapter's security features, if desired.
Go to Chapter 4 for instructions on setting the client adapter's security features, if desired.
Client Utility Procedures
This section provides instructions for the following procedures:
•![]() Opening a client utility
Opening a client utility
•![]() Exiting a client utility
Exiting a client utility
•![]() Determining the version of a client utility
Determining the version of a client utility
•![]() Deleting client utility icons on HPC devices
Deleting client utility icons on HPC devices
Opening a Client Utility
To open any of the client utilities on your Windows CE device, select Start > Programs > Cisco and the utility you wish to open. The screen for that utility appears.
Exiting a Client Utility
To exit any of the client utilities, click OK at the bottom of the screen.
Determining the Version of a Client Utility
To determine which version of a utility you are running, open the utility and click the About button at the bottom of the screen. For example, if you click the About button on the ACU screen, the About screen appears (see Figure 7-5). Click OK to return to the utility's main screen.
Figure 7-5 About Screen

Deleting Client Utility Icons on HPC Devices
Icons for ACU and CEM are automatically added to the desktop of HPC devices when you install the client utilities. If you wish to remove these icons from your desktop, hold down the Alt key and tap the icon, click Delete, and click Yes to confirm your decision.
Note ![]() You can also use File Explorer to browse to the desktop, select the icon, and delete it.
You can also use File Explorer to browse to the desktop, select the icon, and delete it.
Restarting the Client Adapter
ACU enables you to restart the client adapter when necessary. For example, you might want to restart the adapter for the following reasons:
•![]() If your client adapter is experiencing poor throughput, you might want to restart the client adapter to try to force it to disassociate from the access point to which it is currently associated in the hope that it will reassociate to an access point with a stronger signal.
If your client adapter is experiencing poor throughput, you might want to restart the client adapter to try to force it to disassociate from the access point to which it is currently associated in the hope that it will reassociate to an access point with a stronger signal.
•![]() If you use LEAP and then disable it in ACU, you might want to restart the client adapter to ensure that the adapter starts to use the static WEP key set in CEM instead of the dynamic WEP key assigned during LEAP authentication.
If you use LEAP and then disable it in ACU, you might want to restart the client adapter to ensure that the adapter starts to use the static WEP key set in CEM instead of the dynamic WEP key assigned during LEAP authentication.
Follow the steps below to restart the client adapter.
Step 1 ![]() Open ACU by double-clicking the Cisco ACU icon or selecting Start > Programs > Cisco > Aironet Client Utility.
Open ACU by double-clicking the Cisco ACU icon or selecting Start > Programs > Cisco > Aironet Client Utility.
Step 2 ![]() Click OK on the ACU screen. The driver stops the client adapter's radio, writes the configuration (although no parameter settings have been changed), and restarts the radio.
Click OK on the ACU screen. The driver stops the client adapter's radio, writes the configuration (although no parameter settings have been changed), and restarts the radio.
Note ![]() When you click OK, the ACU screen closes. You have to re-open ACU to determine if the client adapter is associated to an access point.
When you click OK, the ACU screen closes. You have to re-open ACU to determine if the client adapter is associated to an access point.
 Feedback