- Preface
- Introduction to Cisco vWAAS
- Configuring Cisco vWAAS and Viewing vWAAS Components
- Cisco vWAAS on Cisco ISR-WAAS
- Cisco vWAAS on VMware ESXi
- Cisco vWAAS on Microsoft Hyper-V
- Cisco vWAAS on RHEL KVM, KVM on CentOS, and KVM in SUSE Linux
- Cisco vWAAS on Cisco ENCS 5400-W Series
- Cisco vWAAS on Cisco CSP 5000-W Series
- Cisco vWAAS with Cisco Enterprise NFVIS
- Cisco vWAAS with Akamai Connect
- Cisco vWAAS in Cloud Computing Systems
- Troubleshooting Cisco vWAAS
- About Cisco vWAAS on VMware ESXi
- Supported Host Platforms and Software Versions
- VMware ESXi Server Datastore Memory and Disk Space for Cisco vWAAS and Cisco vCM Models
- OVA Package Formats for Cisco vWAAS on VMware ESXI
- Installing Cisco vWAAS on VMware ESXi
Cisco vWAAS on VMware ESXi
This chapter describes how to use Cisco vWAAS on VMware ESXi, and contains the following sections:
- About Cisco vWAAS on VMware ESXi
- Supported Host Platforms and Software Versions
- VMware ESXi Server Datastore Memory and Disk Space for Cisco vWAAS and Cisco vCM Models
- OVA Package Formats for Cisco vWAAS on VMware ESXI
- Installing Cisco vWAAS on VMware ESXi
- Operating Guidelines for Cisco vWAAS in WAAS Version 6.4.3 and later in VMware ESXi
- Upgrade and Downgrade Guidelines for Cisco vWAAS on VMware ESXi
About Cisco vWAAS on VMware ESXi
Cisco vWAAS for VMware ESXi provides cloud-based application delivery service over the WAN in ESX and ESXi-based environments. Cisco vWAAS on VMware ESXi is delivered as an OVA file. The Cisco Unified vWAAS OVA file helps you to deploy as an instance of a required Cisco vWAAS model.
Supported Host Platforms and Software Versions
This section contains the following tables:
- Table 4-1 shows the platforms and software versions supported for Cisco vWAAS on VMware ESXi.
- Table 4-2 shows the supported Cisco WAAS versions for VMware ESXi for a new Cisco vWAAS installation.
- Table 4-3 shows the supported Cisco WAAS versions for VMware ESXi for a Cisco vWAAS upgrade.
Table 4-1 Platforms and Software Versions Supported for Cisco vWAAS on VMware ESXi
|
|
|
|
|
|
|---|---|---|---|---|

Note![]() It is recommended to use VMware vCenter Web GUI for the deployment of Cisco vWAAS in Cisco WAAS version 6.4.3b or later.
It is recommended to use VMware vCenter Web GUI for the deployment of Cisco vWAAS in Cisco WAAS version 6.4.3b or later.
Table 4-2 Supported WAAS Versions for VMware ESXi for New Cisco vWAAS Installation
|
|
|
|---|---|
Table 4-3 Supported Cisco WAAS Versions for VMware ESXi for Cisco vWAAS Upgrade
|
|
|
|---|---|
Note![]() For Cisco vWAAS with VMware ESXi Version 5.5 on a Cisco UCS host: if the DRE latency threshold or an AO timeout alarm occurs, check for the I/O command abort in the Cisco vWAAS. To do this, use the copy sysreport EXEC command.
For Cisco vWAAS with VMware ESXi Version 5.5 on a Cisco UCS host: if the DRE latency threshold or an AO timeout alarm occurs, check for the I/O command abort in the Cisco vWAAS. To do this, use the copy sysreport EXEC command.
If the I/O abort is observed:
Upgrade the RAID controller’s driver to Version 6.610.19.00 or later.
If the I/O abort is still observed after the RAID controller driver upgrade:
Capture and share the following logs for further analysis:
—Guest-VM sysreport
—VMware’s host diagnostic report
—RAID controller’s firmware log
VMware ESXi Server Datastore Memory and Disk Space for Cisco vWAAS and Cisco vCM Models
Table 4-4 shows VMware ESXi server datastore memory and disk space per Cisco vWAAS model, for Cisco WAAS v4.3.1 through v5.3.5, and for Cisco WAAS v5.4.x through v6.x.
Table 4-4 vCPUs, Server Datastore Memory, and Disk Space by Cisco vWAAS Model
|
|
|
|||||
|---|---|---|---|---|---|---|
|
|
|
|
|
|
|
|
Table 4-5 shows VMware ESXi server datastore memory and disk space per Cisco vCM model, for Cisco WAAS v4.3.1 through v5.3.5, and for Cisco WAAS v5.4.x through v6.x.
Table 4-5 vCPUs, Server Datastore Memory, and Disk Space by Cisco vCM Model
|
|
|
|||||
|---|---|---|---|---|---|---|
|
|
|
|
|
|
|
|
Note![]() For Cisco WAAS resized CPU and Memory values, refer to Table 1-17, “Resized vWAAS CPU and Memory Specifications for Cisco WAAS Version 6.4.1a and Later,” in the chapter “Introduction to Cisco vWAAS”.
For Cisco WAAS resized CPU and Memory values, refer to Table 1-17, “Resized vWAAS CPU and Memory Specifications for Cisco WAAS Version 6.4.1a and Later,” in the chapter “Introduction to Cisco vWAAS”.
OVA Package Formats for Cisco vWAAS on VMware ESXI
This section contains the following topics:
- OVA Package for Cisco vWAAS on VMware ESXi for Cisco WAAS Version 5.x to 6.2.x
- OVA Package for Cisco vWAAS on VMware ESXi for Cisco WAAS Version 6.4.1 and Later
Note![]() For a listing of hypervisor OVA, zip, and tar.gz files for vWAAS, see the Cisco Wide Area Application Services (WAAS) Download Software page and select the WAAS software version used with your vWAAS instance.
For a listing of hypervisor OVA, zip, and tar.gz files for vWAAS, see the Cisco Wide Area Application Services (WAAS) Download Software page and select the WAAS software version used with your vWAAS instance.
OVA Package for Cisco vWAAS on VMware ESXi for Cisco WAAS Version 5.x to 6.2.x
For Cisco vWAAS on VMware ESXi in Cisco WAAS Version 5.x through 6.2.x, Cisco provides an OVA or NPE OVA package for each Cisco vWAAS connection profile (examples shown in Table 4-6) and for each Cisco vCM connection profile (examples shown in Table 4-7).
Table 4-6 Cisco OVA Package Format Examples for Cisco vWAAS on VMware ESXi
|
|
|
|---|---|
Table 4-7 Cisco OVA Package Formats for vCM for WAAS Versions earlier than Version 6.4.1
|
|
|
|---|---|
OVA Package for Cisco vWAAS on VMware ESXi for Cisco WAAS Version 6.4.1 and Later
For Cisco vWAAS on VMware ESXi in Cisco WAAS Version 6.4.1 and later, Cisco provides a single, unified OVA for NPE and non-NPE version of the Cisco WAAS image for all the Cisco vWAAS models for that hypervisor.
Each unified OVA package is a preconfigured VM image that is ready to run on a particular hypervisor. The launch script for each unified OVA package file provides the model and other required parameters to launch Cisco vWAAS in Cisco WAAS in the required configuration.
The following are examples of the unified OVA and NPE OVA package filenames for Cisco vWAAS in VMware ESXi:
The unified OVA package for VMware ESXi contains the following files.
Use the VMware ESXi OVF template wizard to deploy these files, as described in Installing VMware ESXi for Cisco vWAAS for Cisco WAAS Version 6.4.1 through 6.4.3a and Installing VMware ESXi for Cisco vWAAS for Cisco WAAS Version 6.4.3b and Later.
Installing Cisco vWAAS on VMware ESXi
This section has the following topics:
- Installing VMware ESXi for Cisco vWAAS in Cisco WAAS Versions 5.x to 6.2.x
- Installing VMware ESXi for Cisco vWAAS for Cisco WAAS Version 6.4.1 through 6.4.3a
- Installing VMware ESXi for Cisco vWAAS for Cisco WAAS Version 6.4.3b and Later
Installing VMware ESXi for Cisco vWAAS in Cisco WAAS Versions 5.x to 6.2.x
To install the Cisco vWAAS VM with VMware vSphere ESXi, follow these steps:
Step 1![]() From the vSphere Client, choose File > Deploy OVF Template.
From the vSphere Client, choose File > Deploy OVF Template.
Figure 4-1 File > Deploy OVF Template

Step 3![]() Navigate to the location of the Cisco vWAAS OVA file and click Open.
Navigate to the location of the Cisco vWAAS OVA file and click Open.
- If the virtual host was created using an OVA of Cisco vWAAS in Cisco WAAS Version 5.1.x or later, proceed to Step 4.
- If the virtual host was created using an OVA file of Cisco vWAAS in Cisco WAAS Version 5.0 or earlier, and you have upgraded Cisco vWAAS from inside Cisco WAAS, you must verify that the SCSI Controller Type is set to VMware Paravirtual. Otherwise, Cisco vWAAS will boot with no disk available, and will fail to load the specified configuration.
If needed, change the SCSI controller Type to VMware Paravirtual by following these steps:
a.![]() Power down the Cisco vWAAS.
Power down the Cisco vWAAS.
b.![]() From the VMware vCenter, choose vSphere Client > Edit Settings > Hardware.
From the VMware vCenter, choose vSphere Client > Edit Settings > Hardware.
d.![]() From the Change Type drop-down list, verify that the SCSI Controller Type is set to VMware Paravirtual. If this is not the case, choose VMware Paravirtual.
From the Change Type drop-down list, verify that the SCSI Controller Type is set to VMware Paravirtual. If this is not the case, choose VMware Paravirtual.
f.![]() Power up the Cisco vWAAS, in Cisco WAAS Version 6.1.x or later.
Power up the Cisco vWAAS, in Cisco WAAS Version 6.1.x or later.
Step 4![]() Click Next to accept the selected OVA file.
Click Next to accept the selected OVA file.
The Name and Data Center Location window appears (Figure 4-2).
Step 5![]() Enter a name for the Cisco vWAAS VM, choose the appropriate data center, and then click Next.
Enter a name for the Cisco vWAAS VM, choose the appropriate data center, and then click Next.
The Cluster window appears (if a cluster is configured), or the Resource Pool window appears (if a resource pool is configured). Otherwise, the Datastore window appears (if this window appears, skip to Step 7).
Figure 4-2 Deploy OVF Template > Name and Data Center Location

Step 6![]() If configured, choose a cluster for the Cisco vWAAS VM. Otherwise, select the resource pool and then click Next.
If configured, choose a cluster for the Cisco vWAAS VM. Otherwise, select the resource pool and then click Next.
The Datastore window appears (Figure 4-3).
Step 7![]() Choose a datastore to host the VM and click Next.
Choose a datastore to host the VM and click Next.
Figure 4-3 Deploy OVF Template > Datastore

Note![]() The datastore must be formatted with a block size greater than 1 MB to support file sizes larger than 256 GB.
The datastore must be formatted with a block size greater than 1 MB to support file sizes larger than 256 GB.
The Create a Disk window appears.
Step 8![]() The Disk Provisioning section has three disk format options: Thick Provision Lazy Zeroed, Thick Provision Eager Zeroed, and Thin Provision. Select Thick Provision Eager Zeroed.
The Disk Provisioning section has three disk format options: Thick Provision Lazy Zeroed, Thick Provision Eager Zeroed, and Thin Provision. Select Thick Provision Eager Zeroed.
Note![]() You must choose the Thick Provision Eager Zeroed disk format for Cisco vWAAS deployment; this is the format recommended with Cisco vWAAS deployment for a clean installation.
You must choose the Thick Provision Eager Zeroed disk format for Cisco vWAAS deployment; this is the format recommended with Cisco vWAAS deployment for a clean installation.
The Network Mapping window appears (Figure 4-4).
Step 10![]() Choose the network mapping provided by VMware ESXi and click Next. You have the option to change this later if necessary.
Choose the network mapping provided by VMware ESXi and click Next. You have the option to change this later if necessary.
The Ready to Complete window appears.
Figure 4-4 Deploy OVF Template > Network Mapping

Step 11![]() Click Finish to complete the installation.
Click Finish to complete the installation.
The Status window appears while the OVA file is being deployed.
Figure 4-5 Cisco vWAAS: Status Window

Step 12![]() When the deployment is finished, the Deployment Completed Successfully window appears.
When the deployment is finished, the Deployment Completed Successfully window appears.
Figure 4-6 Cisco vWAAS: Deployment Completed Successfully

Step 14![]() You are ready to start the VM. Highlight the Cisco vWAAS VM and click Power on Virtual Machine.
You are ready to start the VM. Highlight the Cisco vWAAS VM and click Power on Virtual Machine.
Step 15![]() After Cisco vWAAS finishes booting, click the Console tab to view boot up messages.
After Cisco vWAAS finishes booting, click the Console tab to view boot up messages.
Figure 4-7 Cisco vWAAS: Console

Note![]() Under rare conditions, the Cisco vWAAS VM may boot into diskless mode if other VMs on the host VM server do not release control of system resources or the physical disks become unresponsive. For information on how to resolve this situation, see Resolving Diskless Startup and Disk Failure in the chapter “Troubleshooting Cisco vWAAS.”
Under rare conditions, the Cisco vWAAS VM may boot into diskless mode if other VMs on the host VM server do not release control of system resources or the physical disks become unresponsive. For information on how to resolve this situation, see Resolving Diskless Startup and Disk Failure in the chapter “Troubleshooting Cisco vWAAS.”
For Cisco vWAAS configuration information, see the chapter “Configuring Cisco vWAAS and Viewing Cisco vWAAS Components” .
Installing VMware ESXi for Cisco vWAAS for Cisco WAAS Version 6.4.1 through 6.4.3a
- As a pre-requisite, ensure that the required supporting plugins like Adobe Flash and Client Interaction Plugin are installed.
- For OVA deployments, always use vSphere Web Client (Flash) or vSphere Web Client (Flex), because HTML5 mode does not have all the functionality supported.
To deploy the VMware ESXi hypervisor for Cisco vWAAS, follow these steps:
Step 1![]() From the vSphere Client, choose Deploy OVF Template > Deployment Configuration.
From the vSphere Client, choose Deploy OVF Template > Deployment Configuration.
Step 2![]() From the Configuration drop-down list, choose the Cisco vWAAS model for this hypervisor.
From the Configuration drop-down list, choose the Cisco vWAAS model for this hypervisor.
Note![]() When you choose a Cisco vWAAS model, that model’s profile is displayed. For example, if you choose vWAAS-150, the vSphere Client displays a configuration such as 1 vCPU, 3 GB RAM.
When you choose a Cisco vWAAS model, that model’s profile is displayed. For example, if you choose vWAAS-150, the vSphere Client displays a configuration such as 1 vCPU, 3 GB RAM.
Step 4![]() In the Deploy OVF Template window, choose Source to select the source location for the deployed template.
In the Deploy OVF Template window, choose Source to select the source location for the deployed template.
Step 5![]() From the Deploy from a file or URL drop-down list, click Browse....
From the Deploy from a file or URL drop-down list, click Browse....
The Name and Location window is displayed.
Step 6![]() Enter a unique name for the deployed template, and select a location for the deployed template.
Enter a unique name for the deployed template, and select a location for the deployed template.
a.![]() In the Name field, enter a unique name for the deployed template. The template name can contain up to 80 alphanumeric characters.
In the Name field, enter a unique name for the deployed template. The template name can contain up to 80 alphanumeric characters.
b.![]() In the Inventory Location listing, select a folder location.
In the Inventory Location listing, select a folder location.
Step 8![]() In the Deploy OVF Template window, select Deployment Configuration.
In the Deploy OVF Template window, select Deployment Configuration.
Step 9![]() From the Configuration drop-down list, choose the Cisco vWAAS model for your system.
From the Configuration drop-down list, choose the Cisco vWAAS model for your system.
Note![]() When you select a Cisco vWAAS model, the window displays configuration information. For example, if you select vWAAs-200, the window will display a description such as
When you select a Cisco vWAAS model, the window displays configuration information. For example, if you select vWAAs-200, the window will display a description such as Deploy a vWAAS-200 connection profile with 1 vCPU, 3 GB RAM.
Step 11![]() In the Deploy OVF Template window, select Disk Format.
In the Deploy OVF Template window, select Disk Format.
Step 12![]() In the Datastore: field, enter the datastore name.
In the Datastore: field, enter the datastore name.
Step 13![]() For provisioning, choose one of the following virtual disk format types:
For provisioning, choose one of the following virtual disk format types:
- Thick Provision Lazy Zero: The entire space specified for virtual disk files is allocated when the virtual disk is created. The old data on the physical device is not erased when the disk is created, but zeroed out on demand, as needed, from the VM.
- Thick Provision Eager Zero: The entire space specified for virtual disk files is allocated when the virtual disk is created. Old data is erased when the disk is created. The thick provision eager zero option also supports VMware fault tolerance for high availability.
Note![]() The Thin Provision option is not available for Cisco vWAAS with VMware ESXi.
The Thin Provision option is not available for Cisco vWAAS with VMware ESXi.
The VMware ESXi hypervisor is created for the specified Cisco vWAAS model.
Installing VMware ESXi for Cisco vWAAS for Cisco WAAS Version 6.4.3b and Later
Installing VMware ESXi with VMware vCenter
Note![]() On VMware ESXi, the OVA deployment for Cisco WAAS Version 6.4.1 and later must be done only through VMware vCenter.
On VMware ESXi, the OVA deployment for Cisco WAAS Version 6.4.1 and later must be done only through VMware vCenter.
- As a pre-requisite, ensure that the required supporting plugins like Adobe Flash and Client Interaction Plugin are installed.
- For OVA deployments, always use vSphere Web Client (Flash), because HTML5 mode does not have all the functionality supported.
To deploy the VMware ESXi hypervisor for Cisco vWAAS in WAAS Version 6.4.3b and later, follow these steps:
Step 1![]() Open the VMware vSphere Web Client with your specified vCenter IP address.
Open the VMware vSphere Web Client with your specified vCenter IP address.
a.![]() For VMware Version 6.5 for vWAAS in WAAS Version 6.4.3b and later, select the Flash method of login.
For VMware Version 6.5 for vWAAS in WAAS Version 6.4.3b and later, select the Flash method of login.
b.![]() For VMware Version 6.7 for vWAAS in WAAS Version 6.4.3c and later, select the Flex method of login.
For VMware Version 6.7 for vWAAS in WAAS Version 6.4.3c and later, select the Flex method of login.
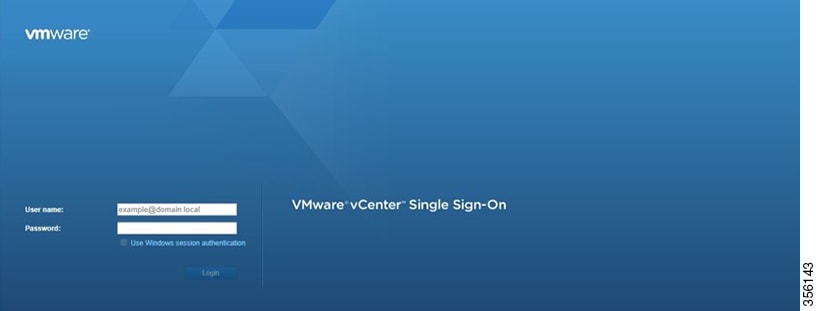
Step 2![]() Log in to the VMware vCenter Single Sign-On window (Figure 4-8).
Log in to the VMware vCenter Single Sign-On window (Figure 4-8).
Figure 4-8 VMware vCenter Single Sign-On Window
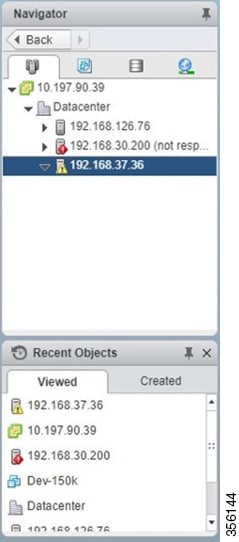
Step 3![]() Navigate to the required datacenter host on which the deployment will be done.
Navigate to the required datacenter host on which the deployment will be done.
Step 4![]() Click the required host to highlight it (example shown in Figure 4-9).
Click the required host to highlight it (example shown in Figure 4-9).
Figure 4-9 Navigator > Datacenter > Host Menu Option
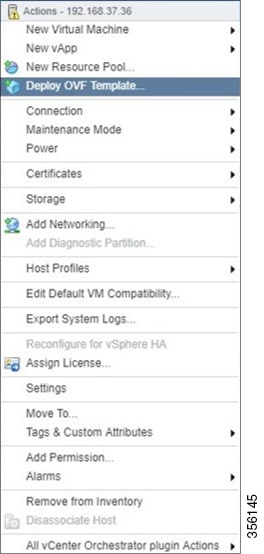
Step 5![]() After you have highlighted the required host, right-click and select Deploy OVF Template... (Figure 4-10).
After you have highlighted the required host, right-click and select Deploy OVF Template... (Figure 4-10).
Figure 4-10 Deploy OVF Template... Menu Option
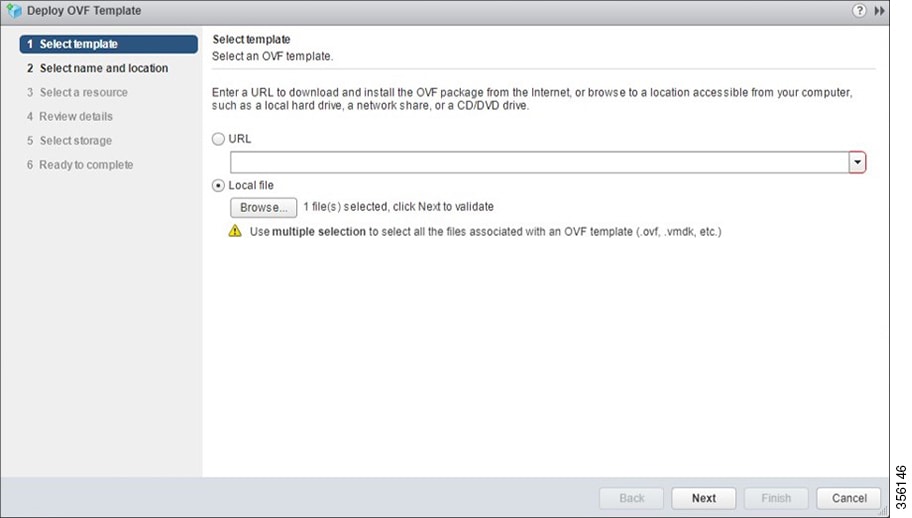
Step 6![]() In the Deploy OVF Template > Select Template window (Figure 4-11):
In the Deploy OVF Template > Select Template window (Figure 4-11):
a.![]() Enter the URL to download the OVA package or browse for the downloaded OVA file using the Browse button.
Enter the URL to download the OVA package or browse for the downloaded OVA file using the Browse button.
Figure 4-11 Deploy OVF Template > Select Template Window
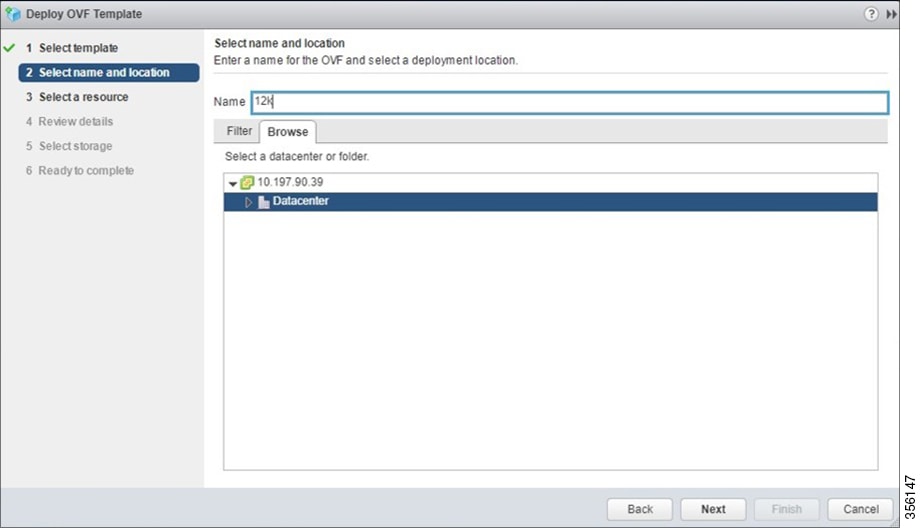
Step 7![]() In the Deploy OVF Template > Select Name and Location window (Figure 4-12):
In the Deploy OVF Template > Select Name and Location window (Figure 4-12):
a.![]() In the Name field, enter the name of the Cisco vWAAS model to be deployed.
In the Name field, enter the name of the Cisco vWAAS model to be deployed.
b.![]() Click the Browse tab and select a datacenter or folder.
Click the Browse tab and select a datacenter or folder.
Figure 4-12 Deploy OVF Template > Select Name and Location Window
Step 8![]() In the Deploy OVF Template > Select a Resource window (Figure 4-13), select the resource (the host) where the OVA will be deployed.
In the Deploy OVF Template > Select a Resource window (Figure 4-13), select the resource (the host) where the OVA will be deployed.
Figure 4-13 Deploy OVF Template > Select a Resource Window

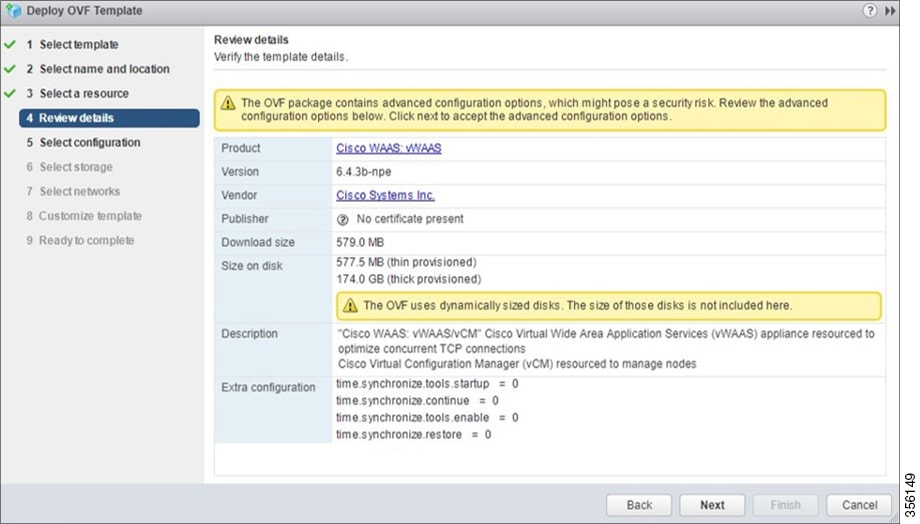
Step 9![]() In the Deploy OVF Template > Review Details window, verify that the template details are correct. Figure 4-14 shows a Review Details window with configuration notices and guidance messages.
In the Deploy OVF Template > Review Details window, verify that the template details are correct. Figure 4-14 shows a Review Details window with configuration notices and guidance messages.
Figure 4-14 Deploy OVF Template > Review Details Window
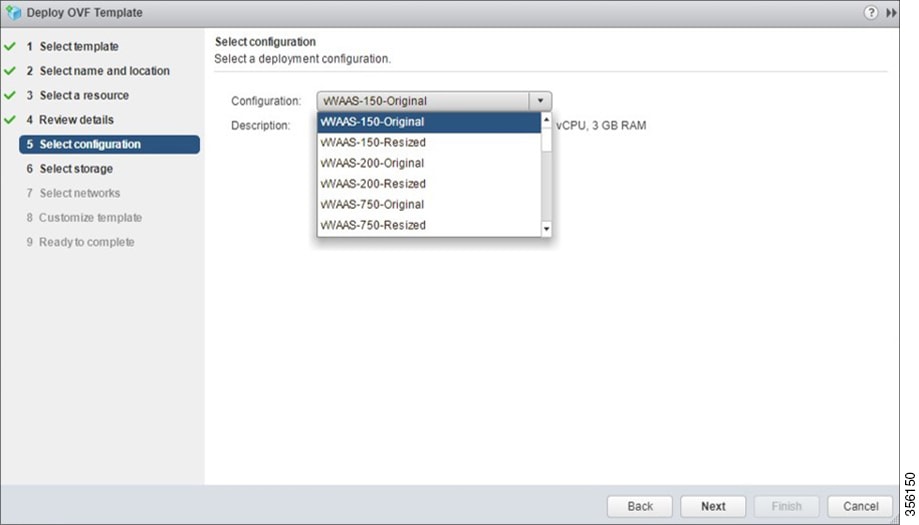
Step 10![]() In the Deploy OVF Template > Select Configuration window (Figure 4-15):
In the Deploy OVF Template > Select Configuration window (Figure 4-15):
a.![]() From the Configuration drop-down list, choose the configuration of the deployed Cisco vWAAS model.
From the Configuration drop-down list, choose the configuration of the deployed Cisco vWAAS model.
Figure 4-15 Deploy OVF Template > Select Configuration Window
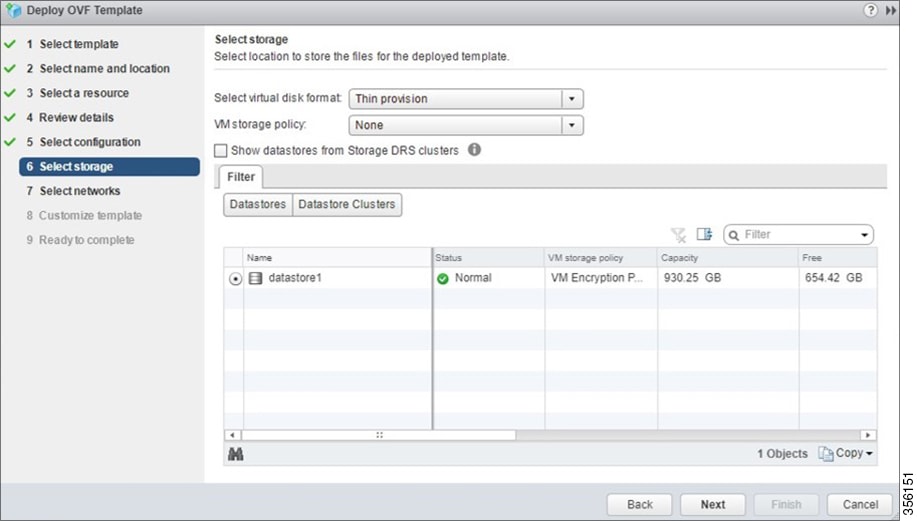
Step 11![]() In the Display OVF Template > Select Storage window (Figure 4-16):
In the Display OVF Template > Select Storage window (Figure 4-16):
a.![]() From the Select virtual disk format drop-down list, select the type of storage required for your system: Thick Provision Lazy Zeroed, Thin Provision, or Thick Provision Eager Zeroed.
From the Select virtual disk format drop-down list, select the type of storage required for your system: Thick Provision Lazy Zeroed, Thin Provision, or Thick Provision Eager Zeroed.
b.![]() From the VM storage policy drop-down list, choose the VM storage policy for your system.
From the VM storage policy drop-down list, choose the VM storage policy for your system.
Figure 4-16 Deploy OVF Template > Select Storage Window
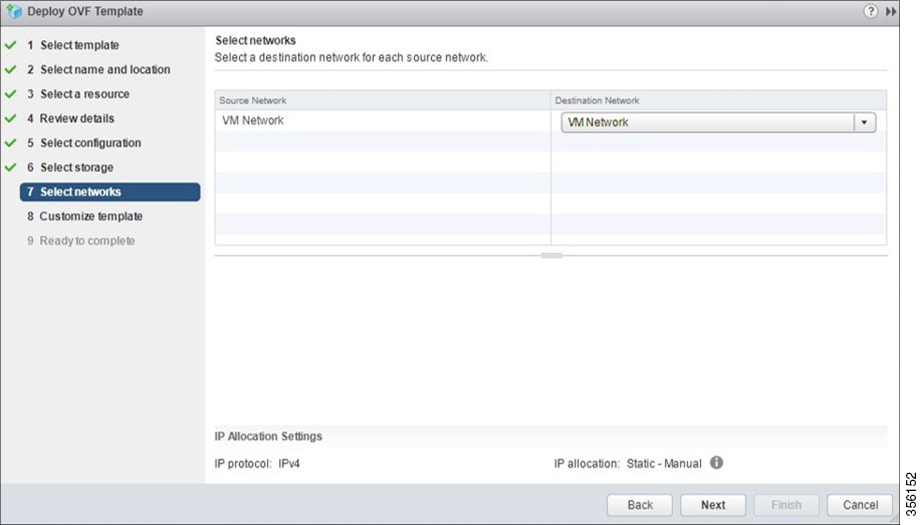
Step 12![]() From the Deploy OVF Template > Select Networks window (Figure 4-17):
From the Deploy OVF Template > Select Networks window (Figure 4-17):
a.![]() From the Destination Network drop-down list, choose the appropriate VM network for your system.
From the Destination Network drop-down list, choose the appropriate VM network for your system.
Figure 4-17 Deploy OVF Template > Select Networks Window
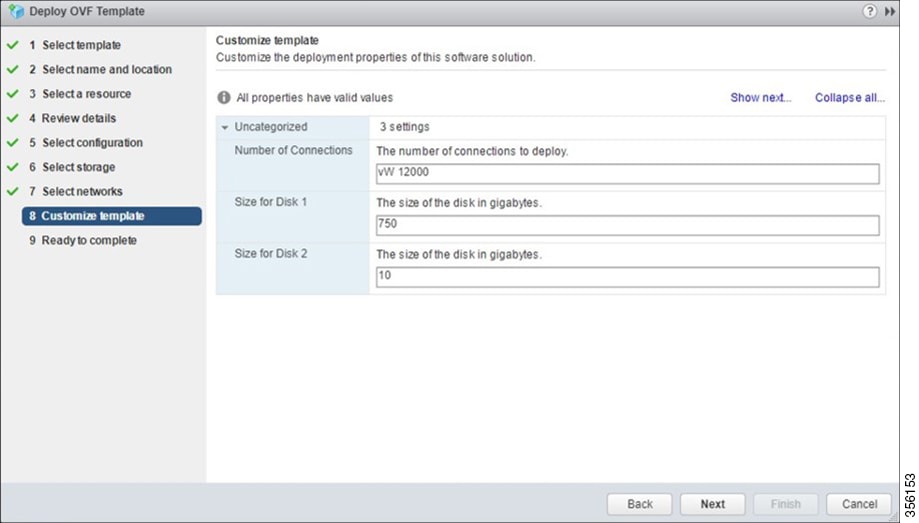
Step 13![]() In the Deploy OVF Template > Customize Template window (Figure 4-18), review the information and click Next.
In the Deploy OVF Template > Customize Template window (Figure 4-18), review the information and click Next.

Figure 4-18 Deploy OVF Template > Customize Template Window
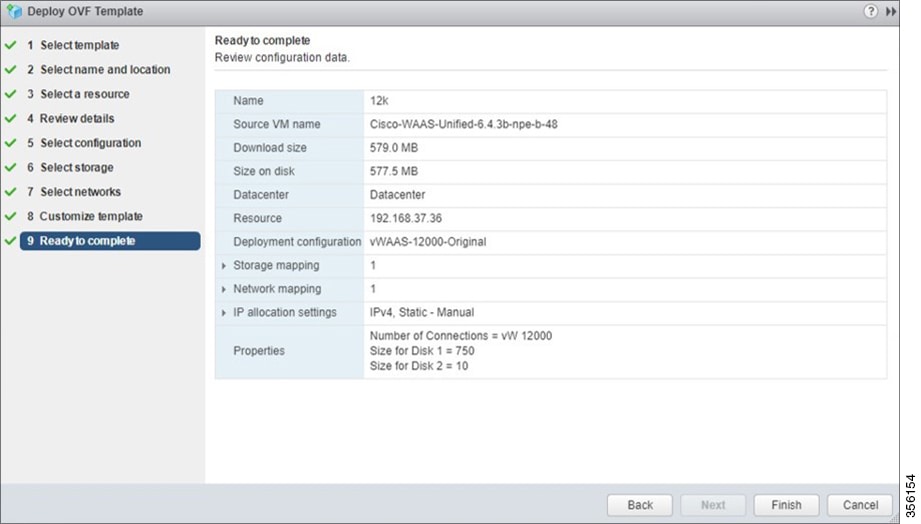
Step 14![]() In the Deploy OVF Template > Ready to Complete window (Figure 4-19):
In the Deploy OVF Template > Ready to Complete window (Figure 4-19):
a.![]() Review and confirm configuration data, including Cisco vWAAS model name, storage mapping, network mapping, number of connections, and disk sizes.
Review and confirm configuration data, including Cisco vWAAS model name, storage mapping, network mapping, number of connections, and disk sizes.
Figure 4-19 Deploy OVF Template > Ready to Complete Window
Step 15![]() The Recent Tasks pane of the VMware vSphere Web Client window (Figure 4-20) displays the status of the import and deployment of the image.
The Recent Tasks pane of the VMware vSphere Web Client window (Figure 4-20) displays the status of the import and deployment of the image.
Figure 4-20 VMware vSphere Web Client Recent Tasks Pane - In-Progress Status

Step 16![]() After deployment is complete, the Recent Tasks pane items show Completed for the deployed Cisco vWAAS image (Figure 4-21).
After deployment is complete, the Recent Tasks pane items show Completed for the deployed Cisco vWAAS image (Figure 4-21).
Figure 4-21 VMware vSphere Web Client Recent Tasks Pane - Completed Status

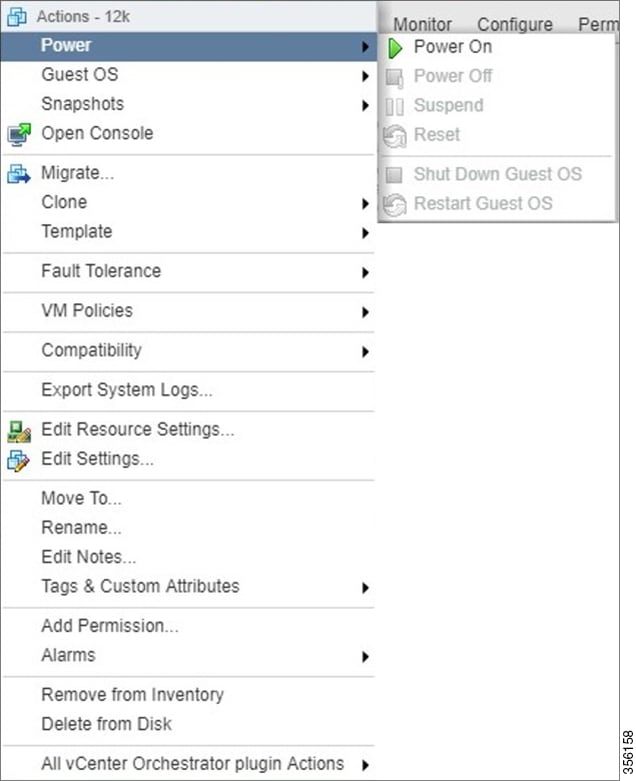
Step 17![]() After deployment is complete, use the Power > Power On menu option to power on the device (Figure 4-22).
After deployment is complete, use the Power > Power On menu option to power on the device (Figure 4-22).
Figure 4-22 VMware vSphere Web Client Power > Power On Menu Option
Note Sporadically, deployment may fail due to a communication error between VMware vCenter and the VMware ESXi host. If this occurs during deployment, try the following steps and then deploy the OVA again:
Increase the timeout value as 120 or higher in the config.vpxd.heartbeat.notrespondingtimeout field.
Or
Alternatively, while deploying, choose the Disk Type option as Thin Provisioning and use the following procedure to convert the disks to Thick Eager Zero.
1.![]() Wait for the deployment to complete 100%
Wait for the deployment to complete 100%
2.![]() Ensure the deployed VM is in Power-Off state. If it is not, power off the device before proceeding to the next step.
Ensure the deployed VM is in Power-Off state. If it is not, power off the device before proceeding to the next step.
3.![]() Navigate to the folder of the virtual disk you want to inflate.
Navigate to the folder of the virtual disk you want to inflate.
a.![]() In the vSphere Web Client, browse to the virtual machine.
In the vSphere Web Client, browse to the virtual machine.
The datastore that stores the virtual machine files is listed.
c.![]() Select the datastore and click the Browse Files icon.
Select the datastore and click the Browse Files icon.
The datastore browser displays contents of the datastore.
4.![]() Expand the virtual machine folder and browse through the list of files. The files with extension.vmdk will have the virtual disk icon.
Expand the virtual machine folder and browse through the list of files. The files with extension.vmdk will have the virtual disk icon.
5.![]() Right-click the.vmdk virtual disk file and select the Inflate option.
Right-click the.vmdk virtual disk file and select the Inflate option.
6.![]() Repeat the above step for all the.vmdk files in the deployed VM.
Repeat the above step for all the.vmdk files in the deployed VM.
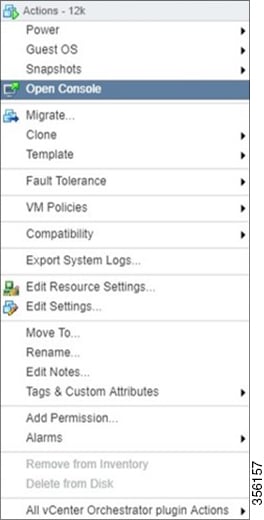
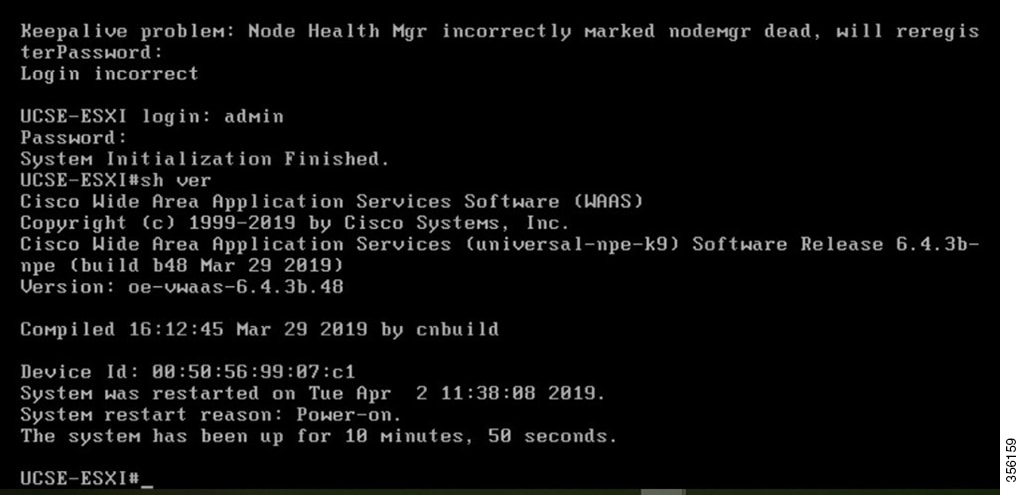
Step 18![]() Use the Open Console menu option to open the device console. Figure 4-23 shows the Open Console menu option and Figure 4-24 shows the device console.
Use the Open Console menu option to open the device console. Figure 4-23 shows the Open Console menu option and Figure 4-24 shows the device console.
Figure 4-23 VMware vSphere Web Client Open Console Menu Option
Installing Cisco vWAAS VM with the VMware OVF Tool
The VMware OVF Tool is a command-line utility that allows you to deploy a required Cisco vWAAS model using Cisco vWAAS Unified OVA package file.
Note![]() The procedure for installing the Cisco vWAAS VM with the VMware OVF tool is available for Cisco vWAAS in VMware ESXi Version 6.5 only.
The procedure for installing the Cisco vWAAS VM with the VMware OVF tool is available for Cisco vWAAS in VMware ESXi Version 6.5 only.
To install the Cisco vWAAS VM with the VMware OVF Tool, follow these steps:
Step 1![]() Identify the -deploymentOption of the vWAAS model you want to deploy.
Identify the -deploymentOption of the vWAAS model you want to deploy.
–![]() Original Cisco vWAAS models supported:
Original Cisco vWAAS models supported:
vWAAS-150, 200, 750, 1300, 2500, 6000, 6000R, 12000, 50000, 150000
To deploy an original Cisco vWAAS model: Use the designation “VW_”, for example, VW_6000
–![]() Resized Cisco vWAAS models supported:
Resized Cisco vWAAS models supported:
vWAAS-150, 200, 750, 1300, 2500, 6000, 6000R, 12000, 50000.
To deploy a resized vWAAS model: Use the designation _Res, for example, VW_6000_Res
To deploy an original vCM model: Use the designation VC_, for example, VC_500
Step 2![]() Download the Cisco vWAAS Unified OVA to your host.
Download the Cisco vWAAS Unified OVA to your host.
Step 3![]() To deploy the Cisco vWAAS Unified OVA, in the VMware OVF Tool, use the following CLI commands:
To deploy the Cisco vWAAS Unified OVA, in the VMware OVF Tool, use the following CLI commands:
Operating Guidelines for Cisco vWAAS in WAAS Version 6.4.3 and later in VMware ESXi
Consider the following guidelines for Cisco vWAAS in WAAS Version 6.4.3x and VMware ESXi 6.0 or later.
–![]() After deployment is completed, and the Cisco vWAAS-200 is configured with IP address and default gateway:
After deployment is completed, and the Cisco vWAAS-200 is configured with IP address and default gateway:
a.![]() In VMware vSphere, choose the Virtual Hardware tab, and from the Adapter Type drop-down list, choose VMXNET3.
In VMware vSphere, choose the Virtual Hardware tab, and from the Adapter Type drop-down list, choose VMXNET3.
b.![]() If the adapter type is set to any other option, such as Flexible or e1000, the configured routers will not appear in the routing table output.
If the adapter type is set to any other option, such as Flexible or e1000, the configured routers will not appear in the routing table output.
c.![]() To verify that the configured routers appear in the routing table output, run the show ip route EXEC command.
To verify that the configured routers appear in the routing table output, run the show ip route EXEC command.
b.![]() From the host, change the adapter type to VMXNET3.
From the host, change the adapter type to VMXNET3.
d.![]() To verify that the configured routers appear in the routing table output, run the show ip route EXEC command.
To verify that the configured routers appear in the routing table output, run the show ip route EXEC command.
Upgrade and Downgrade Guidelines for Cisco vWAAS on VMware ESXi
Consider the following guidelines when upgrading or downgrading your Cisco WAAS system with Cisco vWAAS on VMware ESXi:
- When upgrading Cisco vWAAS, do not upgrade more than five vWAAS nodes at the same time on a single Cisco UCS device. Upgrading more than five vWAAS nodes at the same time may cause the vWAAS devices to go offline and into diskless mode.
- If the virtual host was created using an OVA file of Cisco vWAAS in Cisco WAAS Version 5.0 or earlier, and you have upgraded Cisco vWAAS within Cisco WAAS, you must verify that the SCSI Controller Type is set to VMware Paravirtual. Otherwise, the Cisco vWAAS will boot with no disk available and will fail to load the specified configuration.
If needed, change the SCSI Controller Type to VMware Paravirtual by following these steps:
a.![]() Power down the Cisco vWAAS.
Power down the Cisco vWAAS.
b.![]() From the VMware vCenter, choose vSphere Client > Edit Settings > Hardware.
From the VMware vCenter, choose vSphere Client > Edit Settings > Hardware.
d.![]() From the Change Type drop-down list, verify that the SCSI Controller Type is set to VMware Paravirtual. If this is not the case, choose VMware Paravirtual.
From the Change Type drop-down list, verify that the SCSI Controller Type is set to VMware Paravirtual. If this is not the case, choose VMware Paravirtual.
f.![]() Power up the Cisco vWAAS in Cisco WAAS Version 6.1.x or later.
Power up the Cisco vWAAS in Cisco WAAS Version 6.1.x or later.
 Feedback