Prerequisites for Setting Up Secure Device Provisioning (SDP) for Enrollment in a PKI
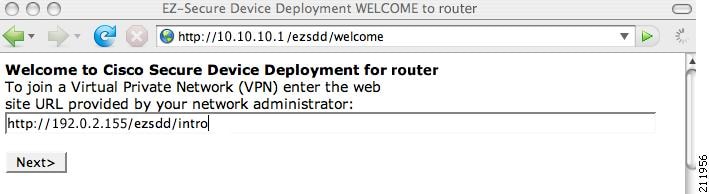
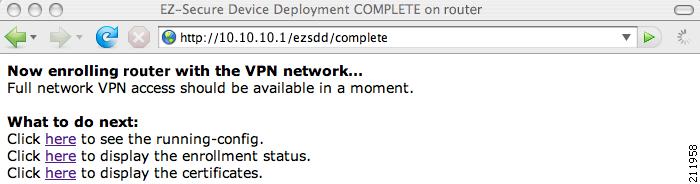
Setting Up SDP for Enrollment in a PKI
Before you set up SDP, your environment should meet the following requirements:
-
The petitioner device and the server must have IP connectivity between each other.
-
The introducer must have a web browser that supports JavaScript.
-
The introducer must have enable privileges on the client device.
-
A Cisco IOS Release 12.3(8)T PKI-enabled image or a later image.
Setting Up SDP for Enrollment in a PKI Using USB Tokens
To leverage USB tokens to provision devices with SDP, your environment should meet the following requirements:
-
Both the petitioner device and the server must have IP connectivity between each other.
-
The introducer must have a web browser that supports JavaScript.
-
The introducer must have enable privileges on the client device.
-
The introducer must have access to a petitioner device.
-
The introducer must have access to the USB token and PIN, if configured.
-
A Cisco IOS Release 12.4(15)T PKI-enabled image or a later image.
 Note |
Cisco IOS Release 12.4(15)T or a later release provides the flexibility to move credentials stored on the USB token. However, the device used to configure the USB token may run any Cisco IOS Release 12.3(14)T PKI-enabled image or a later image. |
Using SDP to Configure a Device for an Internet Connection Through a Service Provider
To leverage SDP to configure a device that is not connected to the Internet, your environment should meet the following requirements:
-
The introducer must have a web browser that supports JavaScript.
-
The introducer must have enable privileges on the client device.
-
A Cisco router that supports a DHCP client and a PPPoE client and has a configured LAN or WAN interface.
-
A Cisco IOS Release 12.4(20)T PKI-enabled image or a later image. If a previous Cisco IOS release is used on one of the devices, the SDP functionality defaults to the earlier Cisco IOS version.


 Feedback