Overview
After you are done with configuring the IE switch to communicate with the Cisco IoT Operations Dashboard, you can add the device to SEA service.
 Note |
|
The documentation set for this product strives to use bias-free language. For the purposes of this documentation set, bias-free is defined as language that does not imply discrimination based on age, disability, gender, racial identity, ethnic identity, sexual orientation, socioeconomic status, and intersectionality. Exceptions may be present in the documentation due to language that is hardcoded in the user interfaces of the product software, language used based on RFP documentation, or language that is used by a referenced third-party product. Learn more about how Cisco is using Inclusive Language.
After you are done with configuring the IE switch to communicate with the Cisco IoT Operations Dashboard, you can add the device to SEA service.
Note |
|
From the Services panel, choose Secure Equipment Access > System Management .
Under the Network Devices panel, click Add Network Device. 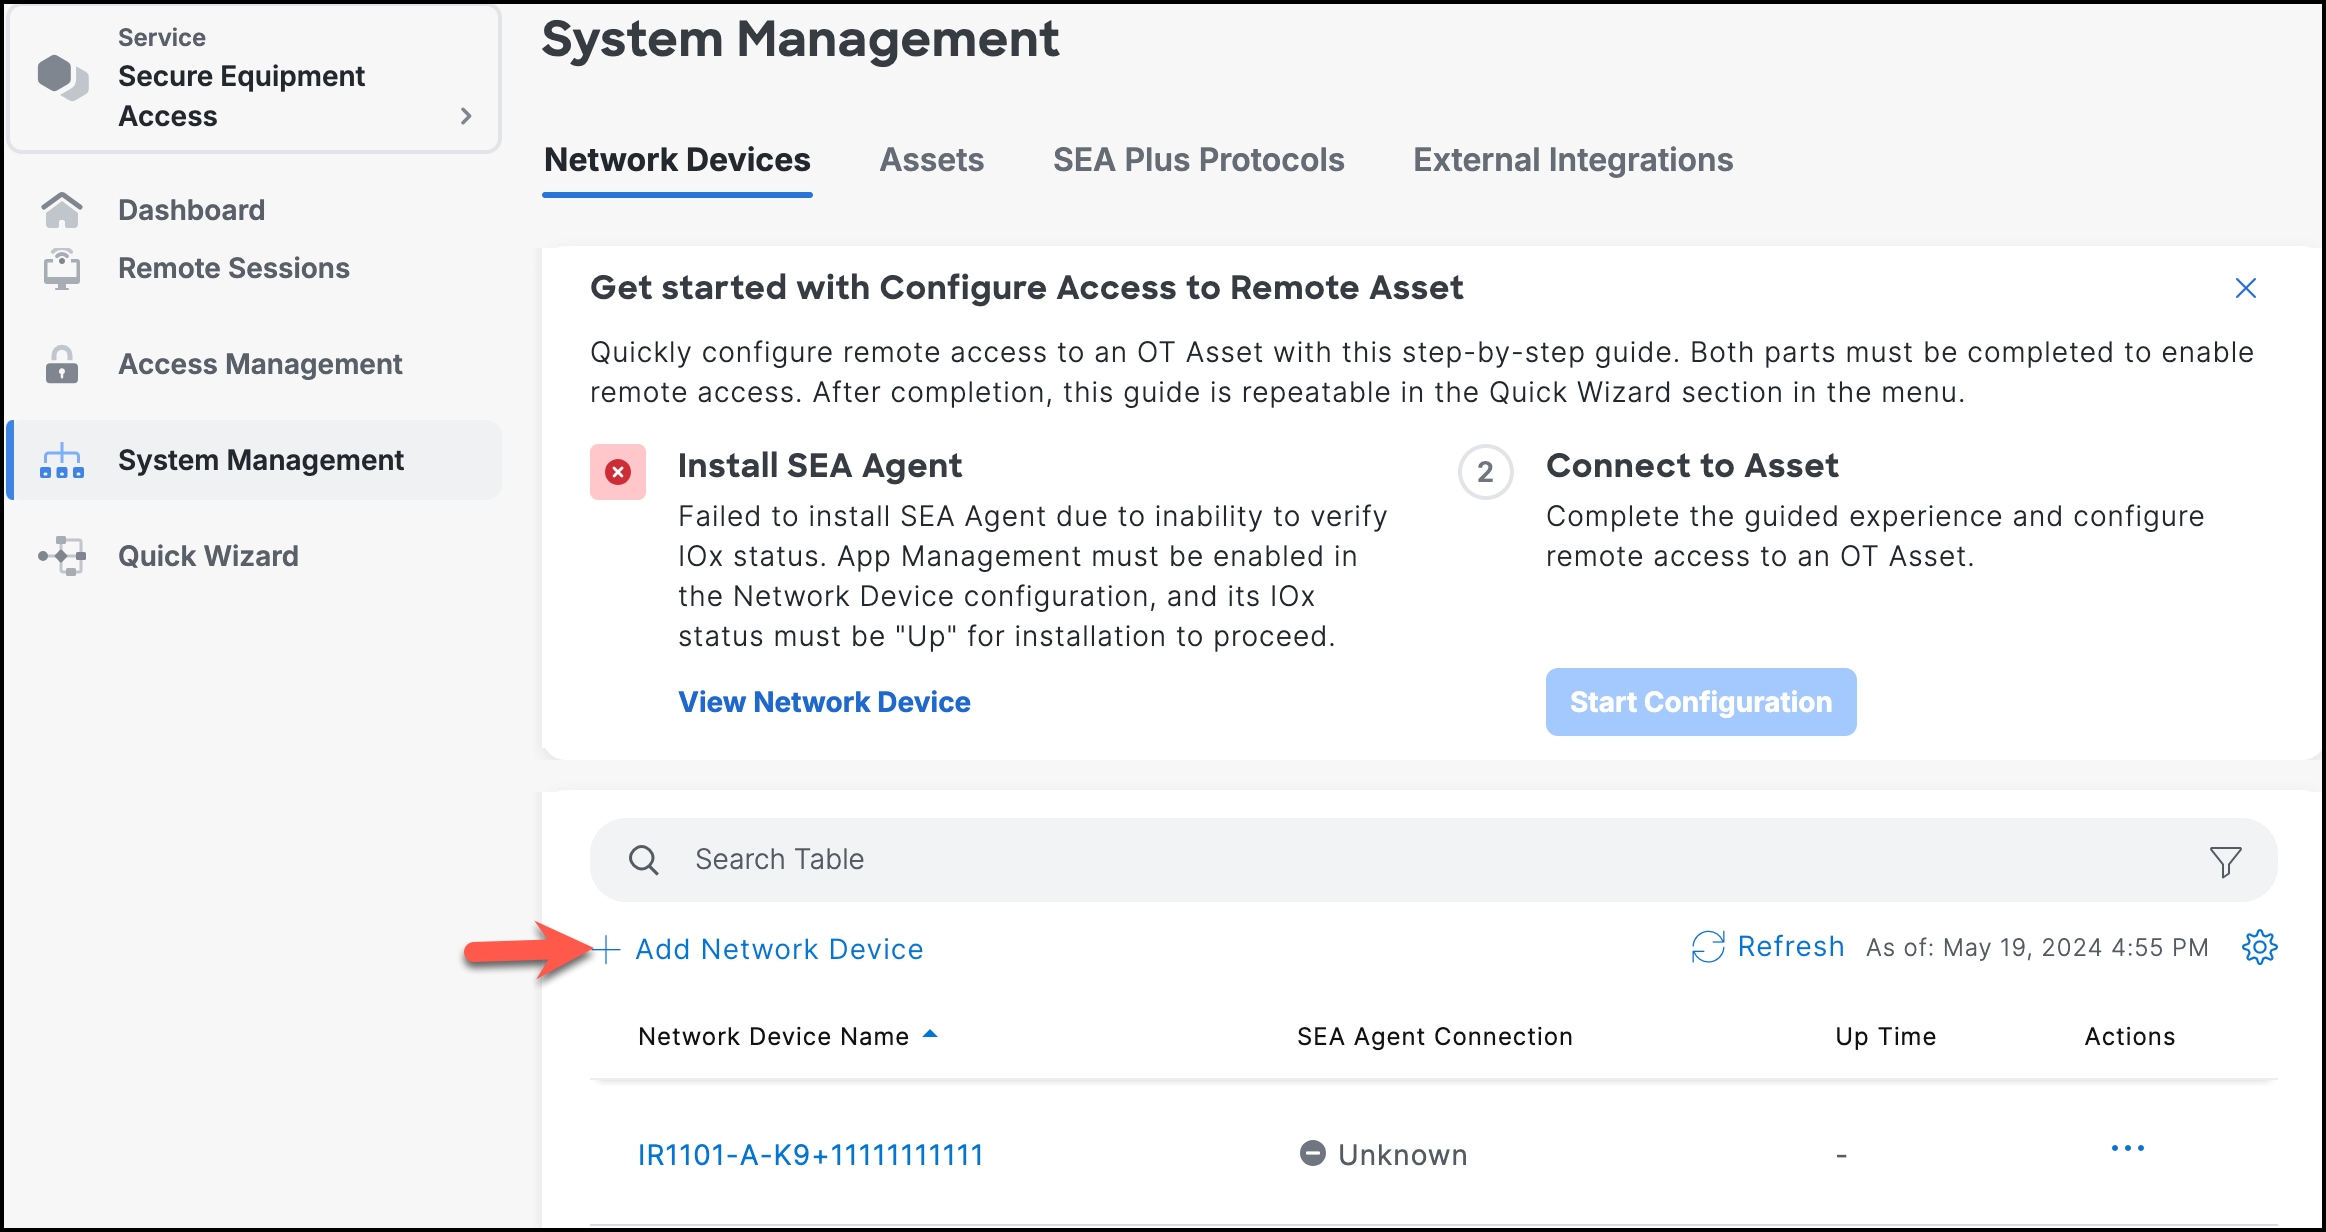
On the Add Network Device page:
Choose a network device from the list or search for it in the Search field. Click Next.
Enter a network device description, VLAN ID, and IP Assignment. For more information on the management VLAN and IP assignment configurations, see Multi-VLAN and Static IP support.
Click Add Network Device.
The installation of the SEA application starts.
Click Next. A confirmation box opens.
Check the SEA Agent state of deployment associated with the network device.
The SEA Agent deployment state changes to Installed. If the status doesn’t change to installed, go to the network device listing and hover over the 3 dots in the Actions column and choose Install SEA Agent. 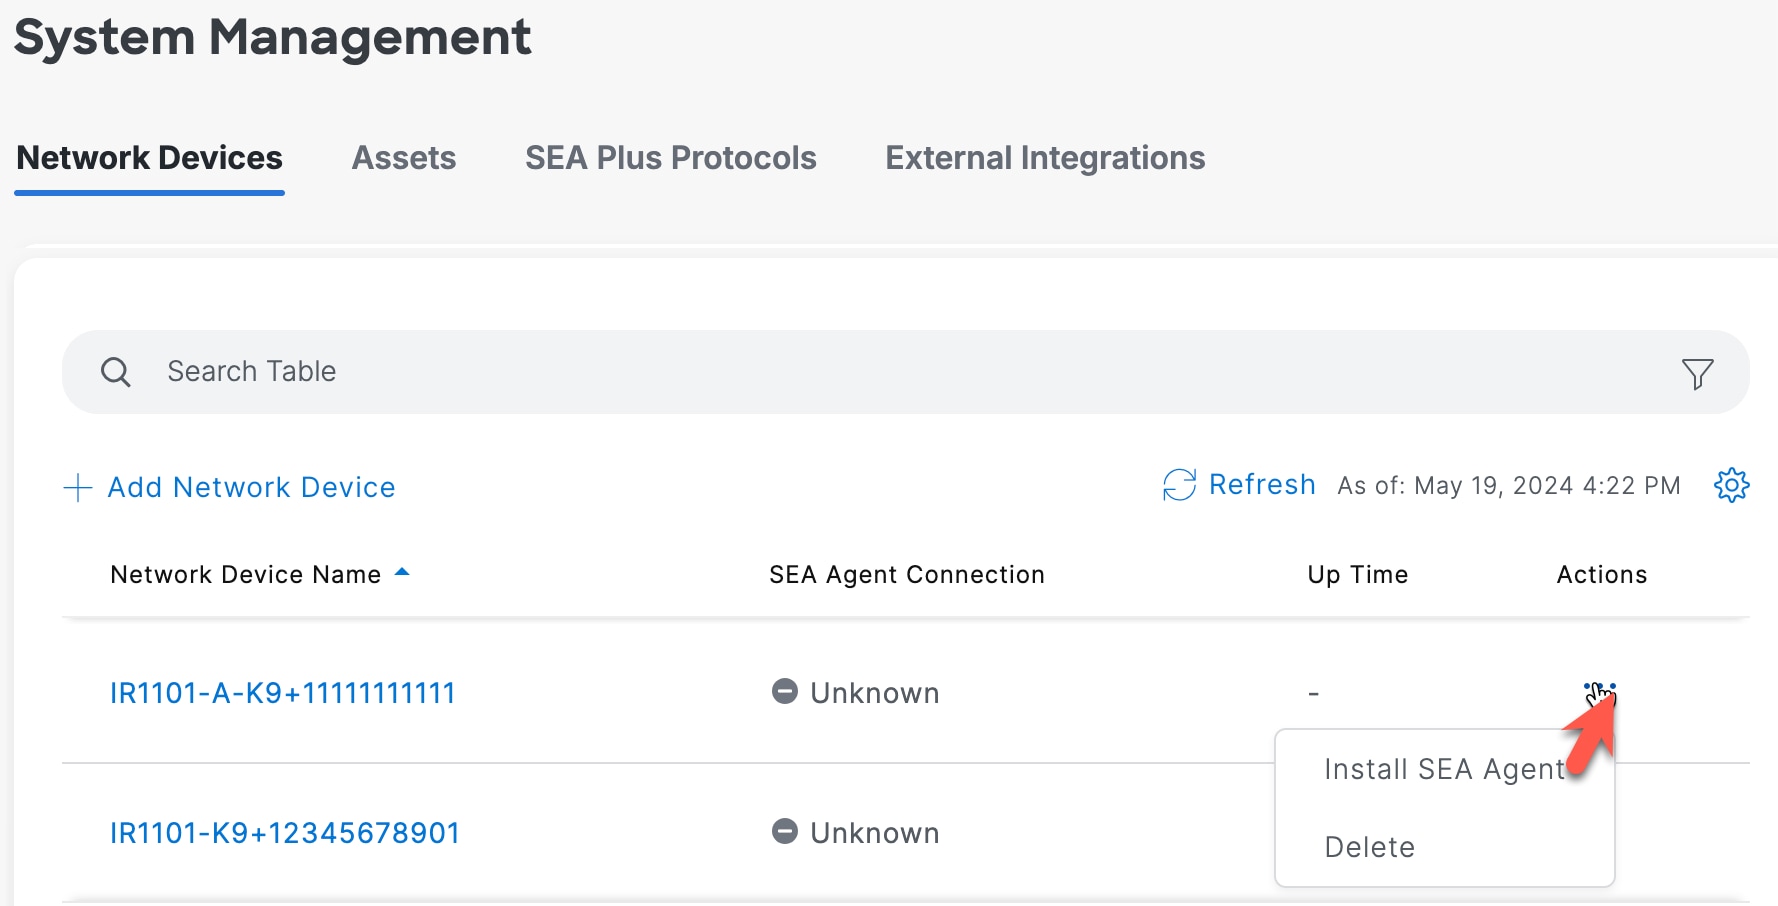
 Feedback