Configure remote sessions

Overview

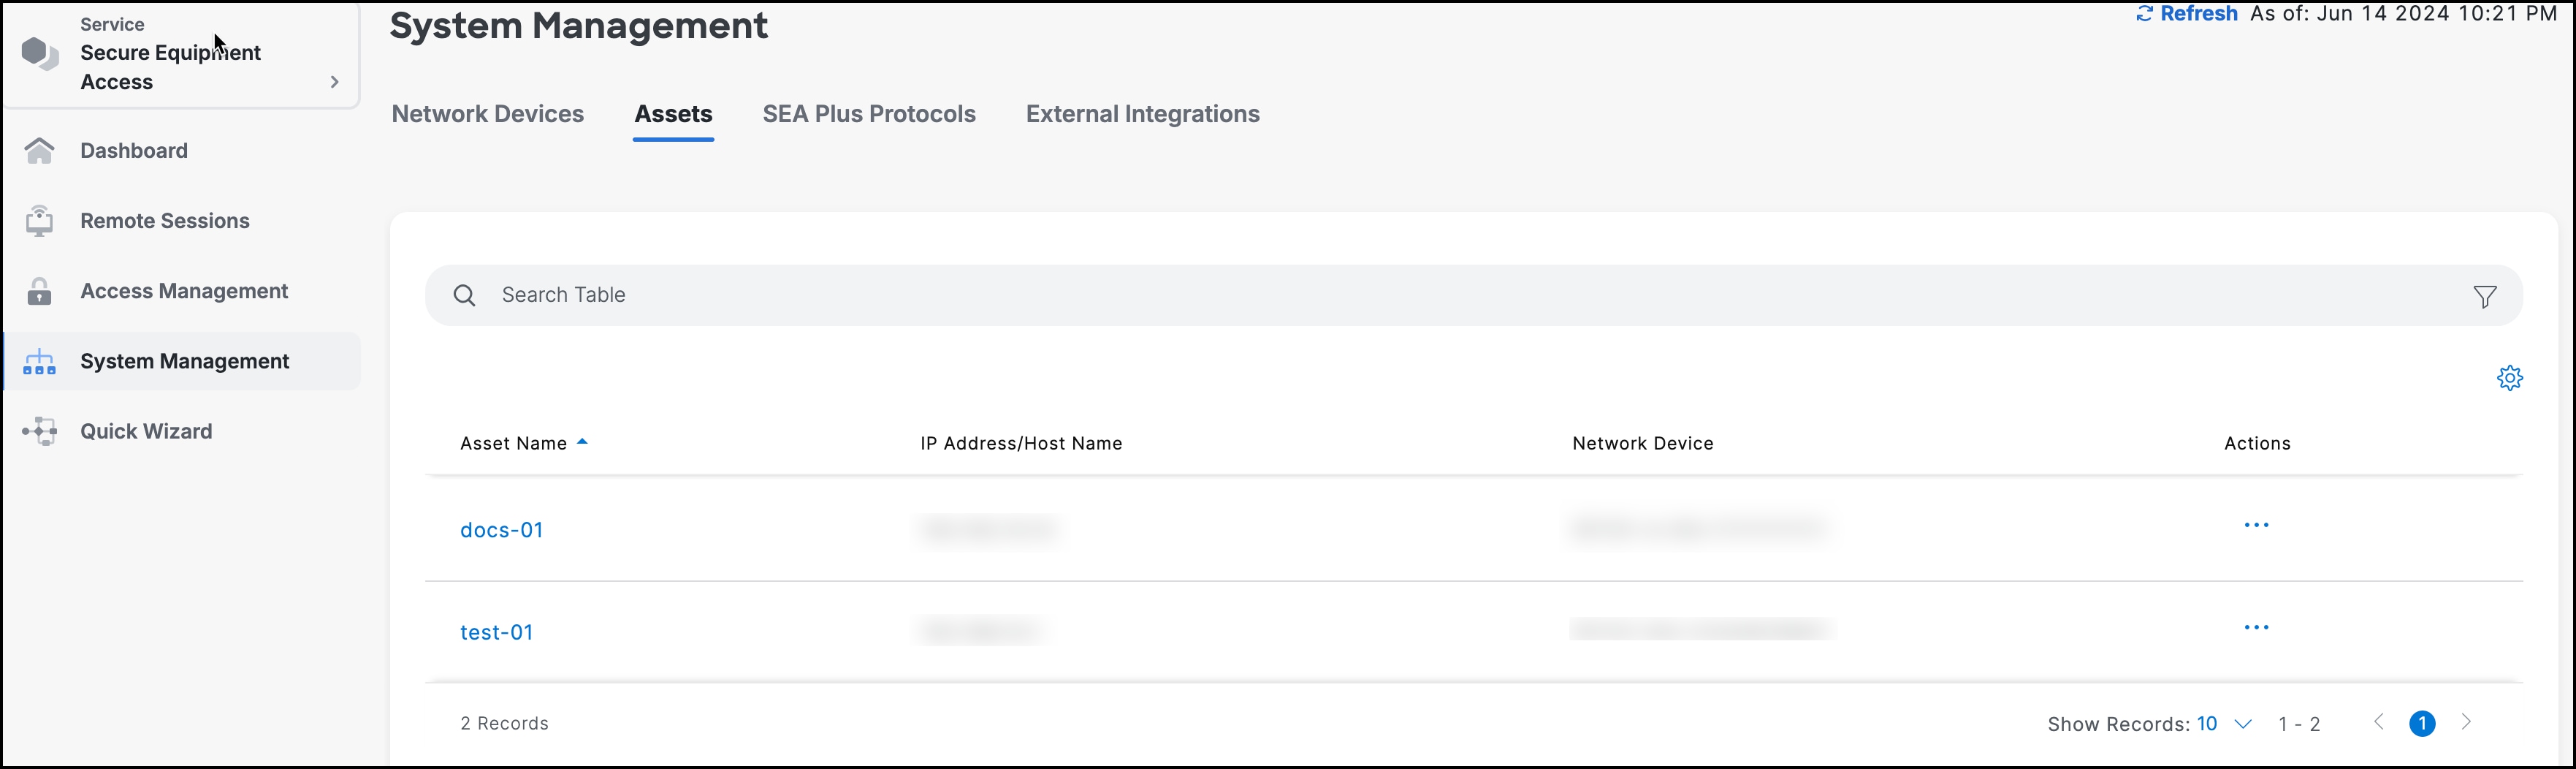
SEA Admins can use Secure Equipment Access (SEA) to remotely manage and interact with OT assets and network devices.

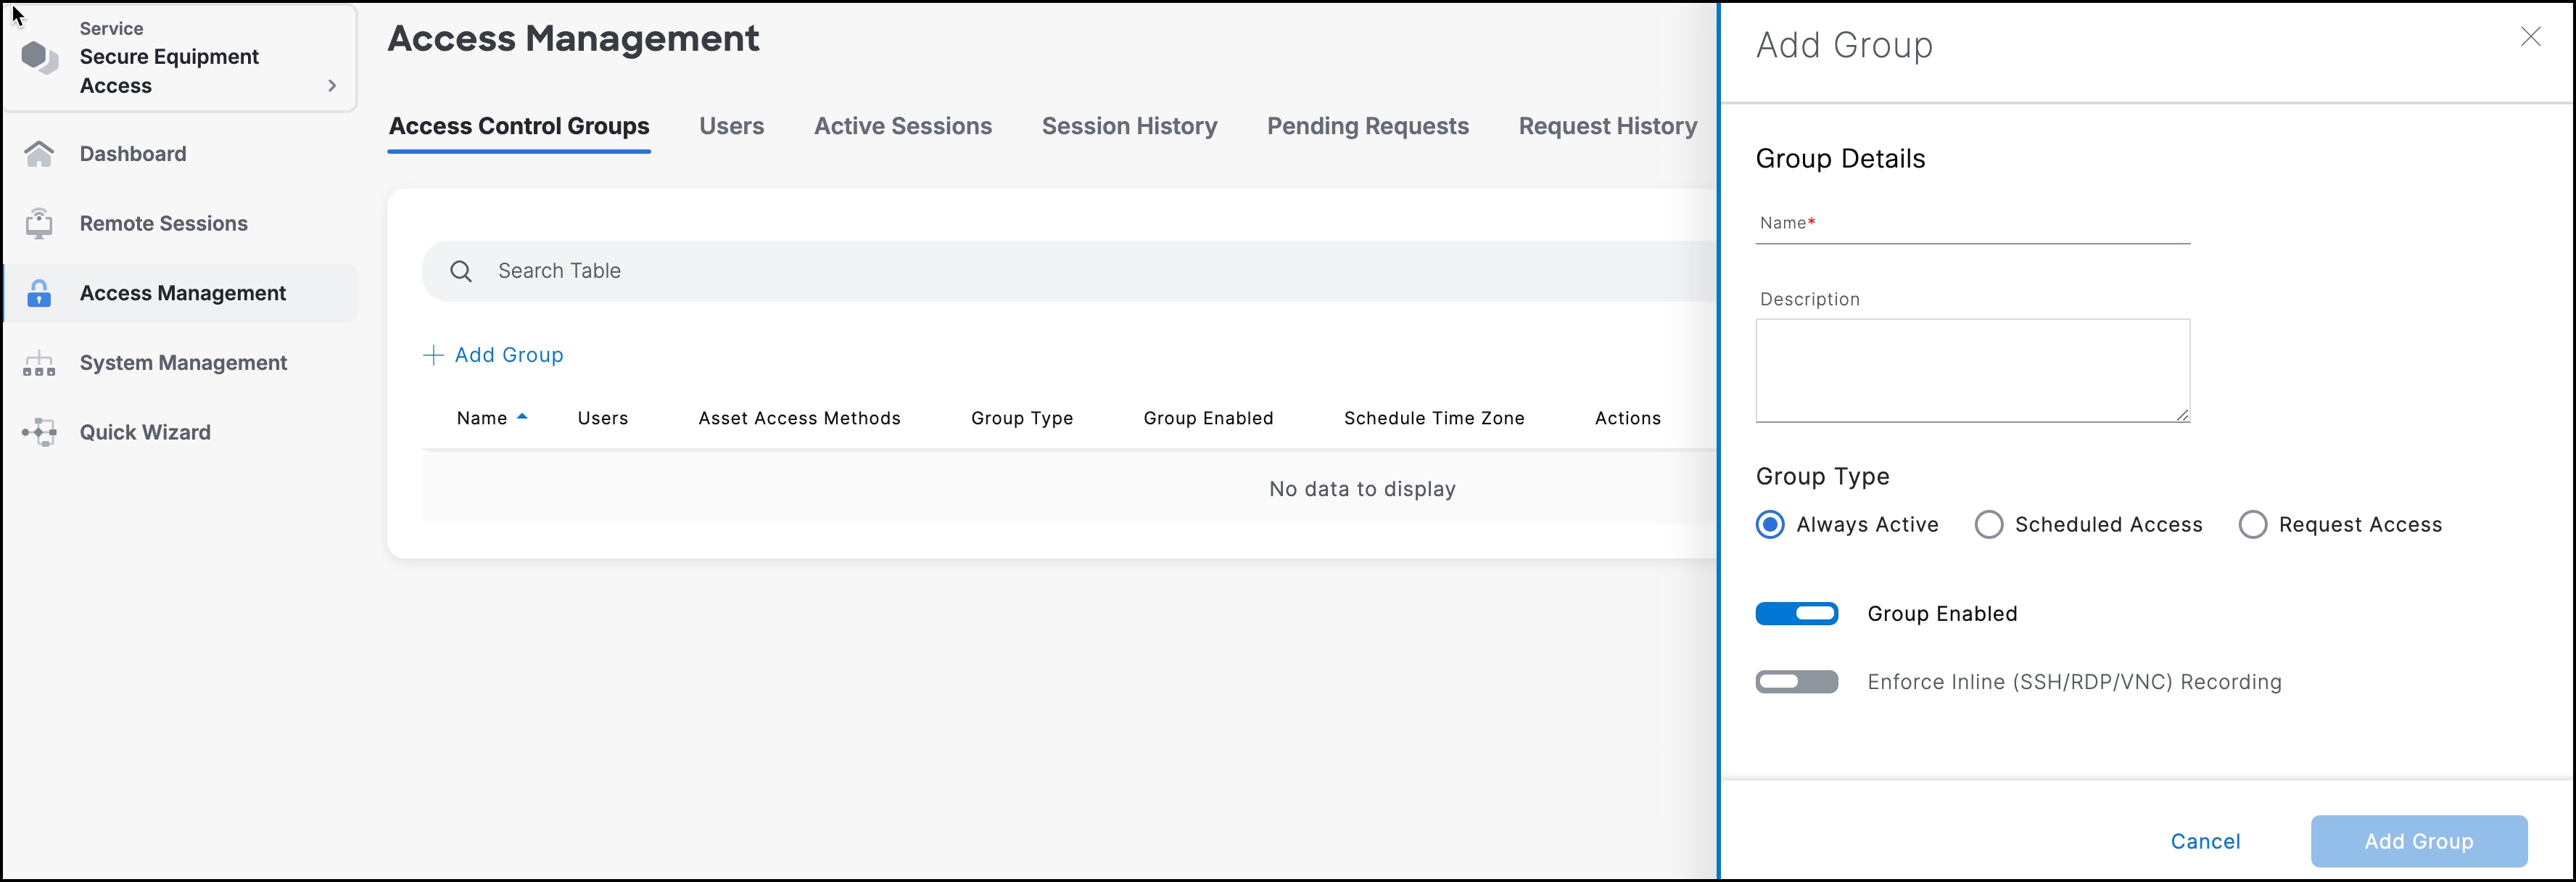
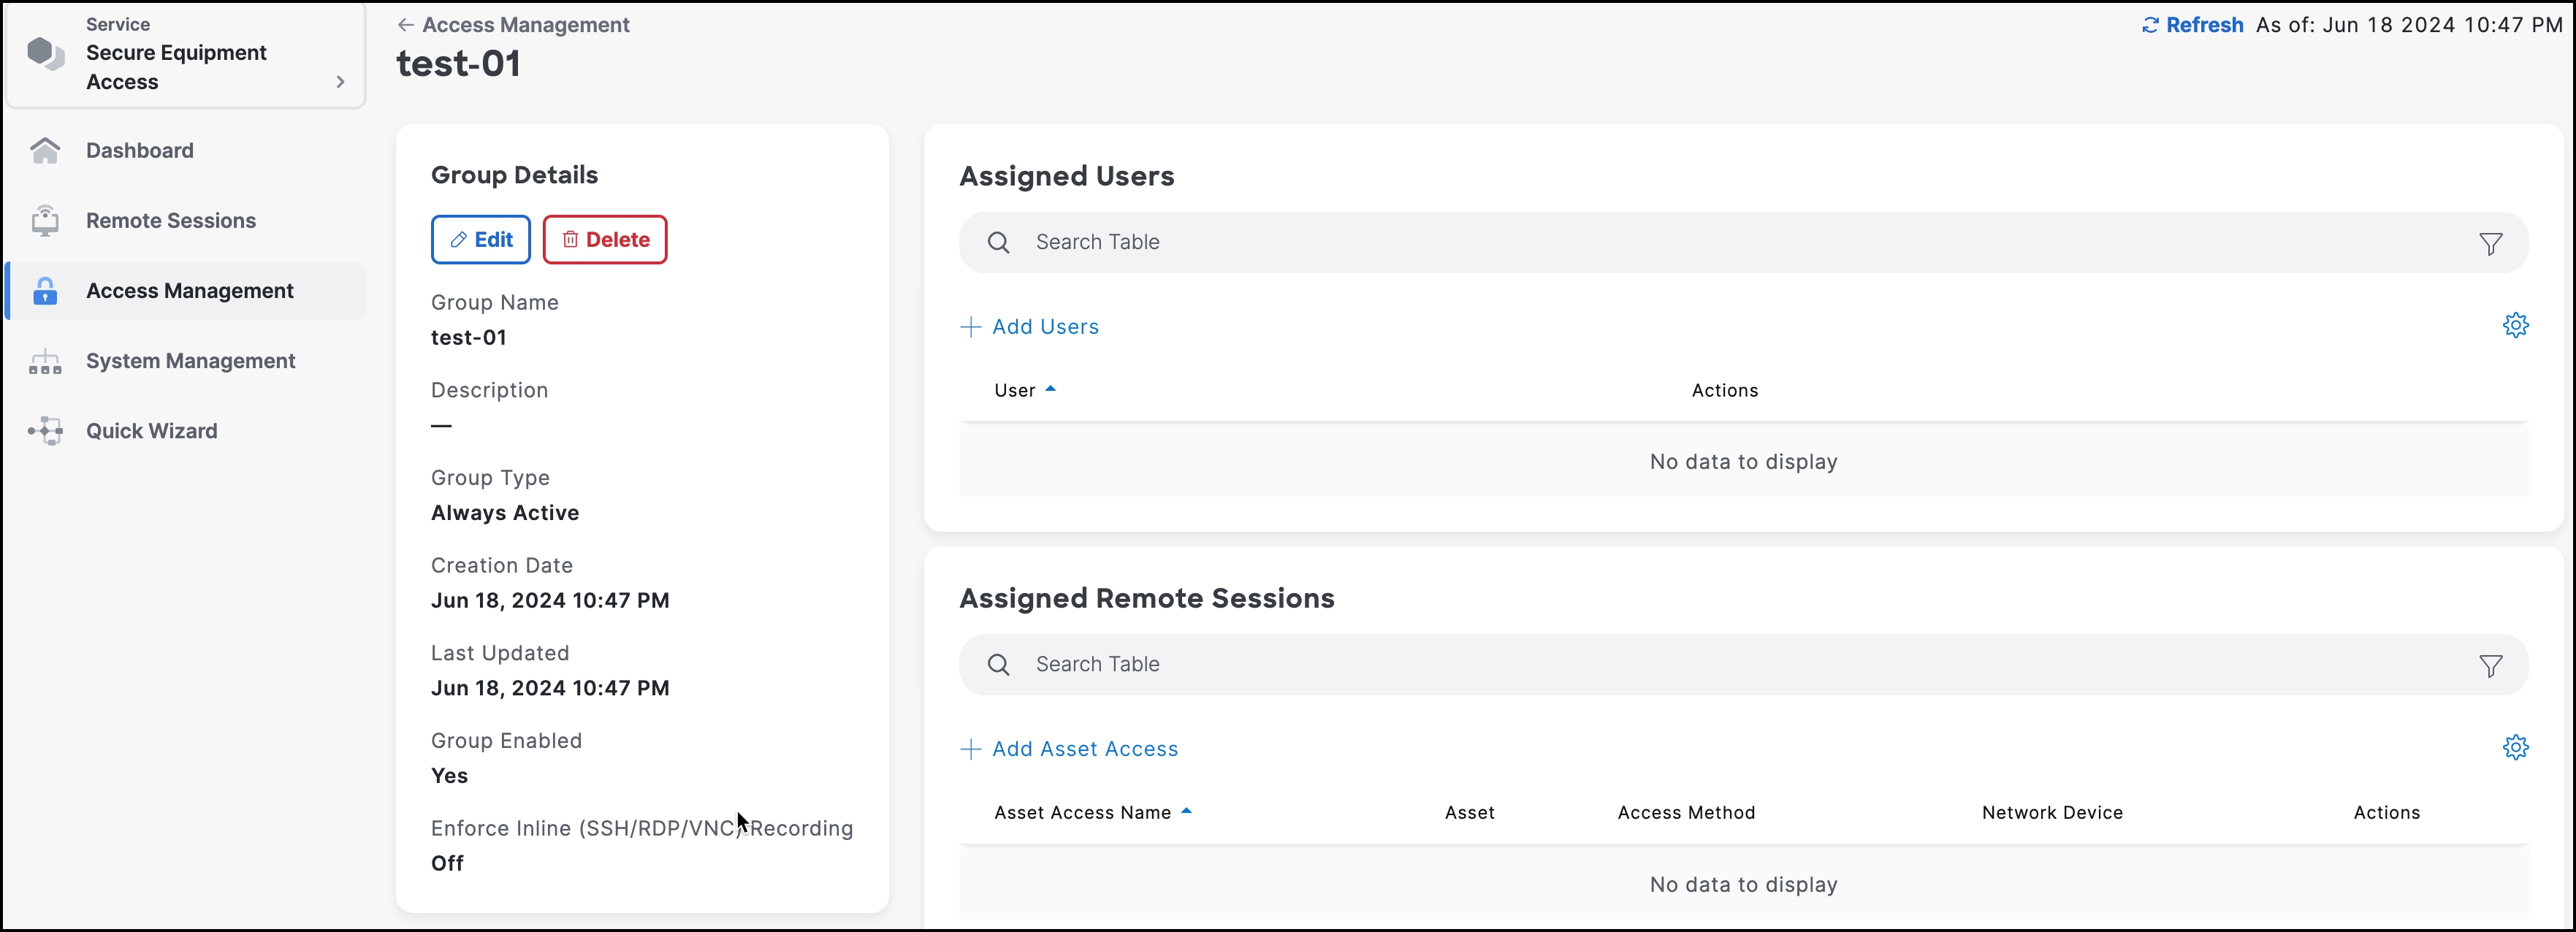
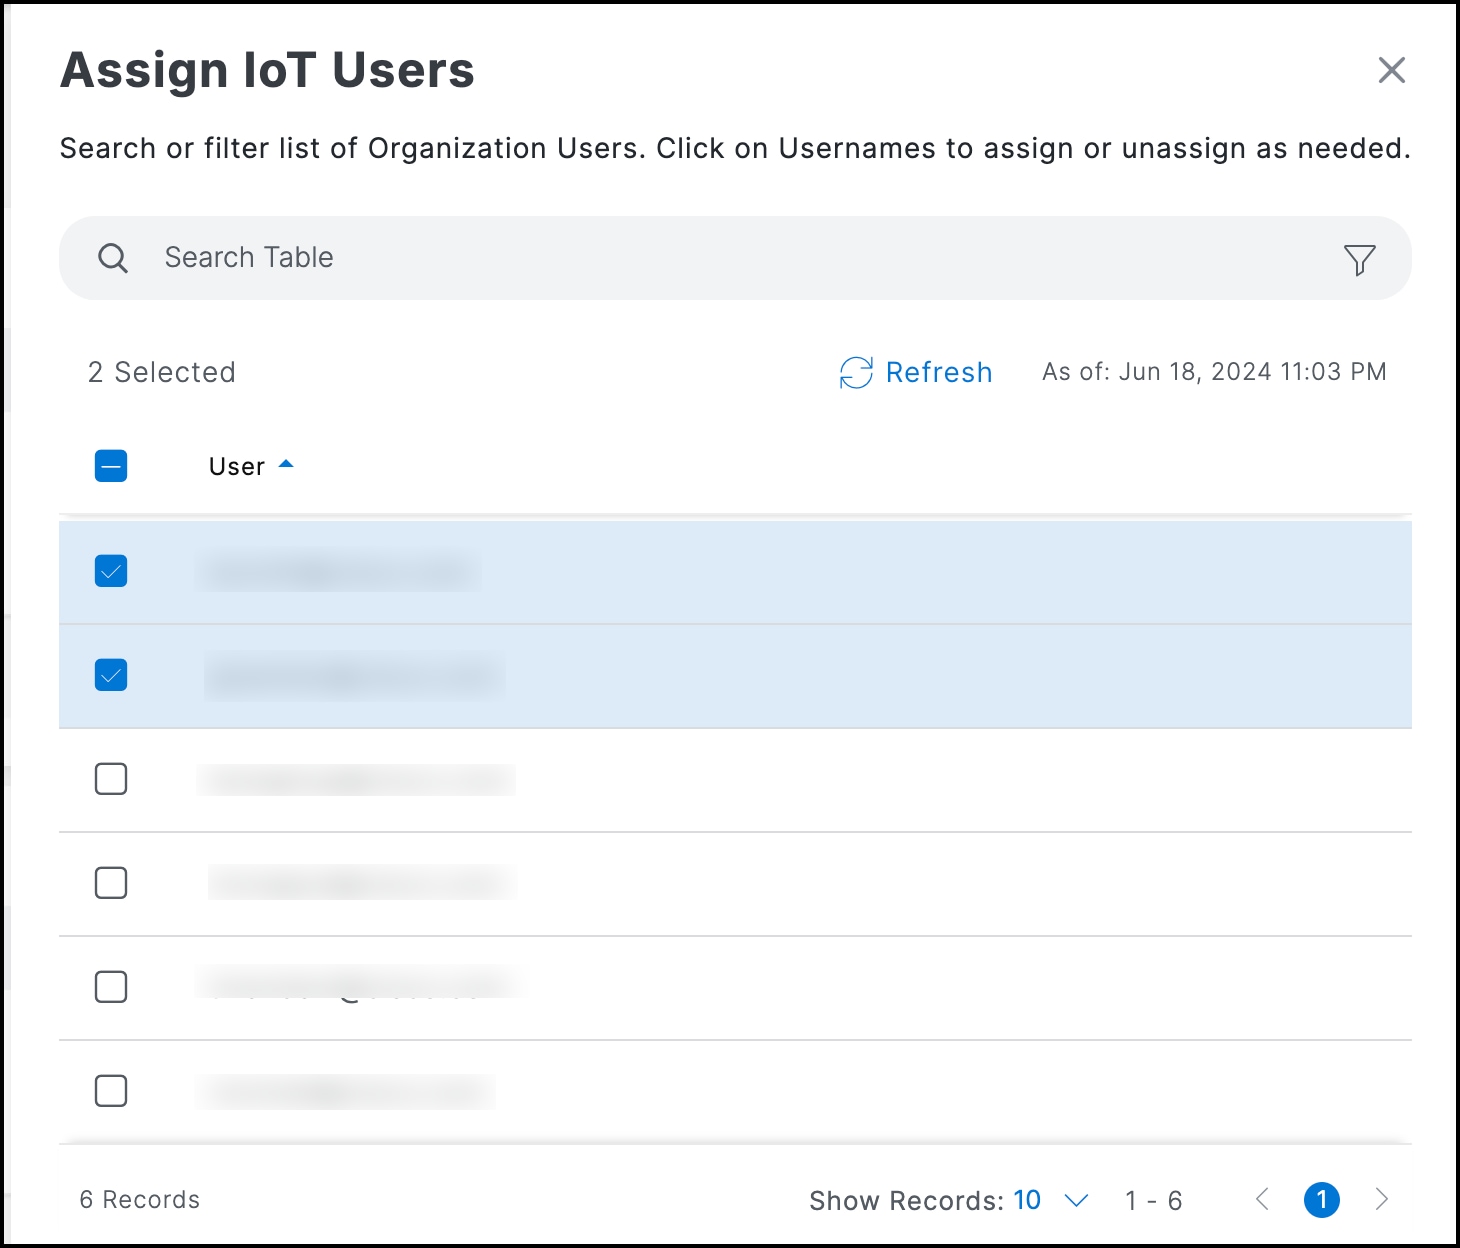
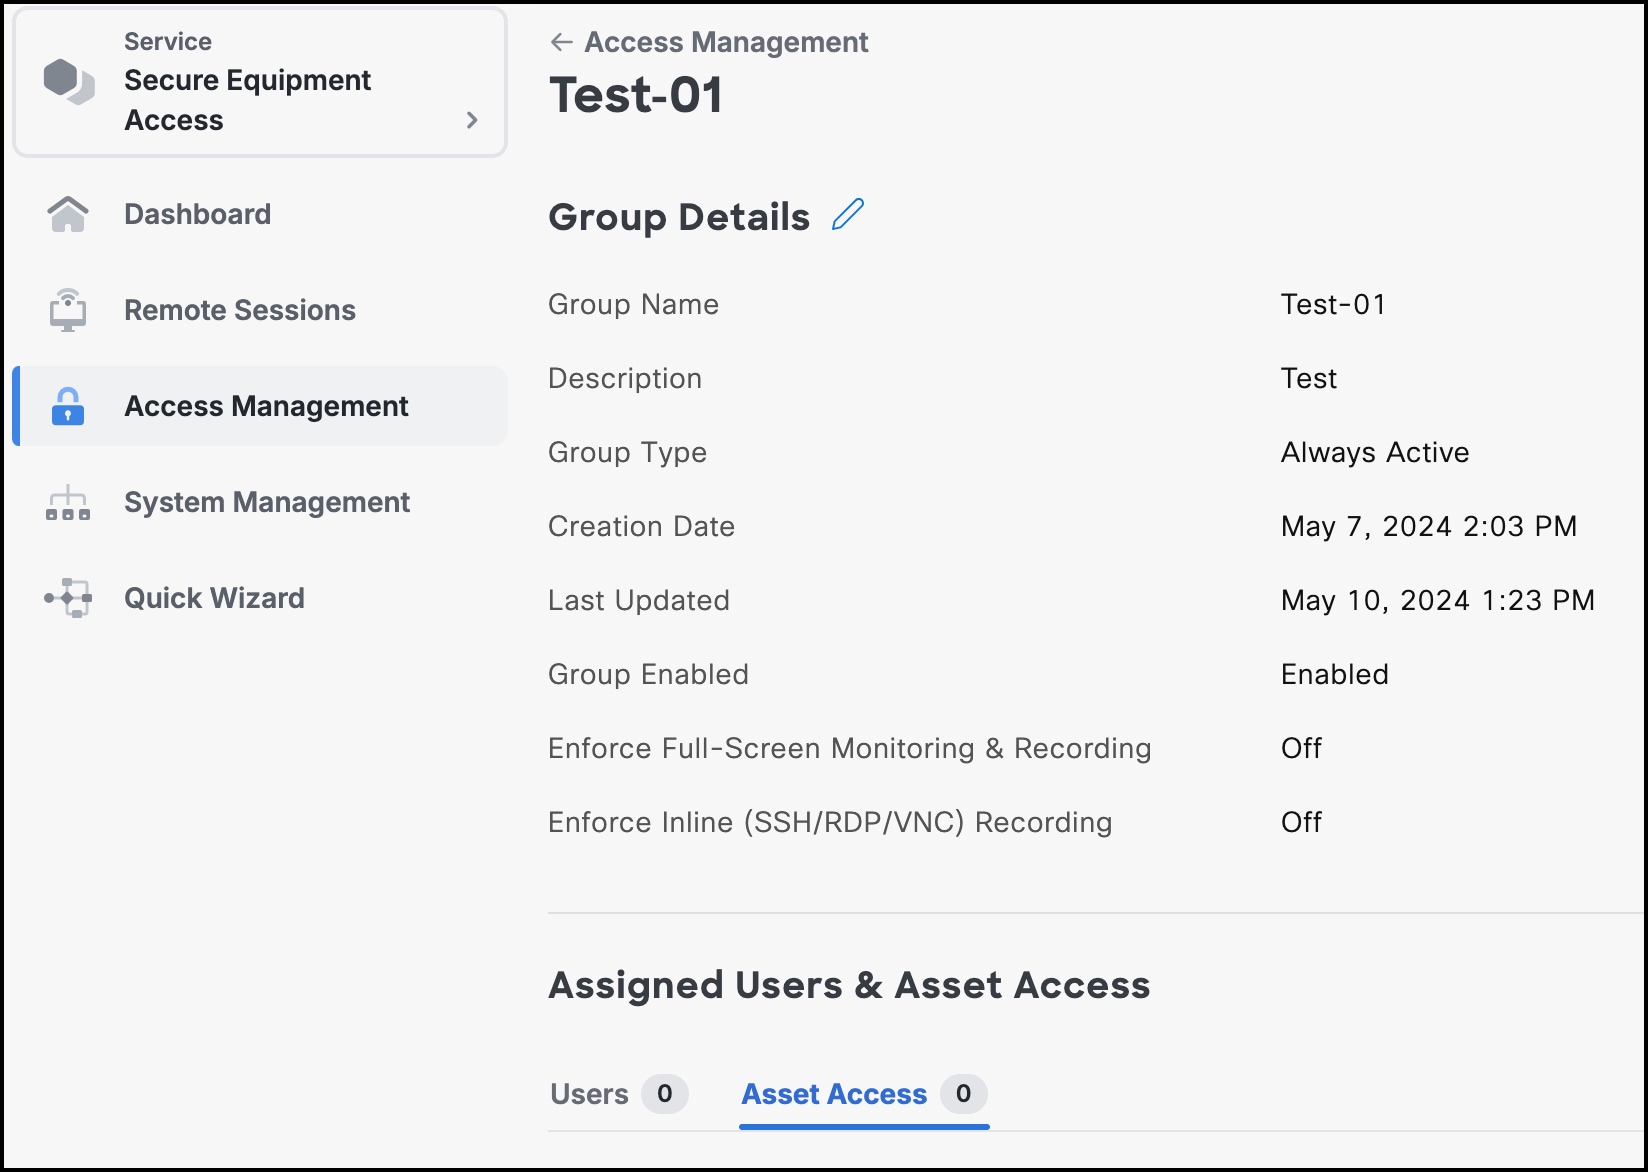
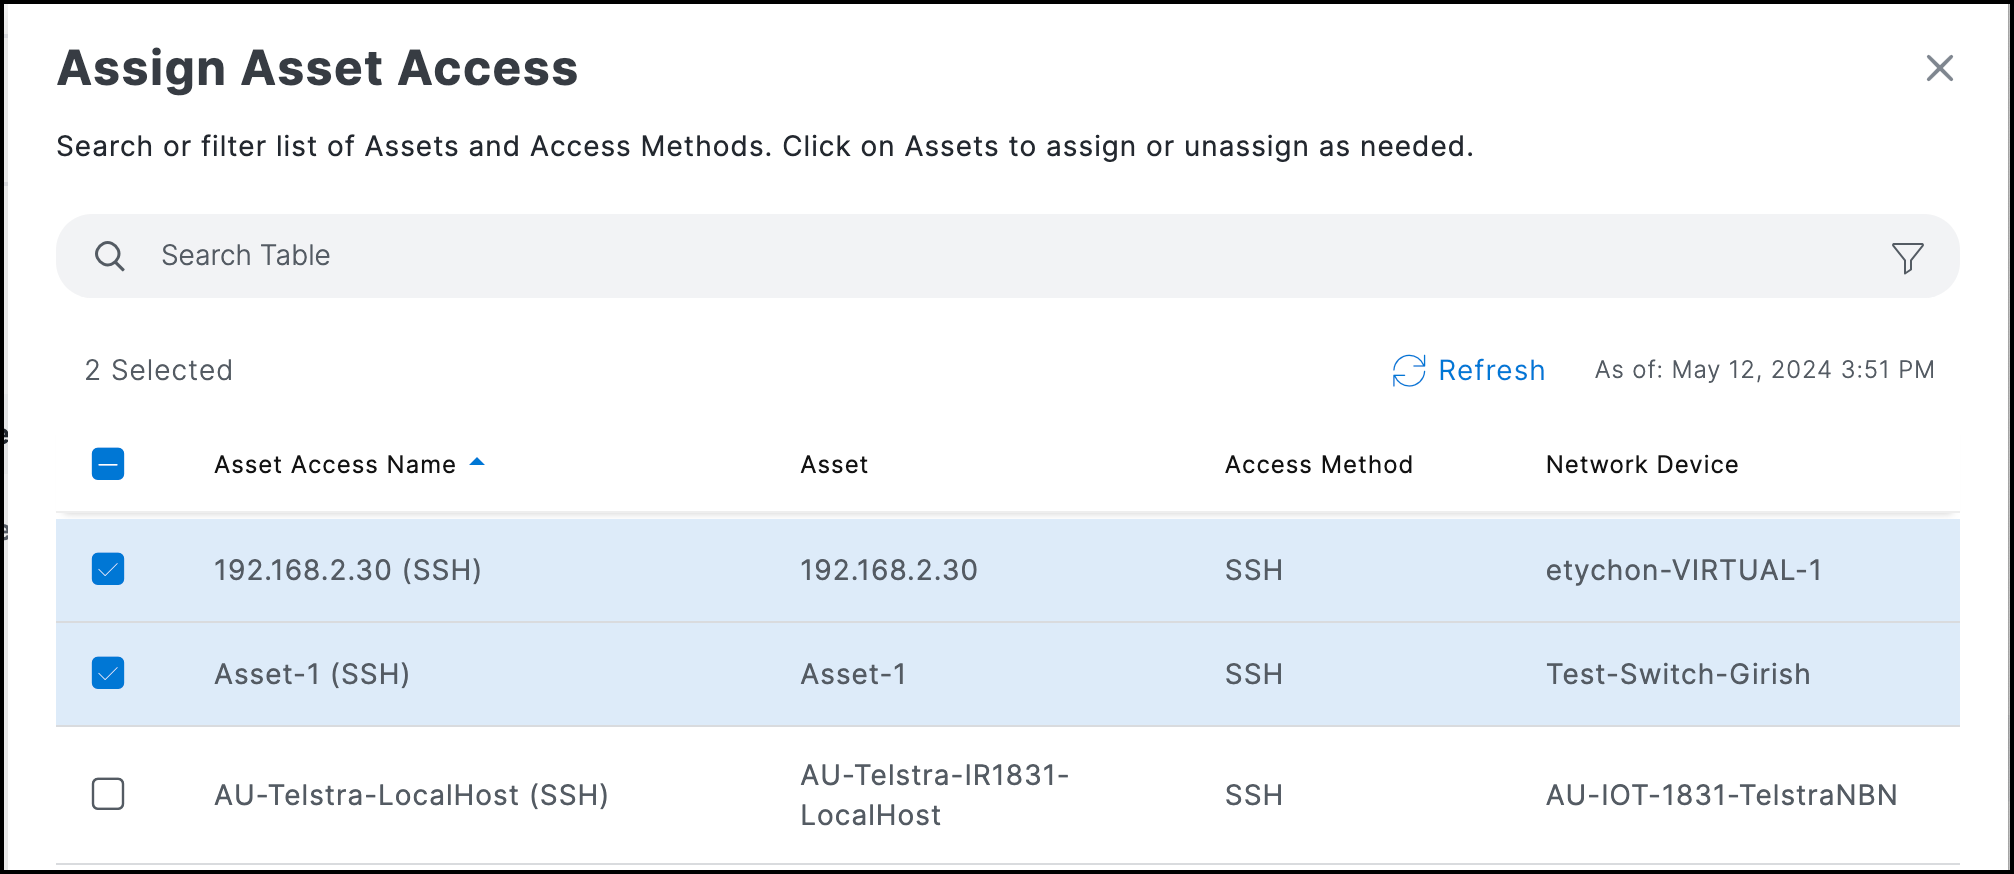
While SEA Admins create groups and manage access, SEA Users are granted access through specific access groups. The purpose of a group is to define which SEA Users can access which access methods. The SEA users will only be able to see the devices they have access to.

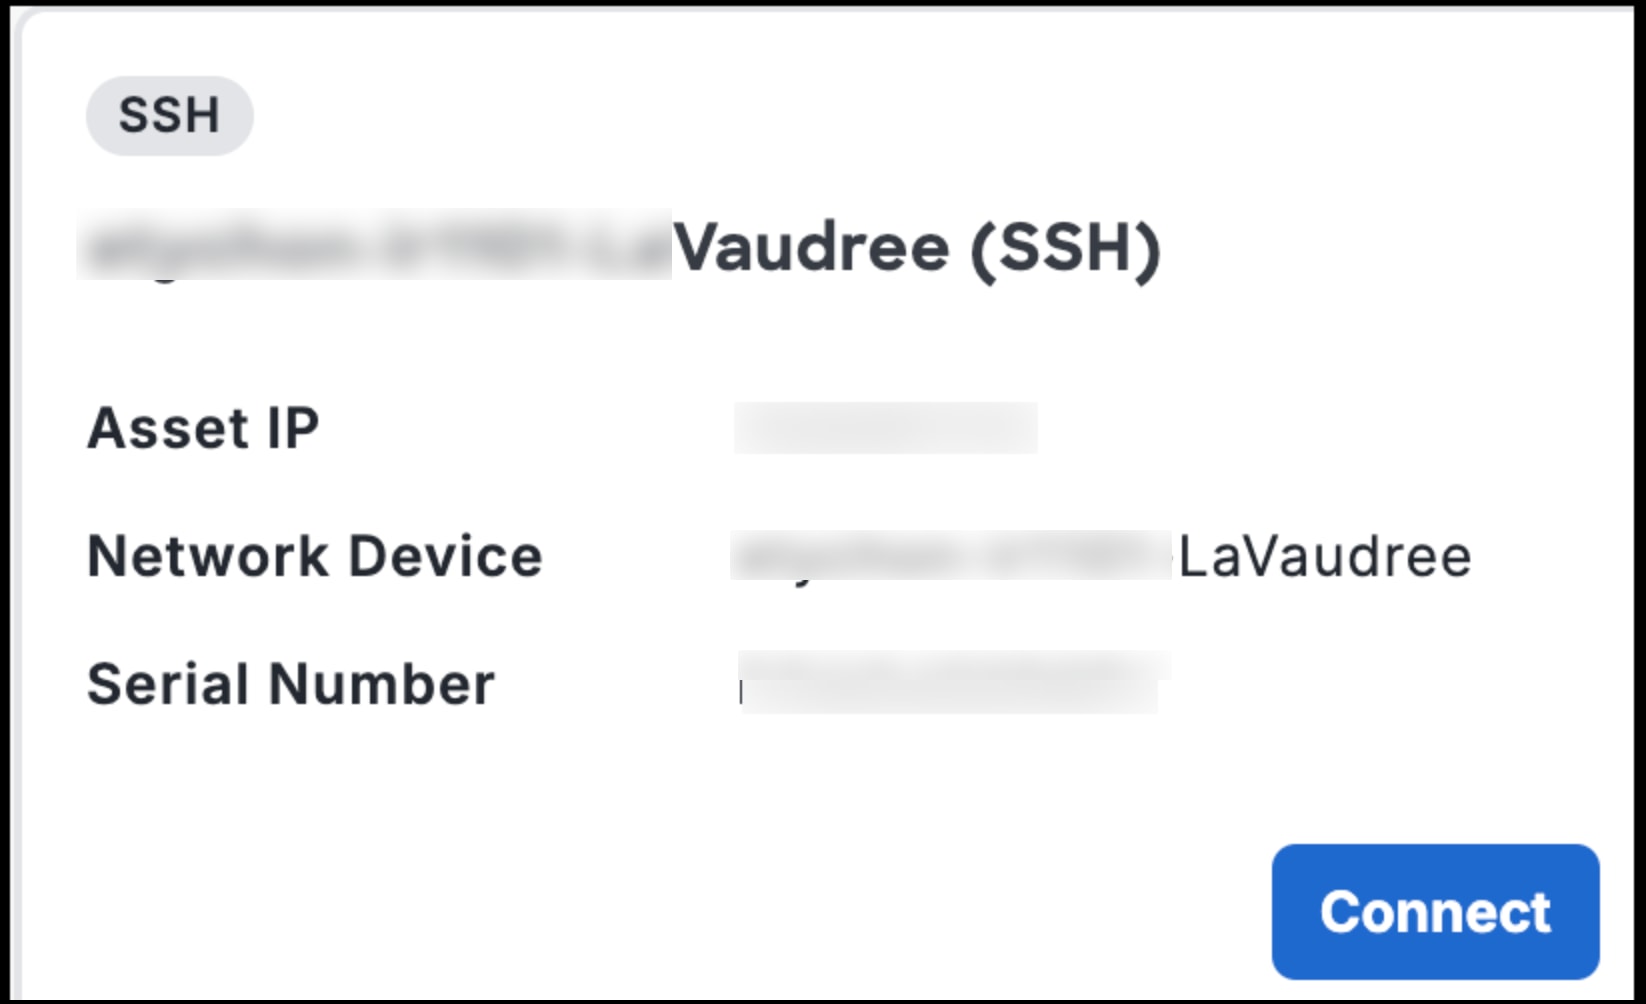
Configuring remote sessions includes the following steps:

  1. Add OT assets to network devices

  2. Configure access methods for OT assets

  3. Create an access group and assign users to the group

  4. Assign assets to users in the group

  5. Connect to remote sessions

Add OT assets to network devices

  1. From the System Management screen, select the network device to which you want to add the OT asset.

  2. From the Network Device details screen, click Add Asset. A page appears, displaying the Network Device Details, SEA Agent Details, and Assets.

  3. On the page, under Assets, click Add Asset. The Add Asset page appears.

    Add assets to a network device
  4. On the page, select Manual entry from the Selection Method, and provide the name and IP address/host name of the asset.

  5. Click Add.

    The newly added asset is listed under the Assets section.

Configure access methods for OT assets

After you add an OT asset, you can configure an access method to connect with the asset. SEA provides various access methods such as SSH, RDP, VNC, Web App, and Telnet to configure SEA-connected clients. For more information on the access methods, see Access Methods.

  1. Go to Secure Equipment Access > System Management > Assets.

    Add asset to network device
  2. Click the name of the asset for which you want to configure the access method. The asset details appear.

  3. Under Access Methods, click Add Access Method and select an access method from the list.

    Select an access method
  4. Provide the specific details relating to the access method that you selected, and then click Add.

    The access method is listed under Access Methods.

Create an access group and assign users to the group

An access group is a collection of users who need access to specific OT assets within the group. You can add multiple users and OT assets to the access group.

Do the following steps:

  1. From the Secure Equipment Access > Access Management screen, click Add Group. The Add Group window appears.

    Add access groups
  2. On the window, provide the following details:

    • Name of the group you want to add.

    • A description to the group

    • Select Always Active from the Group Type.

    • Leave the Group Enabled option enabled.

    • Click Add Group. The details of the added group appear.

      Group details page
  3. Under Assigned Users, click Add Users. The Assign IoT Users window appears.

  4. On the window, select one or more users from the list, and click Save.

    Select IoT users from the list

    The added users are listed under Assigned Users

Assign assets to users in the group

SEA administrators can assign assets to group members.

  1. Click Secure Equipment Access > Access Management.

  2. On the Access Management page, click the name of the group.

    The Group Details page appears.
  3. On the Group Details page, under Assigned Users & Asset Access, click Asset Access.

  4. Click Add Asset Access. The Assign Asset Access page appears.

    Assign Assets
  5. On the Assign Asset Access page, select one or more assets from the list.

    Assign Asset Access
  6. Click Save.

    The sessions appear under Secure Equipment Access > Remote Sessions when an SEA user logs in to IoT OD.

Connect to remote sessions

SEA users can connect to remote sessions after SEA Admins configure the sessions for them.

  1. Log in as an SEA user.

  2. Click Secure Equipment Access > Remote Sessions.

    All your sessions appear on the screen.
  3. Go to the session of your choice and click Connect.

    Connect to a remote session