Upgrade procedures

Upgrade through the Local Manager

The following section explains how to upgrade the sensor through the Local Manager.

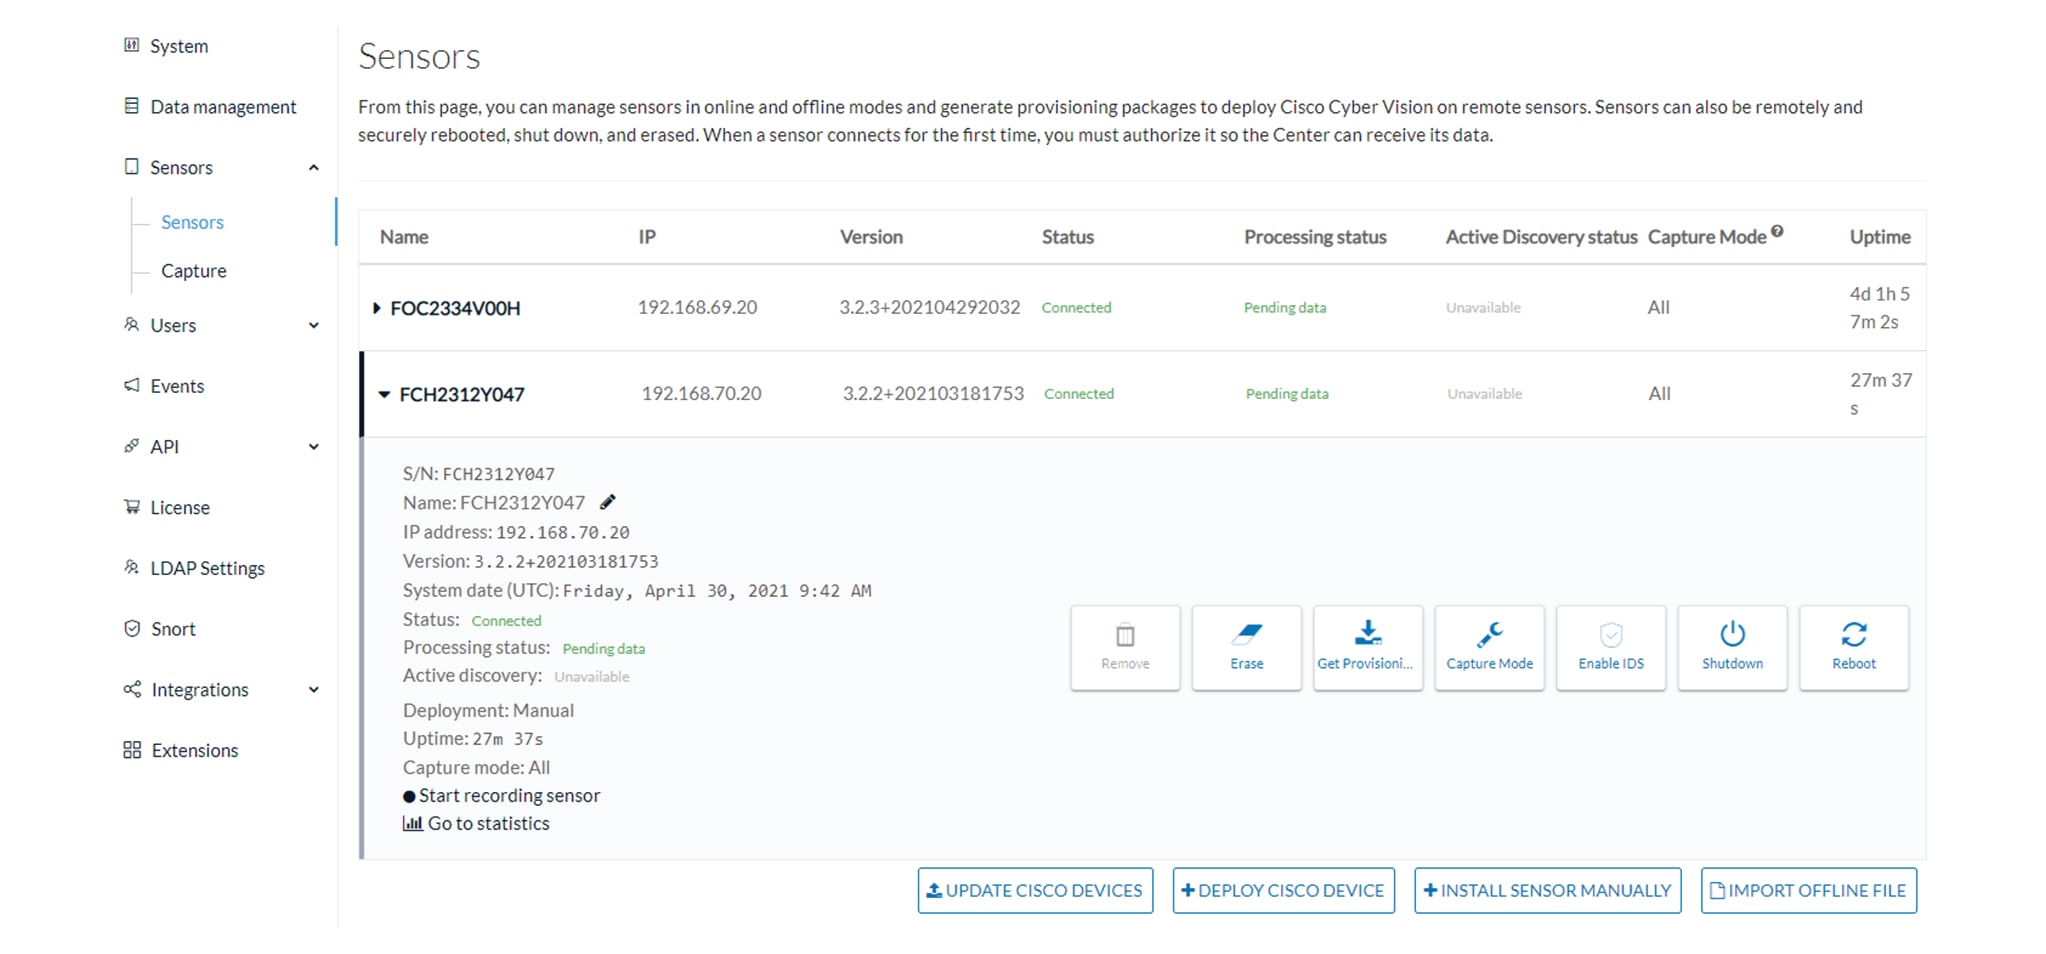
In the Cisco Cyber Vision sensor administration page, the sensor is in 3.2.2. In the example below, we will upgrade the sensor to Cisco Cyber Vision version 3.2.3.

  1. Access the Local Manager.

  2. Stop the application.

    The operation takes a few moments.

    The application status switches to STOPPED.

    In Cisco Cyber Vision, the sensor status moves to Disconnected.

  3. In the Local Manager, click the Deactivate button.

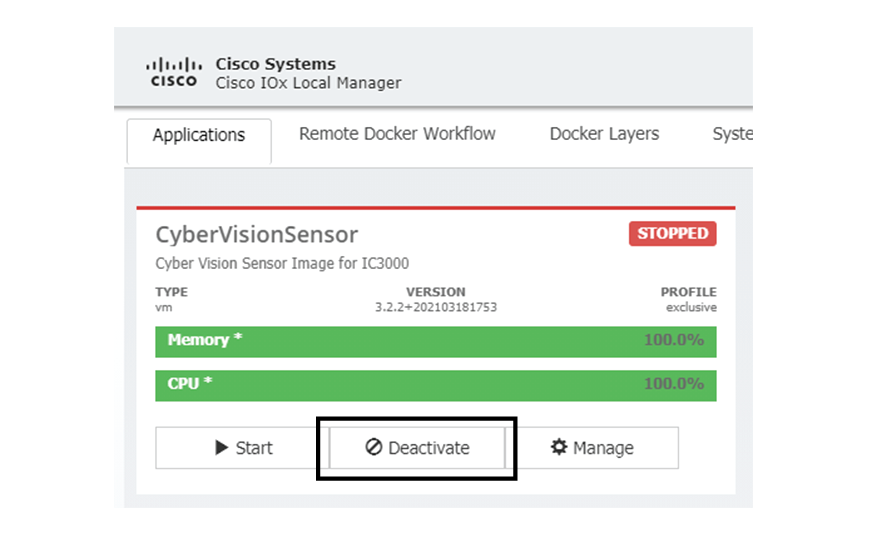
    The application status moves to "DEPLOYED".

  4. Click Upgrade.

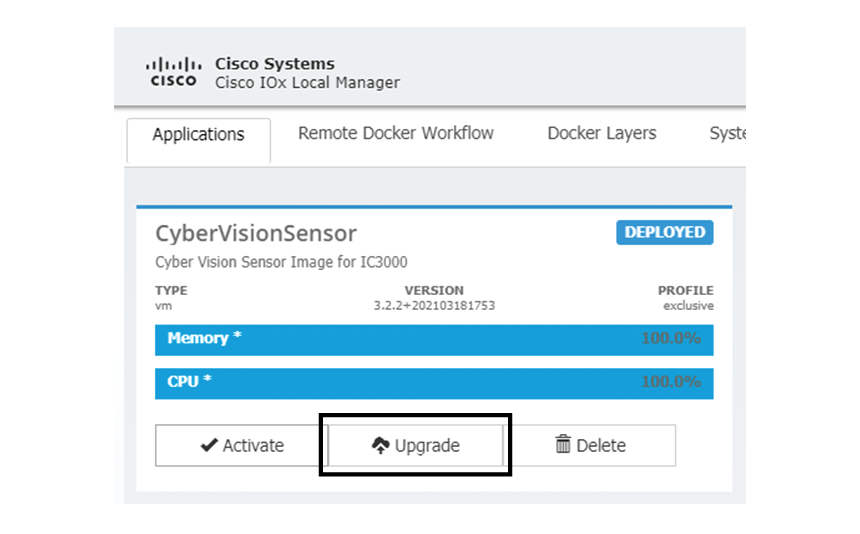
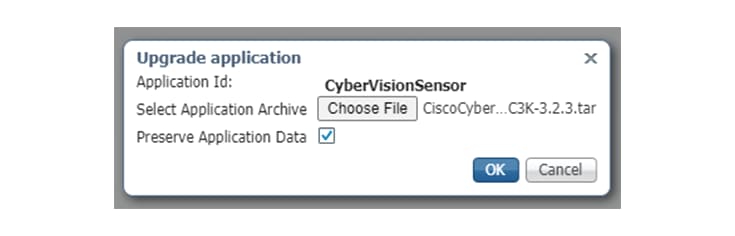
    The pop up Upgrade application appears.

  5. Select the option Preserve Application Data.

  6. Select the new version of the application archive file.

    e.g. Cisco-Cyber-Vision-IOx-IC3K-3.2.3.tar

    The operation takes a few moments.

    A message indicating that the sensor has been successfully upgraded is displayed.

  7. Check the number of the new version.

  8. Click Activate.

  9. Check configurations.

    It can happen that network configurations are lost during the upgrade. If they are, refer to Configure the sensor virtual application and do as explained.

  10. Click the Activate App button.

    The application status moves to ACTIVATED.

  11. Click the Start button.

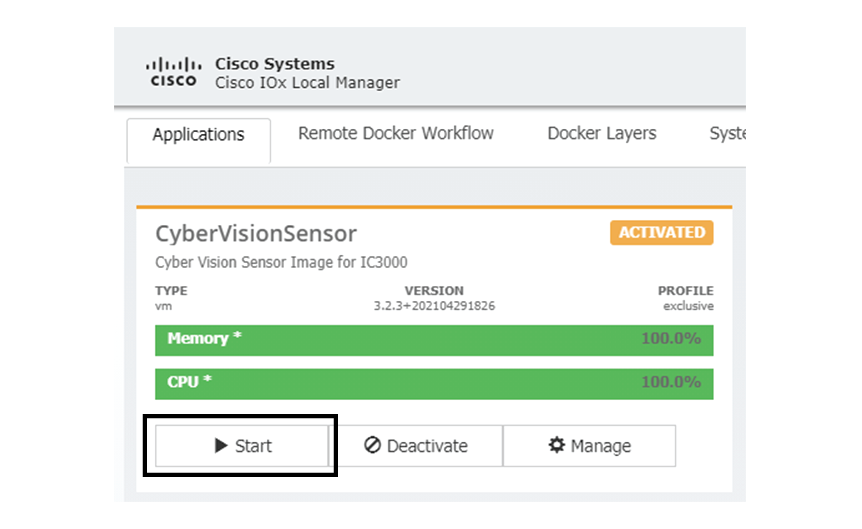
    The application status changes to RUNNING.

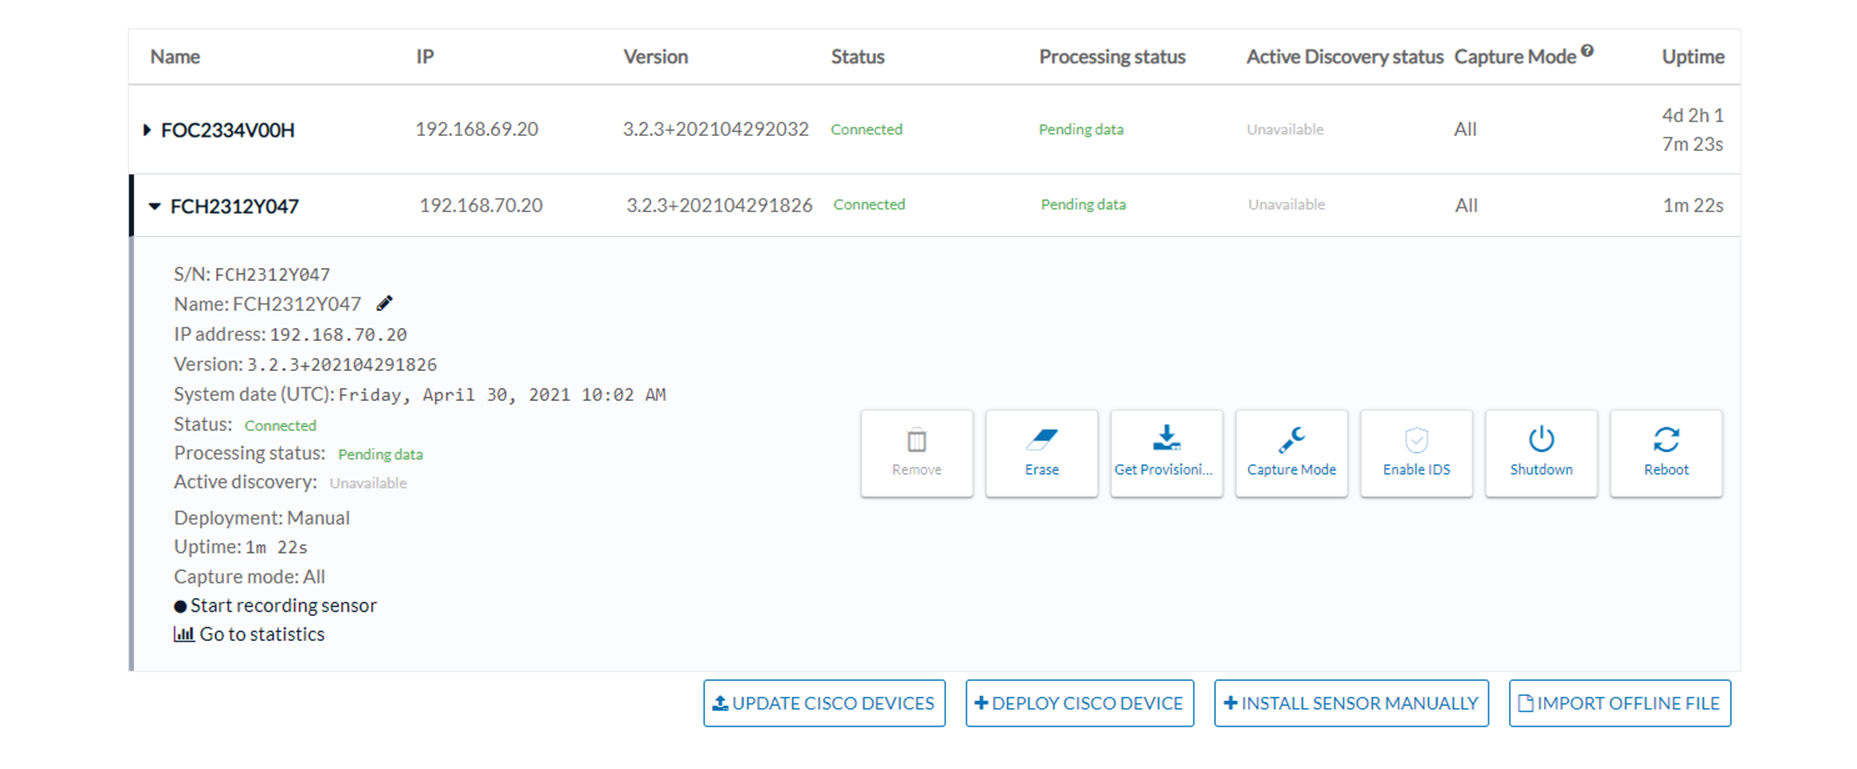
In Cisco Cyber Vision, the sensor is upgraded from version 3.2.2 to 3.2.3 and its status moves to Connected.

Upgrade with the combined update file

Version releases usually include updates for both the Cisco IC3000 sensors and the Center (i.e. combined updates). If operating conditions make it possible , you can update the Center and all its Cisco IC3000 online sensors at once from the user interface. You can proceed to a combined update without opening a shell prompt and using SSH.


Note

Combined updates are applied to the Center and all its Cisco IC3000 online sensors. Make sure (by accessing the sensor administration page) that all your Cisco IC3000 sensors are connected and SSH is authorized between the Center and the sensors before proceeding to a combined update.

Important

Rolling back to an older Cisco Cyber Vision version is not possible.

Requirements:

  • A combined update, available on cisco.com.

To verify that the file you just downloaded is healthy, it is recommended to use the SHA512 checksum provided by Cisco.

To do so (Windows users):

Procedure


Step 1

Access Cisco Cyber Vision download page.

Step 2

Download the file.

Step 3

Open a shell prompt such as Windows Powershell and use the following command to retrieve the file checksum:

Get-FileHash .\CiscoCyberVision-<TYPE>-<VERSION>.<EXT> -Algorithm SHA512 | Format-List

Step 4

In the download page, mouse over the file and copy the SHA512 checksum.

Step 5

Compare both checksums.

  • If both checksums are identical it means the file is healthy.

  • If the checksums do not match try to download the file again.

  • If, after downloading the file again the checksums still don’t match, please contact Cisco support.

To update the Center and all its Cisco IC3000 online sensors:

Step 6

Access the Cisco Cyber Vision's user interface.

Step 7

Access System administration > System and use the System update button.

Step 8

Select the update file CiscoCyberVision-update-combined-<VERSION>.dat

Step 9

Confirm the update.

As the Center and sensors updates proceed, you are redirected to a holding page. Once the update is finished the Center and the sensors need to reboot and you will be logged out from the user interface.

Step 10

Log in again to the user interface.

Step 11

If some sensors were offline when the update occurred, the same procedure can be used as many times as necessary to update all sensors.