Connect to the Cisco IC3000 with the serial console
This section describes how to establish a connection to the Cisco IC3000 from Windows 10 using PuTTY. It is required to perform a sensor management extension installation and to enable Active Discovery (optional) when performing a manual installation.
 Note |
This procedure will also work for other versions of Windows. |
Requirements:
-
A RJ45 or mini USB console cable.
-
A serial console emulator, like PuTTY.
To connect a console to the Cisco IC3000:
Procedure
| Step 1 |
Download and install on your computer a serial console emulator like PuTTY. Refer to its own documentation to use it. |
| Step 2 |
Connect your computer to the Cisco IC3000 through its serial port using the RJ45 or mini USB console cable. |
If you are using Windows, you need to identify to which COM port the console is connected.
To identify the COM port:
| Step 3 |
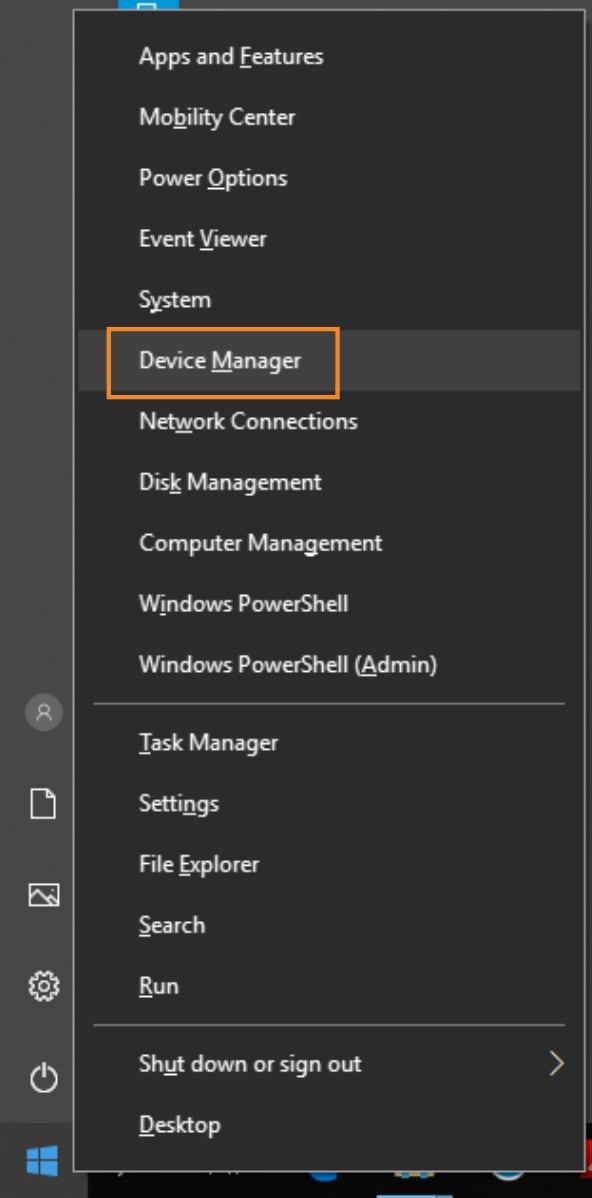
Right click on the Windows Start icon and select "Device Manager".
|
| Step 4 |
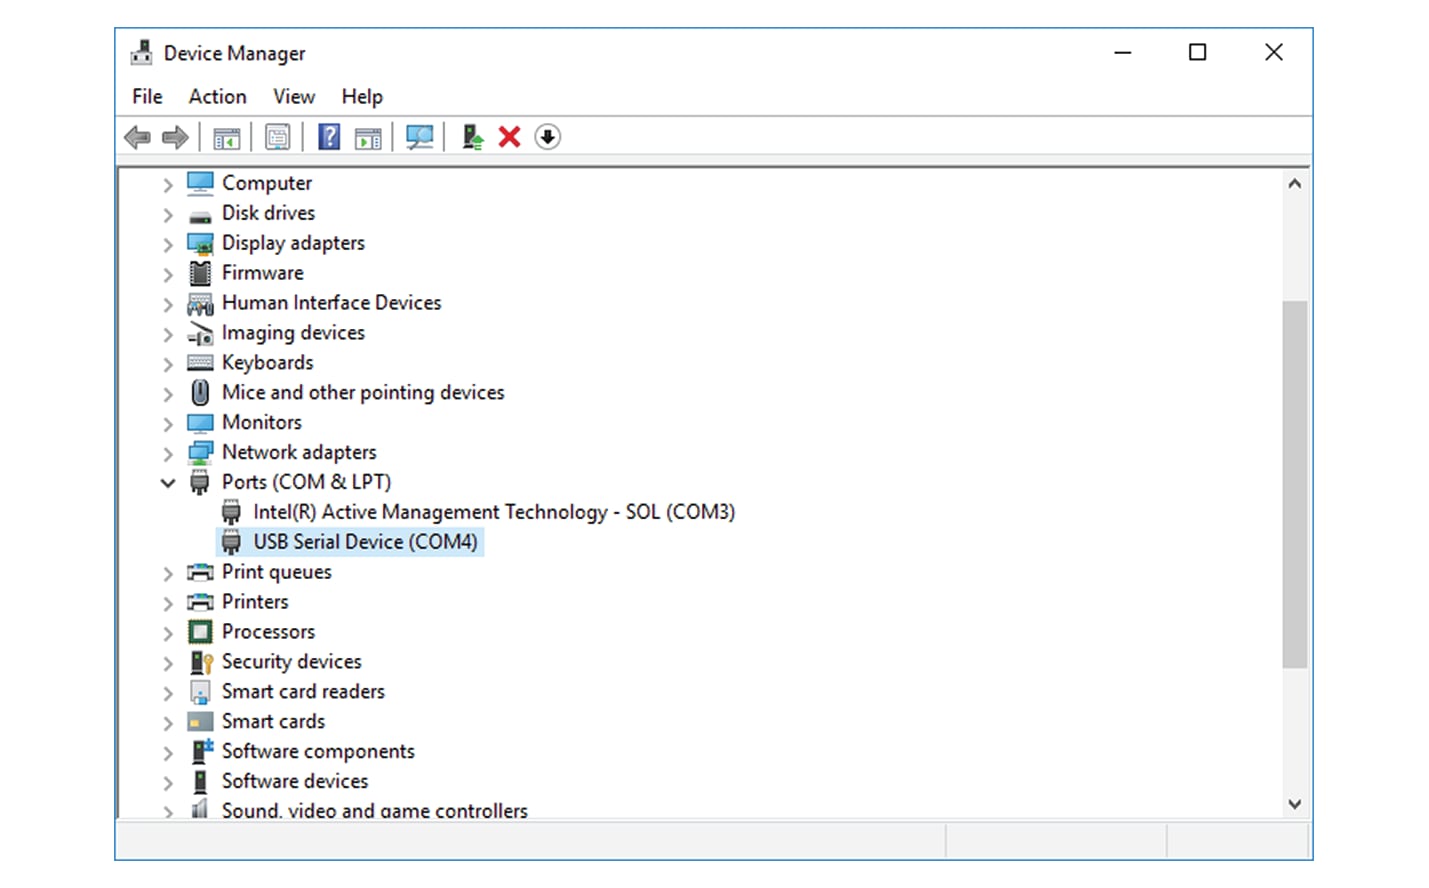
Scroll down and click "Ports (COM & LPT)" menu. The COM number appears.
|
To start a connection to the Cisco IC3000:
| Step 5 |
Make sure there is no USB drive plugged into the Cisco IC3000. |
| Step 6 |
Disconnect the Cisco IC3000 from the DC Current source. |
| Step 7 |
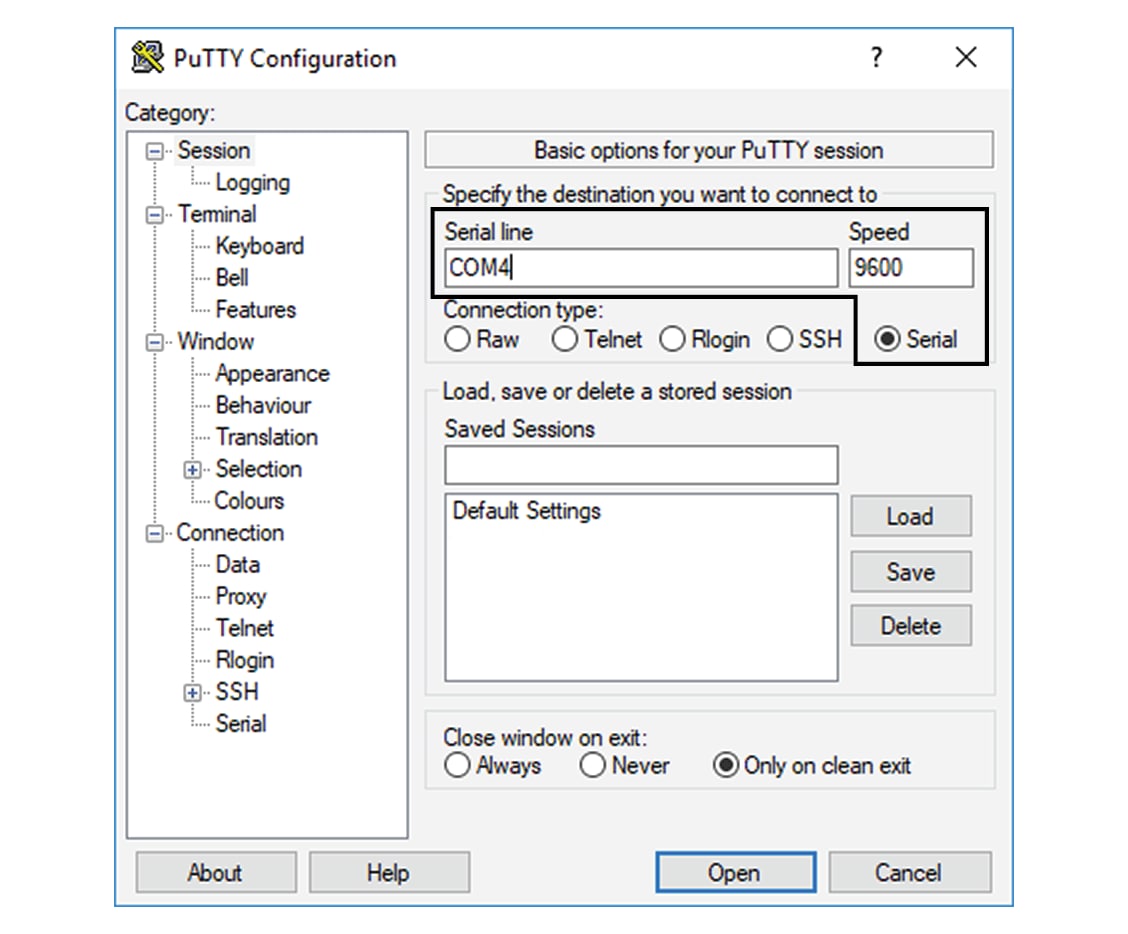
Open PuTTY. The following screen appears:
|
| Step 8 |
Select Serial for the Connection type. |
| Step 9 |
Enter "COM<number>" into the serial line field. Set speed at 9600. |
| Step 10 |
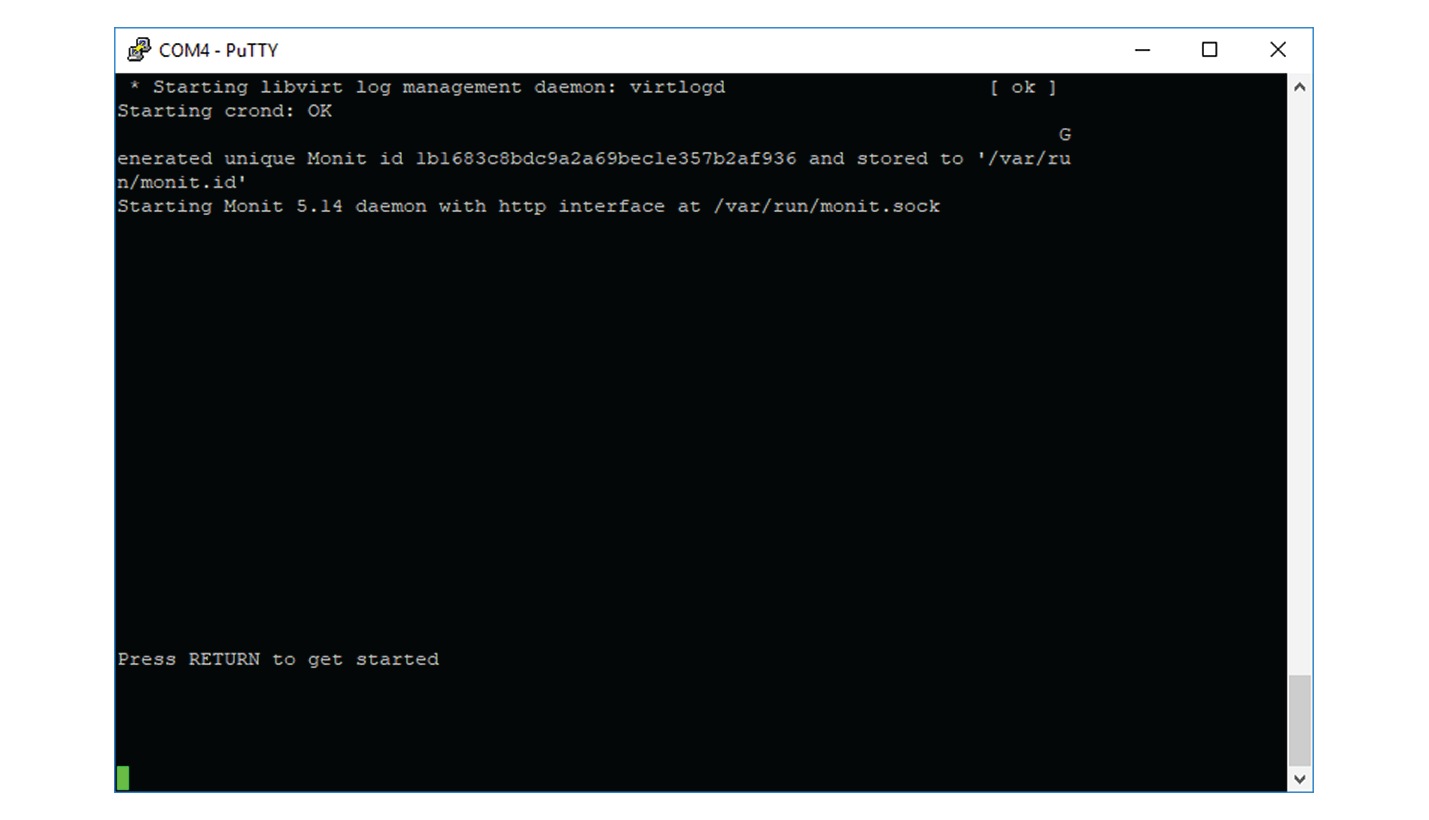
Click Open to display the shell prompt for PuTTY. |
| Step 11 |
Connect the Cisco IC3000 to the DC current source. Wait a few moments. When booting is complete, the shell prompt will ask you to press return to start. The connection has established with success.
|
 Feedback