Decryption Tuning Using TLS/SSL Rules

The following topics provide an overview of how to configure TLS/SSL rule conditions:

TLS/SSL Rule Conditions Overview

A basic TLS/SSL rule applies its rule action to all encrypted traffic inspected by the device. To better control and decrypt encrypted traffic, you can configure rule conditions to handle and log specific types of traffic. Each TLS/SSL rule can contain 0, 1, or more rule conditions; a rule matches traffic only if the traffic matches every condition in that TLS/SSL rule.


Note


When traffic matches a rule, the device applies the configured rule action to the traffic. When the connection ends, the device logs the traffic if configured to do so.


Each rule condition allows you to specify one or more properties of traffic you want to match against; these properties include details of:

  • The flow of traffic, including the security zone through which it travels, IP address and port, country of origin or destination, and origin or destination VLAN.

  • The user associated with a detected IP address.

  • The traffic payload, including the application detected in the traffic.

  • The connection encryption, including the TLS/SSL protocol version and cipher suite and server certificate used to encrypt the connection.

  • The category and reputation of the URL specified in the server certificate’s distinguished name..

Requirements and Prerequisites for Decryption Tuning

Model Support

Any except NGIPSv.

Supported Domains

Any

User Roles

  • Admin

  • Access Admin

  • Network Admin

Network-Based TLS/SSL Rule Conditions

TLS/SSL rules in SSL policies exert granular control over encrypted traffic logging and handling. Network-based conditions allow you to manage which encrypted traffic can traverse your network, using one or more of the following criteria:

  • Zone conditions in TLS/SSL rules allow you to control encrypted traffic by its source and destination security zones. A security zone is a grouping of one or more interfaces, which might be located across multiple devices.

  • Network conditions in TLS/SSL rules allow you to control and decrypt encrypted traffic by its source and destination IP address. You can either explicitly specify the source and destination IP addresses for the encrypted traffic you want to control, or use the geolocation feature, which associates IP addresses with geographical locations, to control encrypted traffic based on its source or destination country or continent.

  • VLAN conditions in TLS/SSL rules allow you to control VLAN-tagged traffic. The system uses the innermost VLAN tag to identify a packet by VLAN.

  • Port conditions in TLS/SSL rules allow you to control encrypted traffic by its source and destination TCP port.

You can combine network-based conditions with each other and with other types of conditions to create a TLS/SSL rule. These TLS/SSL rules can be simple or complex, matching and inspecting traffic using multiple conditions.

Network Zone TLS/SSL Rule Conditions

You can add a maximum of 50 zones to each of the Sources Zones and Destination Zones in a single zone condition:

  • To match encrypted traffic leaving the device from an interface in the zone, add that zone to the Destination Zones.

    Because devices deployed passively do not transmit traffic, you cannot use a zone comprised of passive interfaces in a Destination Zone condition.

  • To match encrypted traffic entering the device from an interface in the zone, add that zone to the Source Zones.

If you add both source and destination zone conditions to a rule, matching traffic must originate from one of the specified source zones and egress through one of the destination zones.

Note that just as all interfaces in a zone must be of the same type (all inline, all passive, all switched, or all routed), all zones used in a zone condition for a TLS/SSL rule must be of the same type. That is, you cannot write a single rule that matches encrypted traffic to or from zones of different types.

Warning icons indicate invalid configurations, such as zones that contain no interfaces. For details, hover your pointer over the icon.

Controlling Encrypted Traffic by Network Zone

Procedure


Step 1

In the SSL rule editor, select the Zones tab.

Step 2

Find the zones you want to add from the Available Zones. To search for zones to add, click the Search by name prompt above the Available Zones list, then type a zone name. The list updates as you type to display matching zones.

Step 3

Click to select a zone. To select all zones, right-click and then select Select All.

Step 4

Click Add to Source or Add to Destination.

Tip


You can also drag and drop selected zones.

Step 5

Save or continue editing the rule.


Example

For example, you could deploy additional identically configured devices—managed by the same Firepower Management Center—to protect similar resources in several different locations. Like the first device, each of these devices protects the assets in an Internal security zone.


Note


You are not required to group all internal (or external) interfaces into a single zone. Choose the grouping that makes sense for your deployment and security policies.


In this deployment, you may decide that although you want these hosts to have unrestricted access to the Internet, you nevertheless want to protect them by decrypting and inspecting incoming encrypted traffic.

To accomplish this, configure a TLS/SSL rule with a zone condition where the Destination Zone is set to Internal. This simple SSL rule matches traffic that leaves the device from any interface in the Internal zone.

What to do next

Network or Geolocation TLS/SSL Rule Conditions

When you build a network-based TLS/SSL rule condition, you can manually specify IP address and geographical locations. Alternately, you can configure network conditions with network and geolocation objects, which are reusable and associate a name with one or more IP addresses, address blocks, countries, continents, and so on.


Note


If you want to write rules to control traffic by geographical location, to ensure you are using up-to-date geolocation data to filter your traffic, Cisco strongly recommends you regularly update the geolocation database (GeoDB) on your Firepower Management Center.


You can add a maximum of 50 items to each of the Source Networks and Destination Networks in a single network condition, and you can mix network and geolocation-based configurations:

  • To match encrypted traffic from an IP address or geographical location, configure the Source Networks.

  • To match encrypted traffic to an IP address or geographical location, configure the Destination Networks.

If you add both source and destination network conditions to a rule, matching encrypted traffic must originate from one of the specified IP addresses and be destined for one of the destination IP addresses.

When building a network condition, warning icons indicate invalid configurations. For details, hover your pointer over the icon.

Controlling Encrypted Traffic by Network or Geolocation

Before you begin

Procedure


Step 1

In the SSL rule editor, select the Networks tab.

Step 2

Find the networks you want to add from the Available Networks, as follows:

  • Click the Networks tab to display network objects and groups to add; click the Geolocation tab to display geolocation objects.

  • To add a network object on the fly, which you can then add to the condition, click the add icon () above the Available Networks list.

  • To search for network or geolocation objects to add, select the appropriate tab, click the Search by name or value prompt above the Available Networks list, then type an object name or the value of one of the object’s components. The list updates as you type to display matching objects.

Step 3

To select an object, click it. To select all objects, right-click and then select Select All.

Step 4

Click Add to Source or Add to Destination.

Tip


You can also drag and drop selected objects.

Step 5

Add any source or destination IP addresses or address blocks that you want to specify manually. Click the Enter an IP address prompt below the Source Networks or Destination Networks list; then type an IP address or address block and click Add.

Step 6

Save or continue editing the rule.


Example

The following graphic shows the network condition for a TLS/SSL rule that blocks encrypted connections originating from your internal network and attempting to access resources either in the Cayman Islands or an offshore holding corporation server at 182.16.0.3.

Screenshot of a sample SSL rule network condition

The example manually specifies the offshore holding corporation’s server IP address, and uses a system-provided Cayman Islands geolocation object to represent Cayman Island IP addresses.

What to do next

VLAN TLS/SSL Rule Conditions

When you build a VLAN-based TLS/SSL rule condition, you can manually specify a VLAN tag from 1 to 4094. Alternately, you can configure VLAN conditions with VLAN tag objects, which are reusable and associate a name with one or more VLAN tags.


Tip


After you create a VLAN tag object, you can use it not only to build TLS/SSL rules, but also to represent VLAN tags in various other places in the system’s web interface. You can create VLAN tag objects either using the object manager or on-the-fly while you are configuring access control rules.


You can add a maximum of 50 items to the Selected VLAN Tags in a single VLAN tag condition. When building a VLAN tag condition, warning icons indicate invalid configurations. For details, hover your pointer over the icon.

Controlling Encrypted VLAN Traffic

Procedure


Step 1

In the SSL rule editor, select the VLAN Tags tab.

Step 2

Find the VLANs you want to add from the Available VLAN Tags, as follows:

  • To add a VLAN tag object on the fly, which you can then add to the condition, click the add icon () above the Available VLAN Tags list.

  • To search for VLAN tag objects and groups to add, click the Search by name or value prompt above the Available VLAN Tags list, then type either the name of the object, or the value of a VLAN tag in the object. The list updates as you type to display matching objects.

Step 3

To select an object, click it. To select all objects, right-click and then select Select All.

Step 4

Click Add to Rule.

Tip


You can also drag and drop selected objects.

Step 5

Add any VLAN tags that you want to specify manually. Click the Enter a VLAN Tag prompt below the Selected VLAN Tags list; then type a VLAN tag or range and click Add. You can specify any VLAN tag from 1 to 4094; use a hyphen to specify a range of VLAN tags.

Step 6

Save or continue editing the rule.


Example

The following graphic shows a VLAN tag condition for an SSL rule that matches encrypted traffic on public-facing VLANs (represented by a VLAN tag object group), as well as the manually added VLAN 42.

Screenshot of a sample SSL rule VLAN tag condition

What to do next

Port TLS/SSL Rule Conditions

When you build a port-based TLS/SSL rule condition, you can manually specify TCP ports. Alternately, you can configure port conditions with port objects, which are reusable and associate a name with one or more ports.

You can add a maximum of 50 items to each of the Selected Source Ports and Selected Destination Ports lists in a single network condition:

  • To match encrypted traffic from a TCP port, configure the Selected Source Ports.

  • To match encrypted traffic to a TCP port, configure the Selected Destination Ports.

  • To match encrypted traffic both originating from TCP Selected Source Portsand destined for TCP Selected Destination Ports, configure both.

You can only configure the Selected Source Ports and Selected Destination Ports lists with TCP ports. Port objects containing non-TCP ports are greyed out in the Available Ports list.

When building a port condition, warning icons indicate invalid configurations. For example, you can use the object manager to edit in-use port objects so that the rules that use those object groups become invalid. For details, hover your pointer over the icon.

Controlling Encrypted Traffic by Port

Procedure


Step 1

In the SSL rule editor, select the Ports tab.

Step 2

Find the TCP ports you want to add from the Available Ports, as follows:

  • To add a TCP port object on the fly, which you can then add to the condition, click the add icon () above the Available Ports list.

  • To search for TCP-based port objects and groups to add, click the Search by name or value prompt above the Available Ports list, then type either the name of the object, or the value of a port in the object. The list updates as you type to display matching objects. For example, if you type 443, the Firepower Management Center displays the system-provided HTTPS port object.

Step 3

To select a TCP-based port object, click it. To select all TCP-based port objects, right-click and then select Select All. If the object includes non-TCP-based ports, you cannot add it to your port condition.

Step 4

Click Add to Source or Add to Destination.

Tip


You can also drag and drop selected objects.

Step 5

Enter a Port under the Selected Source Ports or Selected Destination Ports list to manually specify source or destination ports. You can specify a single port with a value from 0 to 65535.

Step 6

Click Add.

Note


The Firepower Management Center will not add a port to a rule condition that results in an invalid configuration.

Step 7

Save or continue editing the rule.


What to do next

User-Based TLS/SSL Rule Conditions

You can configure TLS/SSL rules to match traffic based on realm, group, or user. Realm, group, and user conditions in TLS/SSL rules allow you perform user control to manage which traffic can traverse your network by associating authoritative users with IP addresses.

For traffic to match a TLS/SSL rule with a user condition, the IP address of either the source or destination host in the monitored session must be associated with a logged in authoritative user. You can control traffic based on realms, individual users, or the groups those users belong to.

Controlling Encrypted Traffic Based on User

Before you begin

Procedure


Step 1

In the SSL rule editor, select Users.

Step 2

Search by name or value above the Available Realms list and select a realm.

Step 3

Search by name or value above the Available Users list and select a user or group.

Step 4

Click Add to Rule.

Tip


You can also drag and drop selected users and groups.

Step 5

Save or continue editing the rule.


What to do next

Reputation-Based TLS/SSL Rule Conditions

Reputation-based conditions in TLS/SSL rules allow you to manage which encrypted traffic can traverse your network, by contextualizing your network traffic and limiting it where appropriate. SSL rules govern the following types of reputation-based control:

  • Application conditions allow you to perform application control. When the system analyzes encrypted IP traffic, it can identify and classify commonly used encrypted applications on your network prior to decrypting the encrypted session. The system uses this discovery-based application awareness feature to allow you to control encrypted application traffic on your network.

    I a single TLS/SSL rule, you can select individual applications, including custom applications. You can use system-provided application filters, which are named sets of applications organized according to its basic characteristics: type, risk, business relevance, and categories.

  • URL conditions allow you to control web traffic based on a websites’ assigned category and reputation.

Selected Applications and Filters in TLS/SSL Rules

Cisco frequently updates and adds additional detectors via system and vulnerability database (VDB) updates. You can also create your own detectors and assign characteristics (risk, relevance, and so on) to the applications they detect. By using filters based on application characteristics, you can ensure that the system uses the most up-to-date detectors to monitor application traffic.

For traffic to match a TLS/SSL rule with an application condition, the traffic must match one of the filters or applications that you add to a Selected Applications and Filters list.


Note


When you filter application traffic using access control rules, you can use application tags as a criterion. to filter. However, you cannot use application tags to filter encrypted traffic because there is no benefit. All applications that the system can detect in encrypted traffic are tagged SSL Protocol; applications without this tag can only be detected in unencrypted or decrypted traffic.


In a single application condition, you can add a maximum of 50 items to the Selected Applications and Filters list. Each of the following counts as an item:

  • One or more filters from the Application Filters list, individually or in custom combination. This item represents set of applications, grouped by characteristic.

  • A filter created by saving search of the applications in the Available Applications list. This item represents a set of applications, grouped by substring match.

  • An individual application from the Available Applications list.

In the web interface, filters added to a condition are listed above and separately from individually added applications.

Note that when you deploy an SSL policy, for each rule with an application condition, the system generates a list of unique applications to match. In other words, you may use overlapping filters and individually specified applications to ensure complete coverage.

Application Filters in TLS/SSL Rules

When building an application condition in a TLS/SSL rule, use the Application Filters list to create a set of applications, grouped by characteristic, whose traffic you want to match.

For your convenience, the system characterizes each application by type, risk, business relevance, category, and tag. You can use these criteria as filters or create custom combinations of filters to perform application control.

Note that the mechanism for filtering applications in a TLS/SSL rule is the same as that for creating reusable, custom application filters using the object manager. You can also save many filters you create on-the-fly in access control rules as new, reusable filters. You cannot save a filter that includes another user-created filter because you cannot nest user-created filters.

Understanding How Filters Are Combined

When you select filters, singly or in combination, the Available Applications list updates to display only the applications that meet your criteria. You can select system-provided filters in combination, but not custom filters.

The system links multiple filters of the same filter type with an OR operation. For example, if you select the Medium and High filters under the Risks type, the resulting filter is:


Risk: Medium OR High

If the Medium filter contained 110 applications and the High filter contained 82 applications, the system displays all 192 applications in the Available Applications list.

The system links different types of filters with an AND operation. For example, if you select the Medium and High filters under the Risks type, and the Medium and High filters under the Business Relevance type, the resulting filter is:


Risk: Medium OR High 
AND 
Business Relevance: Medium OR High

In this case, the system displays only those applications that are included in both the Medium or High Risk type AND the Medium or High Business Relevance type.

Finding and Selecting Filters

To select filters, click the arrow next to a filter type to expand it, then select or clear the check box next to each filter whose applications you want to display or hide. You can also right-click a Cisco-provided filter type (Risks, Business Relevance, Types, or Categories) and select Check All or Uncheck All.

To search for filters, click the Search by name prompt above the Available Filters list, then type a name. The list updates as you type to display matching filters.

After you are done selecting filters, use the Available Applications list to add those filters to the rule.

Available Applications in TLS/SSL Rules

When building an application condition in a TLS/SSL rule, use the Available Applications list to select the applications whose traffic you want to match.

Browsing the List of Applications

When you first start to build the condition the list is unconstrained, and displays every application the system detects, 100 at a time:

  • To page through the applications, click the arrows underneath the list.

  • To display a pop-up window with summary information about the application’s characteristics, as well as Internet search links that you can follow, click Information (information icon) next to an application.

Finding Applications to Match

To help you find the applications you want to match, you can constrain the Available Applications list in the following ways:

  • To search for applications, click the Search by name prompt above the list, then type a name. The list updates as you type to display matching applications.

  • To constrain the applications by applying a filter, use the Application Filters list. The Available Applications list updates as you apply filters.

Once constrained, an All apps matching the filter option appears at the top of the Available Applications list.


Note


If you select one or more filters in the Application Filters list and also search the Available Applications list, your selections and the search-filtered Available Applications list are combined using an AND operation. That is, the All apps matching the filter condition includes all the individual conditions currently displayed in the Available Applications list as well as the search string entered above the Available Applications list.


Selecting Single Applications to Match in a Condition

After you find an application you want to match, click to select it. To select all applications in the current constrained view, right-click and select Select All.

In a single application condition, you can match a maximum of 50 applications by selecting them individually; to add more than 50 you must either create multiple TLS/SSL rules or use filters to group applications.

Selecting All Applications Matching a Filter for a Condition

Once constrained by either searching or using the filters in the Application Filters list, the All apps matching the filter option appears at the top of the Available Applications list.

This option allows you to add the entire set of applications in the constrained Available Applications list to the Selected Applications and Filters list, at once. In contrast to adding applications individually, adding this set of applications counts as only one item against the maximum of 50, regardless of the number of individual application that comprise it.

When you build an application condition this way, the name of the filter you add to the Selected Applications and Filters list is a concatenation of the filter types represented in the filter plus the names of up to three filters for each type. More than three filters of the same type are followed by an ellipsis (...). For example, the following filter name includes two filters under the Risks type and four under Business Relevance:


Risks: Medium, High Business Relevance: Low, Medium, High,...

Filter types that are not represented in a filter you add with All apps matching the filter are not included in the name of the filter you add. The instructional text that is displayed when you hover your pointer over the filter name in the Selected Applications and Filters list indicates that these filter types are set to any; that is, these filter types do not constrain the filter, so any value is allowed for these.

You can add multiple instances of All apps matching the filter to an application condition, with each instance counting as a separate item in the Selected Applications and Filters list. For example, you could add all high risk applications as one item, clear your selections, then add all low business relevance applications as another item. This application condition matches applications that are high risk OR have low business relevance.

Application-Based TLS/SSL Rule Condition Requirements

For encrypted traffic to match a TLS/SSL rule with an application condition, the traffic must match one of the filters or applications that you add to a Selected Applications and Filters list.

You can add a maximum of 50 items per condition, and filters added to a condition are listed above and separately from individually added applications. When building an application condition, warning icons indicate invalid configurations. For details, hover your pointer over the icon.

Adding an Application Condition to a TLS/SSL Rule

For Classic device models, you must have the Control license to use this feature.

Procedure


Step 1

In the SSL rule editor, select the Applications tab.

Step 2

If you want to constrain the list of applications displayed in the Available Applications list, you must select one or more filters in the Application Filters list. For more information, see Application Filters in TLS/SSL Rules.

Step 3

Find and select the applications you want to add from the Available Applications list. You can search for and select individual applications, or, when the list is constrained, All apps matching the filter. For more information, see Available Applications in TLS/SSL Rules.

Step 4

Click Add to Rule.

Tip


Click Clear All Filters to clear your existing selections. You can also drag and drop selected applications and filters.

Step 5

Save or continue editing the rule.


What to do next

Limitations to Encrypted Application Control

Encrypted Application Identification

The system can identify unencrypted applications that become encrypted using StartTLS. This includes such applications as SMTPS, POPS, FTPS, TelnetS, and IMAPS. In addition, it can identify certain encrypted applications based on the Server Name Indication in the TLS ClientHello message, or the server certificate subject distinguished name value.

Speed of Application Identification

The system cannot perform application control on encrypted traffic before:

  • An encrypted connection is established between a client and server, and

  • The system identifies the application in the encrypted session

This identification occurs after the server certificate exchange. If traffic exchanged during the TLS/SSL handshake matches all other conditions in a TLS/SSL rule containing an application condition but the identification is not complete, the SSL policy allows the packet to pass. This behavior allows the handshake to complete so that applications can be identified. For your convenience, affected rules are marked with an Information (information icon).

After the system completes its identification, the system applies the TLS/SSL rule action to the remaining session traffic that matches its application condition.

Automatically Enabling Application Detectors

At least one detector must be enabled for each application rule condition in the policy. If no detector is enabled for an application, the system automatically enables all system-provided detectors for the application; if none exist, the system enables the most recently modified user-defined detector for the application.

Reputation-Based URL Blocking in Encrypted Traffic

With a URL Filtering license, URL conditions in TLS/SSL rules can control access to encrypted websites, based on the category and reputation of the requested URLs. For detailed information, see URL Conditions (URL Filtering).


Tip


URL conditions in TLS/SSL rules do not support manual URL filtering. Instead, use a distinguished name condition matching on the subject common name.


Block Encrypted Traffic Based on URL Reputation

You must have the URL filtering license to use this feature.

Procedure

Step 1

In the SSL rule editor, select the Category tab.

Step 2

Find the categories of URL you want to add from the Categories list. To match encrypted web traffic regardless of category, select Any category. To search for categories to add, click the Search by name or value prompt above the Categories list, then type the category name. The list updates as you type to display matching categories.

Step 3

To select a category, click it.

Tip


Although you can right-click and Select All categories, adding all categories this way exceeds the 50-item maximum for a TLS/SSL rule. Instead, use Any.

Step 4

If you want to qualify your category selections, you must click a reputation level from the Reputations list. You can only select one reputation level. If you do not specify a reputation level, the system defaults to Any, meaning all levels.

  • If the rule blocks web access or decrypts traffic (the rule action is Block, Block with reset, Decrypt - Known Key, Decrypt - Resign, or Monitor) selecting a reputation level also selects all reputations more severe than that level. For example, if you configure a rule to block Suspicious sites (level 2), it also automatically blocks High Risk (level 1) sites.

  • If the rule allows web access, subject to access control (the rule action is Do not decrypt), selecting a reputation level also selects all reputations less severe than that level. For example, if you configure a rule to allow Benign sites (level 4), it also automatically allows Well known (level 5) sites.

    Note


    If you change the rule action for a rule, the system automatically changes the reputation levels in URL conditions according to the above points.

Step 5

Click Add to Rule to add the selected items to the Selected Categories list.

Tip


You can also drag and drop selected items.

Step 6

Save or continue editing the rule.


Example

The following graphic shows the URL condition for an example access control rule that blocks: all malware sites, all high-risk sites, and all non-benign social networking sites.

Screenshot of a sample SSL rule URL condition

The following table summarizes how you build the condition shown in the graphic above.

Table 1. Example: Building A URL Condition

To block...

Select this Category or URL Object...

And this Reputation...

malware sites, regardless of reputation

Malware Sites

Any

any URL with a high risk (level 1)

Any

1 - High Risk

social networking sites with a risk greater than benign (levels 1 through 3)

Social Network

3 - Benign sites with security risks

What to do next

Server Certificate-Based TLS/SSL Rule Conditions

TLS/SSL rules can handle and decrypt encrypted traffic based on server certificate characteristics. You can configure TLS/SSL rules based on the following server certificate attributes:

  • Distinguished name conditions allow you to handle and inspect encrypted traffic based on the CA that issued a server certificate, or the certificate holder. Based on the issuer distinguished name, you can handle traffic based on the CA that issued a site’s server certificate.

  • Certificate conditions in TLS/SSL rules allow you to handle and inspect encrypted traffic based on the server certificate used to encrypt that traffic. You can configure a condition with one or more certificates; traffic matches the rule if the certificate matches any of the condition’s certificates.

  • Certificate status conditions in TLS/SSL rules allow you to handle and inspect encrypted traffic based on the status of the server certificate used to encrypt the traffic, including whether a certificate is valid, revoked, expired, not yet valid, self-signed, signed by a trusted CA, whether the Certificate Revocation List (CRL) is valid; whether the Server Name Indication (SNI) in the certificate matches the server in the request.

  • Cipher suite conditions in TLS/SSL rules allow you to handle and inspect encrypted traffic based on the cipher suite used to negotiate the encrypted session.

  • Session conditions in TLS/SSL rules allow you to inspect encrypted traffic based on the SSL or TLS version used to encrypt the traffic.

To detect multiple cipher suites in a rule, the certificate issuer, or the certificate holder, you can create reusable cipher suite list and distinguished name objects and add them to your rule. To detect the server certificate and certain certificate statuses, you must create external certificate and external CA objects for the rule.

Certificate Distinguished Name TLS/SSL Rule Conditions

When configuring the rule condition, you can manually specify a literal value, reference a distinguished name object, or reference a distinguished name group containing multiple objects.


Note


You cannot configure a distinguished name condition if you also choose the Decrypt - Known Key action. Because that action requires you to choose a server certificate to decrypt traffic, the certificate already matches the traffic.


You can match against multiple subject and issuer distinguished names in a single certificate status rule condition; only one common or distinguished name needs to match to match the rule.

If you add a distinguished name manually, it can contain the common name attribute (CN). If you add a common name without CN=, the system prepends CN= before saving the object.

You can also add a distinguished name with one each of the following attributes, separated by commas: C, CN, O, OU.

In a single DN condition, you can add a maximum of 50 literal values and distinguished name objects to the Subject DNs, and 50 literal values and distinguished name objects to the Issuer DNs.

The system-provided DN object group, Cisco-Undecryptable-Sites, contains websites whose traffic the system cannot decrypt. You can add this group to a DN condition to block or not decrypt traffic to or from these websites, without wasting system resources attempting to decrypt that traffic. You can modify individual entries in the group. You cannot delete the group. System updates can modify the entries on this list, but the system preserves user changes.

The first time the system detects an encrypted session to a new server, DN data is not available for ClientHello processing, which can result in an undecrypted first session. After the initial session, the managed device caches data from the server Certificate message. For subsequent connections from the same client, the system can match the ClientHello message conclusively to rules with DN conditions and process the message to maximize decryption potential.

Controlling Encrypted Traffic by Certificate Distinguished Name

Procedure


Step 1

In the SSL rule editor, select DN.

Step 2

Find the distinguished names you want to add from the Available DNs, as follows:

  • To add a distinguished name object on the fly, which you can then add to the condition, click Add (add icon) above the Available DNs list.

  • To search for distinguished name objects and groups to add, click the Search by name or value prompt above the Available DNs list, then type either the name of the object, or a value in the object. The list updates as you type to display matching objects.

Step 3

To select an object, click it. To select all objects, right-click and then select Select All.

Step 4

Click Add to Subject or Add to Issuer.

Tip


You can also drag and drop selected objects.

Step 5

Add any literal common names or distinguished names that you want to specify manually. Click the Enter DN or CN prompt below the Subject DNs or Issuer DNs list; then type a common name or distinguished name and click Add.

Step 6

Add or continue editing the rule.


Example

The following figure shows a distinguished name rule condition searching for certificates issued to goodbakery.example.com or issued by goodca.example.com. Traffic encrypted with these certificates is allowed, subject to access control.

Sample SSL rule distinguished name condition

The following figure shows a distinguished name rule condition searching for certificates issued to badbakery.example.com and associated domains, or certificates issued by badca.example.com. Traffic encrypted with these certificates is decrypted using a re-signed certificate.

Sample SSL rule distinguished name condition, using a distinguished name object, CN, and DN

What to do next

Certificate TLS/SSL Rule Conditions

When you build a certificate-based TLS/SSL rule condition, you can upload a server certificate; you save the certificate as an external certificate object, which is reusable and associates a name with a server certificate. Alternately, you can configure certificate conditions with existing external certificate objects and object groups.

You can search the Available Certificates field in the rule condition based for external certificate objects and object groups based on the following certificate distinguished name characteristics:

  • Subject or issuer common name (CN)

  • Subject or issuer organization (O)

  • Subject or issuer organizational unit (OU)

You can choose to match against multiple certificates in a single certificate rule condition; if the certificate used to encrypt the traffic matches any of the uploaded certificates, the encrypted traffic matches the rule.

You can add a maximum of 50 external certificate objects and external certificate object groups to the Selected Certificates in a single certificate condition.

Note the following:

  • You cannot configure a certificate condition if you also select the Decrypt - Known Key action. Because that action requires you to select a server certificate to decrypt traffic, the implication is that the certificate already matches the traffic.

  • If you configure a certificate condition with an external certificate object, any cipher suites you add to a cipher suite condition, or internal CA objects you associate with the Decrypt - Resign action, must match the external certificate’s signature algorithm type. For example, if your rule’s certificate condition references an EC-based server certificate, any cipher suites you add, or CA certificates you associate with the Decrypt - Resign action, must also be EC-based. If you mismatch signature algorithm types in this case, the policy editor displays a warning next to the rule.

  • The first time the system detects an encrypted session to a new server, certificate data is not available for ClientHello processing, which can result in an undecrypted first session. After the initial session, the managed device caches data from the server Certificate message. For subsequent connections from the same client, the system can match the ClientHello message conclusively to rules with certificate conditions and process the message to maximize decryption potential.

Controlling Encrypted Traffic by Certificate

Procedure


Step 1

In the SSL rule editor, select Certificate.

Step 2

Find the server certificates you want to add from the Available Certificates, as follows;

  • To add an external certificate object on the fly, which you can then add to the condition, click Add (add icon) above the Available Certificates list.

  • To search for certificate objects and groups to add, click the Search by name or value prompt above the Available Certificates list, then type either the name of the object, or a value in the object. The list updates as you type to display matching objects.

Step 3

To select an object, click it. To select all objects, right-click and then select Select All.

Step 4

Click Add to Rule.

Tip


You can also drag and drop selected objects.

Step 5

Add or continue editing the rule.


What to do next

Certificate Status TLS/SSL Rule Conditions

For each certificate status TLS/SSL rule condition you configure, you can match traffic against the presence or absence of a given status. You can select several statuses in one rule condition; if the certificate matches any of the selected statuses, the rule matches the traffic.

You can choose to match against the presence or absence of multiple certificate statuses in a single certificate status rule condition; the certificate needs to match only one of the criteria to match the rule.

You should consider, when setting this parameter, whether you're configuring a decrypt rule or a block rule. Typically, you should click Yes for a block rule and No for a decrypt rule. Examples:

  • If you're configuring a Decrypt - Resign rule, the default behavior is to decrypt traffic with an expired certificate. To change that behavior, click No for Expired so traffic with an expired certificate is not decrypted and resigned.

  • If you're configuring a Block rule, the default behavior is to allow traffic with an expired certificate. To change that behavior click Yes for Expired so traffic with an expired certificate is blocked.

The following table describes how the system evaluates encrypted traffic based on the encrypting server certificate’s status.

Table 2. Certificate Status Rule Condition Criteria

Status Check

Status Set to Yes

Status Set to No

Revoked

The policy trusts the CA that issued the server certificate, and the CA certificate uploaded to the policy contains a CRL that revokes the server certificate.

The policy trusts the CA that issued the server certificate, and the CA certificate uploaded to the policy does not contain a CRL that revokes the certificate.

Self-signed

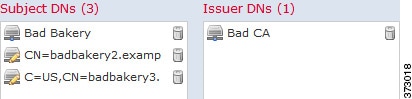
The detected server certificate contains the same subject and issuer distinguished name.

The detected server certificate contains different subject and issuer distinguished names.

Valid

All of the following are true:

  • The policy trusts the CA that issued the certificate.

  • The signature is valid.

  • The issuer is valid.

  • None of the policy’s trusted CAs revoked the certificate.

  • The current date is between the certificate Valid From and Valid To date.

At least one of the following is true:

  • The policy does not trust the CA that issued the certificate.

  • The signature is invalid.

  • The issuer is invalid.

  • A trusted CA in the policy revoked the certificate.

  • The current date is before the certificate Valid From date.

  • The current date is after the certificate Valid To date.

Invalid signature

The certificate’s signature cannot be properly validated against the certificate’s content.

The certificate’s signature is properly validated against the certificate’s content.

Invalid issuer

The issuer CA certificate is not stored in the policy’s list of trusted CA certificates.

The issuer CA certificate is stored in the policy’s list of trusted CA certificates.

Expired

The current date is after the certificate Valid To date.

The current date is before or on the certificate Valid To date.

Not yet valid

The current date is before the certificate Valid From date.

The current date is after or on the certificate Valid From date.

Invalid certificate

The certificate is not valid. At least one of the following is true:

  • Invalid or inconsistent certificate extension; that is, a certificate extension had an invalid value (for example, an incorrect encoding) or some value inconsistent with other extensions.

  • The certificate cannot be used for the specified purpose.

  • The Basic Constraints path length parameter has been exceeded.

    For more information, see RFC 5280, section 4.2.1.9.

  • The certificate's value for Not Before or Not After is invalid. These dates can be encoded as UTCTime or GeneralizedTime

    For more information, see RFC 5280 section 4.1.2.5.

  • The format of the name constraint is not recognized; for example, an email address format of a form not mentioned in RFC 5280, section 4.2.1.10. This could be caused by an improper extension or some new feature not currently supported.

    An unsupported name constraint type was encountered. OpenSSL currently supports only directory name, DNS name, email, and URI types.

  • The root certificate authority is not trusted for the specified purpose.

  • The root certificate authority rejects the specified purpose.

The certificate is valid. All of the following are true:

  • Valid certificate extension.

  • The certificate can be used for the specified purpose.

  • Valid Basic Constraints path length.

  • Valid values for Not Before and Not After.

  • Valid name constraint.

  • The root certificate is trusted for the specified purpose.

  • The root certificate accepts the specified purpose.

Invalid CRL

The Certificate Revocation List (CRL) digital signature is not valid. At least one of the following is true:

  • The value of the CRL's Next Update or Last Update field is invalid.

  • The CRL is not yet valid.

  • The CRL has expired.

  • An error occurred when attempting to verify the CRL path. This error occurs only if extended CRL checking is enabled.

  • CRL could not be found.

  • The only CRLs that could be found did not match the scope of the certificate.

The CRL is valid. All of the following are true:

  • Next Update and Last Update fields are valid.

  • The CRL's date is valid.

  • The path is valid.

  • The CRL was found.

  • The CRL matches the certificate's scope.

Server mismatch

The server name does not match the server's Server Name Indication (SNI) name, which could indicate an attempt to spoof the server name.

The server name matches the SNI name of the server to which the client is requesting access.

Note that even though a certificate might match more than one status, the rule causes an action to be taken on the traffic only once.

Checking whether a CA issued or revoked a certificate requires uploading root and intermediate CA certificates and associated CRLs as objects. You then add these trusted CA objects to an SSL policy’s list of trusted CA certificates.

Trusting External Certificate Authorities

You can trust CAs by adding root and intermediate CA certificates to your SSL policy, then use these trusted CAs to verify server certificates used to encrypt traffic.

If a trusted CA certificate contains an uploaded certificate revocation list (CRL), you can also verify whether a trusted CA revoked the encryption certificate.

Procedure

Step 1

In the SSL rule editor, select Trusted CA Certificates.

Step 2

Find the trusted CAs you want to add from the Available Trusted CAs, as follows:

  • To add a trusted CA object on the fly, which you can then add to the condition, click Add (add icon) above the Available Trusted CAs list.

  • To search for trusted CA objects and groups to add, click the Search by name or value prompt above the Available Trusted CAs list, then type either the name of the object, or a value in the object. The list updates as you type to display matching objects.

Step 3

To select an object, click it. To select all objects, right-click and then select Select All.

Step 4

Click Add to Rule.

Tip


You can also drag and drop selected objects.

Step 5

Add or continue editing the rule.


What to do next
Trusted External Certificate Authority Configuration

Verified server certificates include certificates signed by trusted CAs. After you add trusted CA certificates to the SSL policy, you can configure a TLS/SSL rule with certificate status conditions to match against this traffic.


Tip


Upload all certificates within a root CA’s chain of trust to the list of trusted CA certificates, including the root CA certificate and all intermediate CA certificates. Otherwise, it is more difficult to detect trusted certificates issued by intermediate CAs. Also, if you configure certificate status conditions to trust traffic based on the root issuer CA, all traffic within a trusted CA’s chain of trust can be allowed without decryption, rather than unnecessarily decrypting it.


When you create an SSL policy, the system populates the Trusted CA Certificates tab with a default Trusted CA object group, Cisco Trusted Authorities.

You can modify individual entries in the group, and choose whether to include this group in your SSL policy. You cannot delete the group. System updates can modify the entries on this list, but user changes are preserved.

Matching Traffic on Certificate Status

Before you begin

Procedure


Step 1

In the Firepower Management Center, choose Policies > Access Control > SSL.

Step 2

Add a new policy or edit an existing policy.

Step 3

Add a new TLS/SSL rule or edit an existing rule.

Step 4

In the Add Rule or Editing Rule dialog box, choose Cert Status.

Step 5

For each certificate status, you have the following options:

  • Choose Yes to match against the presence of that certificate status.

  • Choose No to match against the absence of that certificate status.

  • Choose Any to skip the condition when matching the rule. In other words, choosing Any means the rule matches whether the certificate status is present or absent.

Step 6

Add or continue editing the rule.


Example

The organization trusts the Verified Authority certificate authority. The organization does not trust the Spammer Authority certificate authority. The system administrator uploads the Verified Authority certificate and an intermediate CA certificate issued by Verified Authority to the system. Because Verified Authority revoked a certificate it previously issued, the system administrator uploads the CRL that Verified Authority provided.

The following figure shows a certificate status rule condition checking for valid certificates, those issued by a Verified Authority, are not on the CRL, and still within the Valid From and Valid To date. Because of the configuration, traffic encrypted with these certificates is not decrypted and inspected with access control.

Example of SSL policy with rule condition that matches valid certificates not in a CRL with valid dates

The following figure shows a certificate status rule condition checking for the absence of a status. In this case, because of the configuration, it matches against traffic encrypted with a certificate that has not expired and monitors that traffic.

Example of SSL policy with rule conditions that match in the absence of status

The following graphic illustrates a certificate status rule condition that matches on the presence or absence of several statuses. Because of the configuration, if the rule matches incoming traffic encrypted with a certificate issued by an invalid user, self-signed, invalid, or expired, it decrypts the traffic with a known key.

Example of matching SSL policy rule using several criteria

The following graphic illustrates a certificate status rule condition that matches if the SNI of the request matches the server name or if the CRL is not valid. Because of the configuration, if the rule matches either condition, traffic is blocked.

Example of an SSL policy rule matching the server SNI name or invalid CRL

What to do next

Cipher Suite TLS/SSL Rule Conditions

The system provides predefined cipher suites you can add to a cipher suite rule condition. You can also add cipher suite list objects containing multiple cipher suites.


Note


You cannot add new cipher suites. You can neither modify nor delete predefined cipher suites.


You can add a maximum of 50 cipher suites and cipher suite lists to the Selected Cipher Suites in a single cipher suite condition. The system supports adding the following cipher suites to a cipher suite condition:

  • SSL_RSA_FIPS_WITH_3DES_EDE_CBC_SHA

  • SSL_RSA_FIPS_WITH_DES_CBC_SHA

  • TLS_DHE_RSA_WITH_3DES_EDE_CBC_SHA

  • TLS_DHE_RSA_WITH_AES_128_CBC_SHA

  • TLS_DHE_RSA_WITH_AES_128_CBC_SHA256

  • TLS_DHE_RSA_WITH_AES_128_GCM_SHA256

  • TLS_DHE_RSA_WITH_AES_256_CBC_SHA

  • TLS_DHE_RSA_WITH_AES_256_CBC_SHA256

  • TLS_DHE_RSA_WITH_AES_256_GCM_SHA384

  • TLS_DHE_RSA_WITH_CAMELLIA_128_CBC_SHA

  • TLS_DHE_RSA_WITH_CAMELLIA_128_CBC_SHA256

  • TLS_DHE_RSA_WITH_CAMELLIA_256_CBC_SHA

  • TLS_DHE_RSA_WITH_CAMELLIA_256_CBC_SHA256

  • TLS_DHE_RSA_WITH_DES_CBC_SHA

  • TLS_DH_Anon_WITH_AES_128_GCM_SHA256

  • TLS_DH_Anon_WITH_AES_256_GCM_SHA384

  • TLS_DH_Anon_WITH_CAMELLIA_128_CBC_SHA

  • TLS_DH_anon_WITH_CAMELLIA_128_CBC_SHA256

  • TLS_DH_Anon_WITH_CAMELLIA_256_CBC_SHA

  • TLS_DH_anon_WITH_CAMELLIA_256_CBC_SHA256

  • TLS_ECDHE_ECDSA_WITH_3DES_EDE_CBC_SHA

  • TLS_ECDHE_ECDSA_WITH_AES_128_CBC_SHA

  • TLS_ECDHE_ECDSA_WITH_AES_128_CBC_SHA256

  • TLS_ECDHE_ECDSA_WITH_AES_128_GCM_SHA256

  • TLS_ECDHE_ECDSA_WITH_AES_256_CBC_SHA

  • TLS_ECDHE_ECDSA_WITH_AES_256_CBC_SHA384

  • TLS_ECDHE_ECDSA_WITH_AES_256_GCM_SHA384

  • TLS_ECDHE_ECDSA_WITH_NULL_SHA

  • TLS_ECDHE_ECDSA_WITH_RC4_128_SHA

  • TLS_ECDHE_RSA_WITH_3DES_EDE_CBC_SHA

  • TLS_ECDHE_RSA_WITH_AES_128_CBC_SHA

  • TLS_ECDHE_RSA_WITH_AES_128_CBC_SHA256

  • TLS_ECDHE_RSA_WITH_AES_128_GCM_SHA256

  • TLS_ECDHE_RSA_WITH_AES_256_CBC_SHA

  • TLS_ECDHE_RSA_WITH_AES_256_CBC_SHA384

  • TLS_ECDHE_RSA_WITH_AES_256_GCM_SHA384

  • TLS_ECDHE_RSA_WITH_NULL_SHA

  • TLS_ECDHE_RSA_WITH_RC4_128_SHA

  • TLS_RSA_WITH_3DES_EDE_CBC_SHA

  • TLS_RSA_WITH_AES_128_CBC_SHA

  • TLS_RSA_WITH_AES_128_CBC_SHA256

  • TLS_RSA_WITH_AES_128_GCM_SHA256

  • TLS_RSA_WITH_AES_256_CBC_SHA

  • TLS_RSA_WITH_AES_256_CBC_SHA256

  • TLS_RSA_WITH_AES_256_GCM_SHA384

  • TLS_RSA_WITH_CAMELLIA_128_CBC_SHA

  • TLS_RSA_WITH_CAMELLIA_128_CBC_SHA256

  • TLS_RSA_WITH_CAMELLIA_256_CBC_SHA

  • TLS_RSA_WITH_CAMELLIA_256_CBC_SHA256

  • TLS_RSA_WITH_DES_CBC_SHA

  • TLS_RSA_WITH_NULL_MD5

  • TLS_RSA_WITH_NULL_SHA

  • TLS_RSA_WITH_RC4_128_MD5

  • TLS_RSA_WITH_RC4_128_SHA

Note the following:

  • If you add cipher suites not supported for your deployment, you cannot deploy your configuration. For example, passive deployments do not support decrypting traffic with the any of the ephemeral Diffie-Hellman (DHE) or ephemeral elliptic curve Diffie-Hellman (ECDHE) cipher suites. Creating a rule with these cipher suites prevents you from deploying your access control policy.

  • If you configure a cipher suite condition with a cipher suite, any external certificate objects you add to a certificate condition, or internal CA objects you associate with the Decrypt - Resign action, must match the cipher suite’s signature algorithm type. For example, if your rule’s cipher suite condition references an EC-based cipher suite, any server certificates you add, or CA certificates you associate with the Decrypt - Resign action, must also be EC-based. If you mismatch signature algorithm types in this case, the policy editor displays a warning icon next to the rule.

  • You can add an anonymous cipher suite to the Cipher Suite condition in an SSL rule, but keep in mind:

    • The system automatically strips anonymous cipher suites during ClientHello processing. For the system to use the rule, you must also configure your TLS/SSL rules in an order that prevents ClientHello processing. For more information, see SSL Rule Order.

    • You cannot use either the Decrypt - Resign or Decrypt - Known Key action in the rule, because the system cannot decrypt traffic encrypted with an anonymous cipher suite.

  • When specifying a cipher suite as a rule condition, consider that the rule matches on the negotiated cipher suite in the ServerHello message, rather than on the full list of cipher suites specified in the ClientHello message. During ClientHello processing, the managed device strips unsupported cipher suites from the ClientHello message. However, if this results in all specified cipher suites being stripped, the system retains the original list. If the system retains unsupported cipher suites, subsequent evaluation results in an undecrypted session.

Controlling Encrypted Traffic by Cipher Suite

Procedure


Step 1

In the SSL rule editor, select Cipher Suite.

Step 2

Find the cipher suites you want to add from the Available Cipher Suites, as follows;

  • To add a cipher suite list on the fly, which you can then add to the condition, click Add (add icon) above the Available Cipher Suites list.

  • To search for cipher suites and lists to add, click the Search by name or value prompt above the Available Cipher Suites list, then type either the name of the cipher suite, or a value in the cipher suite. The list updates as you type to display matching cipher suites.

Step 3

To select a cipher suite, click it. To select all cipher suites, right-click and then select Select All.

Step 4

Click Add to Rule.

Tip


You can also drag and drop selected cipher suites.

Step 5

Add or continue editing the rule.


What to do next

Encryption Protocol Version TLS/SSL Rule Conditions

You can choose to match against traffic encrypted with SSL version 3.0, or TLS version 1.0, 1.1, or 1.2. By default, all protocol versions are selected when you create a rule; if you select multiple versions, encrypted traffic that matches any of the selected versions matches the rule. You must select at least one protocol version when saving the rule condition.

You cannot select SSL v2.0 in a version rule condition; the system does not support decrypting traffic encrypted with SSL version 2.0. You can configure an undecryptable action to allow or block this traffic without further inspection.

Controlling Traffic by Encryption Protocol Version

Procedure


Step 1

In the SSL rule editor, select Version.

Step 2

Select the protocol versions you want to match against.

Step 3

Add or continue editing the rule.


What to do next